HomeFarm

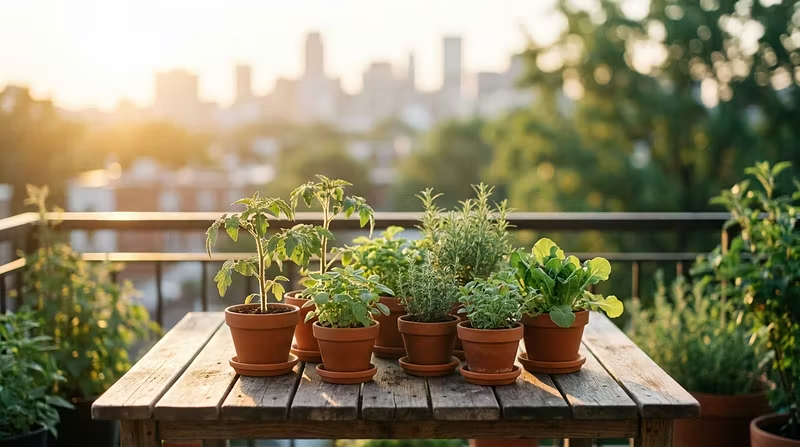
Grow fresh fruits & veggies from home 🌱 A beginner-friendly guide to turning your balcony into a mini garden.
1 joined
Profile picture
ε€ζ™΄ηœ©Profile picture@lefeiΒ·May 8

How to Turn Kitchen Scraps Into Free Fertilizer (Zero-Cost Composting for Apartments)

Commercial fertilizer costs $15-30 per bag. Meanwhile, you're throwing away free plant food every single day.


Here's how to compost in an apartment β€” no yard, no smell, no worms required.


What Kitchen Scraps Can You Compost?


YES βœ…

  • Fruit and vegetable peels/cores

  • Coffee grounds and tea bags (remove staples)

  • Eggshells (crush them first)

  • Stale bread and grains

  • Nut shells

  • Shredded newspaper/cardboard


NO ❌

  • Meat, fish, or dairy (attracts pests, smells terrible)

  • Cooking oil or grease

  • Pet waste

  • Diseased plant material

  • Citrus peels in large quantities (too acidic)


Method 1: The Freezer Method (Easiest)


This is the laziest composting method and it works perfectly.


  1. Keep a container in your freezer

  2. Toss scraps in as you cook

  3. When full, blend them with water into a slurry

  4. Pour directly into your potting soil

  5. Mix it in and let it break down naturally


Time to usable compost: 2-4 weeks in warm weather


The freezer prevents any smell. The blending speeds up decomposition dramatically. It's basically a fertilizer smoothie for your plants.


Method 2: Bokashi Bucket (~$30 one-time cost)


Bokashi is a Japanese fermentation method. You sprinkle special bran (inoculated with beneficial microbes) over food scraps in a sealed bucket.


  1. Add scraps, sprinkle bran, press down to remove air

  2. Repeat until the bucket is full

  3. Seal and let it ferment for 2 weeks

  4. Bury the fermented scraps in your plant containers

  5. Wait 2 more weeks, then plant


Advantage: Bokashi can handle meat and dairy β€” the fermentation kills pathogens. It also produces a nutrient-rich "tea" you can drain and use as liquid fertilizer (dilute 100:1 with water).


Method 3: Vermicomposting (Most Efficient)


Red wiggler worms eat your food scraps and produce the best compost on earth β€” worm castings.


  1. Get a worm bin (or make one from two stacked plastic bins with holes drilled in the bottom)

  2. Add shredded newspaper as bedding

  3. Add ~500 red wigglers (about $25-30 online)

  4. Feed them your scraps β€” they eat roughly half their body weight per day

  5. Harvest castings every 2-3 months


Advantage: Worm castings are gardening gold. They contain 5x more nitrogen, 7x more phosphorus, and 11x more potassium than regular soil. Your plants will visibly respond within a week.


Smell? Zero. A healthy worm bin smells like forest floor. If it smells bad, you're overfeeding.


The Cost Comparison


Method

Setup Cost

Annual Fertilizer Value

Freezer blend

$0

~$40-60

Bokashi

~$30

~$60-80

Vermicomposting

~$50

~$100-150


Compare that to buying commercial fertilizer at $15-30 per bag, 3-4 times per year.


Start Today


You don't need to buy anything to start. Tonight, save your vegetable peels in a freezer bag instead of throwing them away. That's step one.


If you want the complete home growing system β€” from composting to container selection to harvest schedules β€” check out the HomeFarm guide. Everything you need to grow food at home, minus the guesswork.


Stop paying for what you can make for free 🌱

Profile picture
ε€ζ™΄ηœ©Profile picture@lefeiΒ·May 8

I Tracked My Grocery Savings From Balcony Gardening for 6 Months β€” Here's the Breakdown

Everyone says growing your own food saves money. But does it actually? I tracked every dollar for 6 months to find out.


The Setup (One-Time Costs)


Item

Cost

6x fabric grow bags (5-gallon)

$18

2x window boxes

$12

Potting mix (2 large bags)

$20

Seeds (tomatoes, peppers, lettuce, herbs, green onions)

$8

Liquid fertilizer

$7

Total startup

$65


What I Grew (6-Month Harvest)


Crop

Harvested

Store Equivalent Price

Cherry tomatoes

~15 lbs

$45

Lettuce & greens

~8 lbs

$32

Herbs (basil, cilantro, mint)

Continuous

$90+ (at $4/bunch weekly)

Green onions

Continuous

$36 (at $1.50/bunch weekly)

Chili peppers

~4 lbs

$20

Bell peppers

~6 lbs

$24

Total grocery value


$247


The Math


  • Startup cost: $65

  • Ongoing costs (extra soil, fertilizer): ~$15

  • Total invested: $80

  • Total grocery value produced: $247

  • Net savings: $167 in 6 months


And here's the thing β€” year two is almost pure profit. The grow bags, window boxes, and tools carry over. You only need seeds and fertilizer, which is maybe $20-25 total.


The Hidden Savings Nobody Talks About


1. Fewer impulse grocery trips. When you have fresh herbs and salad greens at home, you skip those "quick grocery runs" where you always spend $30+ on stuff you didn't need.


2. Zero food waste on what you grow. You pick exactly what you need, when you need it. No more throwing out that $4 bag of spinach that went slimy in the fridge.


3. It compounds. Once you learn the basics, you can expand each season. I started with 4 containers. Now I have 12 and I'm growing twice as much.


What Surprised Me Most


Herbs were the biggest money saver by far. A single basil plant that cost me $0.10 in seeds replaced $4/week in store-bought basil for 4+ months. That's an absurd ROI.


Want to Start Your Own?


I've put together a complete guide that covers everything β€” which containers to buy, what soil to use, watering and feeding schedules, seasonal planting calendars, and fixes for every common problem. It's all inside my HomeFarm ebook. Built for complete beginners who want to stop overpaying for produce and start growing their own.


Your balcony is a free asset. Use it 🌱

Profile picture
ε€ζ™΄ηœ©Profile picture@lefeiΒ·May 8

7 Beginner Gardening Mistakes That Kill Your Plants (And How to Fix Each One)

I've watched dozens of people try to grow their own food and quit within a month. It's almost never because gardening is hard β€” it's because they make the same avoidable mistakes on day one.


Here are the 7 I see the most, and exactly how to fix them.


Mistake #1: Overwatering πŸ’€


This kills more houseplants and container gardens than anything else. Beginners think more water = more love. Wrong.


The fix: Stick your finger 1 inch into the soil. If it's still moist, don't water. Most container vegetables only need watering when the top inch is dry. In summer, that's usually every 1-2 days. In spring/fall, every 3-4 days.


Mistake #2: Not Enough Sunlight β˜€οΈ


"My balcony gets some sun" isn't enough information. Most vegetables need 6-8 hours of direct sunlight per day. If your space gets less than 4 hours, you're limited to leafy greens and herbs.


The fix: Track your sun exposure for one day before planting anything. Set a timer every hour and note whether your growing area is in direct sun, partial shade, or full shade. Then pick plants that match.


Mistake #3: Using Garden Soil in Containers πŸͺ΄


Garden soil is dense and doesn't drain well in pots. Your roots will suffocate and rot.


The fix: Always use potting mix (not garden soil, not topsoil). Good potting mix is light, fluffy, and drains fast. Look for mixes that contain perlite or vermiculite β€” they keep the soil aerated.


Mistake #4: Containers Too Small πŸ“¦


That cute little 4-inch pot is fine for herbs, but tomatoes and peppers need room. Cramped roots = stunted plants = no harvest.


The fix:

  • Herbs β†’ 6-8 inch pots

  • Lettuce β†’ 8-12 inch wide, shallow containers

  • Tomatoes β†’ minimum 5-gallon bucket (12+ inches deep)

  • Peppers β†’ 3-5 gallon containers


When in doubt, go bigger.


Mistake #5: Planting at the Wrong Time πŸ“…


Planting tomatoes in January (unless you're in the tropics) is a death sentence. Every plant has an ideal planting window.


The fix: Google your USDA Hardiness Zone (or your country's equivalent). Then look up the "last frost date" for your area. Most warm-season crops (tomatoes, peppers, squash) go outside 2 weeks AFTER the last frost date. Cool-season crops (lettuce, spinach, peas) can go out 4-6 weeks before it.


Mistake #6: Ignoring Drainage πŸ•³οΈ


No drainage holes = root rot = dead plant. This is non-negotiable.


The fix: Every single container needs drainage holes at the bottom. If you're using a decorative pot without holes, either drill them yourself or use it as a cachepot (put a nursery pot with holes inside it). Elevate containers slightly off the ground with pot feet or small stones so water flows out freely.


Mistake #7: Never Feeding Your Plants 🍽️


Potting mix has some nutrients, but they get used up in 4-6 weeks. After that, your plants are starving.


The fix: Start fertilizing once a month after the first month of growth. A balanced liquid fertilizer (like 10-10-10) diluted to half strength works for most vegetables. For tomatoes and peppers, switch to a high-potassium fertilizer once they start flowering β€” it promotes fruit production.


---


The Bottom Line


None of these mistakes are hard to fix. The difference between people who grow food successfully and people who give up is usually just knowing these basics upfront.


If you want the complete system β€” container sizing charts, watering schedules, seasonal planting calendars, and troubleshooting for 20+ common problems β€” I've put it all in one guide over at HomeFarm. It's designed to get you from zero to your first harvest without the guesswork.


Now go grow something 🌱

Profile picture
ε€ζ™΄ηœ©Profile picture@lefeiΒ·May 8

5 Vegetables That Grow Ridiculously Well on a Tiny Balcony (No Experience Needed)

I've been growing food on my apartment balcony for a while now, and the #1 question I get is: "What should I start with?"


Here's the honest answer β€” most beginner guides overcomplicate it. You don't need a backyard. You don't need fancy equipment. You need the right plants and 15 minutes a day.


The 5 Best Balcony Vegetables for Complete Beginners


1. Cherry Tomatoes πŸ…

Why: They're almost impossible to kill. One plant in a 5-gallon bucket can produce 200+ tomatoes per season.

Pro tip: Put them against a south-facing wall. The reflected heat makes them go crazy.


2. Lettuce & Salad Greens πŸ₯¬

Why: Ready to harvest in 30 days. You can grow them in a window box β€” no deep container needed.

Pro tip: Plant a new row every 2 weeks so you never run out (this is called "succession planting").


3. Green Onions πŸ§…

Why: Buy green onions once from the grocery store. Cut the tops off, eat them, put the roots in soil. They regrow. Forever. Seriously.

Pro tip: A single 12-inch pot can hold 20+ green onion bulbs.


4. Herbs (Basil, Mint, Cilantro) 🌿

Why: Fresh herbs from the store cost $3-5 per bunch. One $2 plant gives you unlimited supply for months.

Pro tip: Mint is invasive β€” always keep it in its own pot or it'll take over everything.


5. Peppers (Chili or Bell) 🌢️

Why: Compact plants that love containers. A single chili plant can produce 50-100 peppers.

Pro tip: Peppers love heat. If your balcony gets afternoon sun, they'll thrive.


The Setup Cost


Here's what you actually need:

  • 5-gallon buckets or fabric grow bags (~$3 each)

  • Potting mix (~$10 for a big bag)

  • Seeds (~$1-2 per packet)


Total: under $30 to grow food for months.


The grocery savings add up fast β€” I haven't bought herbs or salad greens from the store in over a year.


Want the Full System?


I put together a complete guide covering container selection, soil mixing, watering schedules, seasonal planning, and troubleshooting for every common problem. It's all in my ebook on HomeFarm β€” check it out if you want to skip the trial-and-error phase and start harvesting faster.


Happy growing 🌱

Profile picture
ε€ζ™΄ηœ©Profile picture@lefeiΒ·May 8

5 Vegetables You Can Grow Indoors (Even in a Tiny Apartment)

Most people think you need a big backyard to grow food. You don't. I've been growing fresh produce on a 3-foot balcony for two years, and here's what actually works:


1. Lettuce & Greens β€” The easiest starting point. A shallow container, some potting mix, and a sunny windowsill is all you need. Ready to harvest in 30 days.


2. Cherry Tomatoes β€” Get a 5-gallon pot, a small tomato cage, and put it where it gets 6+ hours of sun. One plant can give you tomatoes for months.


3. Herbs (Basil, Mint, Cilantro) β€” These grow fast, smell amazing, and save you $5+ every grocery trip. Basil alone pays for itself in a week.


4. Green Onions β€” Buy them once from the store. Cut the green tops, put the roots in water. They'll regrow endlessly. Zero effort, zero cost.


5. Peppers β€” JalapeΓ±os and bell peppers love containers. They're compact, productive, and way tastier than store-bought.


The trick isn't having a green thumb β€” it's starting small and picking plants that actually want to grow indoors.


I wrote the full guide on soil prep, container selection, seasonal timing, and pest control in my ebook. It's everything I wish I knew when I started.