Planform

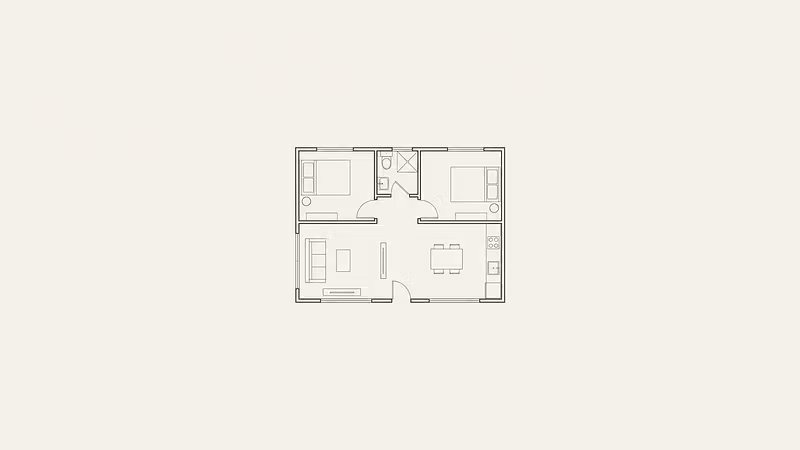
Draw rooms, walls, and furniture on a clean 2D canvas, then export a floor plan you can share with clients or contractors.
Addis Ababa, ET
•Created byProfile pictureAbdisa jemal
1 joined
Profile picture
Abdisa jemalProfile picture@abdisajemal57·Oct 3
Pinned post

Starter challenge: small apartment studio furniture plan

Welcome to Floor Plan Studio. This week’s starter challenge is laying out a small apartment studio furniture plan.


Work through it in three steps:


  1. Draw the basic wall perimeter. Keep it compact, like a real studio, and mark doors and windows so circulation is obvious.

  2. Place standard furniture blocks. Start with bed, sofa, table, kitchen run, and storage. Leave walking space so the plan still feels livable.

  3. Share your exported plan in the comments for feedback. Post a screenshot or export and say what you would change next.


If you are just getting started, use promo code foundingmember for 30% off any plan.


Pin this thread and drop your first layout below. We will review and help you tighten the layout.

Profile picture
Abdisa jemalProfile picture@abdisajemal57·Oct 3
Pinned post

Starter Template: Sample 2D Layout & Export Guide

First template focus: studio apartment layout with furniture dimensions


This walkthrough shows how to build a clean 2D studio plan in Floor Plan Studio, then export it for clients or contractors.


1. Set up the grid

  • Open a new 2D plan and set the grid to 1 ft (or 0.3 m).

  • Draw the outer shell as a 24 ft × 18 ft studio (about 432 sq ft).

  • Place one entry door on the short wall and two windows on the long exterior wall.


2. Draw interior walls

Keep the studio open. Use short partitions only where they help:

  • A 6 ft closet wall near the entry.

  • A 4 ft bath enclosure in the far corner (bath roughly 8 ft × 5 ft).

  • Leave the remaining space as one living / sleeping zone.


3. Position furniture (typical sizes)

Place blocks to scale so visitors can see real dimensions:

  • Queen bed: 60 in × 80 in

  • Nightstand: 20 in × 18 in

  • Sofa: 84 in × 36 in

  • Coffee table: 36 in × 20 in

  • Dining table for two: 36 in × 30 in with two chairs

  • Kitchen run: 10 ft of counters, 24 in depth, fridge 36 in wide

  • Desk: 48 in × 24 in


Leave at least 36 in of circulation in front of the kitchen and bath door.


4. Export a clean plan

  • Turn on dimension labels for walls and major furniture.

  • Hide the grid, keep wall thickness visible.

  • Export PDF for contractors and PNG for client decks.

  • Name the file something like studio-24x18-furnished.pdf.


Use this studio as your first template. Duplicate it, swap furniture sizes, and you have a repeatable client-ready layout.

Profile picture
Abdisa jemalProfile picture@abdisajemal57·Oct 3
Pinned post

Welcome to Floor Plan Studio

Welcome to Floor Plan Studio. This thread is your starting point for your first 2D floor plan.


Draw walls

Start a new project, then sketch exterior walls first. Click to place wall segments, close the outline, and add interior walls last so rooms stay easy to edit.


Place furniture

Open the furniture library, drop items into rooms, and snap them to walls. Use scale and rotation so pieces fit the space.


Export 2D plans

When the layout looks right, export a 2D plan. Check labels, dimensions, and room names before you share the file.


Share your work

Reply here with your first project, a screenshot, or a question. Other members can comment and you can iterate from feedback.


If you get stuck, post in this thread and we will help you get the plan out.