With the Control Center, you can block specific countries from your whop. Learn how Control Center works and how you can use it in this guide.
Key takeaways
- Geo-locking lets you restrict product access by country, aligning your whop with regional business constraints like shipping limitations.
- You can block specific countries and ban existing users from those regions to maintain geographic consistency.
- Access the Control Center through your products dashboard context menu to manage country-based restrictions per product.
Whop comes with powerful features that shape how your whop runs and how members experience it. While Whop is a global platform - accessible from anywhere in the world - not every business model is suited to global access.
That’s where the Control Center comes in. With its geo-locking feature, you can control exactly where your whops are available, ensuring they align with your business goals.
In this guide, we’ll walk you step by step through accessing the Control Center and setting up geo-locking for your whops.
When and why you should control who can join your whop
Why would you want to control who can join your whop? Well, let's say you're running a Content Rewards campaign for your physical product. You've created a free whop for this reward, and thousands of people have joined and are submitting their work.
You're getting a lot of views on the content - great, right?
Well, there's one small problem - your product is only shipped throughout the US, and half of your submissions come from creators in Asia. This means that while they are getting views, the viewers are in Asia too.
To fix this, ban all countries other than US from joining your whop. This means that only US-based Whop users can take part in your Content Rewards, keeping your campaign and views in the US.
In this guide, we’re going to take a look at how you can access the Control Center, add geo-locks (location-blocking), and how to remove them if needed.
How to access the Control Center
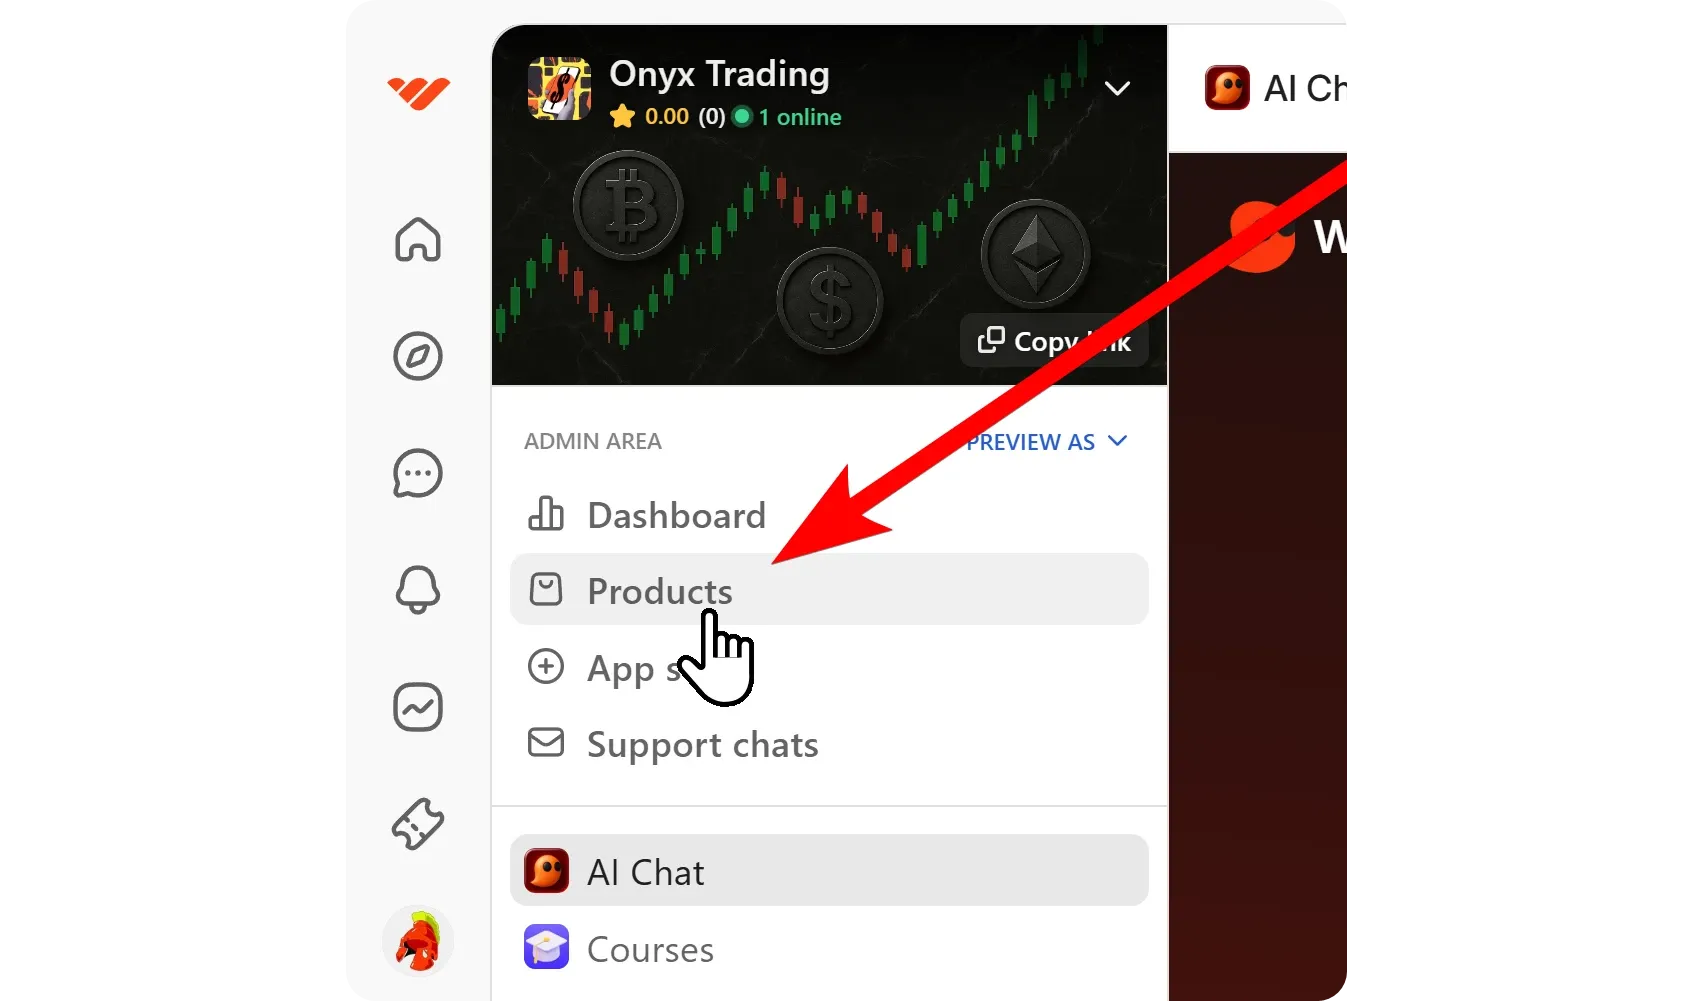
Each product you create on whop has its own control center. First, let’s click on the Products button under the admin area of your whop.
This will take you to your products dashboard where you can see all your products and their statistics.
Once you're in the products dashboard, click on the context menu button of a product (three dots to its right) and select the Control Center option from the list.
This will display the Control Center popup on the right side of your screen. There, you’ll see the Block users based on IP address section.
Clicking on the Add button at the top right of the section will display a country list where you can select as many countries as you want to block users from there from joining your whop.
You can also see how many users are in your whop from the countries in the list.
After selecting the countries you want to add to your block list, click the Save button at the bottom of the section to save the changes.
Now you’ll see how many users are from the blocked countries in your whop at the bottom left of the section. If there are any, you’ll be able to click the Ban users button at the bottom right to remove them from your whop.
If you ever want to remove a country from your block list, all you have to do is click on its remove button (X icon), and the changes will be automatically applied.
Head to your dashboard and try out the Control Center
Using the Control Center is that easy. Now, it’s your turn to give it a try. If you want to learn more about whop and its features, you should check out our other guides on using Whop.
If you don’t have a whop yet, you should check out our guide on creating one in under 5 minutes and join thousands of creators generating an income online.


