MidJourney is one of the most powerful generative image services out there. If you're ready to get started, let's take a look at how you can edit an image you've created.
Key takeaways
- MidJourney's web-based editor lets you erase image sections and regenerate them with new or existing prompts.
- You can selectively replace parts of AI images while keeping the rest intact, matching DALL-E 3's editing capabilities.
- Adjust canvas size and aspect ratio to expand your image beyond its original boundaries with AI-generated content.
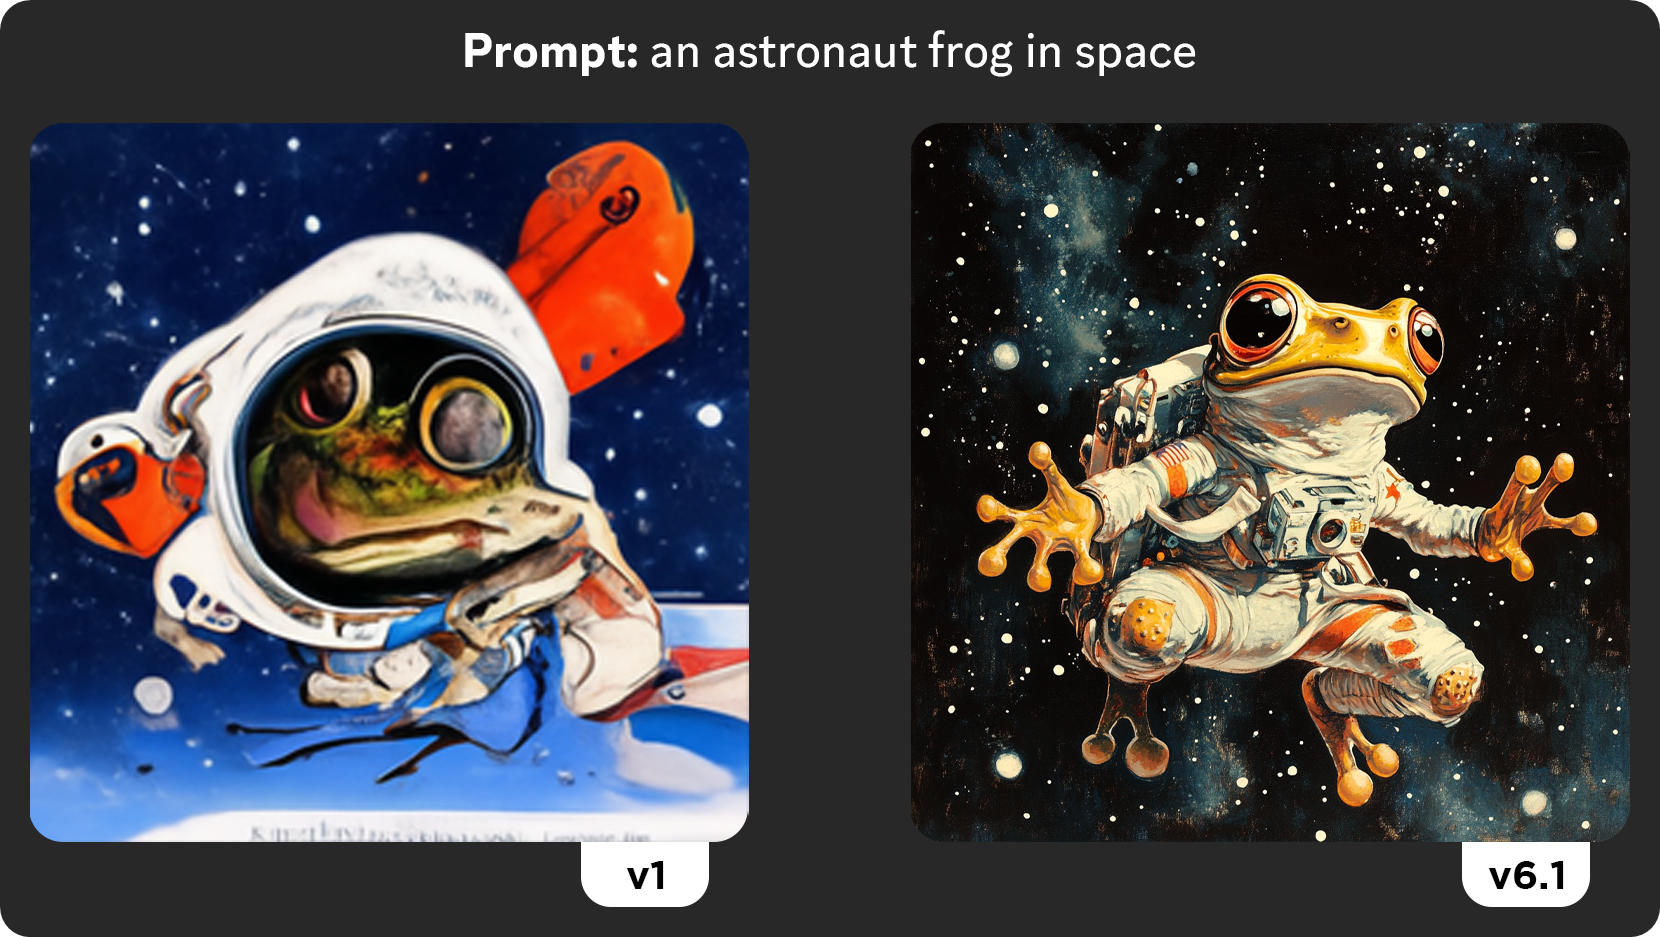
MidJourney is one of the most powerful generative image services out there – some people even think it’s the best. No matter your thoughts on AI-generated art, it’s impossible to deny how far it has come since it first came out. If we take a look at the comparison between versions 1 and 6.1, we see an undeniable jump in quality – although the frog in the 6.1th version might struggle a bit without a helmet.
While 6.1 is the current and best version of MidJourney, previous versions still deliver excellent results. However, they can not edit certain parts of images, which is something that DALL·E 3 has had for a long time.
Luckily for generative image lovers, it’s now possible to do exactly that! In August of 2024, MidJourney introduced new capabilities so that you can now edit your images. Let’s take a look at how you can edit an image you’ve created in MidJourney.
Editing an Image in MidJourney
Originally, you could only interact with MidJourney by using its Discord server and bot. However, it now has a web interface so you can use MidJourney without having to use Discord.
Once you’ve opened the Imagine page of the MidJourney website, you’ll be able to see all of the images that you’ve created in the past, and the 'Imagine' input box at the top of your screen. While you can use the input box to create new images, we want to edit an image we’ve already created. So, let’s click on an existing image to view it.
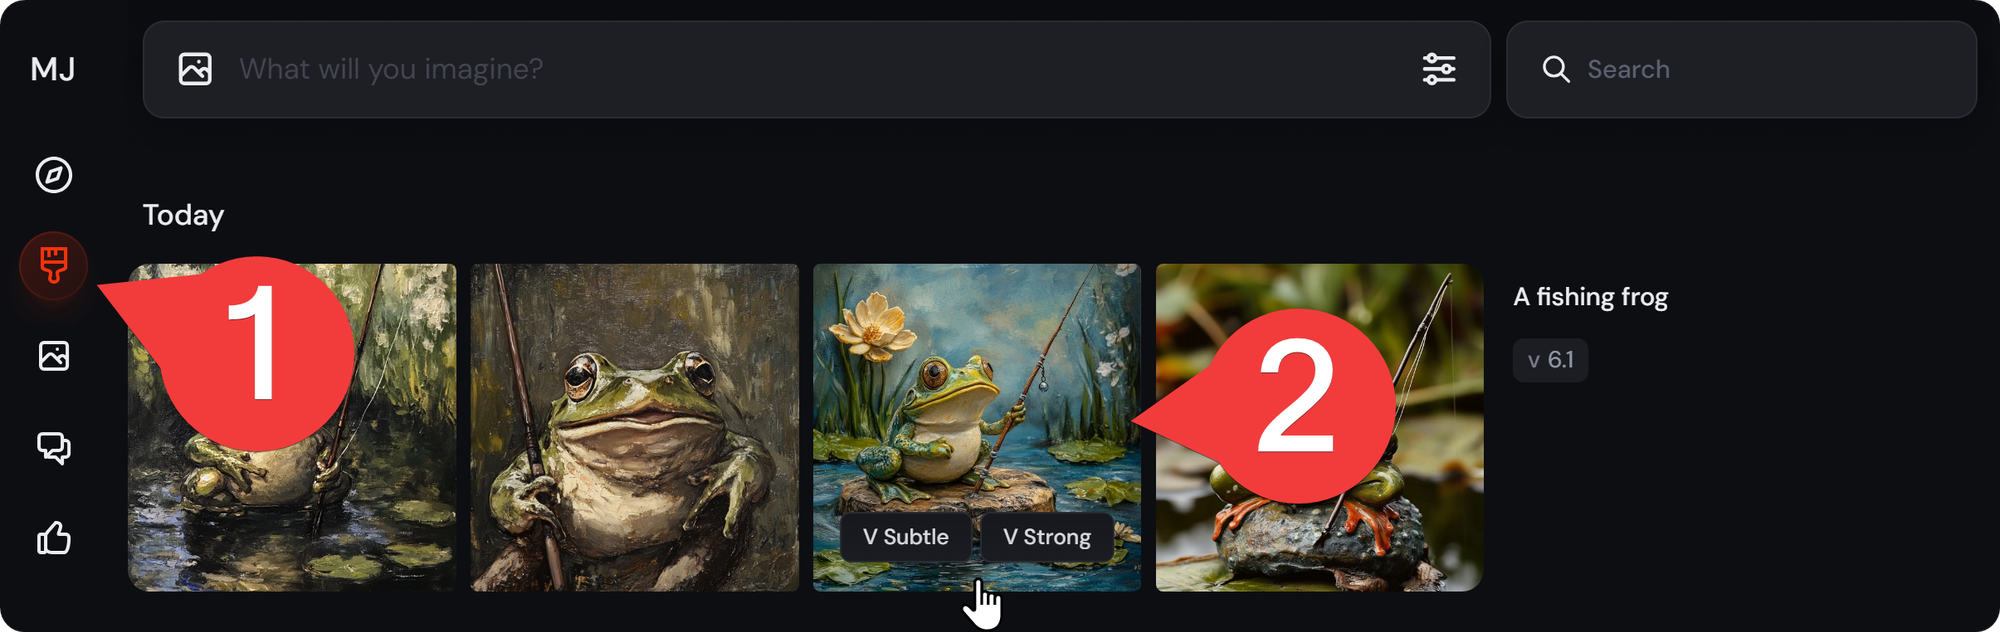
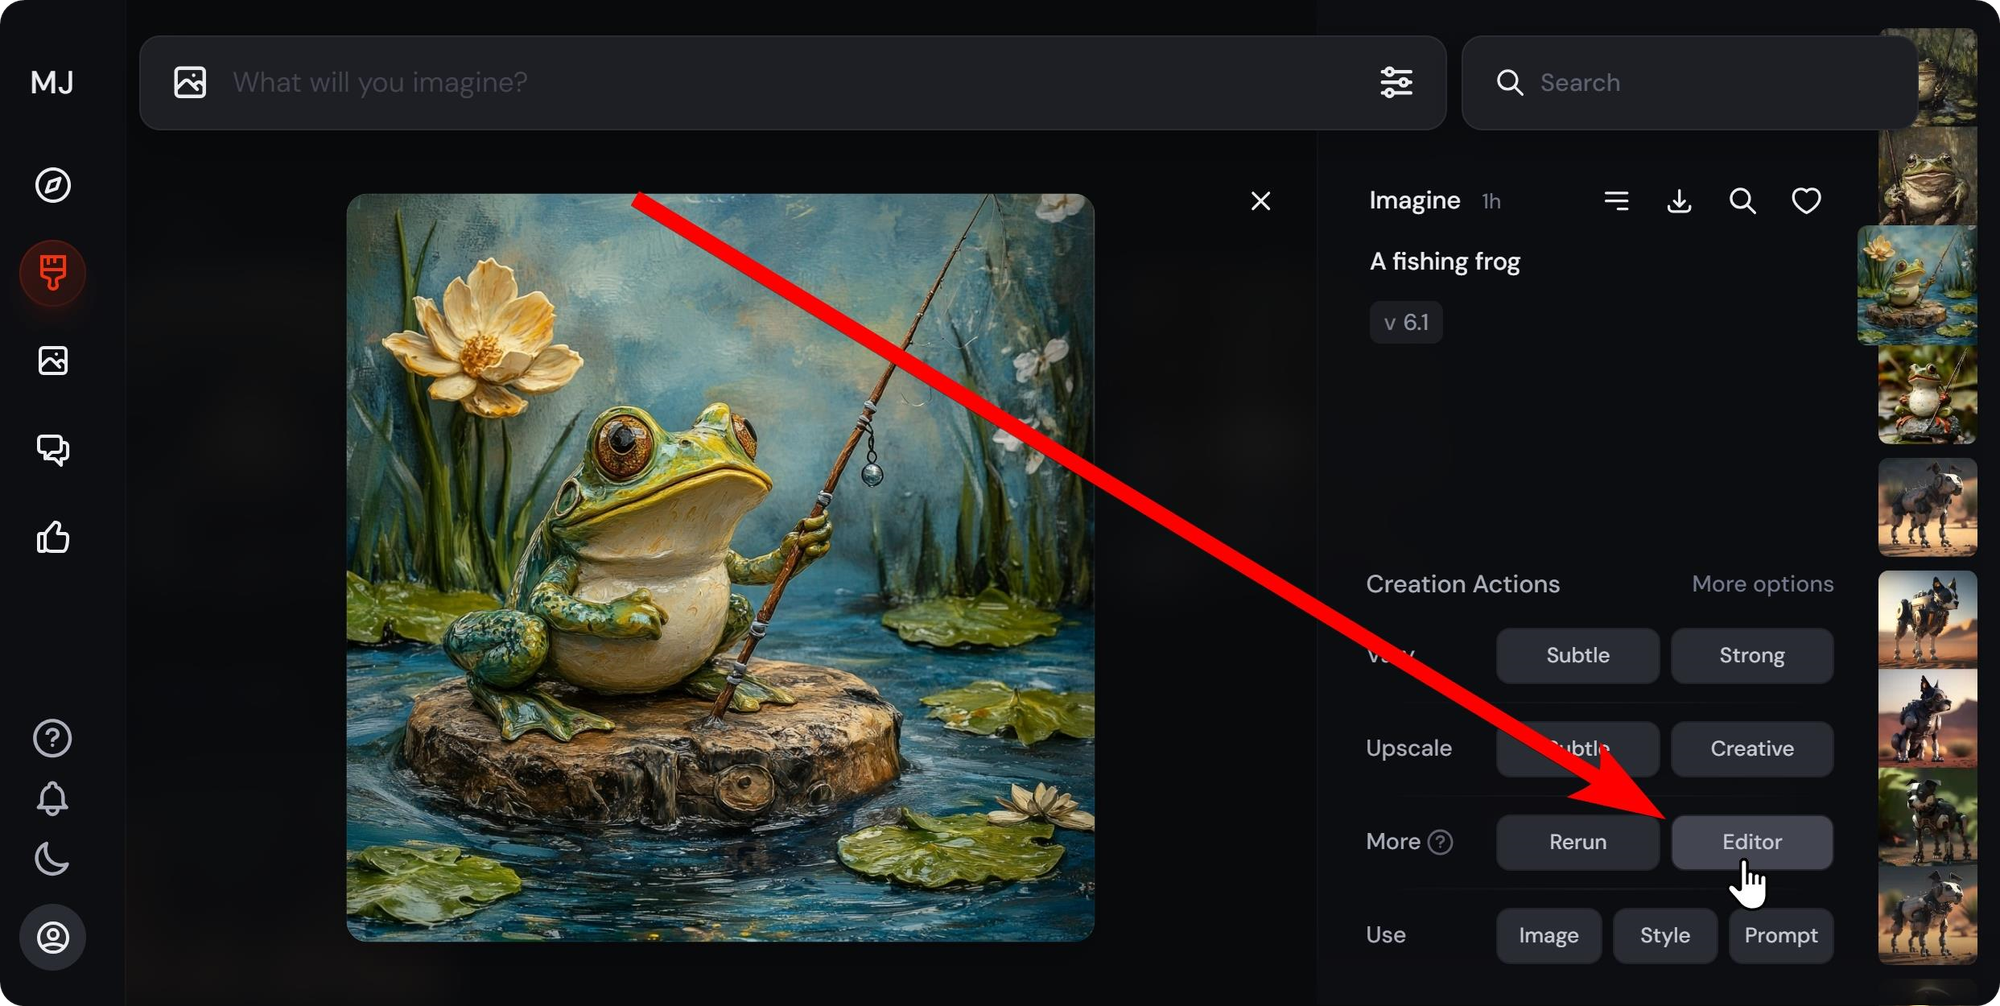
When you click on an image, you’ll be taken to its page. There, you can see the bigger image, its prompt, and its creation options like vary subtle/strong, upscale subtle/creative, and more.
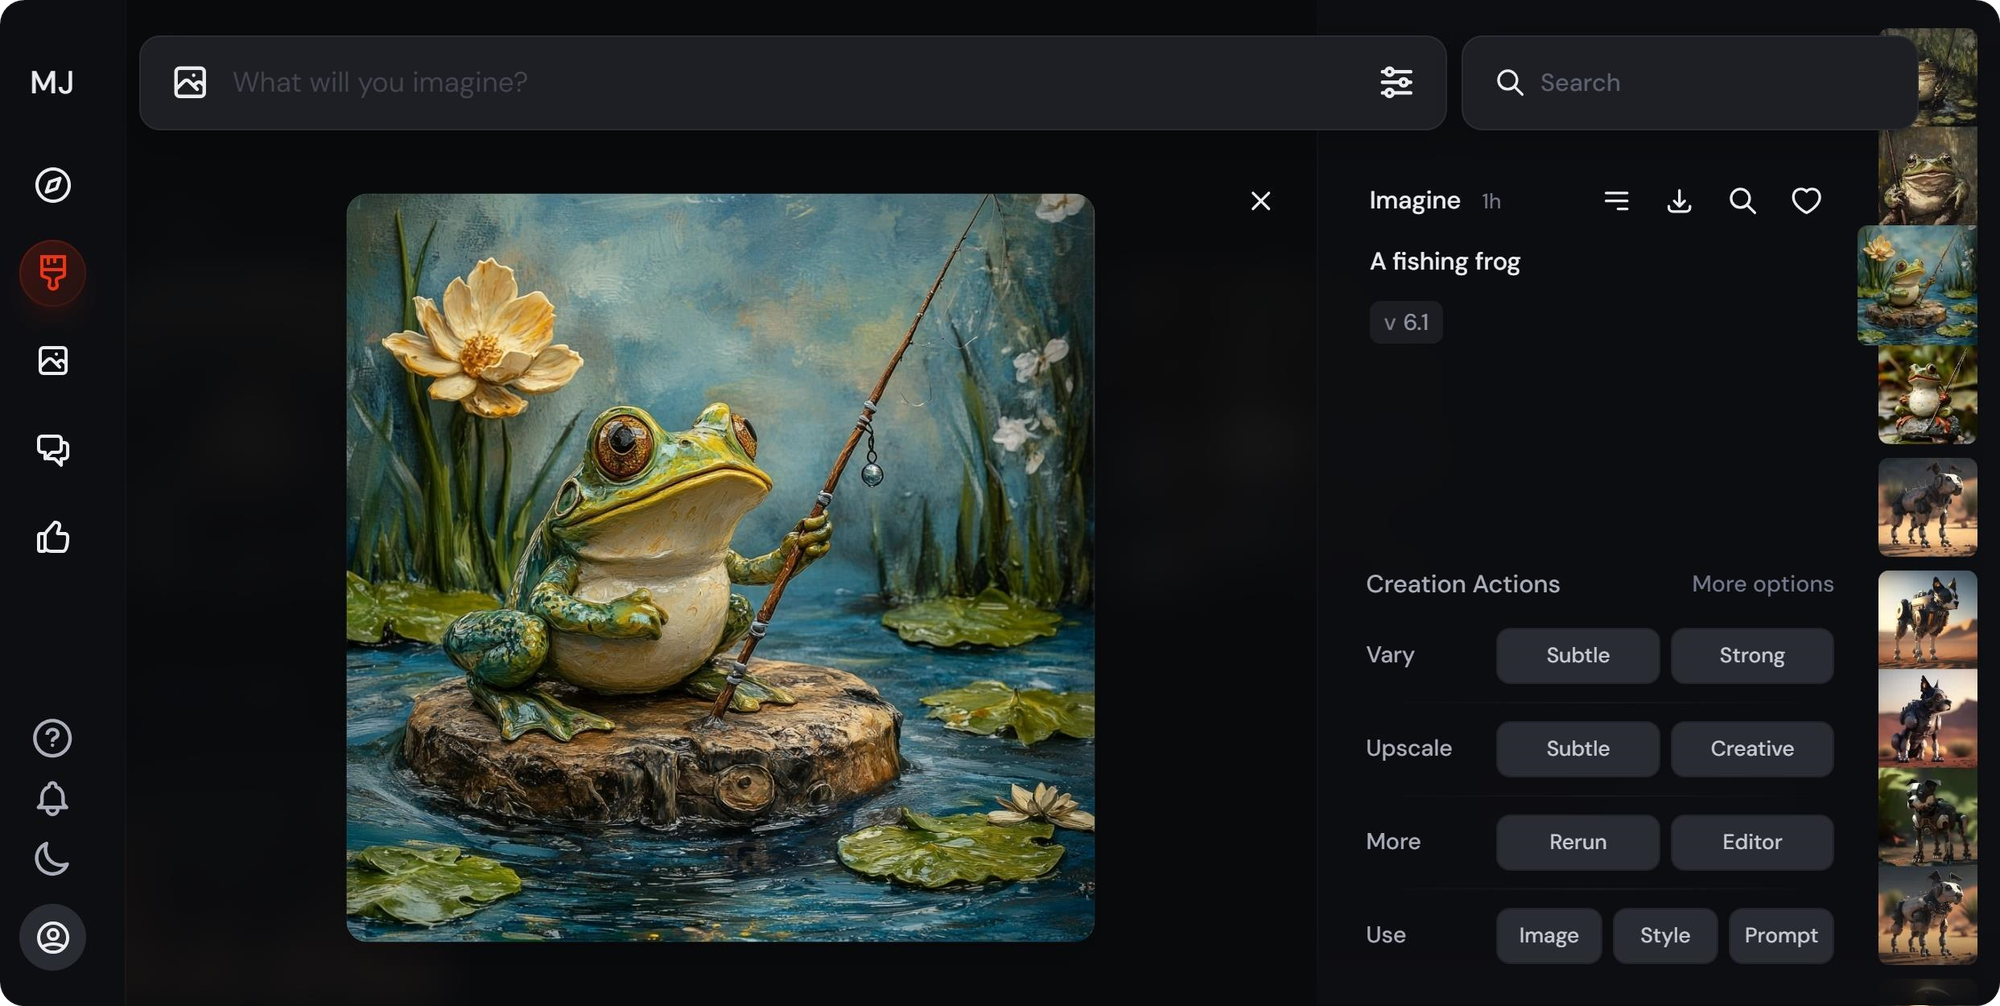
Let’s click on the Editor button under the Creation Actions section to go to the editor page of the image.
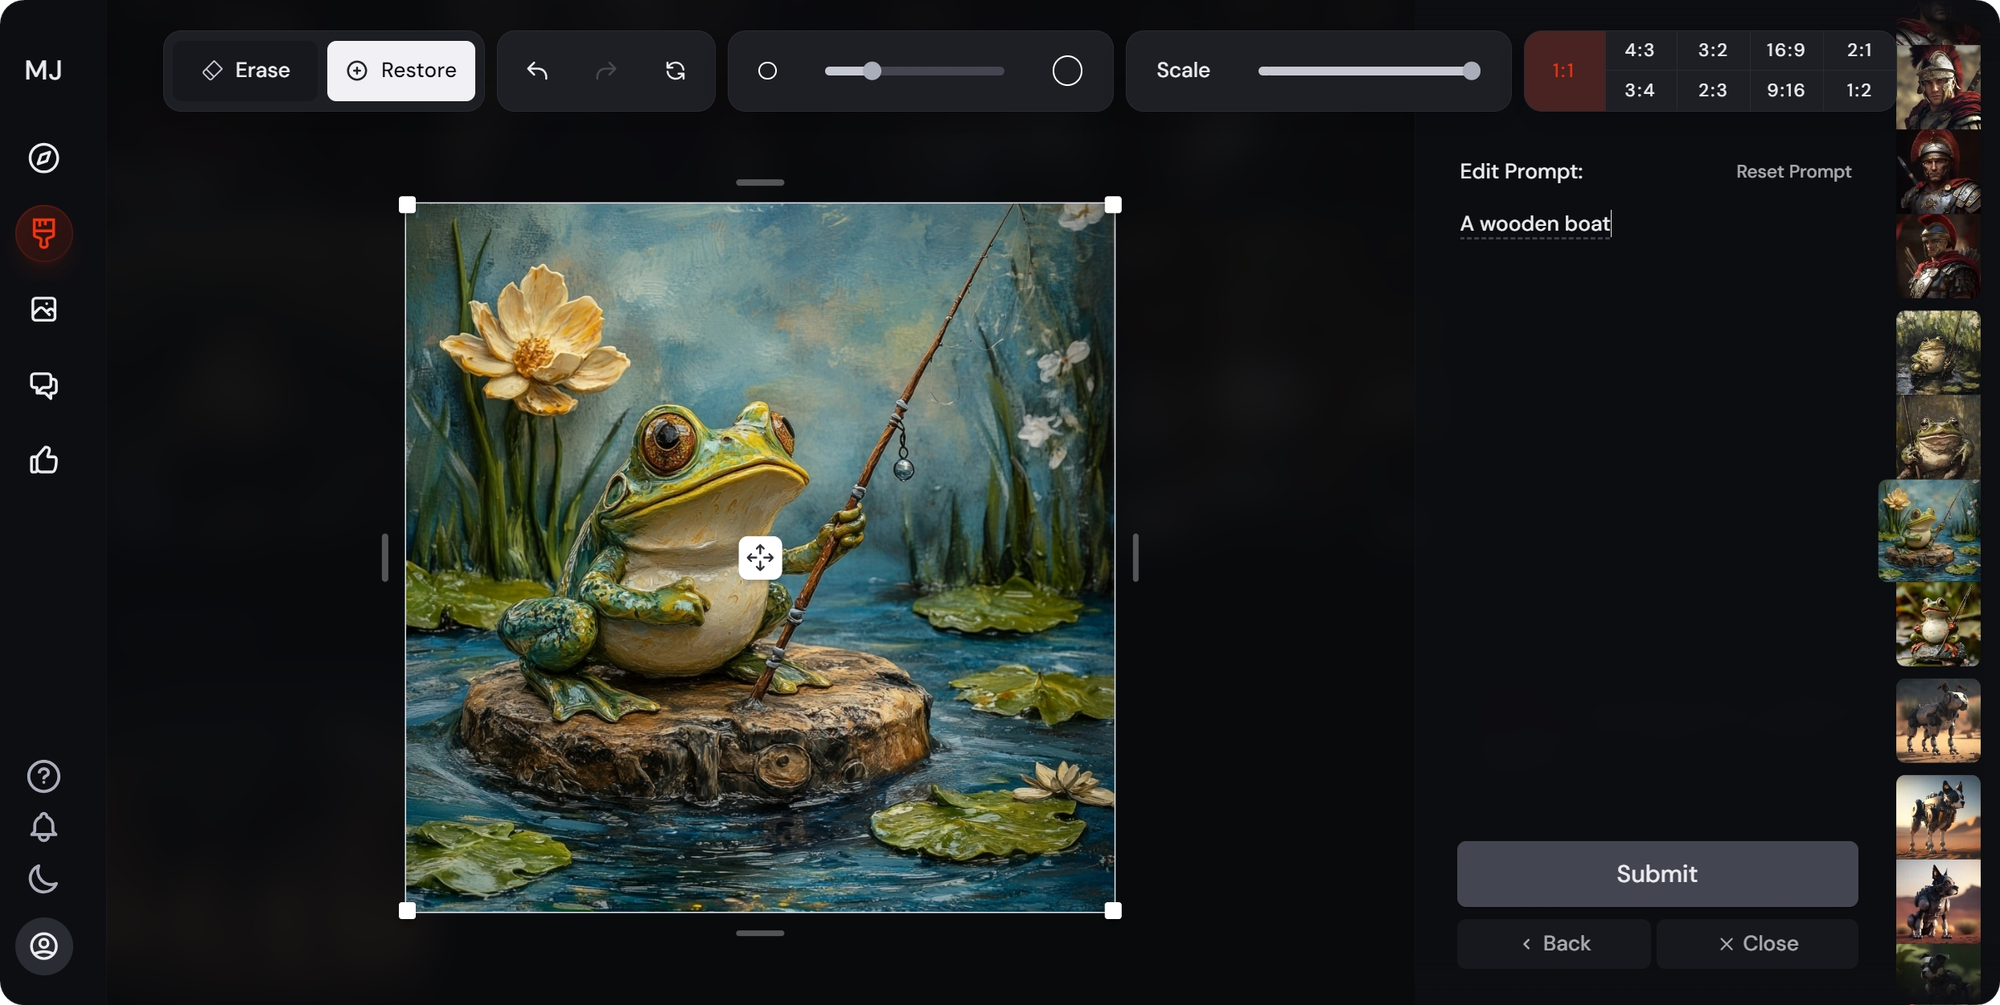
On the Editor page, you can see a few different tools at the top of your screen. Additionally, you can now change the scaling of the image, move it, edit the prompt, etc.
While some of the tools you can see at the top are related to the edit brush, others control the scaling of the image and the canvas. Let’s break down each tool in the next section.
MidJourney Editing Tools and Settings
As we’ve mentioned, the Editor page shows a bunch of different tools, all related to editing the image. Let’s examine each one from left to right:
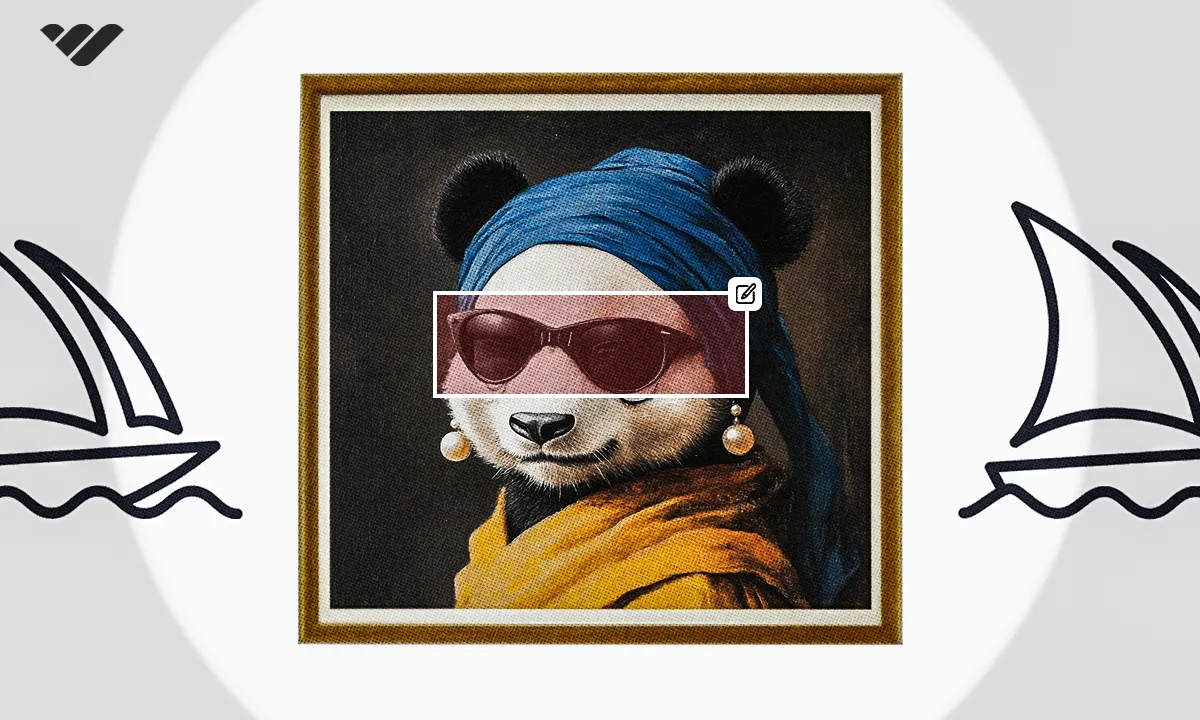
- Erase: If you hover over the image in the Editor, you’ll see that your cursor will turn into a brush with a dash in the middle. If you click on the image while Erase is selected, you’ll see the image being redacted. After adjusting the prompt and clicking the Submit button at the bottom right of your screen, the erased parts will be replaced.
- Restore: The restore tool works just like the erase tool, but it is in reverse. You can restore the parts that were erased by the Erase tool.
- Undo: As its name suggests, the Undo tool takes back the last edit you did.
- Redo: Just like the Undo tool, the Redo tool will apply the last edit you undid.
- Reset: The reset tool will undo every edit you’ve made to the image and turn it back to its initial form.
- Brush Size: The brush size slider determines the size of your erase and restore tools.
- Scale: The scale slider will adjust the size of the image based on the canvas size. Sliding it down will make the image smaller.
- Aspect Ratio: The aspect ratio buttons will determine the ratio of the canvas size. While it doesn’t affect the image itself, it allows you to add new parts to the image itself.

MidJourney Image Editing: The Full Process
Now, let’s see how you can actually edit a part of an image you’ve created. Once you click on the Editor button under the Creation Actions section of the image page, the default tool will be the Erase. If you click and drag on the image, you’ll see that the parts you’re selecting will be deleted. After you erase the parts you want to replace, you have two options: leave the prompt as it is for the AI to fill the erased parts with the overall style of the image, or enter a new prompt for the AI to fill the erased parts.
As you can see in the video below, we’re selecting the lower part of the frog, changing the prompt to “a wooden boat,” and hitting the Submit button. This will add a wooden boat to the area we’ve erased. If we were to leave the prompt as it is, it would just create another variant for the erased area.
After you submit an edit, the image you see won’t change, since the edit request will be considered a new image. You can either use the list on the right side of your screen to navigate to the new image, or you can just go back to the Imagine tab of the MidJourney website to see your new creation.
There you have it - a full explanation of how you edit your MidJourney images. Whether you're using MidJourney to create fan art, images for your business, or just for fun, you can find a community of like-minded people on Whop.