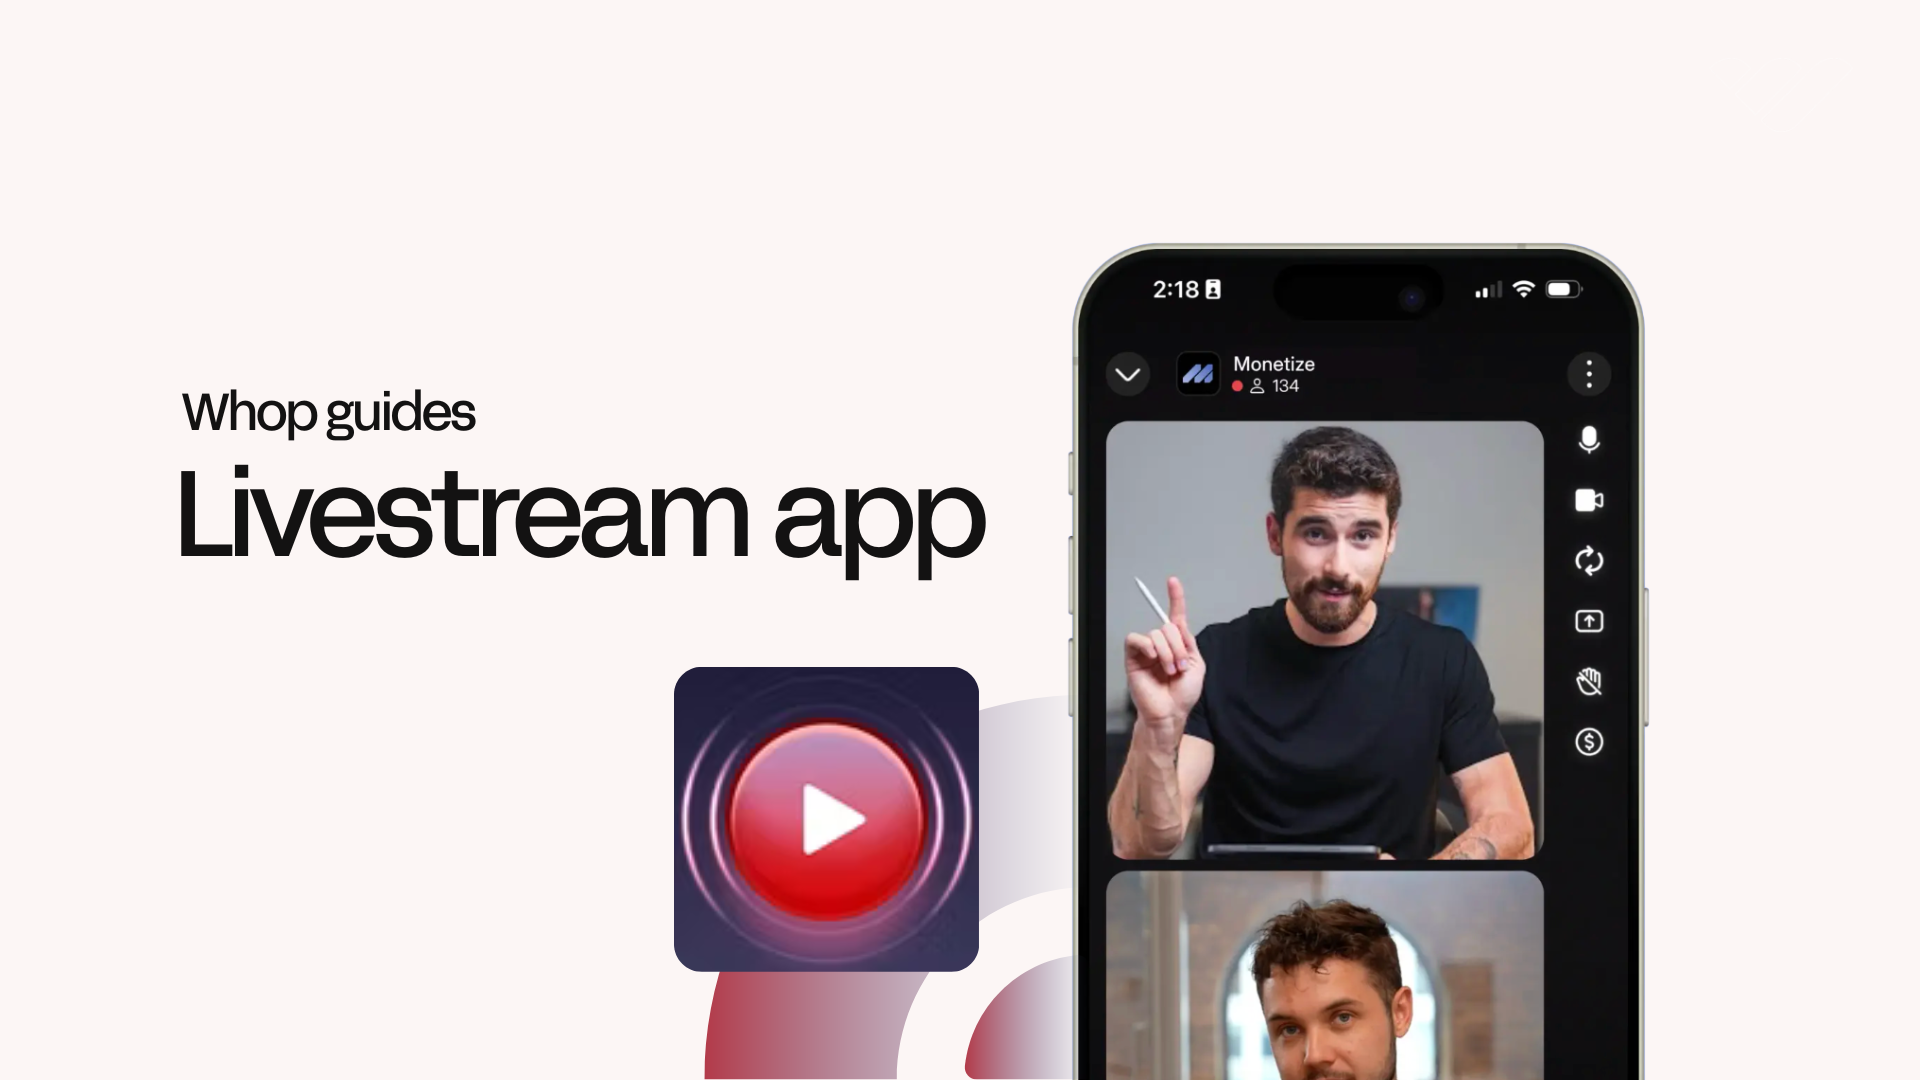
Whop is one of the best platforms to livestream and engage with your audience. Learn how to start livestreaming in under two clicks with this guide.
Key takeaways
- Whop combines livestreaming, community management, and monetization in one platform, eliminating the need to juggle separate tools.
- You can start streaming with just two clicks using your camera, or connect OBS for professional broadcasting with custom scenes.
- Whop offers unlimited stream duration and built-in monetization features to help creators earn from their content.
Livestreaming has been around for nearly two decades, and it’s still one of the best ways to connect with your audience. But there’s something that holds most streaming platforms back: they’re just for streaming.
Whop changes that. Here, you can livestream and run your entire community in one place. No more sending people to a different platform, asking them to sign up again, or juggling separate tools.
With Whop, you can stream, share resources, and give your audience a space to connect — all under one roof.
How to start a livestream on Whop
You can start a livestream on Whop with just two clicks.
First, let’s make sure you have a whop to begin with. If you haven’t already, check out our guide on creating your whop in under 5 minutes.
Have a whop ready to go?
- Click on the Add app button under the Admin area of your whop. This is going to take you to the Whop App Store.
- In the App Store, find the Livestreaming app and click on its Add button.
- Select which products can access the app.
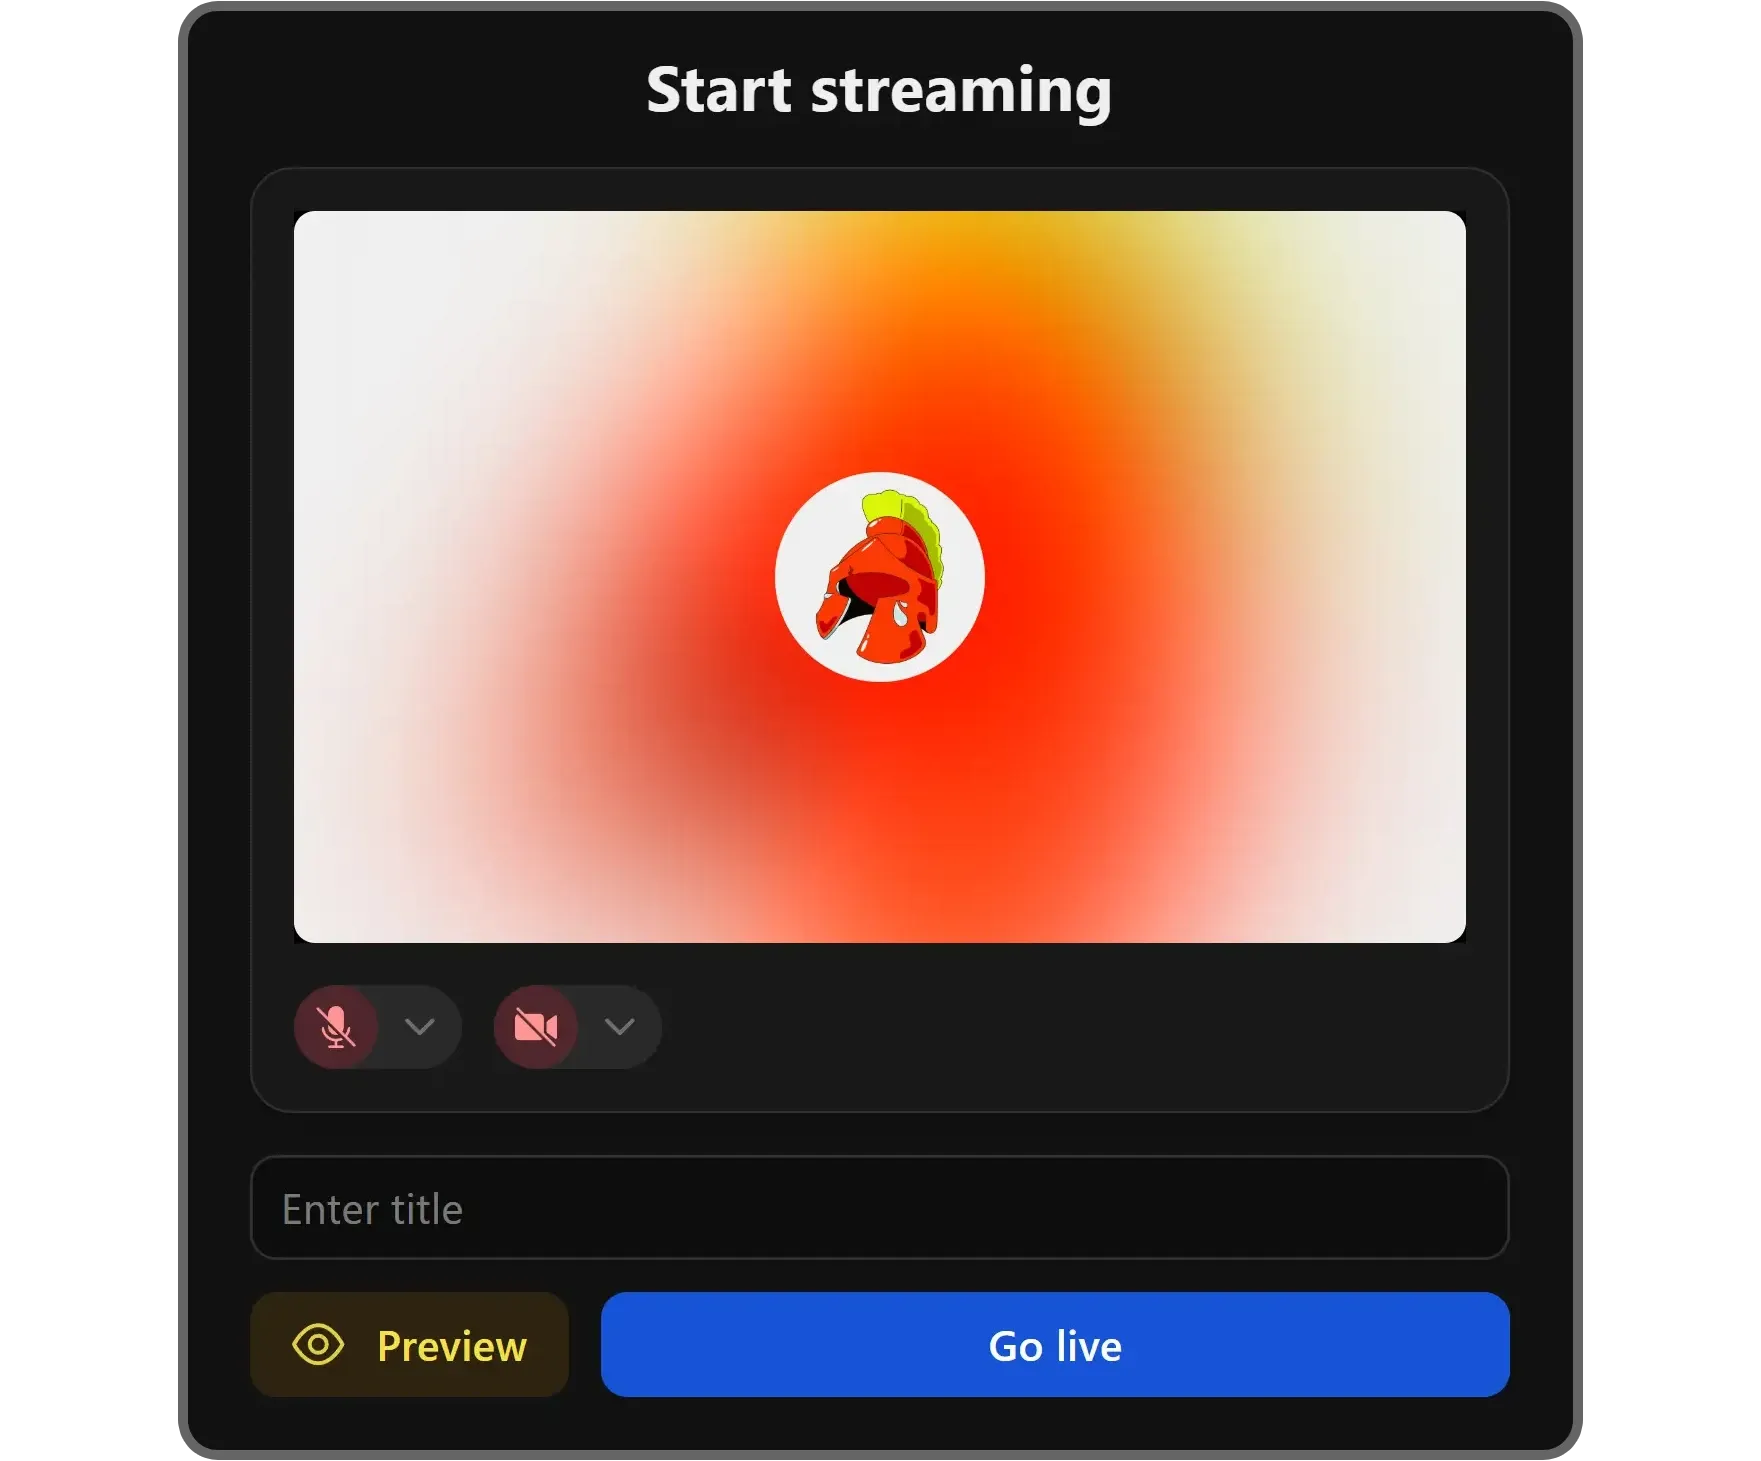
Once you're in the app, you're going to see five things:
- The preview of your camera
- The microphone toggle and selection buttons
- The camera toggle and selection buttons
- The title of the livestream
- The Go Live button
Once you set the microphone, camera, and the title of the livestream, you can click the Go Live button to start your livestream.
Livestream controls on Whop
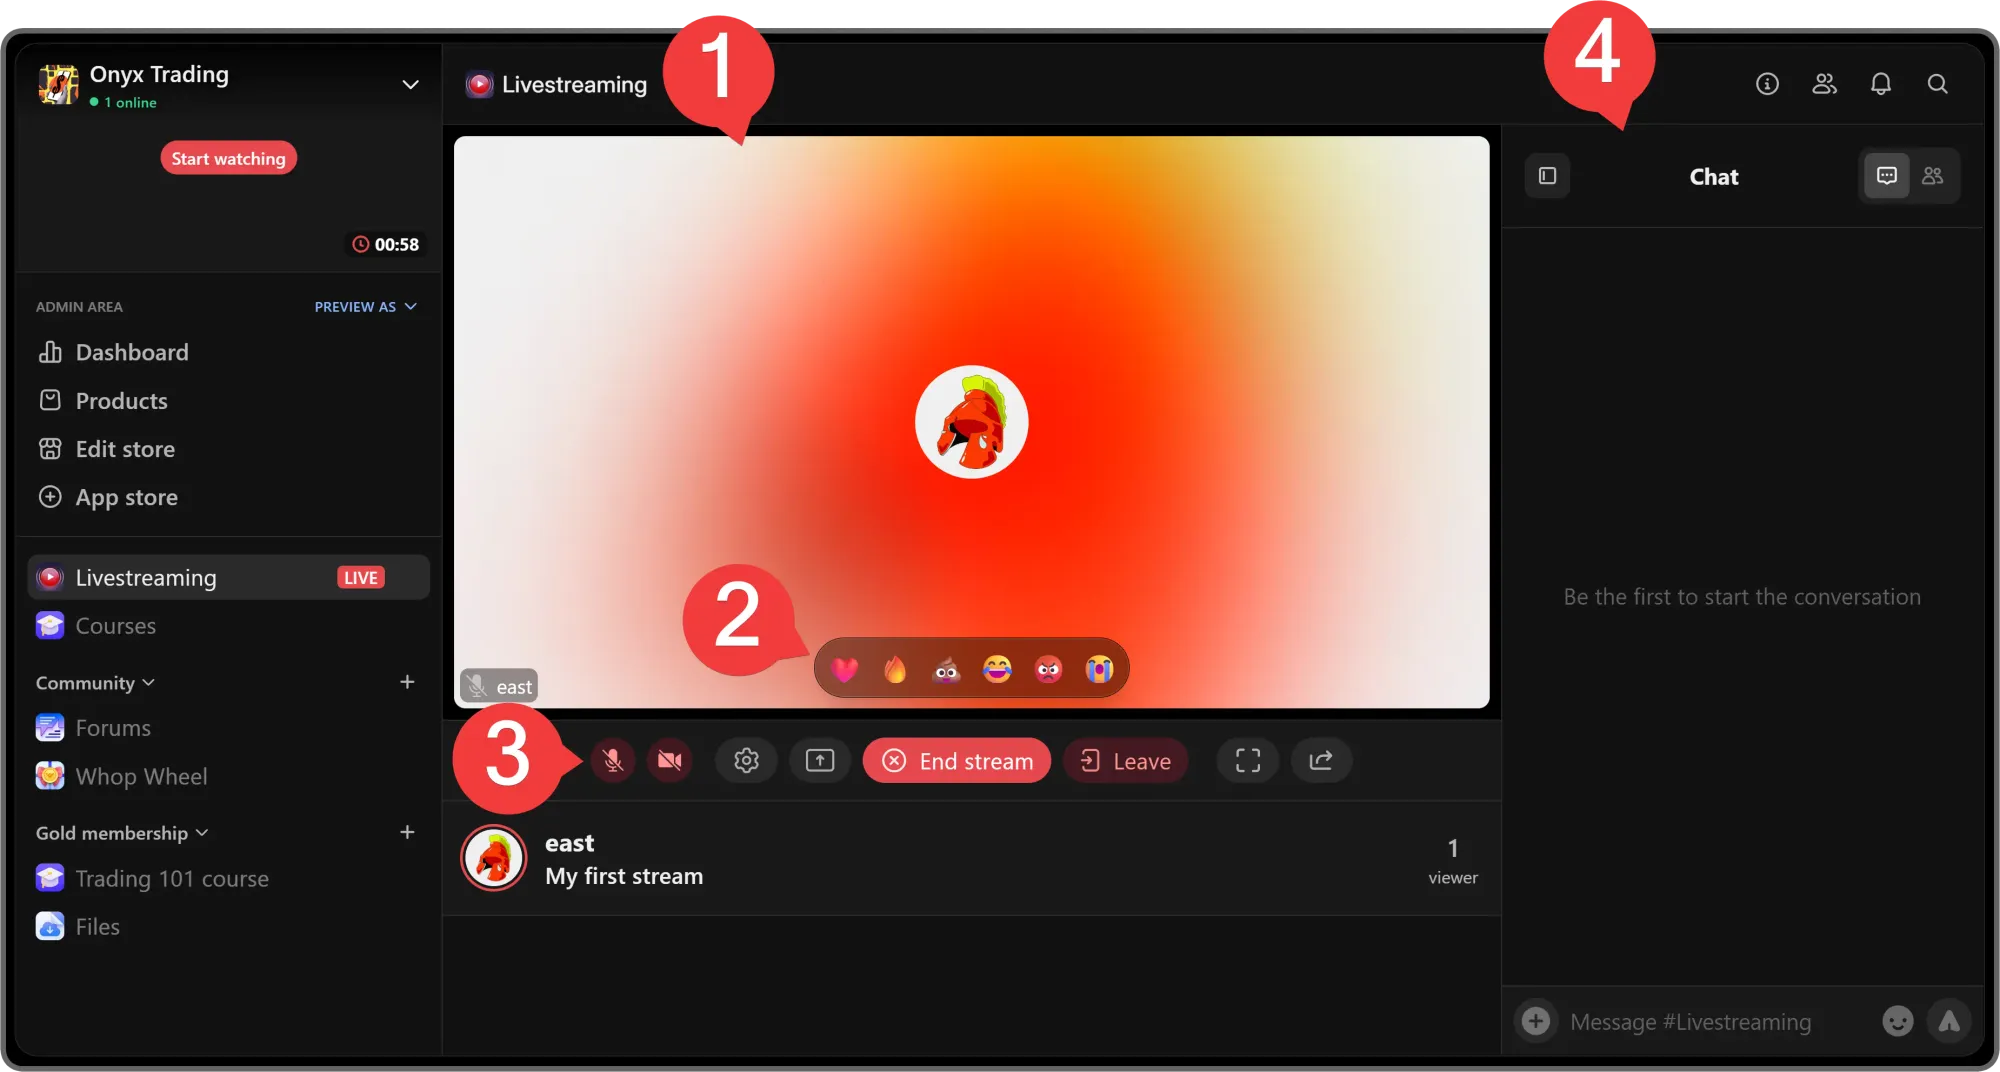
After starting your first stream, everything in the user interface will pretty much be self-explanatory.
- This is your stream. Since you just started the stream, you’re by yourself, but people will be able to ‘Request to speak’ and join as well. When you turn on your camera or share your screen, your viewers will be able to see it here.
- This is the live reactions bar. You and your viewers will be able to send reactions to the stream, and they will appear on the left side of your stream (not blocking anything important)
- These are your stream controls. Let’s break them down starting from the left:
- Audio input: You can click on it to mute your microphone or click the drop-down menu button to change your audio input device
- Video input: Just like the audio input button, clicking on it will enable or disable your camera, and the dropdown allows you to change the video input device
- Livestream settings: Clicking on the settings button will allow you to get your stream key (and ingest URL), enable/disable live reactions, select who can react (everyone or no one), who can send messages (everyone or only admins), enable/disable the Block URLs and Block Media from chat settings, set a user message cooldown, and adjust banned words from the chat
- Share screen: Clicking on the share screen button will prompt you to which window or screen you want to stream on the app
- End stream: As its name suggests, clicking on the End stream button will end the stream
- Leave: Also as its name suggests, clicking on the Leave button will make you leave the livestream. This will not end the stream
- Enter fullscreen: Clicking on this button will make your livestream go fullscreen
- Share livestream: Clicking on this button will display a popup where you can easily invite Whop users to your stream, copy your stream link, or share it on X (Twitter)
- Open chat: Clicking on this button will display the chat of your livestream on the right side of your screen. This button is only visible if the chat is hidden
- This is your chat section. Clicking on the Hide chat button at the top left of it will hide the section (this will make you see the Open chat button as mentioned above). You can switch between the chat view and the viewers using the tab buttons at the top right, and you can chat with your viewers using the input field at the bottom
How to connect OBS to the Livestream app on Whop
On Whop, you can go live with your camera, share your screen, or level up by connecting OBS.
OBS (Open Broadcaster Software) is a livestreaming tool that lets you capture your screen, use your camera, and add custom visuals. You can even set up different scenes — like showing your screen with a small camera overlay in the corner, or switching to full-screen video when needed.
This setup is perfect for trading, gaming, or any desktop-focused stream. To connect OBS to your Whop livestream, you’ll first need to generate a stream key.
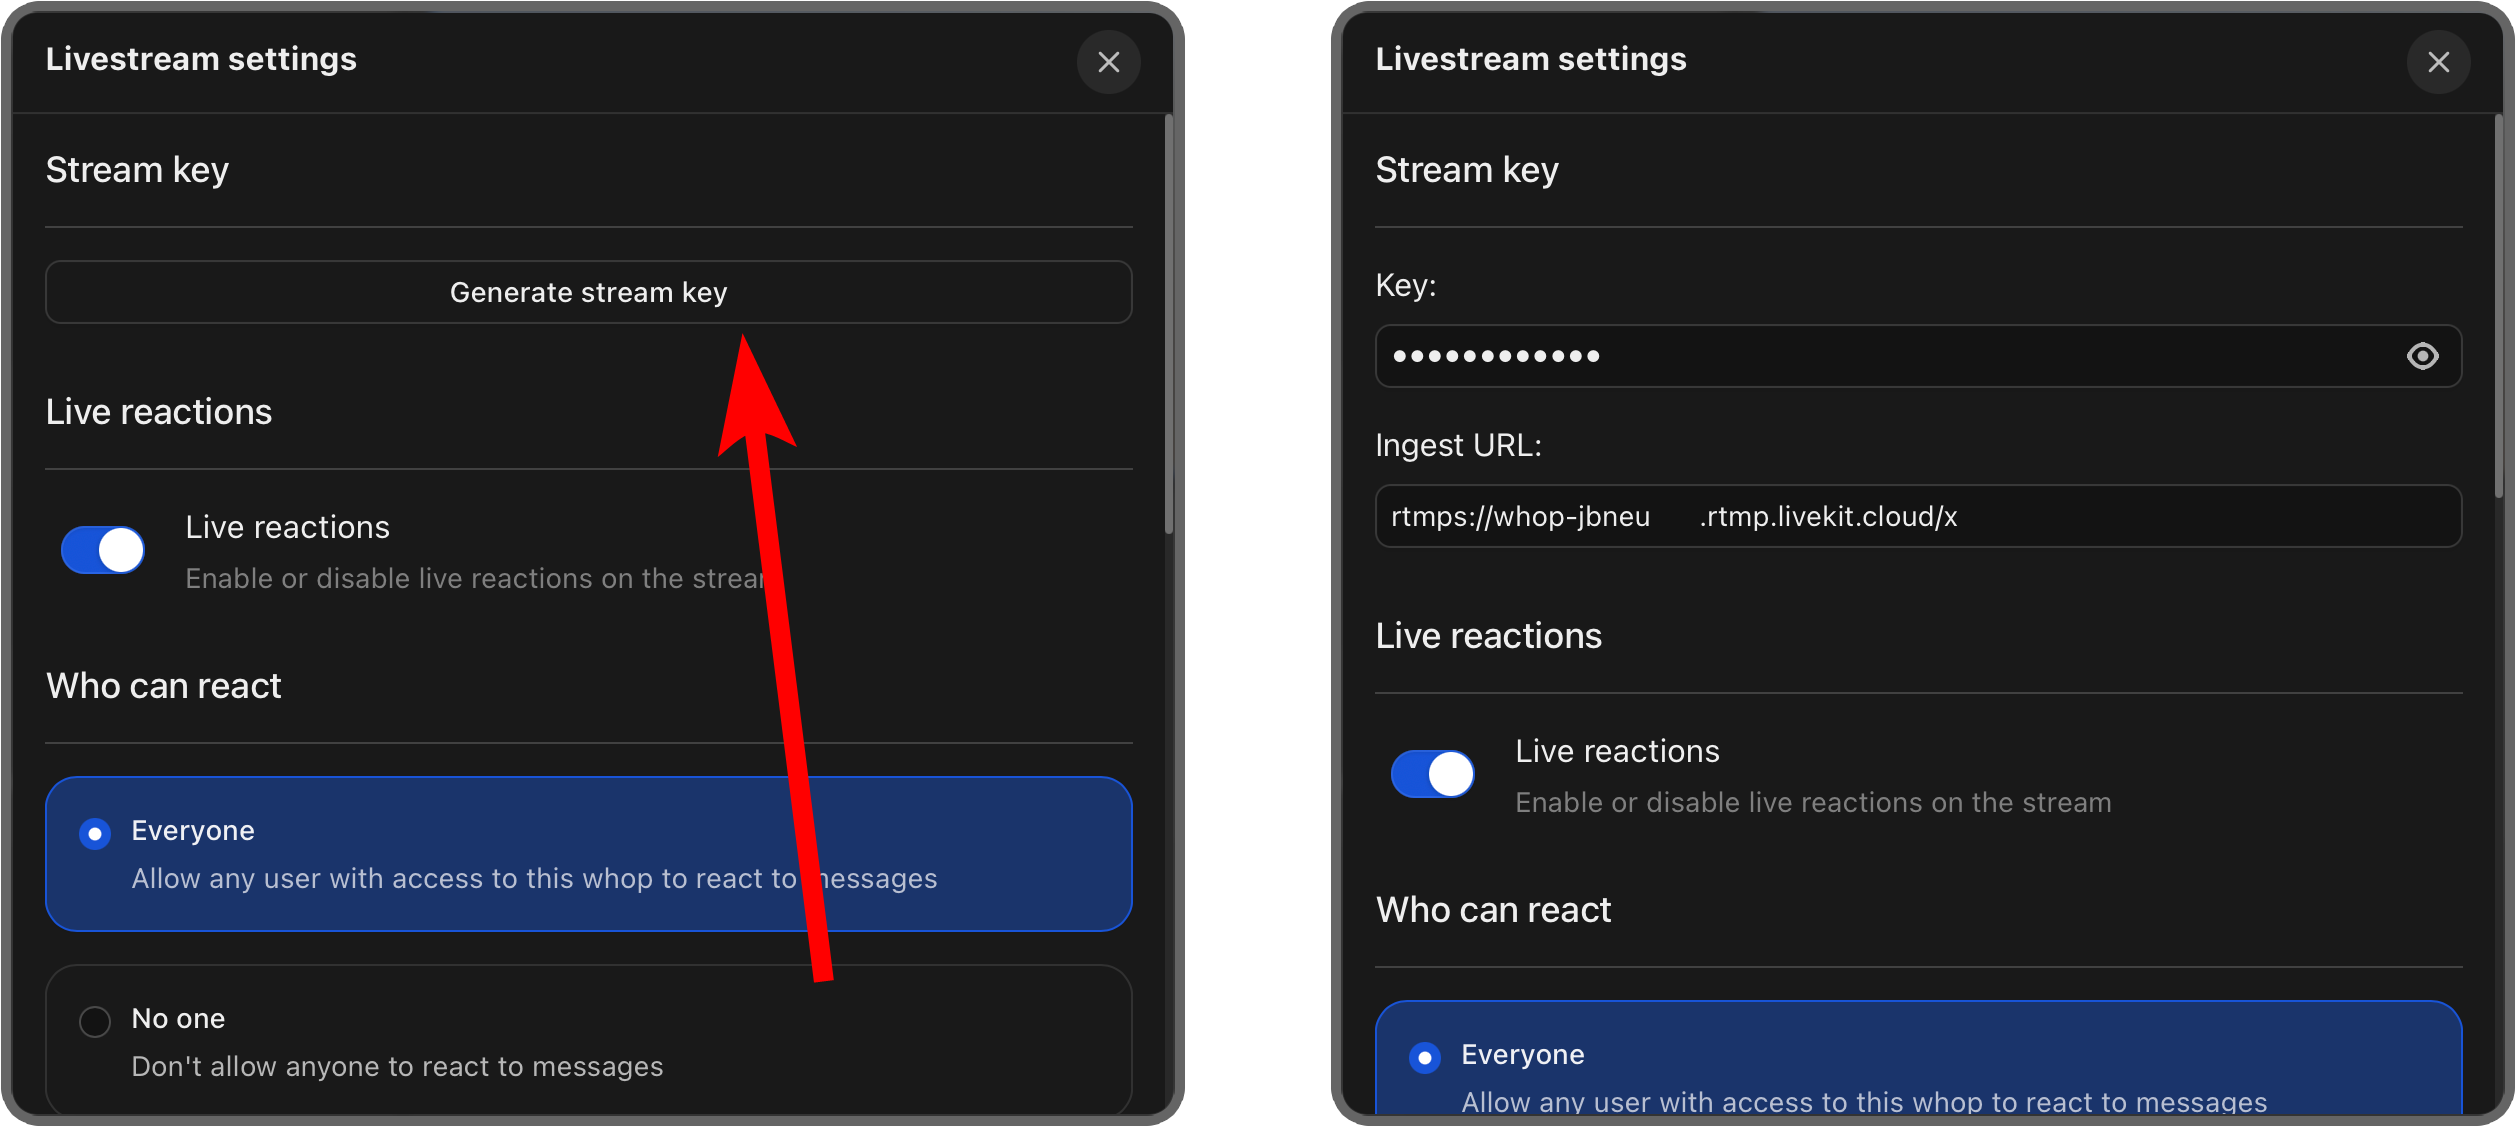
Click the Livestream settings button on Whop. This is going to display the Livestream settings popup.
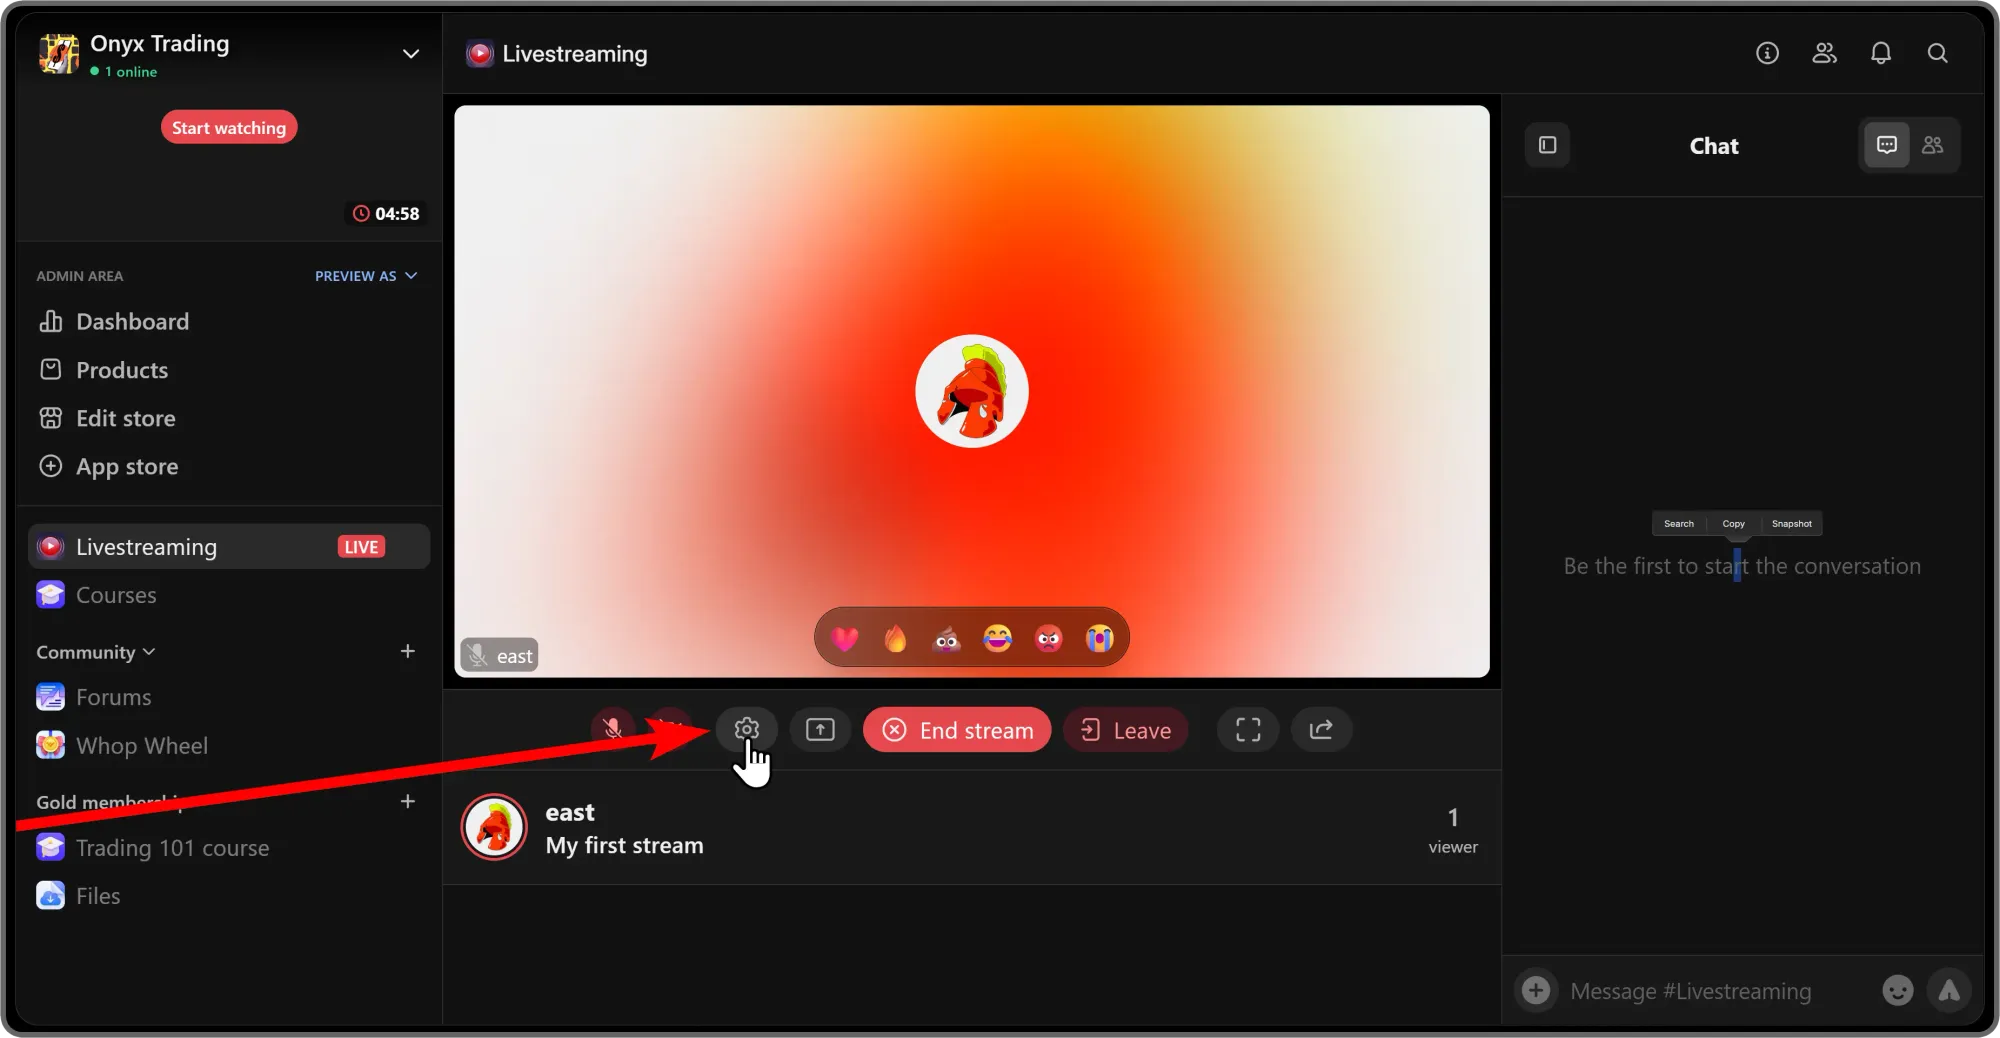
In the Livestream settings popup, the first thing you're going to see is the Stream key section with the Generate stream key button in it. Clicking on the button will display a Key and an Ingest URL.
You can think of them as your way of connecting and authenticating your OBS stream to your Whop livestream.
You shouldn't share these details with anyone. People who have access to these details will be able to display anything on your livestream.
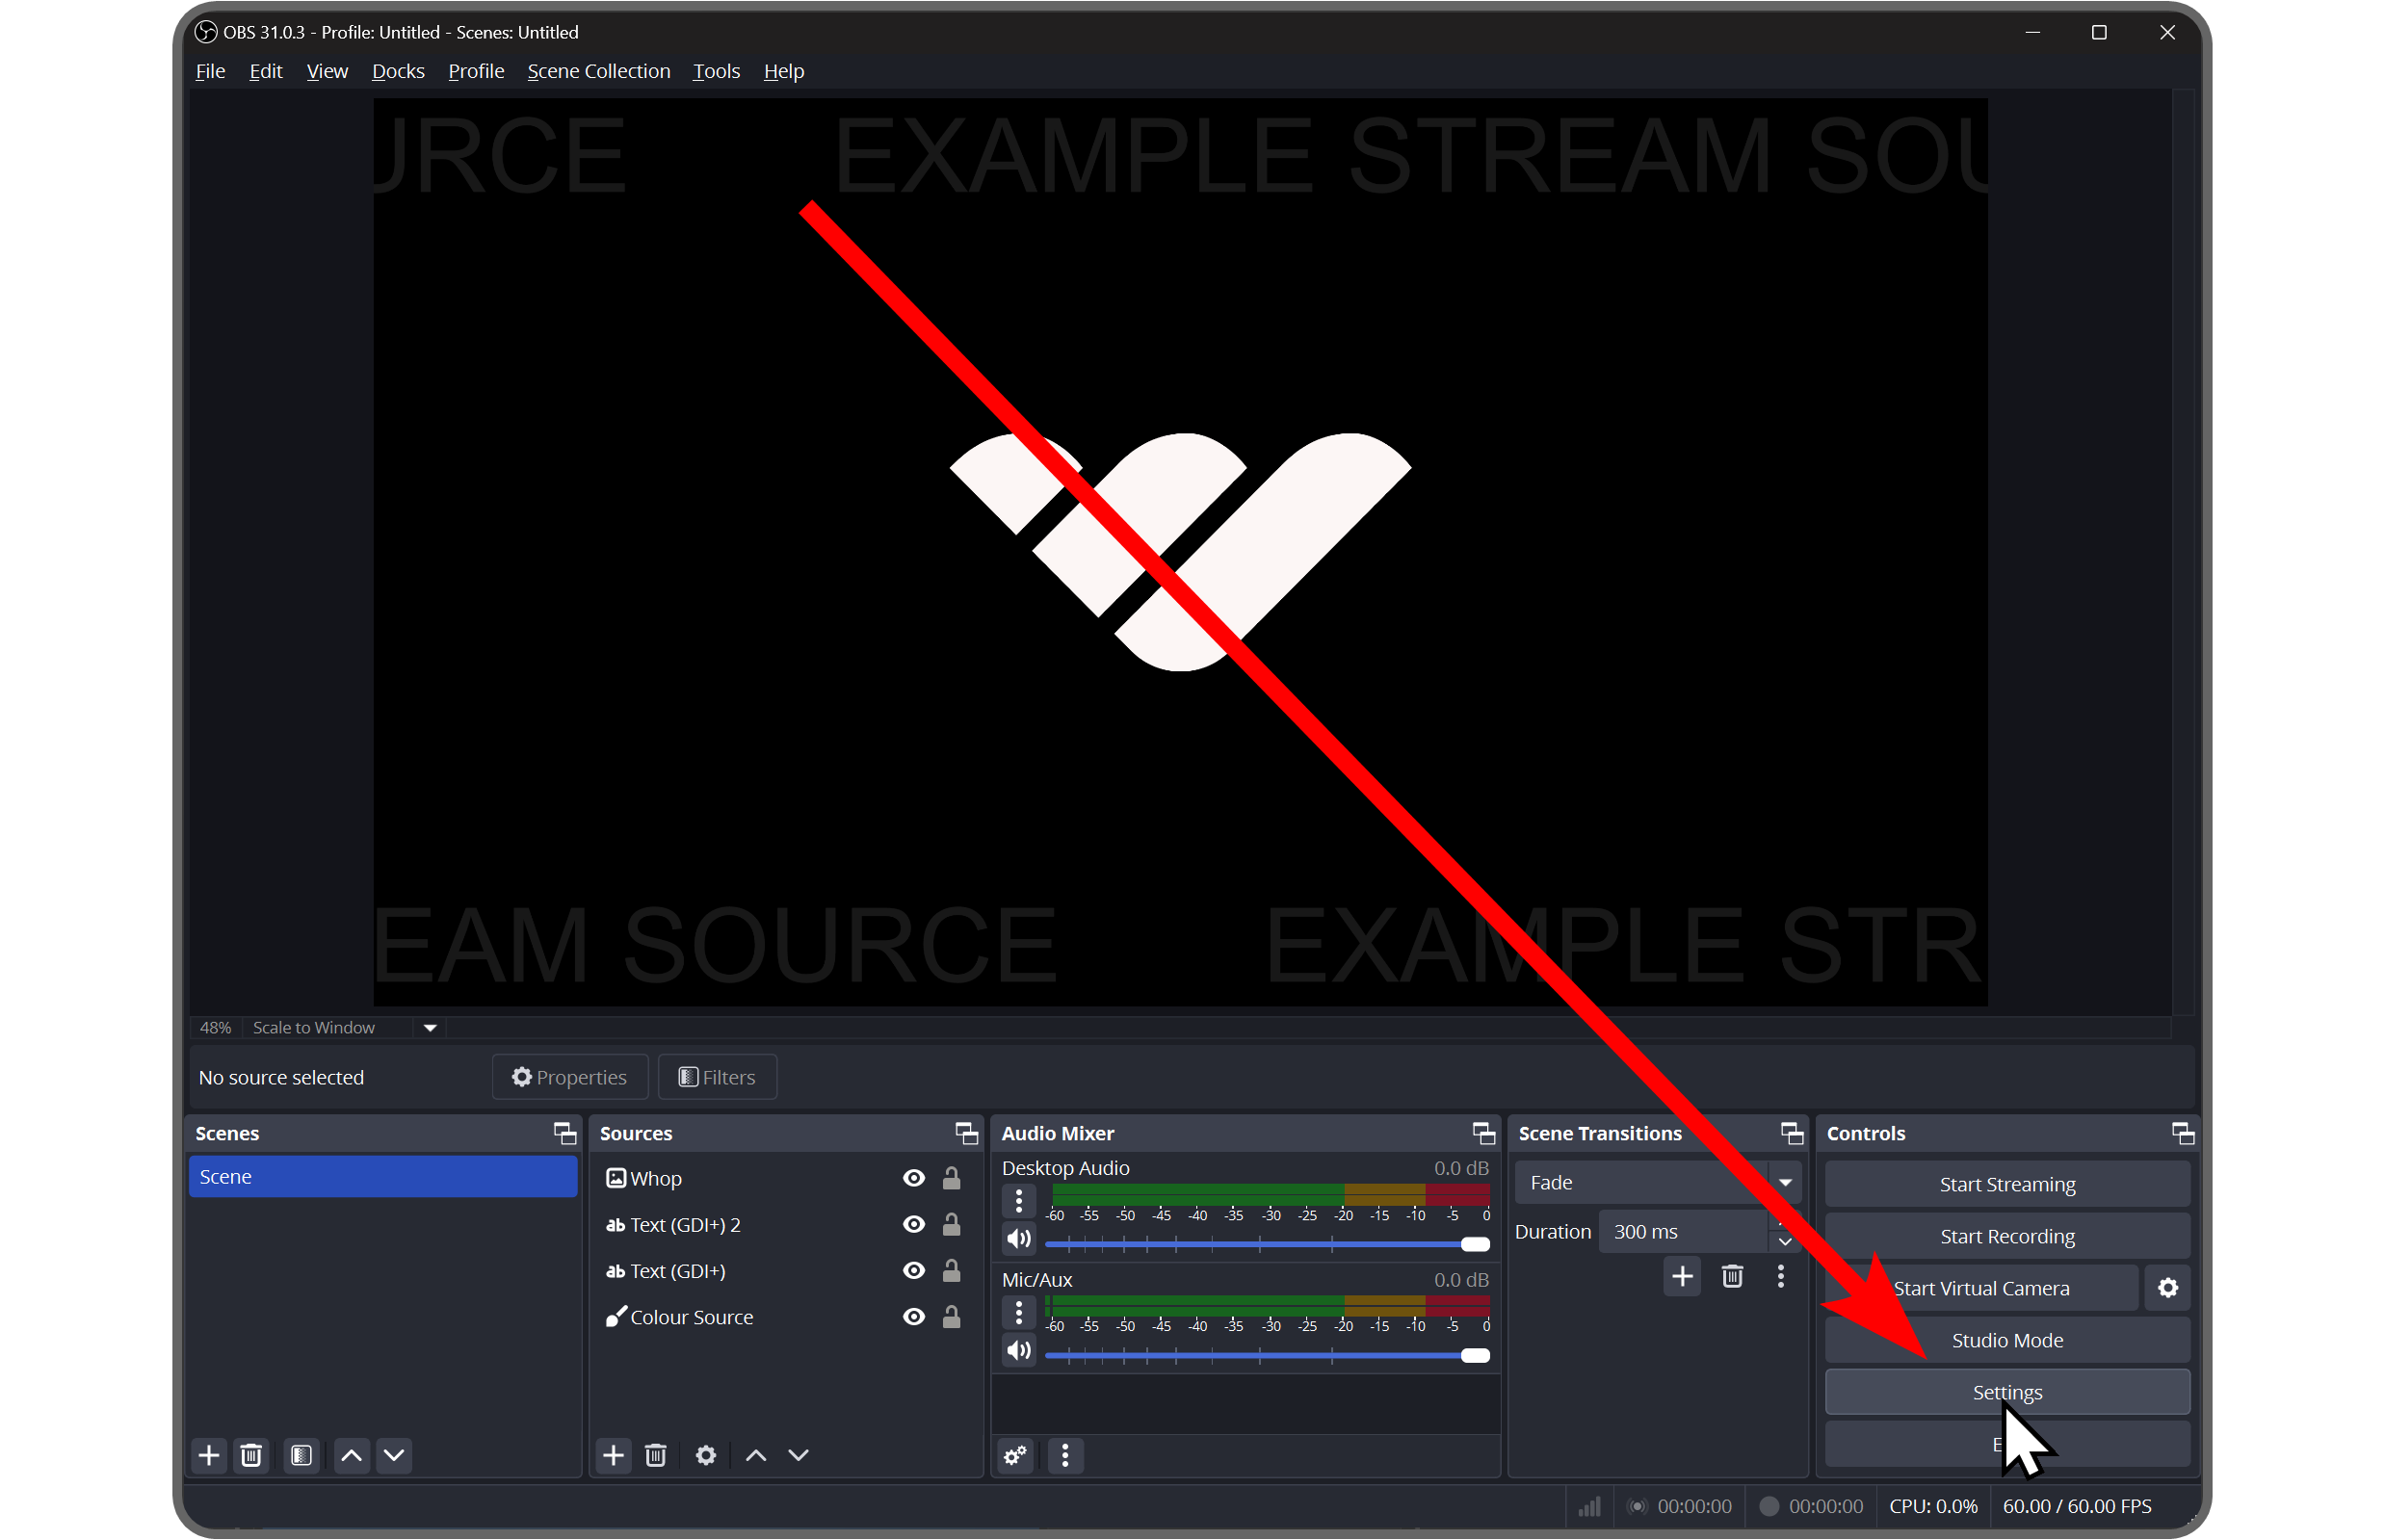
Now that you have a stream key, let's switch to OBS and click on the Settings button. This will display a menu of all the software settings.
In the OBS settings, navigate to the Stream section and select Custom... from the Service dropdown menu.
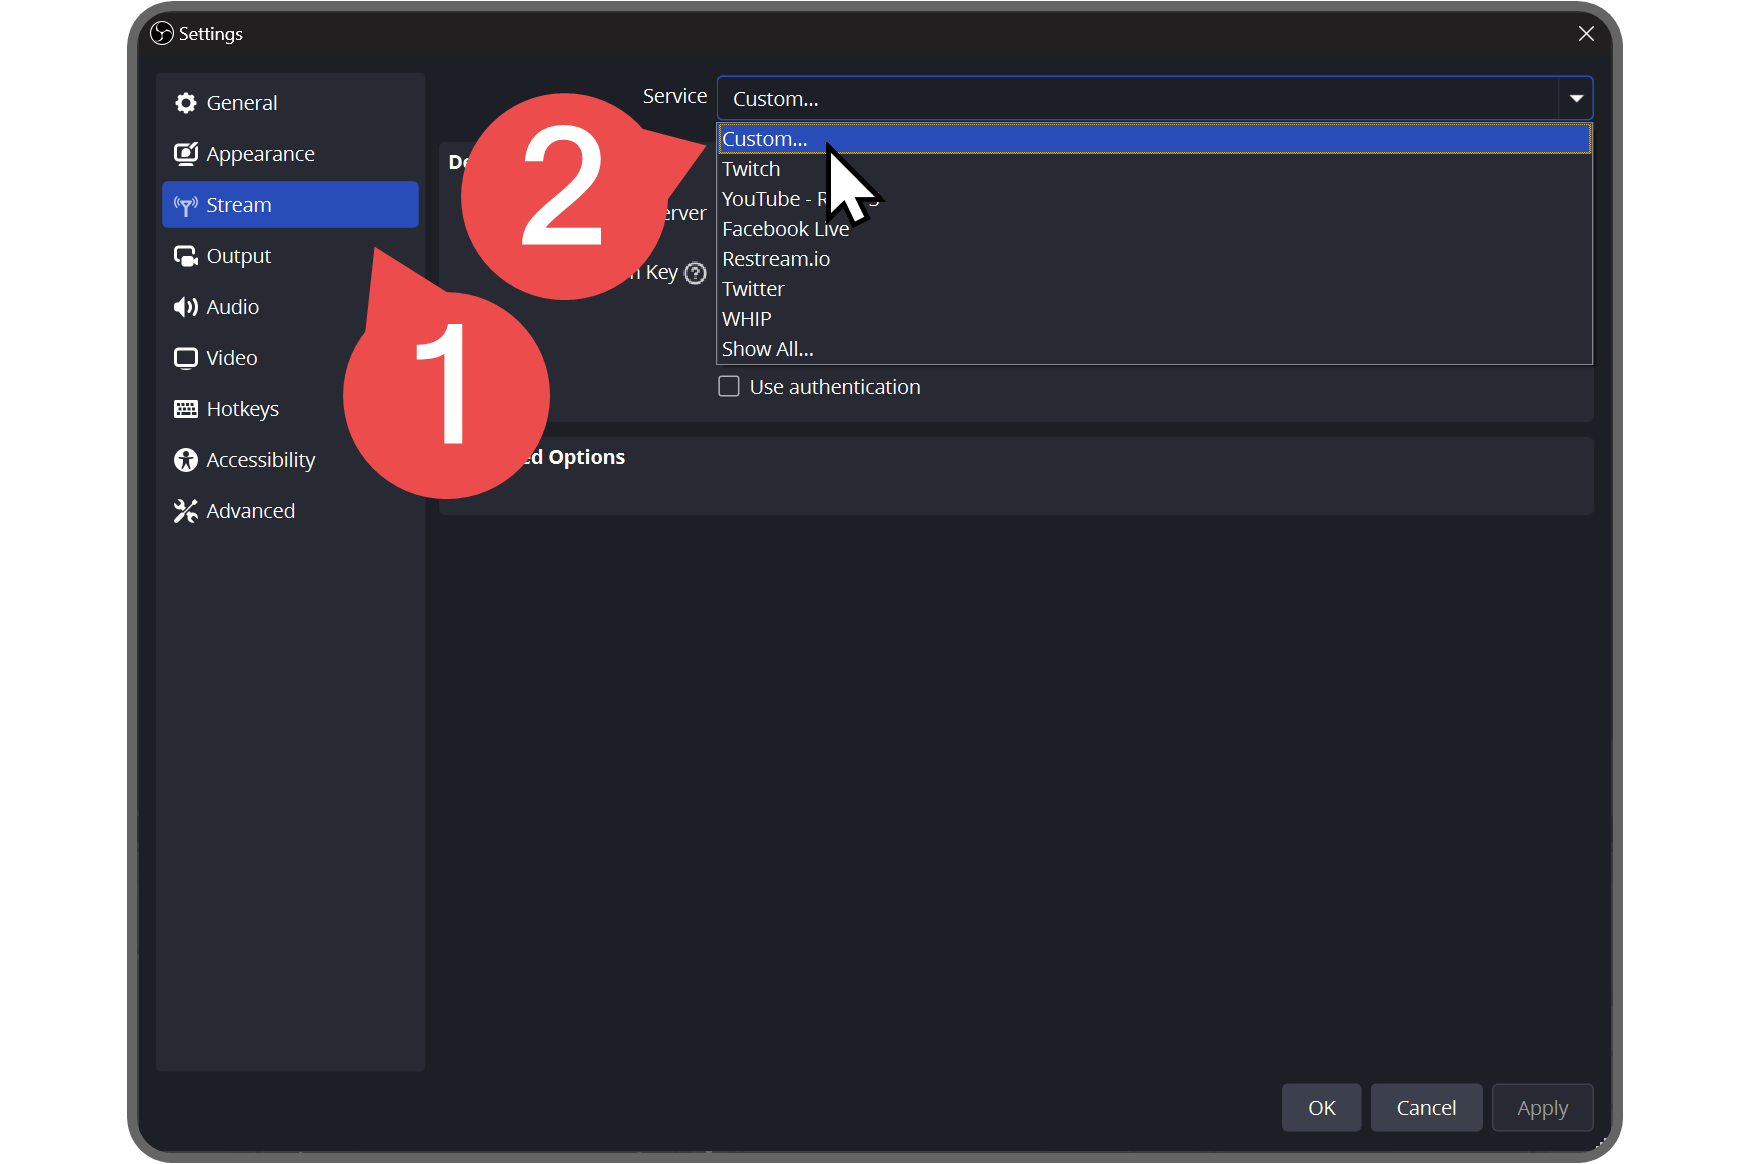
After selecting the Custom... option, you'll see two input fields below it: Server and Stream Key.
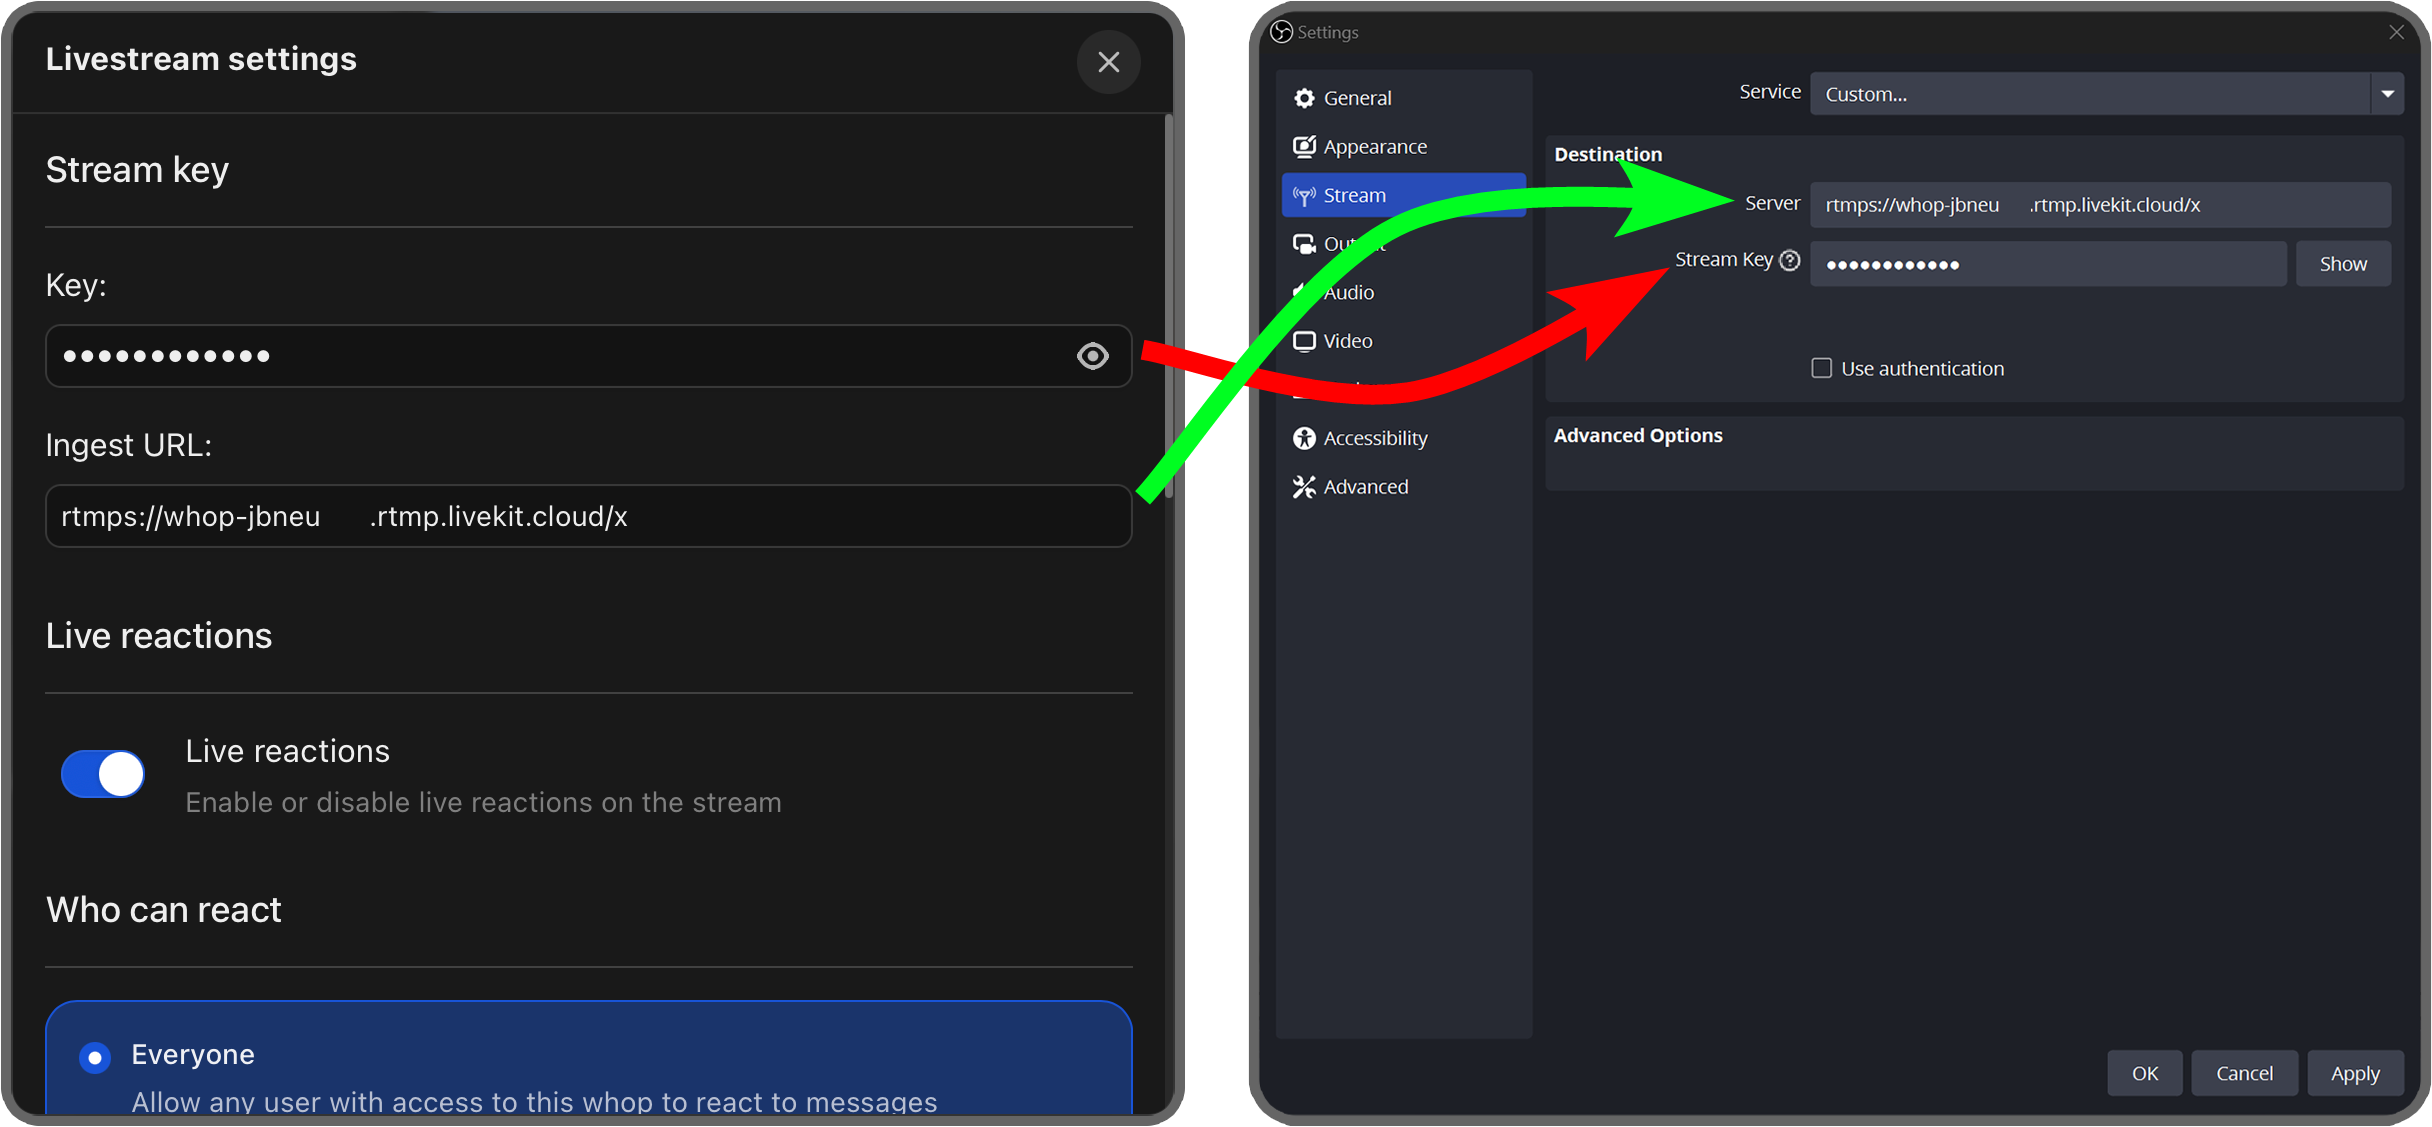
Paste the Key into the Stream Key field and the Ingest URL into the Server field.
Once you're done with the settings, click the Apply button at the bottom right of the OBS settings menu to save the changes and the OK button to close the settings.
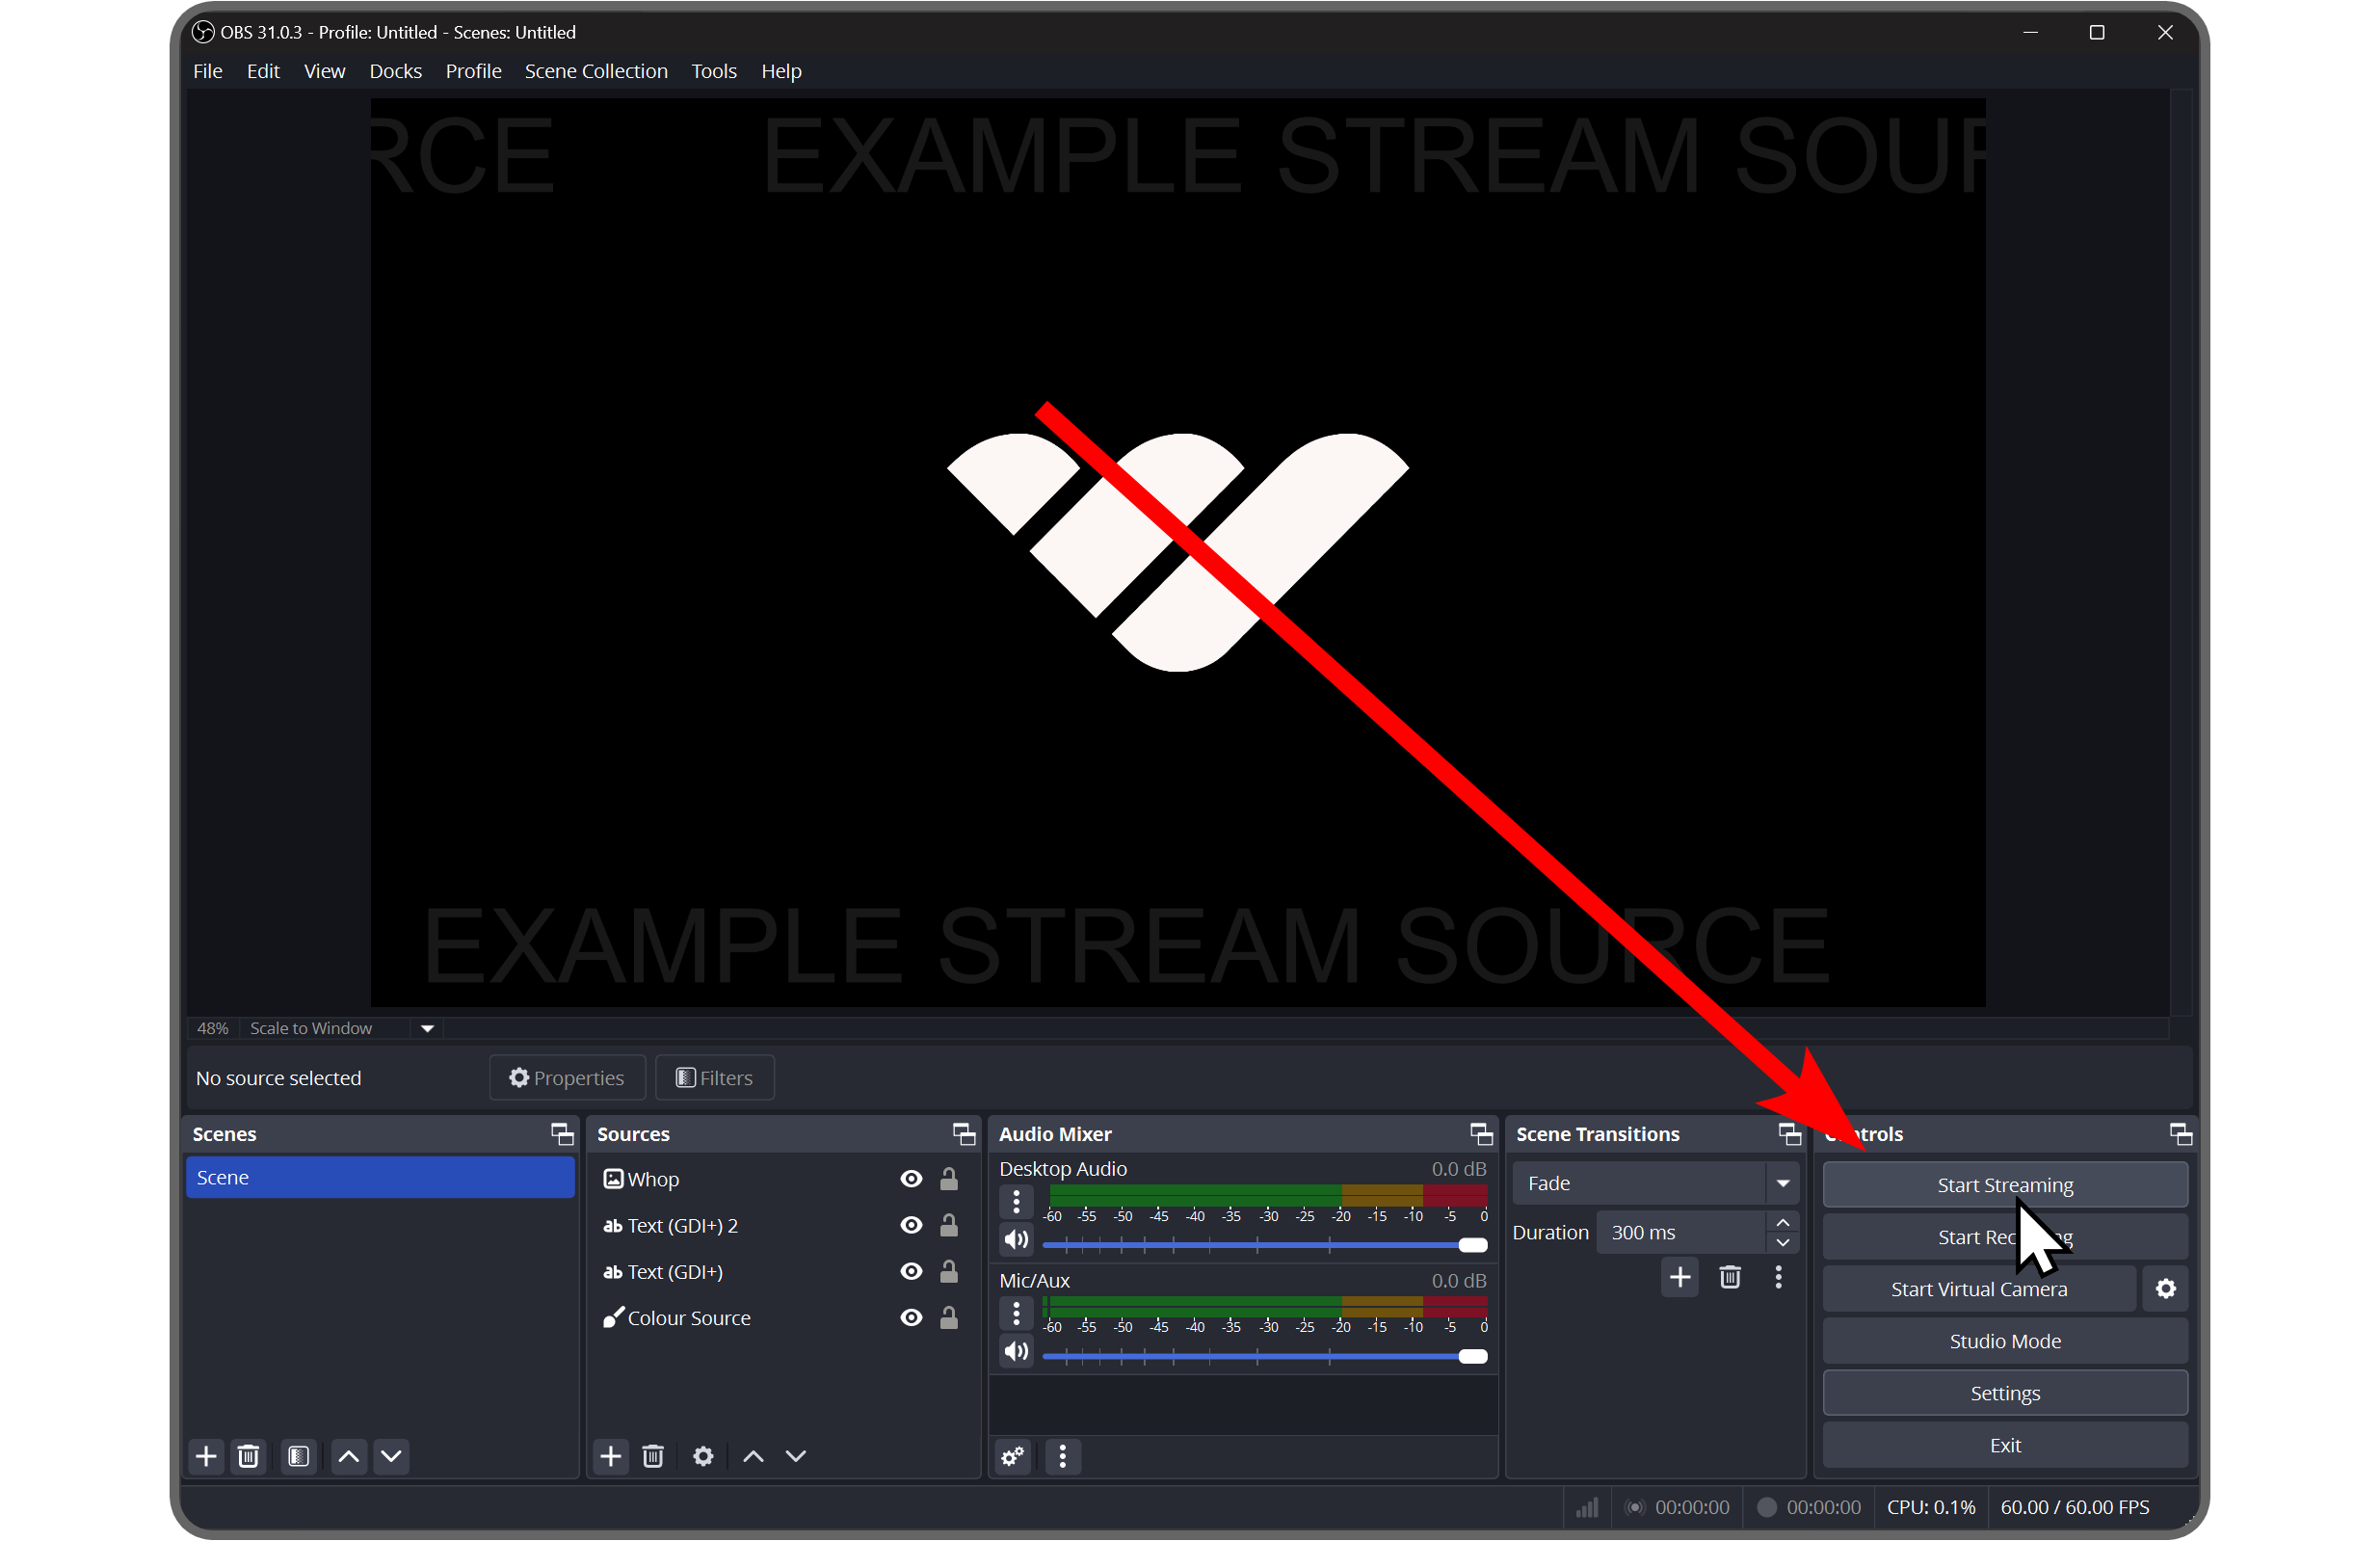
Your OBS stream is now connected to your Whop livestream - but they're not sharing the visuals just yet. When you're ready to start streaming from OBS to Whop, click the Start Streaming button on the main OBS window. This is going to make OBS start sending the stream to Whop.
After starting the stream on OBS, you should be able to see your OBS output in the Whop livestream. Making any changes to your OBS sources will instantly reflect them on your Whop livestream as well.
If you ever want to sever the connection between OBS and your Whop livestream, click the Stop Streaming button (this will appear after you start a stream in OBS).
Why livestream on Whop?
Here’s what makes Whop the best place to go live:
- Integrated community: Your members don’t have to bounce between apps. They can watch your stream, access resources, and connect with your community — all in one place.
- No time limits: Stream for as long as you want. Want to host a 24-hour trading marathon? Go for it.
- Simple to use: Whop’s livestream interface is clean and easy. No steep learning curve for you, no confusion for your viewers.
- No extra tools required: You can go live on Whop with just two clicks. OBS and other software are optional, not mandatory.
- Built-in monetization: Beyond livestreams, you can monetize everything you host on Whop — from communities and coaching to files, courses, and more.
Start livestreaming on Whop and stand out
Whop is home to tens of thousands of creators, and the average creator on Whop makes over $7,300 per month.
Create your whop today and start building the perfect platform for your target audience.


