GPTs are customized versions of ChatGPT - check out this guide to understand how you can find, use, and create GPTs.
Key takeaways
- GPTs are customized ChatGPT versions with specific personalities and goals, accessible to all users without a Plus subscription.
- Creating a custom GPT is simple using the GPT Builder interface, which lets you define behavior, upload knowledge files, and add capabilities.
- You can monetize your custom GPTs by setting them to private and selling access through platforms like Whop.
Since the arrival of GPT, AI has been at the forefront of everyone's mind. But what is a GPT?
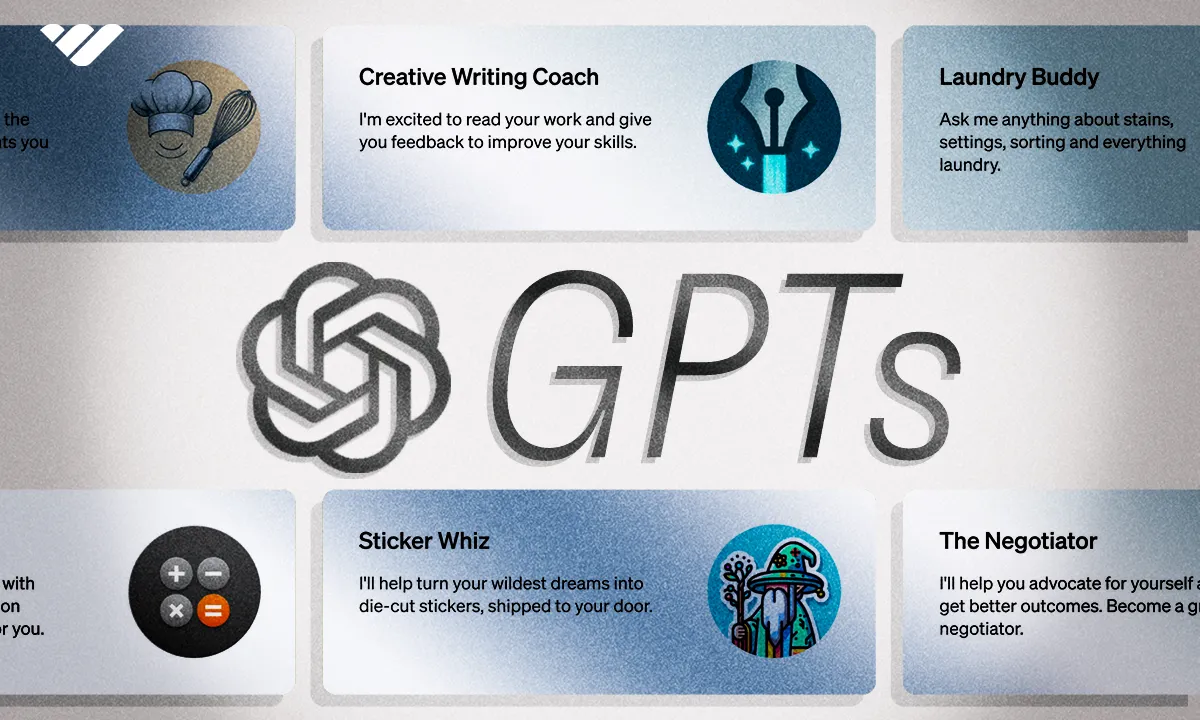
A GPT can simply be explained as a customized version of ChatGPT created by anyone. If you were to ask ChatGPT a question, it would reply with ChatGPT's default personality. To make it assume an identity or focus on specific topics, you need to tell it in your prompt. On the other hand, GPTs are usually created with certain personalities and goals in mind. The Code Tutor by Khan Academy, for example - aims to help people learn to code.
GPTs can use ChatGPT's database in their responses, but they can also be trained using information provided by the GPT's creator. Think of a prompt like “I want you to act like an {X} expert and help me on the {Y} topic.” - ChatGPT is going to assume the personality you gave to it and will try its best to focus its responses on its goal, which is helping you on the topic you provided.
A GPT, however, is most likely to have a personality assigned to it. Let’s take Planty, for example. It’s a GPT made by the ChatGPT team itself, and it’s designed to be fun and friendly - its aim is to help users with plant care.
How to Find GPTs Made by Others
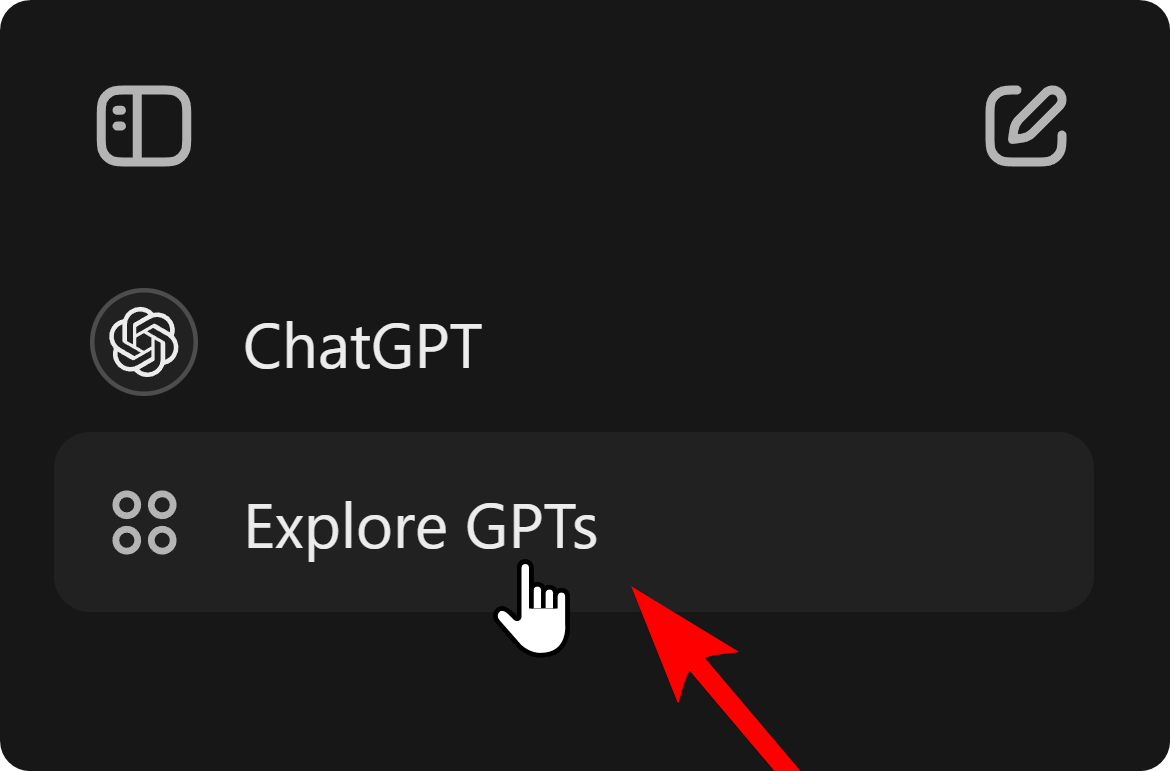
There are a lot of GPTs made by others, including the ChatGPT team itself. Using GPTs doesn’t require a ChatGPT Plus subscription, so that’s a plus. To view the GPT catalog, you can click on the Explore GPTs button at the top left of your screen, below the ChatGPT button.
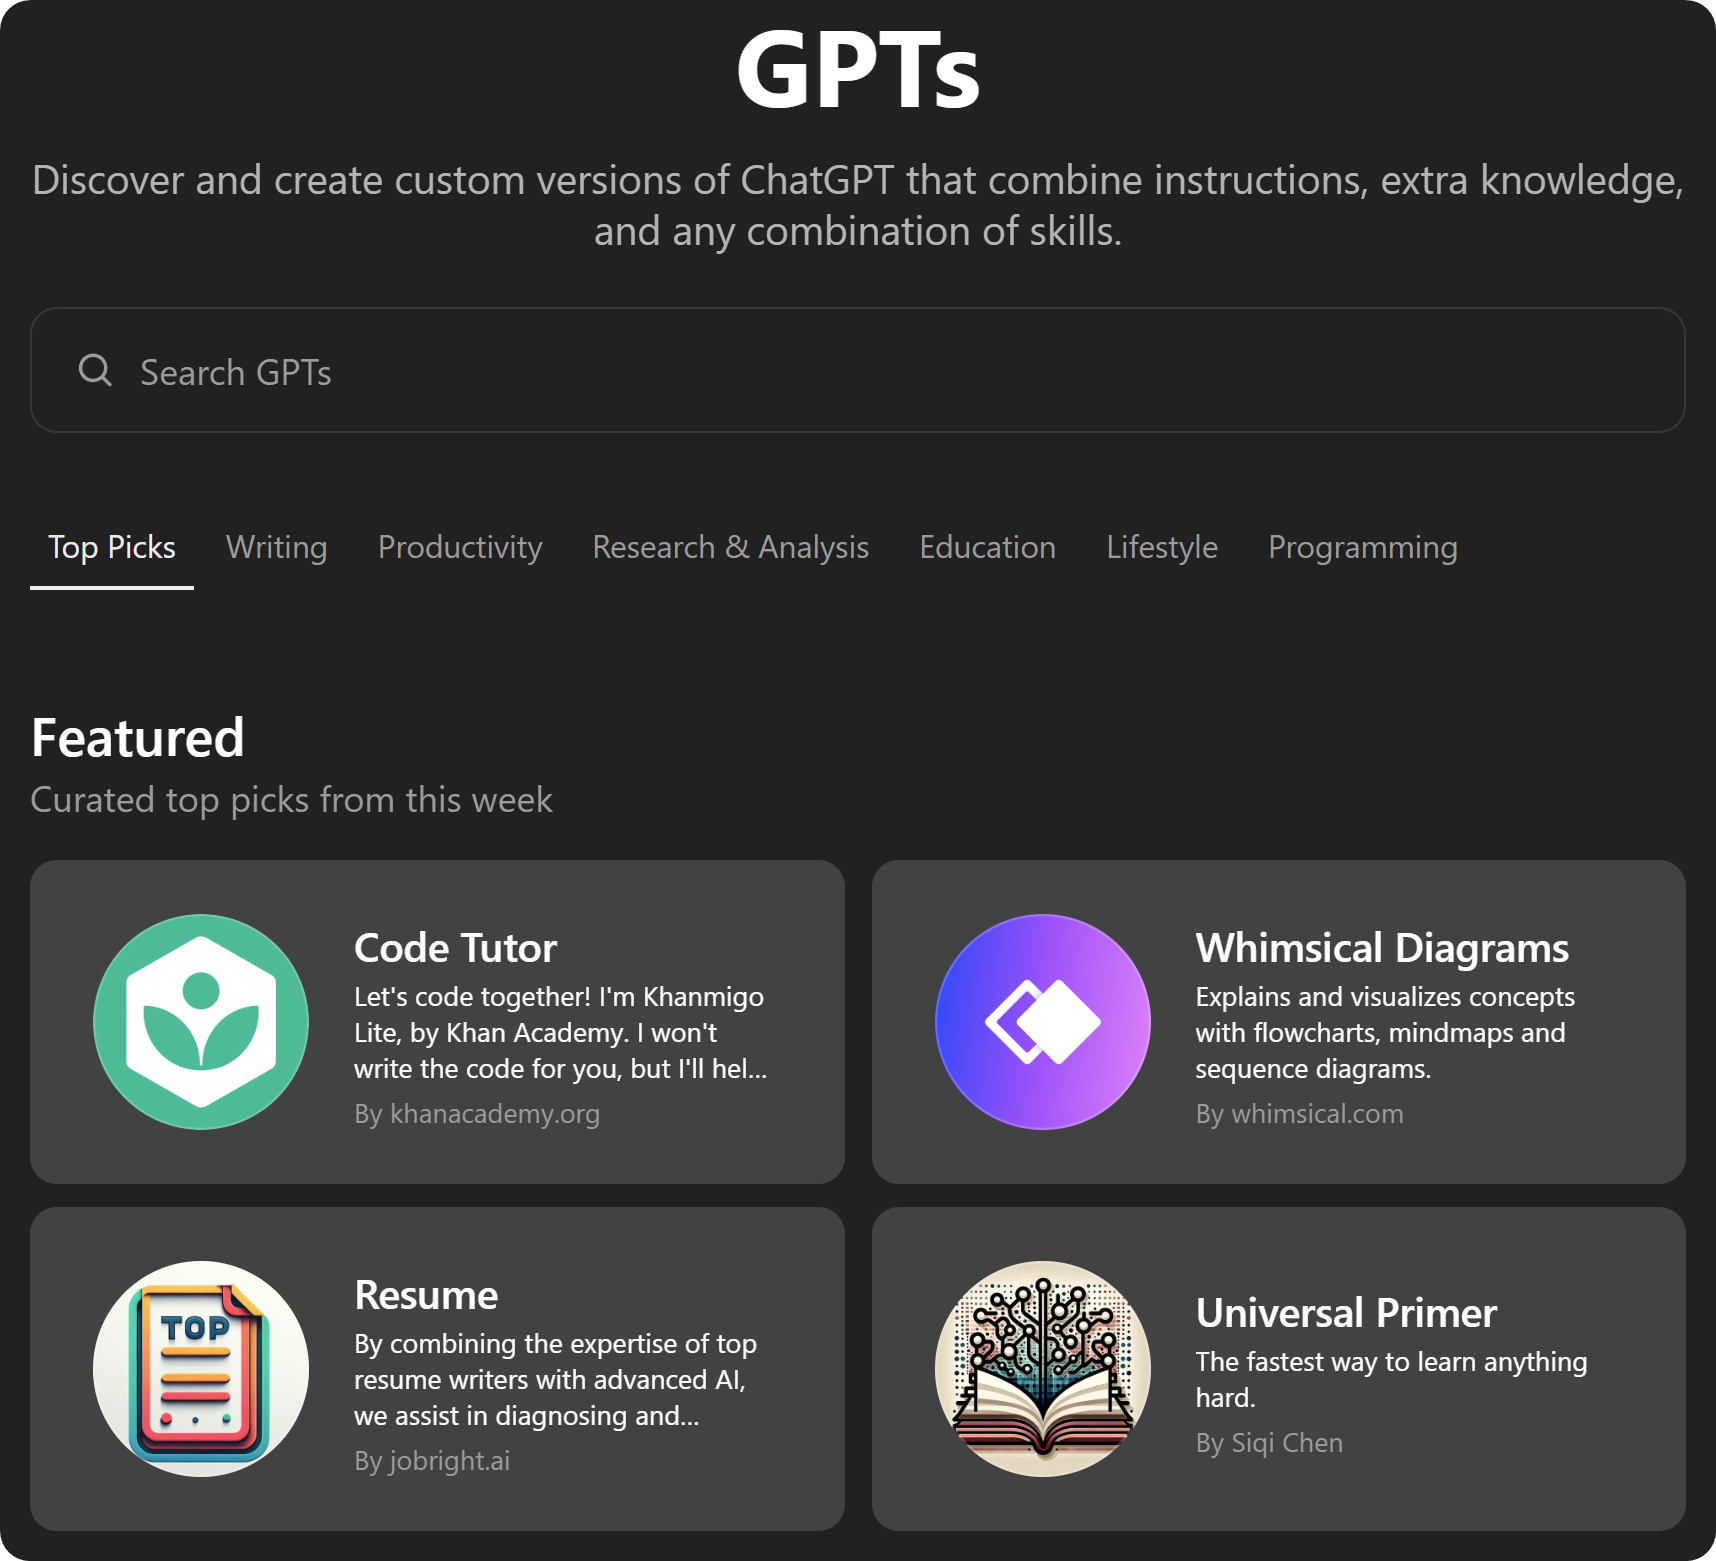
Once there, you’re going to see a search bar at the top, which allows you to search for GPTs to your liking. Below that, you can see seven categories and their features GPTs.
You can click on the See more button under each category to see a total of 12 GPTs. If you want to get a larger catalog, you’re going to have to use the search bar.
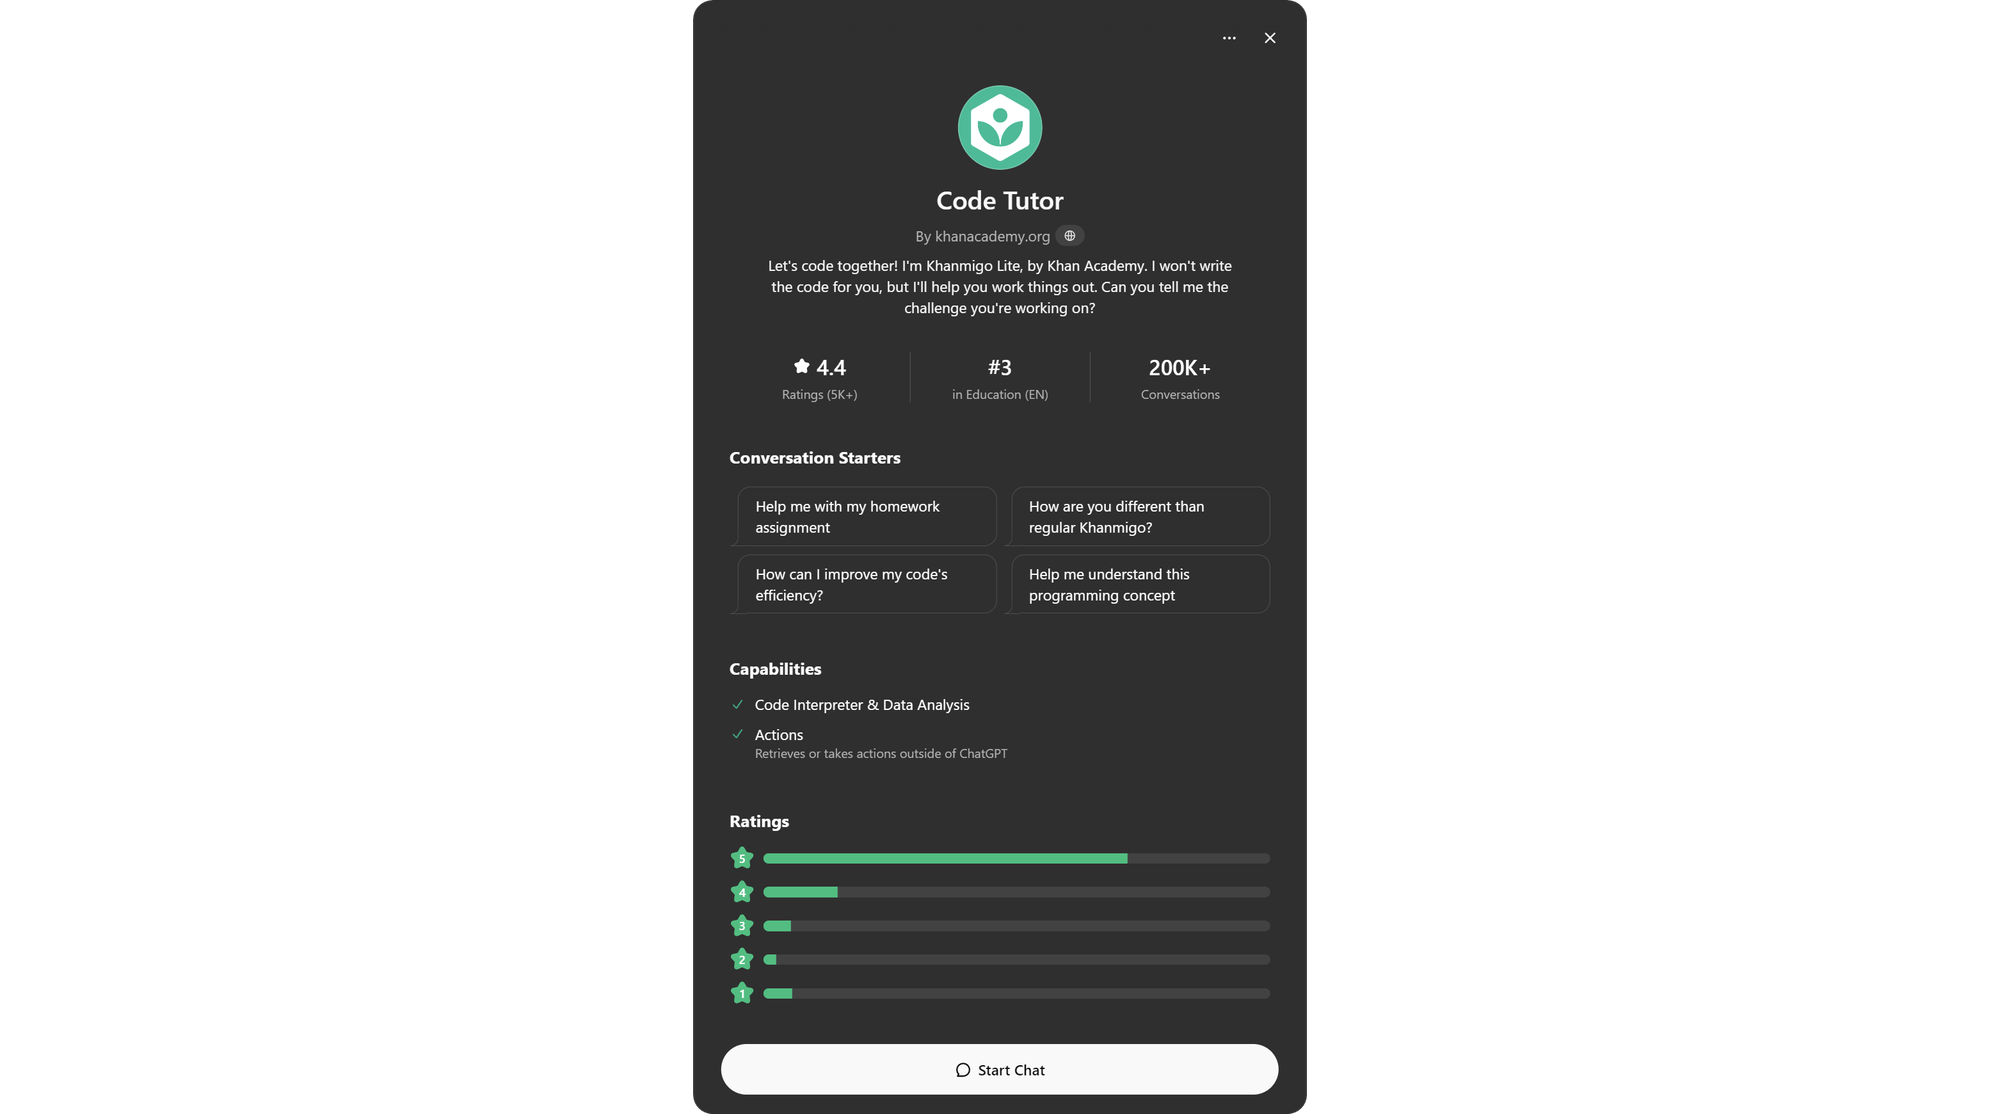
Clicking on a GPT is going to display its card. The card contains information like the description of it, it’s rating, ranking, total conversations, conversation starters, capabilities, and detailed ratings.
To open a chat with the GPT, you’re viewing the card of, you can click the Start Chat button at the bottom of the card.
Once you click the Start Chat button, you’ll be directed to a screen that looks very much like the regular chat view of ChatGPT but with the icon, description, and conversation starters of the GPT. You can now start talking to it just like you would to the regular ChatGPT.

How to Create Your Own GPT
If you’re a ChatGPT Plus subscriber, you can create and use your own GPTs as well, and doing so is much easier than you expect. One great thing about custom GPTs you create is that you can make them public OR private. This means that you can use a platform like Whop to sell access to GPTs you make and set to private, generating an income.
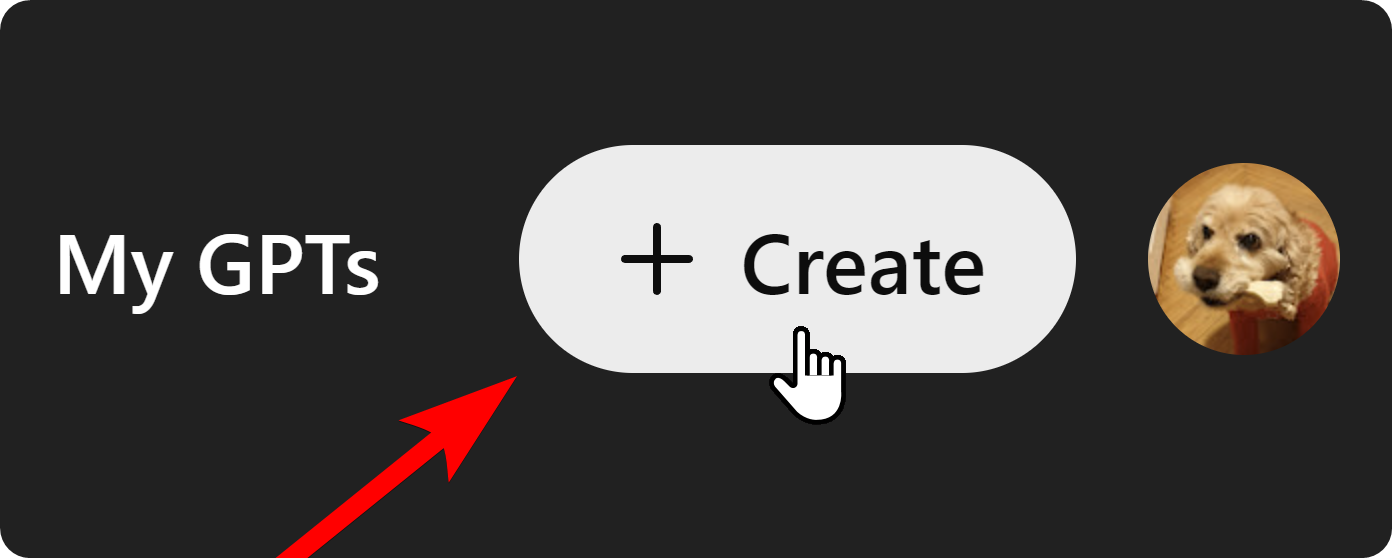
So, let’s get started by clicking on the Create button at the top right of your screen in the Explore GPTs section of the website. Doing this is going to direct you to a “New GPT” page.
In the New GPT creation page, you’re going to see the Create and Configuration tabs on the left, which respectively allow you to set up your new GPT and adjust its advanced settings. On the right side of your page, you can see a preview of how your GPT is going to look from the perspective of a user.
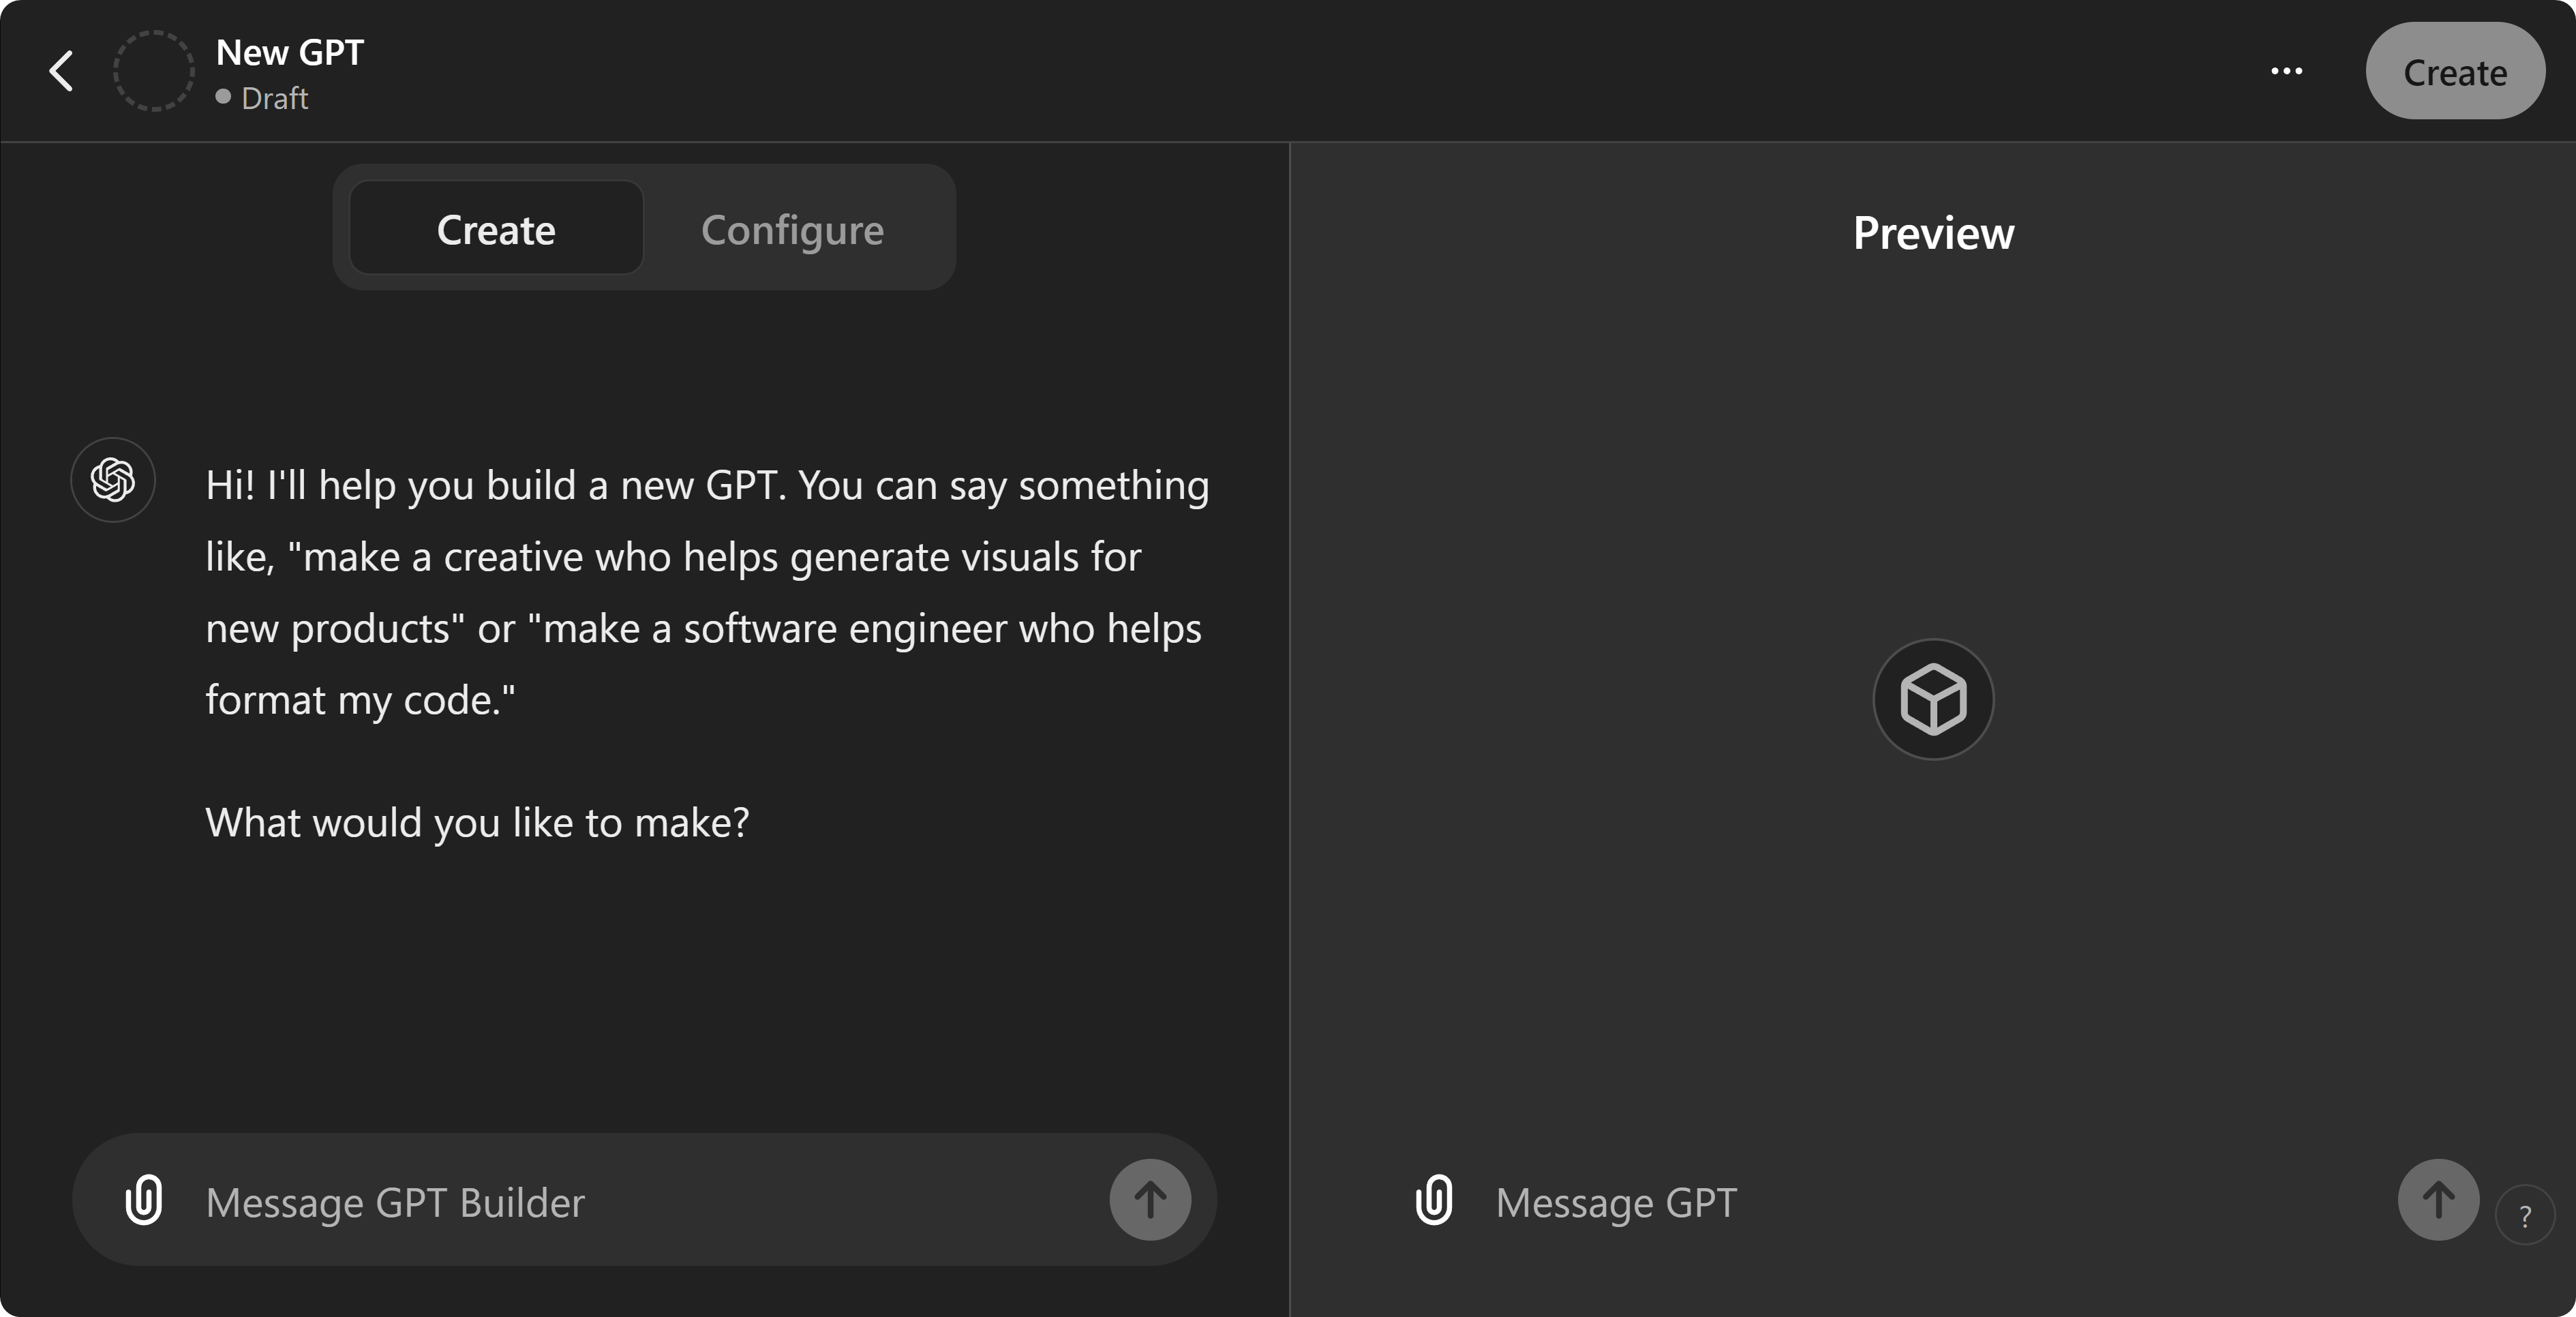
Using the “Message GPT Builder” input box in the Create section of the GPT, you can adjust what you want your GPT to be. There’s no limit on how much you can customize your GPT using this section. You can chat about it for hours, fine-tuning your GPT. You can tell it to add or remove some functionalities, change its profile picture, description, and more.
The better you explain the GPT idea you have in your mind to the GPT Builder, the closer outcome you’ll get. Of course, as with everything, you shouldn't overdo it, or your GPT might go on a path that you don’t want, like being specifically focused on an aspect when you want it to be somewhat of a generalist.
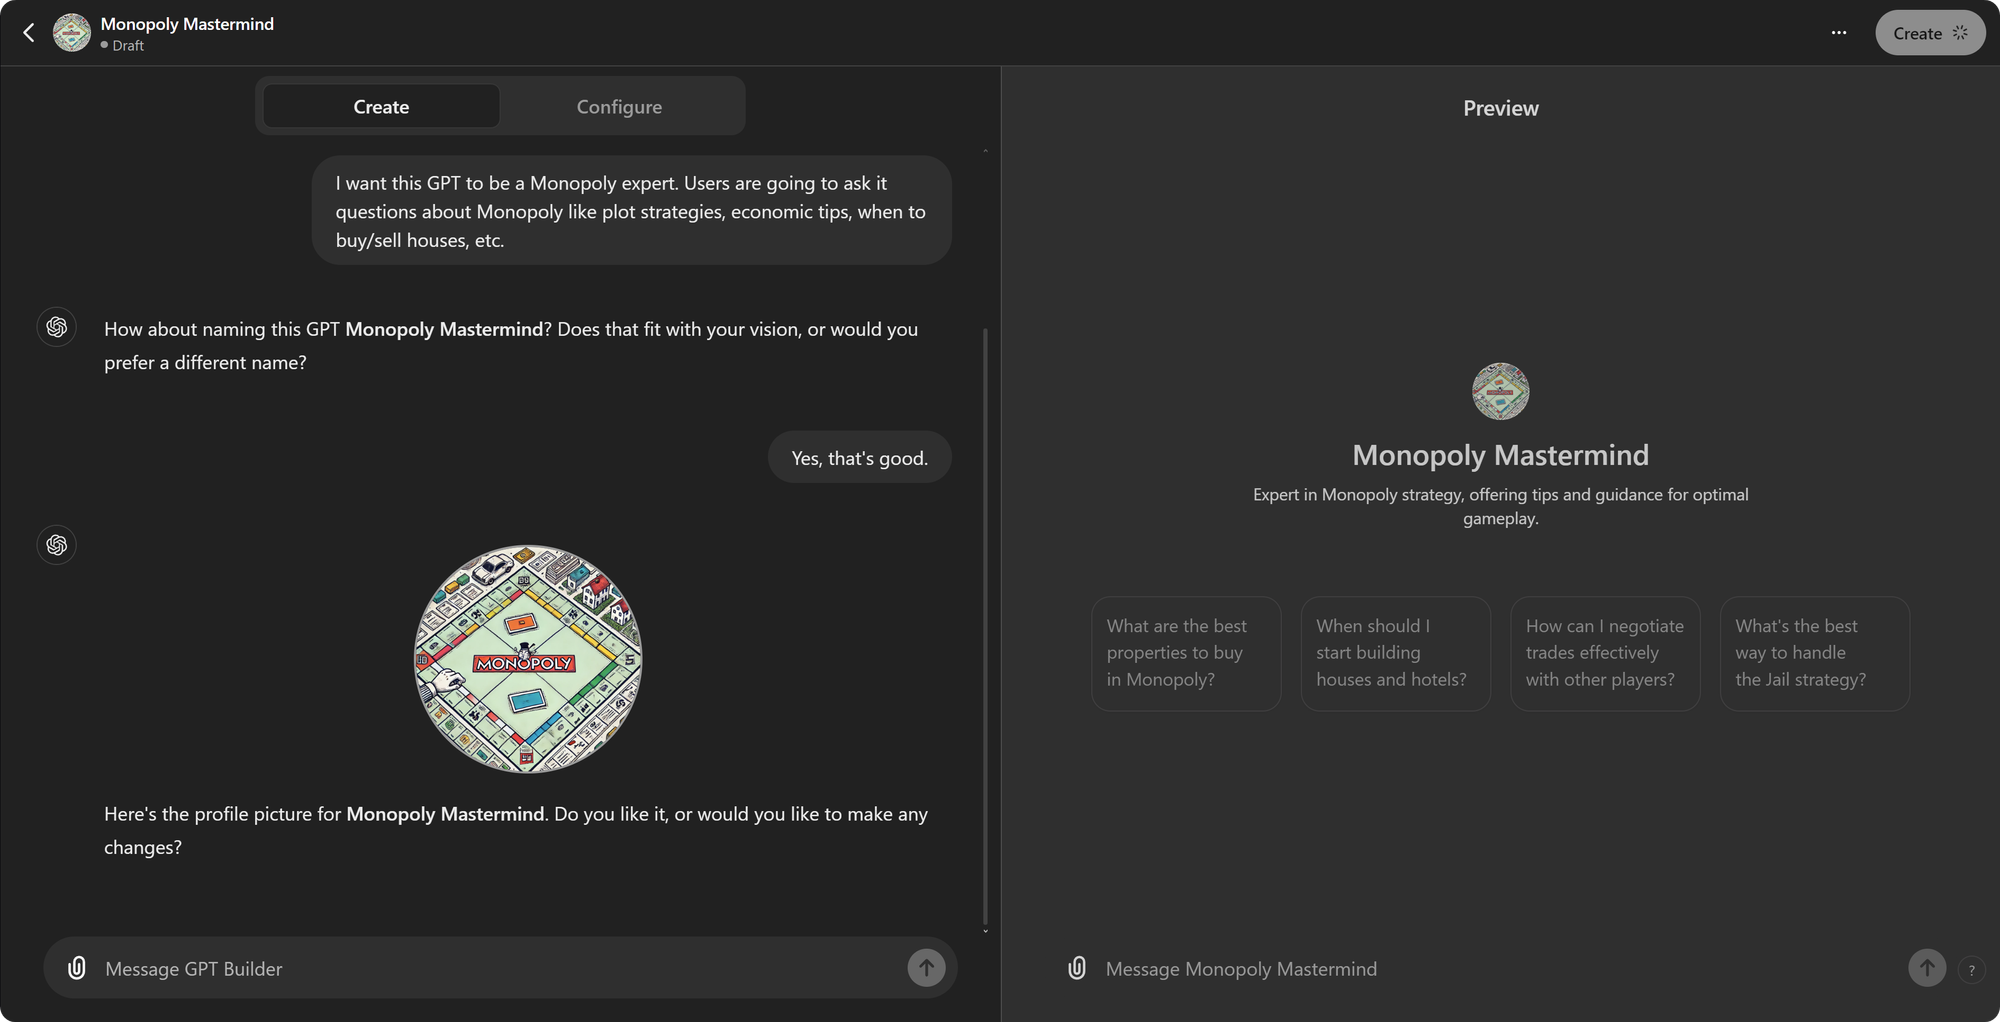
As you configure your GPT using the GPT Builder on the left side of your screen, you can test out how it performs using the Preview section on the right. As you talk with GPT Builder, it’s a good idea to frequently test how your GPT is responding to the changes using the preview.

Advanced Configurations
If you take a look at the Configure tab of your GPT, you’re going to see eight settings. You can click on the GPT’s icon at the top to change it and use the Name, Description, and Instructions sections as plain text.
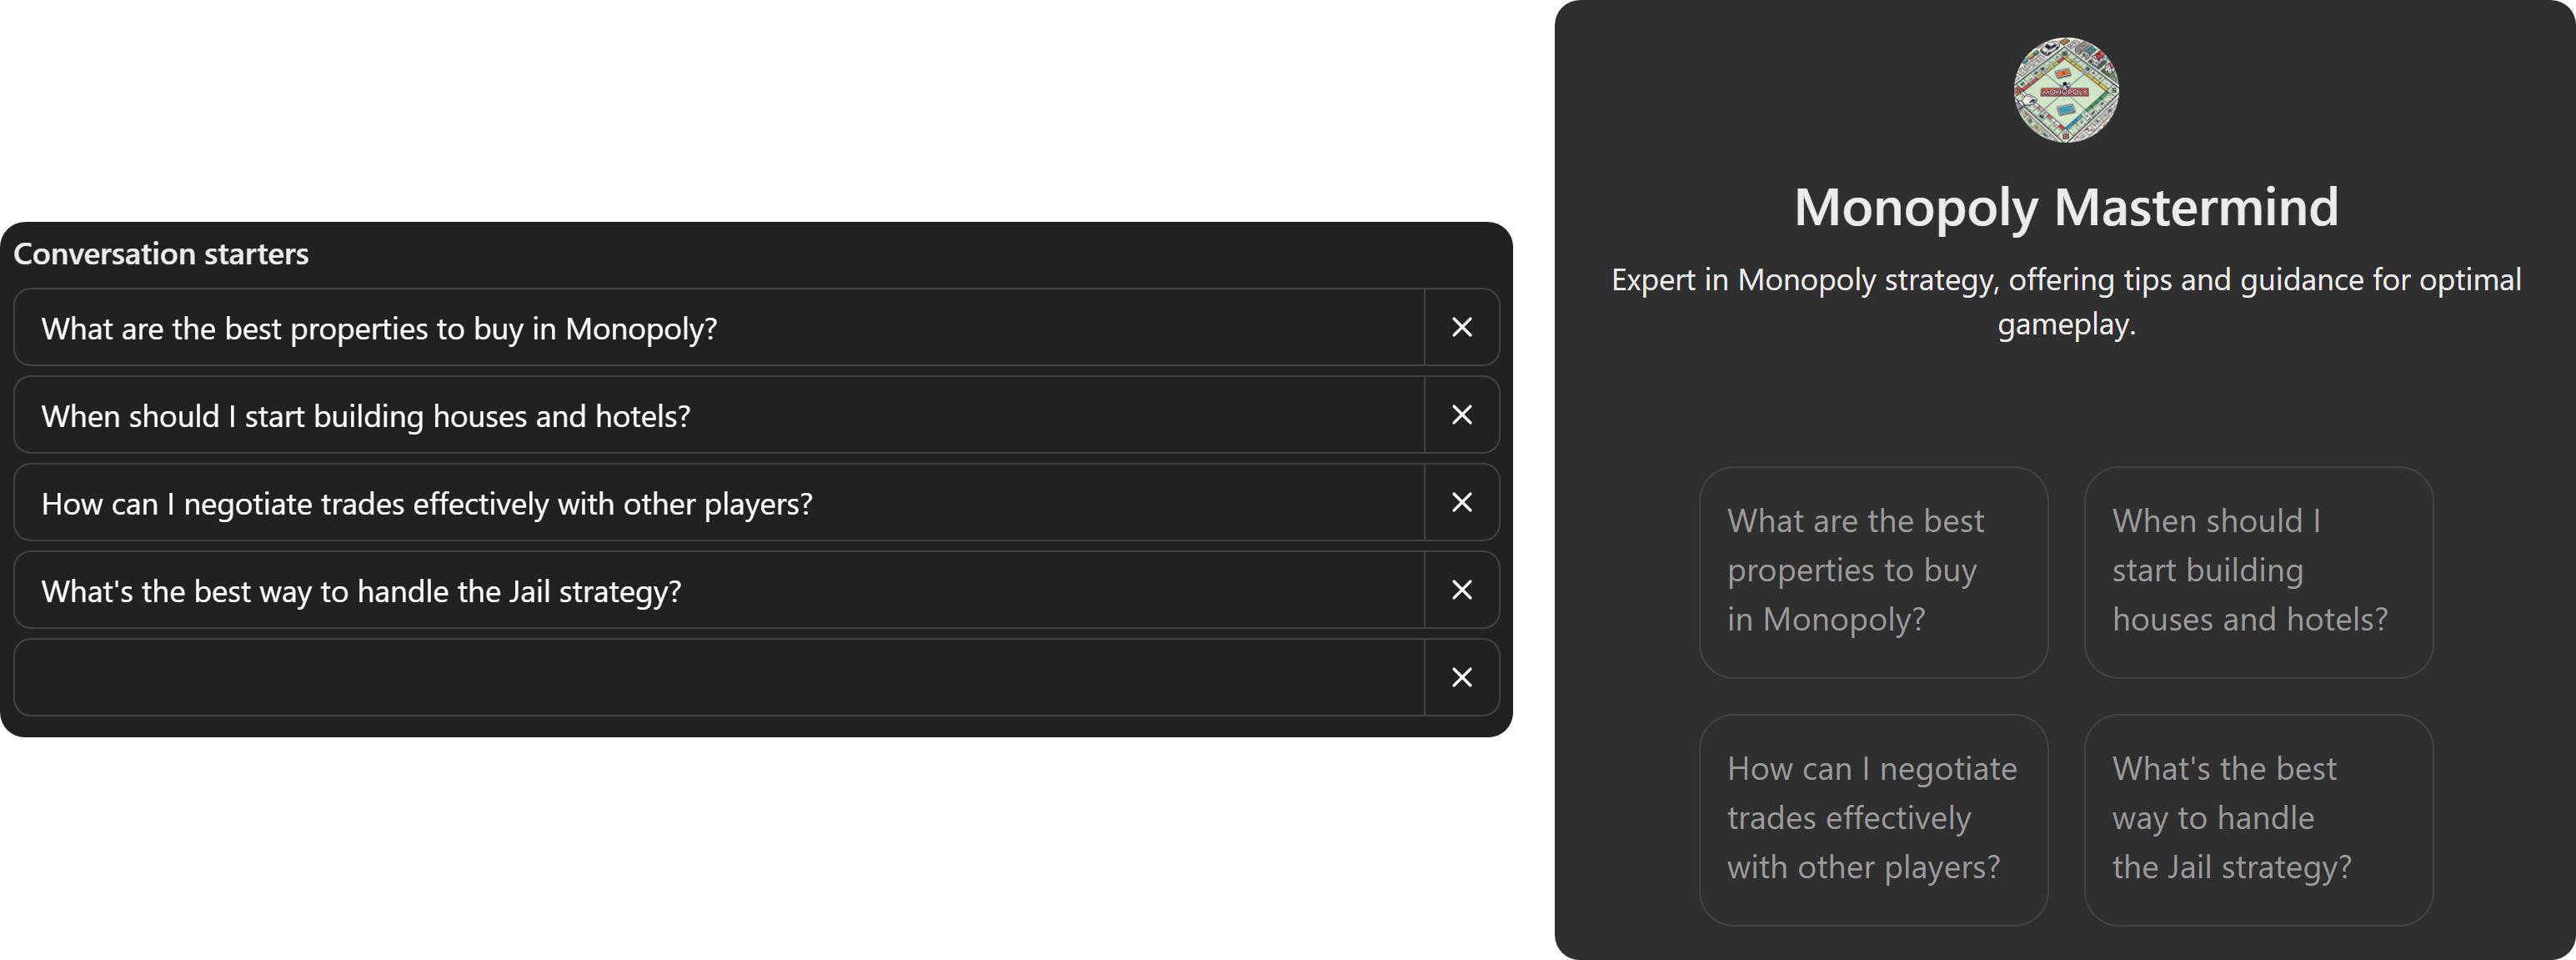
You might be wondering, “hey, I didn’t write any of this!” Well, remember how you talked to GPT Builder in the Create section? These fields, including the Conversation starters section, are based on those conversations you had. You can freely change any of these fields to your liking. Changing the Instructions field is going to alter how your GPT interacts with users.

The Conversations starters section will come with four starters that are made based on your conversation in the Create section. They will be displayed below your GPT’s description and allow people to click on them to send them as prompts. You can add a total of 12 conversation starters to your GPT.
The Knowledge section under the Conversation starters is another powerful tool ChatGPT offers to GPT creators. You can use the Upload files button to upload all kinds of files that the GPT will use for information when talking to users.

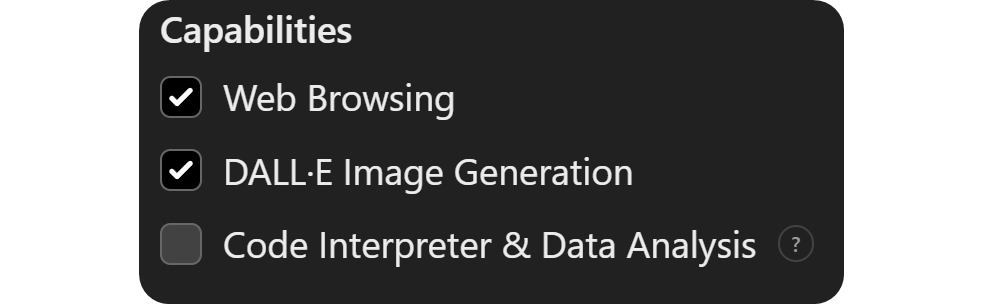
The Capabilities section has three toggle settings: web browsing, which allows your GPT to browse the web when talking to users; DALL•E image generation, which allows users to create generative images using your GPT; and code interpreter & data analysis, which allows your GPT to write code. You can turn these settings on and off at any time.
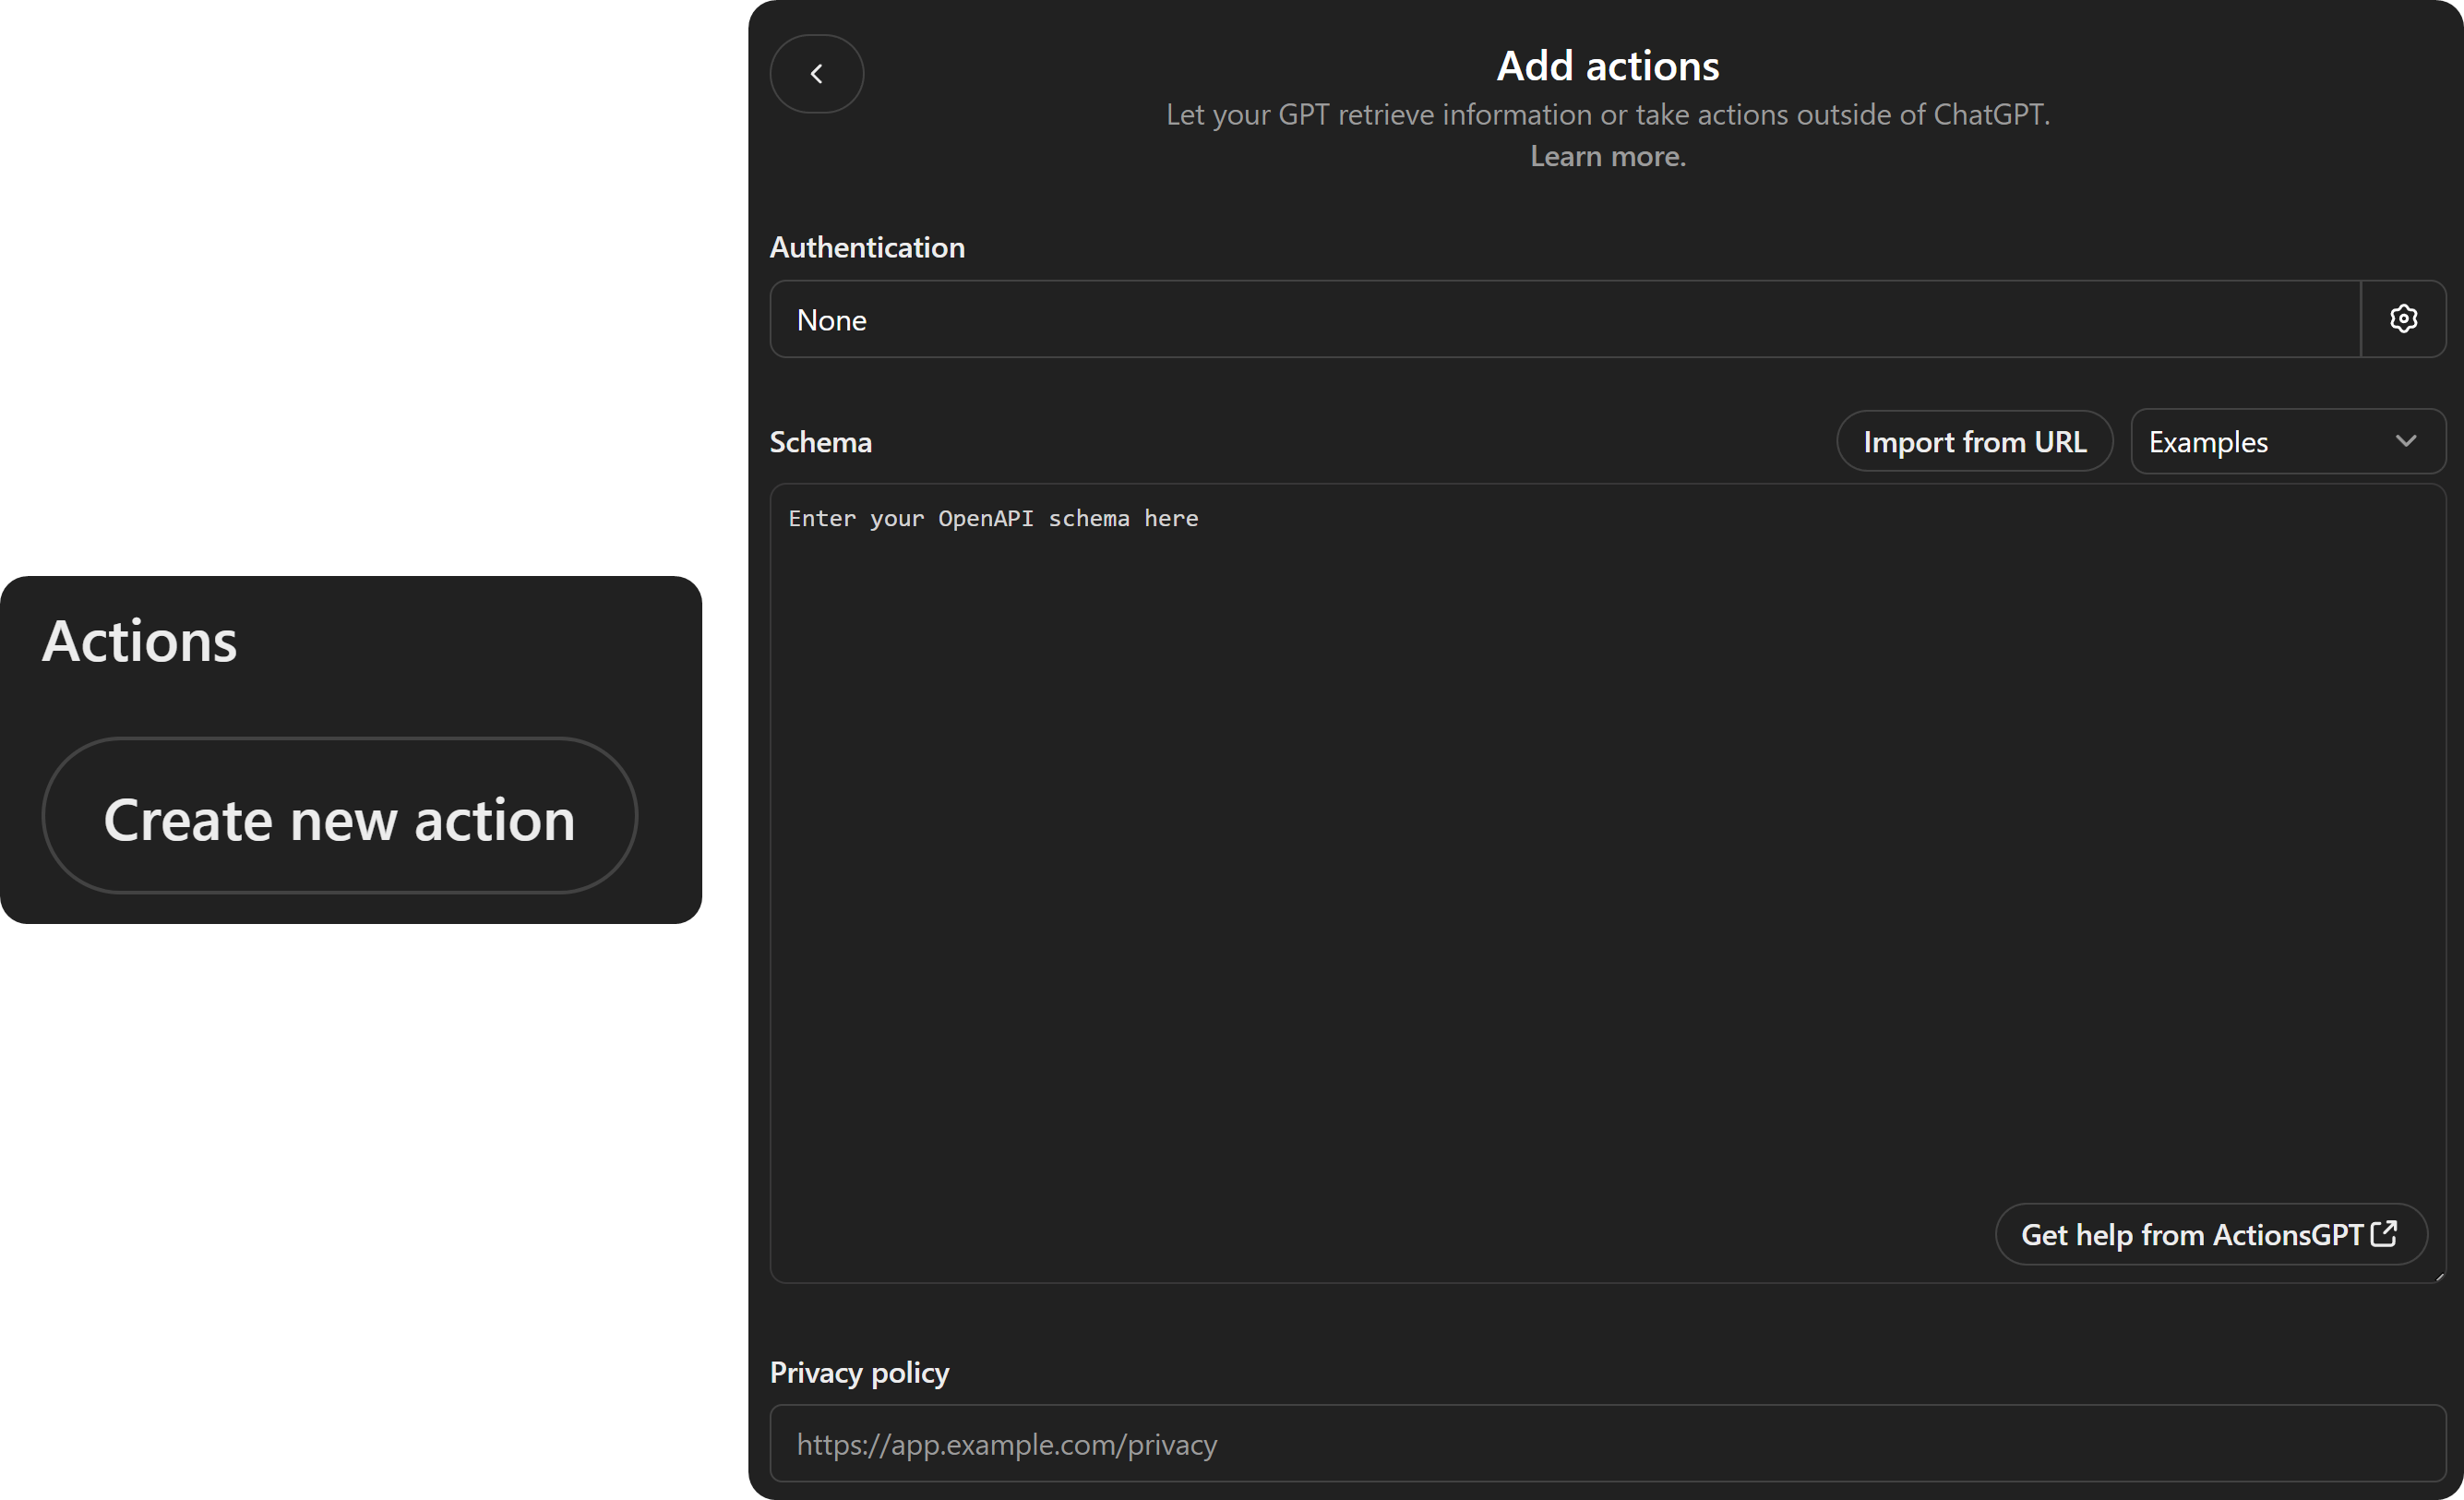
The last configuration option you’re going to see is the Create new action button. Clicking on it is going to take you to the Add actions page, which allows you to expand the functionality of your GPT. On this page, you can define custom actions for your GPTs and connect them to one or more APIs. This is the continuation of the plugins that ChatGPT had before they transformed into GPTs.
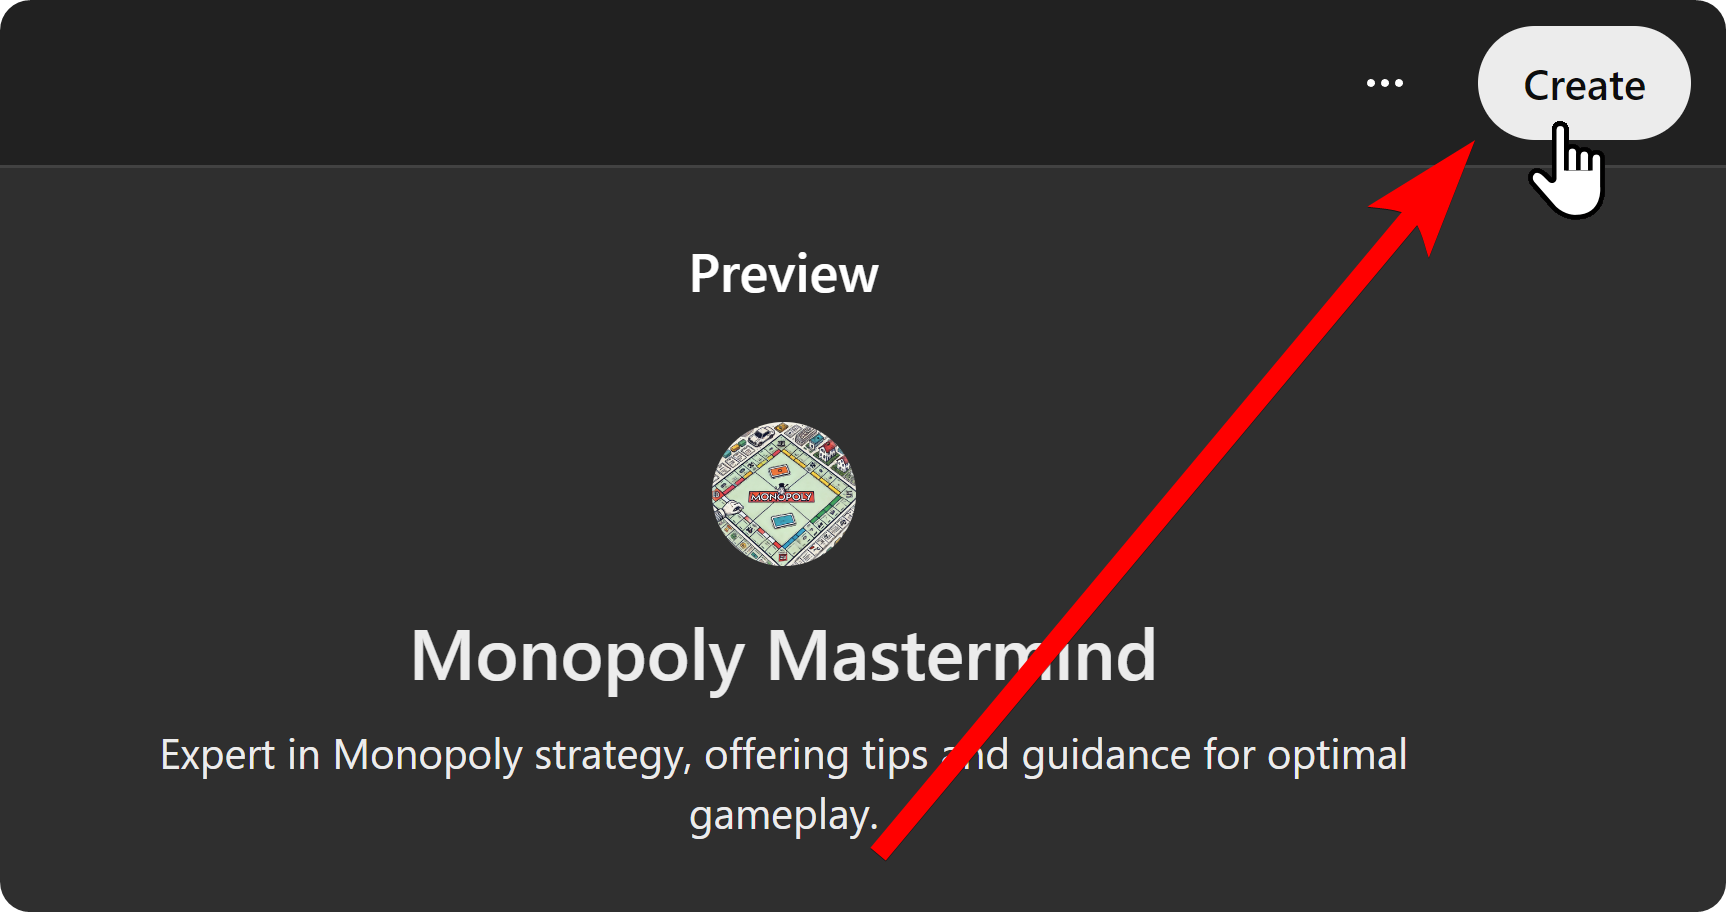
Publishing Your GPT to the Public or Monetizing It
Once you’re done with creating your GPT, it’s time to publish it. Let’s click on the Create button at the top right of your screen to see the publish options.
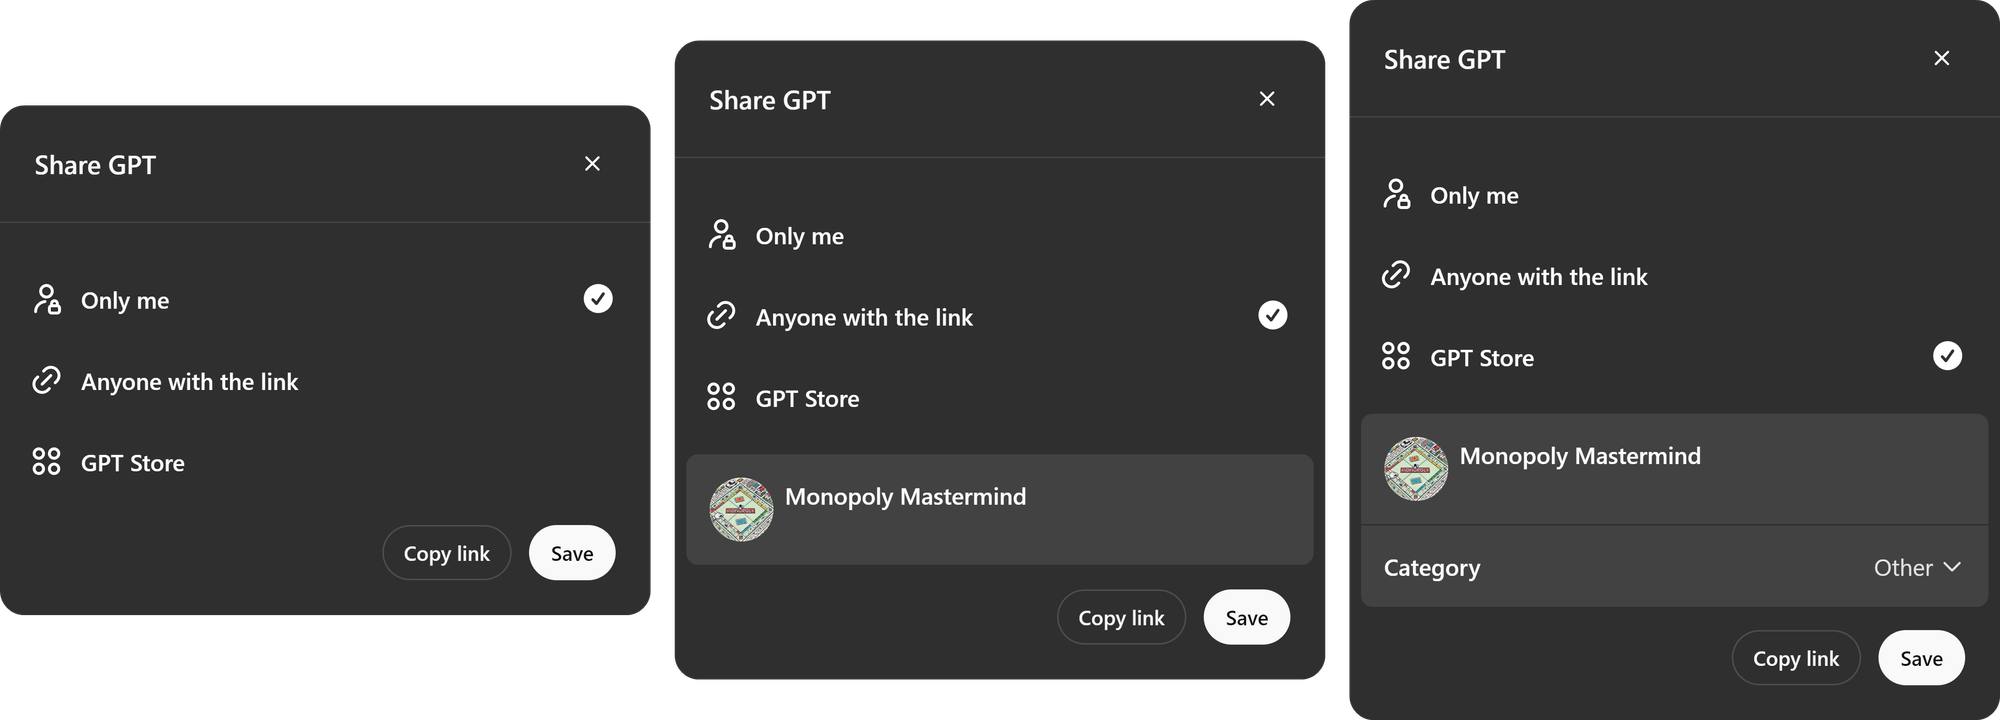
Once you click the Create button, you’ll see the Share GPT window, which has three options: only me, anyone with the link, and GPT Store. Selecting the only me option will make the GPT private to you, meaning that no one else will be able to use it. Selecting anyone with the link option will give you a private link that you can share with people so that they can use your GPT.
The last option is the GPT Store, which will prompt you to select a category for your GPT and publish it to the public, meaning that everyone can find your GPT in the GPT store and use it.
Use Whop to Sell Access to Your GPTs
If you’ve followed this guide and created your own GPT, or if you already had one, you should consider monetizing it so you can generate income with your GPTs. Check out our How to Sell Access to ChatGPT Plugins or Apps guide to see how you can monetize your GPTs on Whop, which takes less than 10 minutes to set up.


