Some of the best digital products to sell are coaching services, online courses, paid community memberships, content libraries, social media scripts, and SaaS. This guide breaks down top digital product ideas and shows you how to create and launch them.
Key takeaways
- Digital products like courses and ebooks offer 90-95% profit margins, making them highly lucrative for creators.
- Online communities and memberships provide unlimited earning potential with some creators making over $250k monthly.
- You can start selling most digital products for $0 using platforms like Whop, AI tools, and social media marketing.
Online courses, ebooks, coaching services, paid community memberships, and SaaS are just some of the best digital products you can sell in 2026.
Whop creators have already sold over $2 billion of the — and the market's just getting started, with digital product sales projected to reach $416 billion by 2030.
So we're breaking down the best digital products to sell this year and how to start building your own today.
Let’s get into it. But first — a quick refresh on what digital products actually are:
What are digital products?
Digital products are assets that exist in a digital format that you can sell or share online. This includes online courses, music files, ebooks, community access, and even virtual items (such as skins) sold inside of online games.
Digital products can be a downloadable good for someone to experience alone, or access to an interactive online experience, like a live webinar or coaching session. As of 2025, they create more than $2.5 trillion in value per year.
Trending digital products to sell in 2026
| Digital product | Best for | Profit margin |
|---|---|---|
| Online courses | Experts and educators with teaching skills | 90% |
| Membership sites | Community owners and builders | 90% |
| Ebooks | Writers and experts | 90-95% |
| Coaching & mentorship | Specialist professionals | 70-80% |
| Subscriptions | Content and tool creators | 80-90% |
| Online communities | Experts and leaders | 90% |
| Video courses | Teachers and trainers | 75-85% |
| Masterclasses | Specialists | 80% |
| Email courses | Email marketers and educators | 70% |
| Apps | Developers | 90% |
114 best digital products to sell
From passive income to scalable online businesses, these are the top digital products to sell in 2026 and beyond.
Coaching, courses & bundles for educators & mentors to sell
Popular formats: online courses, printables, coaching bundles, webinars, quizzes, worksheets
1. Coaching and mentorship
Online coaching and mentorships are one of the OG digital info products.
1:1 support, group programs, mindset calls, Voxer support – however you do it is your call. Coaching works for any niche – fitness, freelancing, dating, business, sales, personal development – you name it.
"The best product you can sell digitally is some sort of coaching/membership offer on something you're really passionate about or knowledgeable in."
-Diego Monroy from Whop
Some creators use coaching as their main income stream, while others use it as a premium add-on to courses and communities.
- How easy is it? Easy when you know your stuff
- How much does it cost to start? $0 to market on socials and start coaching with Whop
- How much can you earn: Anywhere from $100 to thousands per client, depending on niche, specialization, and marketing effort
- Potential challenges: Scaling personalized support without burnout
- Skills needed: Subject expertise, strong communication abilities, and client management skills
2. Online courses
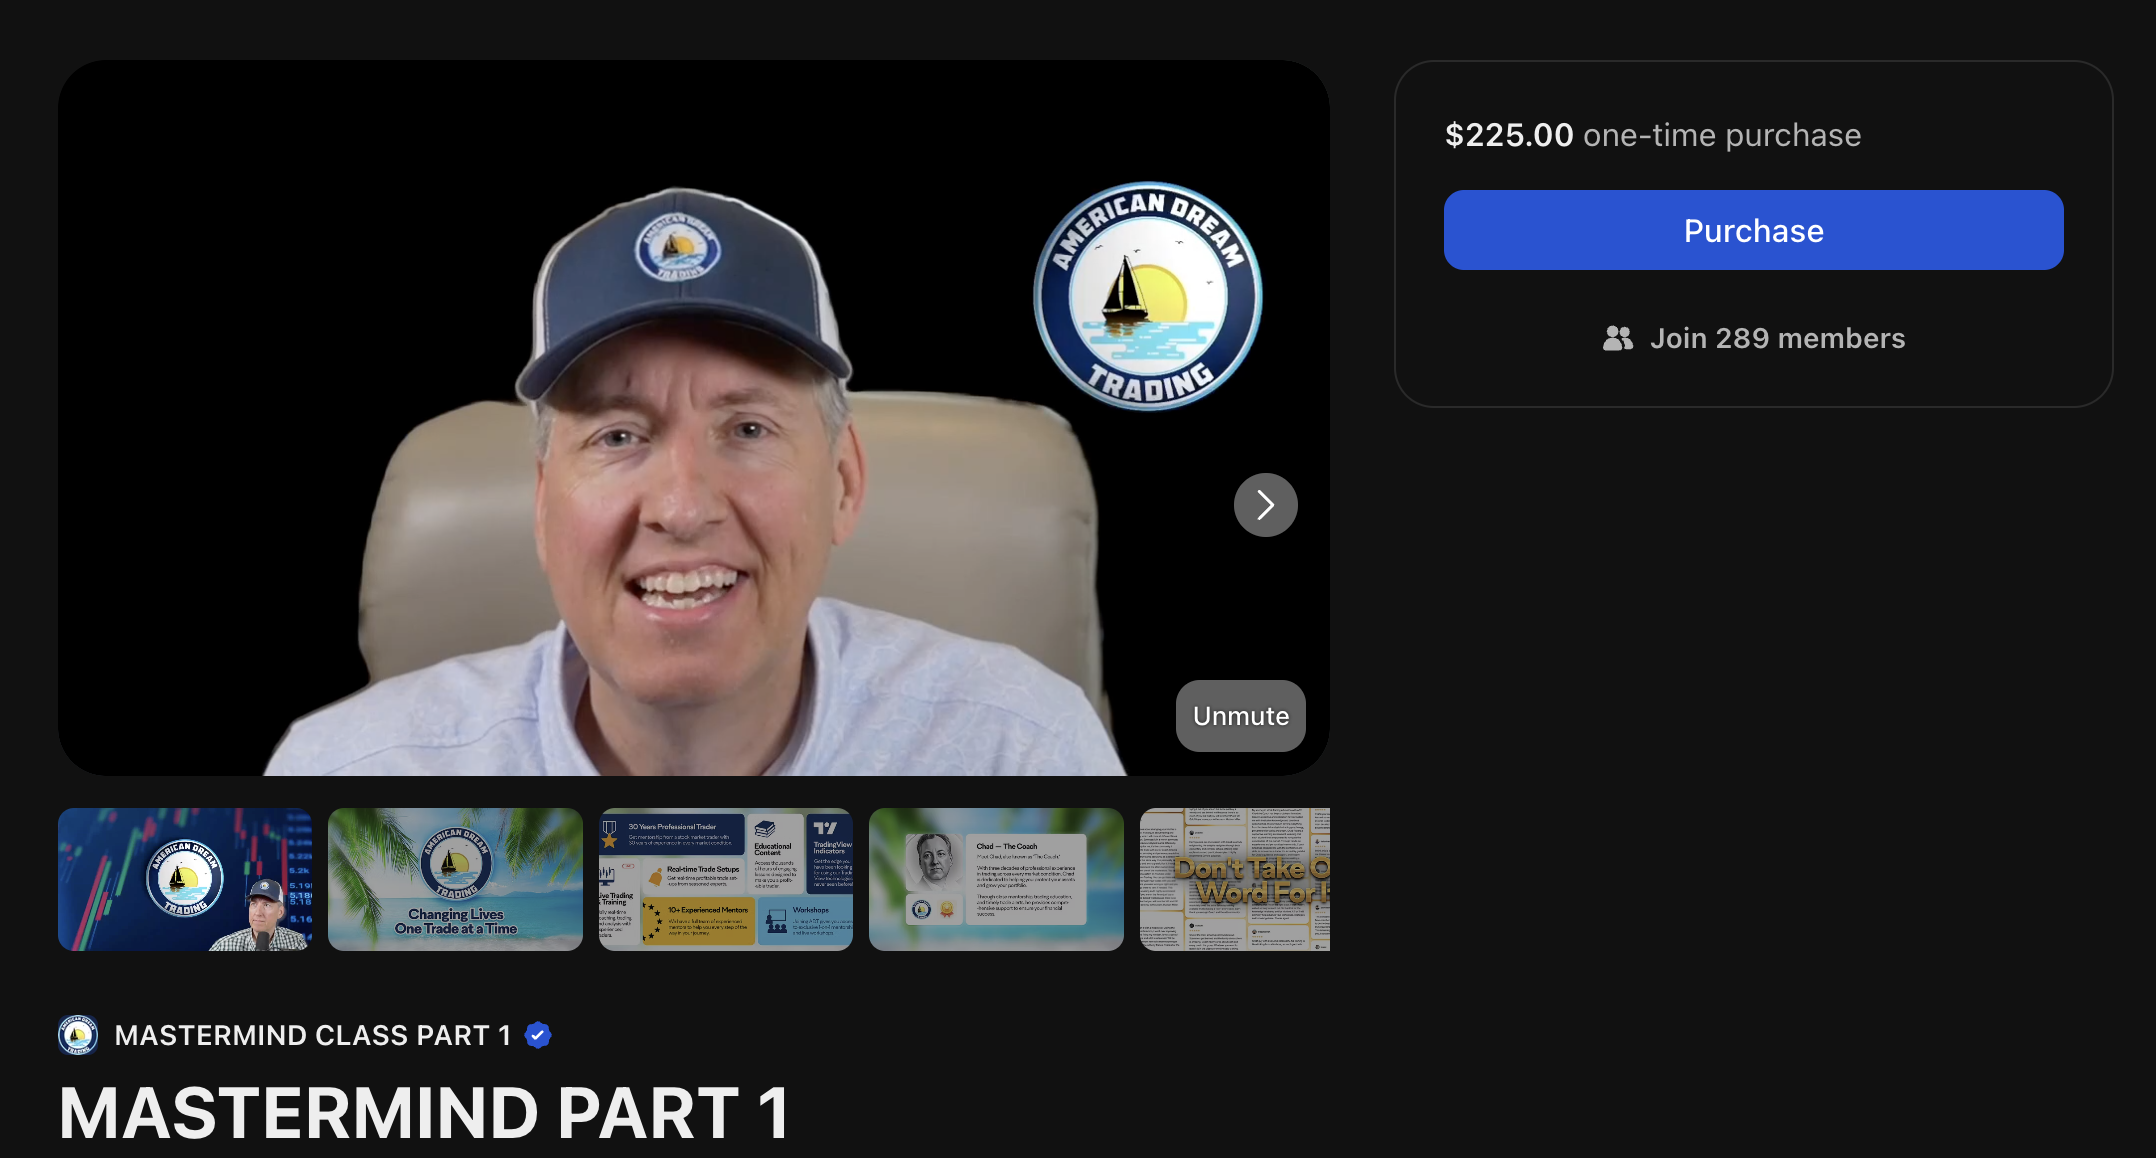
"Whop is my go-to, I've investigated a lot of options out there in terms of course hosting and payment processing, but Whop is the leader for me, for sure."
- Coach Carl Parnell
When it comes to selling online courses, your options are endless. You can build an online course for traders, show freelancers how to land clients, or share your experience going viral on social media.
Once you’ve created the building blocks of your online course you can sell it to hundreds of thousands of students. Just remember to update it regularly to make sure that your students are getting their value.
- How easy is it? Very easy when you use AI and course builders (like the course builder in Whop) to generate your course
- How much does it cost to start? $0 with Whop
- How much can you earn? Anywhere from $50-$5000+ per course sold
- Potential challenges: Breaking through the crowded course market
- Skills needed: Subject expertise, video creation, and instructional design
Create and sell your course with Whop
3. Membership sites
Memberships are one of the easiest ways to build a community around your brand.
“Organizations that build their businesses around people’s needs to belong, to be connected, and to be admired, that are focused on relationships over products, are winning in today’s economy.”
-Robbie Kellman Baxter, business consultant and author of "The Membership Economy"
You could offer access to a schedule of relevant online talks, digital coworking sessions, or video coaching in exchange for a monthly fee. You can easily use your whop as a membership site.
- How easy is it? Medium: easy to start, needs dedication to grow
- How much does it cost to start? Nothing with Whop
- How much can you earn? Unlimited earning potential
- Potential challenges: Keeping members engaged month after month
- Skills needed: Community management, content creation, and engagement strategies
Sell online memberships with Whop
4. Ebooks
Don't want to create an online course or membership? You could always pack your knowledge into an ebook and smash marketing on that.
Once you’ve written your content, publish ebooks on Whop, Amazon, and other digital platforms to increase your reach. Use your socials to create content around the topic and generate interest. Pop a link in your bio to your whop and boom, sales funnel.
"I do what is called organic sales meaning I don't run ads I don't have any paid advertisement. I just use my following off social media whether it be YouTube takes I can Instagram to drive sales directly to these books."
-Jeremie Lander from Better Finance Today LLC
- How easy is it? Write your ebook with AI, and it can be created in less than one day
- How much does it cost to start? $0 with platforms like ChatGPT, Canva, and Whop
- How much can you earn? $5-100 per ebook sale
- Potential challenges: Getting readers to actually buy (and finish) the book
- Skills needed: Writing ability, research skills, and basic formatting knowledge
5. Subscriptions
Digital subscriptions work like memberships: users pay a monthly fee to access a tool or exclusive content.
Some of the most popular digital subscriptions are for magazines, newsletters, job boards, and recipe programs.
The video above shows Orangie - a meme coin trader who sells subscriptions to his crypto trading whop.
- How easy is it? Easy to get started when you use Whop
- How much does it cost to start? $0 to start selling subscriptions with Whop
- How much can you earn? Wide earning range, with subscriptions anywhere from $10 to over $1000 a month per subscriber
- Potential challenges: Justifying recurring payments to subscribers
- Skills needed: Consistent content creation, marketing, and retention strategies
Sell subscriptions online and earn recurring revenue
6. Tutorials
Tutorial videos and guides are an easy digital product to sell because they're one-and-done, earning a passive profit once they’re out on the market.
Your tutorial should walk somebody through a topic or show them the solution to a pain point. But I mean, this could be anything, as serious as building sales funnels to something as unserious as coding your first minigame with AI.
Tutorials can be in the form of videos, downloadable guides, or interactive content.
- How easy is it? Easy. All you need is your knowledge and a way to put it into video or text format
- How much does it cost to start? $0 with platforms like Canva and Whop
- How much can you earn? Depends on the format of the tutorial
- Potential challenges: Explaining complex ideas simply and clearly
- Skills needed: Teaching ability, screen recording, and subject expertise
7. Online communities
Online communities bring together people from around the world who share a special interest.
A community can be just for fun (like a fan community or gaming community), for personal development (such as an online fitness community) or for professional development (like an online business community or skill-learning group).
This creator has build hundreds of online communities, and tells us "Only make content that you would watch, because organic content is more important than ever right now".
- How easy is it? Easy to start but requires commitment to grow
- How much does it cost to start? $0 with Whop
- How much can you earn? Unlimited earning potential - some creators on Whop make over $250k per month with online communities
- Potential challenges: Keeping members active and conversations lively
- Skills needed: Community management, engagement strategies, and conflict resolution
Monetize your audience by selling community access with Whop
8. Video courses
Got something to teach and don’t want to create a full-on interactive course? Sell a video course.
Doesn’t have to be long; it can just be a lesson or two. I might do one soon, showing Baristas how to pour better latte art. You could do one on styling winter outfits for men, or growing plants indoors.
Simply film a lesson or two and upload them to a platform like Whop.
- How easy is it? Easy
- How much does it cost to start? $0 with Whop
- How much can you earn? Mid-level earnings for videos alone, higher earning potential for videos + community access
- Potential challenges: Maintaining learner attention till the end
- Skills needed: Video production, teaching abilities, and content structuring
9. Study guides
Students will always need study guides, but they need something more engaging than boring PDFs. And like Fatimah says in the video above, selling study guides is a perfect hustle for current students already getting great grades.
"If you have even a certain angle figured out that other college kids want to learn off of you, you can sell that information and make a little side project or a side business utilizing a platform called Whop."
-Fatimah from Fatimah's Guide
Create interactive study materials that combine clear explanations with practice questions, memory techniques, and quick reference charts.
Include different learning formats (visual, auditory, kinesthetic) and practice test generators.
Tip: You can also upload your study notes to various sites to earn extra income.
- How easy is it? Easy/medium using AI
- How much does it cost to start? From $0 to $20 (for the graphic design apps)
- How much can you earn? From $5 to $20
- Potential challenges: Summarizing info without losing depth
- Skills needed: Subject expertise, educational design, and study methodology
10. Email courses
Another way to run courses: via emails.
Land directly in people’s inboxes with an email course spread out over days or weeks. This keeps you front of mind, and you can use the emails to upsell other digital products.
Keep it simple here: ask for a one-time fee in exchange for the course, or offer a monthly plan where people pay a rolling fee for fresh course content each month.
Whop lets you send your forum posts to user emails, so your readers get snippets directly in their inbox. They can access the full course material within your whop.
- How easy is it? Easy to create, but can be difficult to gain traction at first
- How much does it cost to start? From $0, but costs increase as subscribers increase (on some platforms)
- How much can you earn? Mid-level earnings
- Potential challenges: Keeping students engaged across emails
- Skills needed: Email marketing, content sequencing, and automation setup
11. Online masterminds
Masterminds are slightly different from online courses and memberships. A mastermind typically brings together a tight-knit group of people who all want to reach the same goal.
Most masterminds come with premium prices because they’re so specific and because they include a lot of 1:1 time with the mastermind host. To do this well, you need to specialize in something that people want.
"There is nothing quite like a Mastermind Group for dramatically increasing the income of your own business, whilst … doing precisely the same for your Mastermind Group Members too."
-Nick Jervis from The Mastermind Group Blueprint
- How easy is it? Easy/medium - organizing online masterminds requires you to have some knowledge on the topic the mastermind is about
- How much does it cost to start? From $0 using platforms like Whop
- How much can you earn? From $50 to $200
- Potential challenges: Facilitating meaningful connections and results online
- Skills needed: Expert knowledge, group facilitation, and community building
12. Teaching materials
This is a great side hustle for teachers: create comprehensive bundles including lesson plans, worksheets, assessment tools, and interactive activities.
Take it one step further and make everything customizable, and include options for different learning styles.
Team your flashcards and learning materials with progress-tracking tools, parent communication templates, and modification suggestions for special needs students.
- How easy is it? Easy using AI, medium if complex teaching materials
- How much does it cost to start? From $0 to $20 (for AI subscriptions in the long run)
- How much can you earn? From $5 to hundreds of dollars, depending on the topic of the teaching material
- Potential challenges: Aligning with curriculum and student needs
- Skills needed: Educational expertise, curriculum design, and age-appropriate content
13. Masterclasses
If you’ve run in-person workshops or masterclasses, it’s time to start selling them online.
You can create a fresh masterclass from scratch, or buy PLR presentation templates — once it’s recorded and uploaded, you can sell it over and over again.
- How easy is it? Easy - as long as you have the knowledge
- How much does it cost to start? From $0 when you create a masterclass with Whop
- How much can you earn? Mid to high earnings here, as some masterminds can be sold for thousands of dollars
- Potential challenges: Delivering deep value in limited time
- Skills needed: Expert-level knowledge, presentation skills, and curriculum design
Create and sell your masterclass easily with Whop
14. Customizable meal plans or recipes
For many people (okay, yes, me personally), meal planning is a huge pain. Not everyone has the time (or the creativity) to think of healthy, easy-to-follow meal plans. But if you’ve got a passion for food, selling customizable meal plans or recipe collections is a great small business idea.
You can design meal plans based on specific dietary needs (think keto, vegan, or gluten-free), or create general plans that help people eat healthier throughout the week.
Sell your meal plans online and market them through social media platforms, where you can share meal prep tips or recipe ideas to engage your audience.
- How easy is it? Easy if you're creating generic plans - medium if you're creating custom plans per client
- How much does it cost to start? From $0
- How much can you earn? From $30 to $100+
- Potential challenges: Catering to various dietary needs
- Skills needed: Nutrition knowledge, meal planning expertise, and dietary requirement understanding
15. Online language learning tools or quizzes
If you speak more than one language, monetize it. You could teach English online or offer lessons in whatever language you know fluently.
Create flashcards, quizzes, vocab lists, grammar cheat sheets, whatever helps people level up fast.
Make them look good, keep them useful, and sell them as a digital bundle.
Use Whop to host it all, and if you’re up for it, offer feedback or tutoring through DMs or chat.
- How easy is it? Easy if you're creating tools and quizzes with AI but if you ever want to scale and provide one-to-one services, you'll need to be very fluent in at least two languages
- How much does it cost to start? From $0 to $20 (for AI subscriptions)
- How much can you earn? From $10 to $100
- Potential challenges: Engaging learners at different skill levels
- Skills needed: Fluency in multiple languages, educational design, and quiz creation abilities
16. Customizable digital vision boards
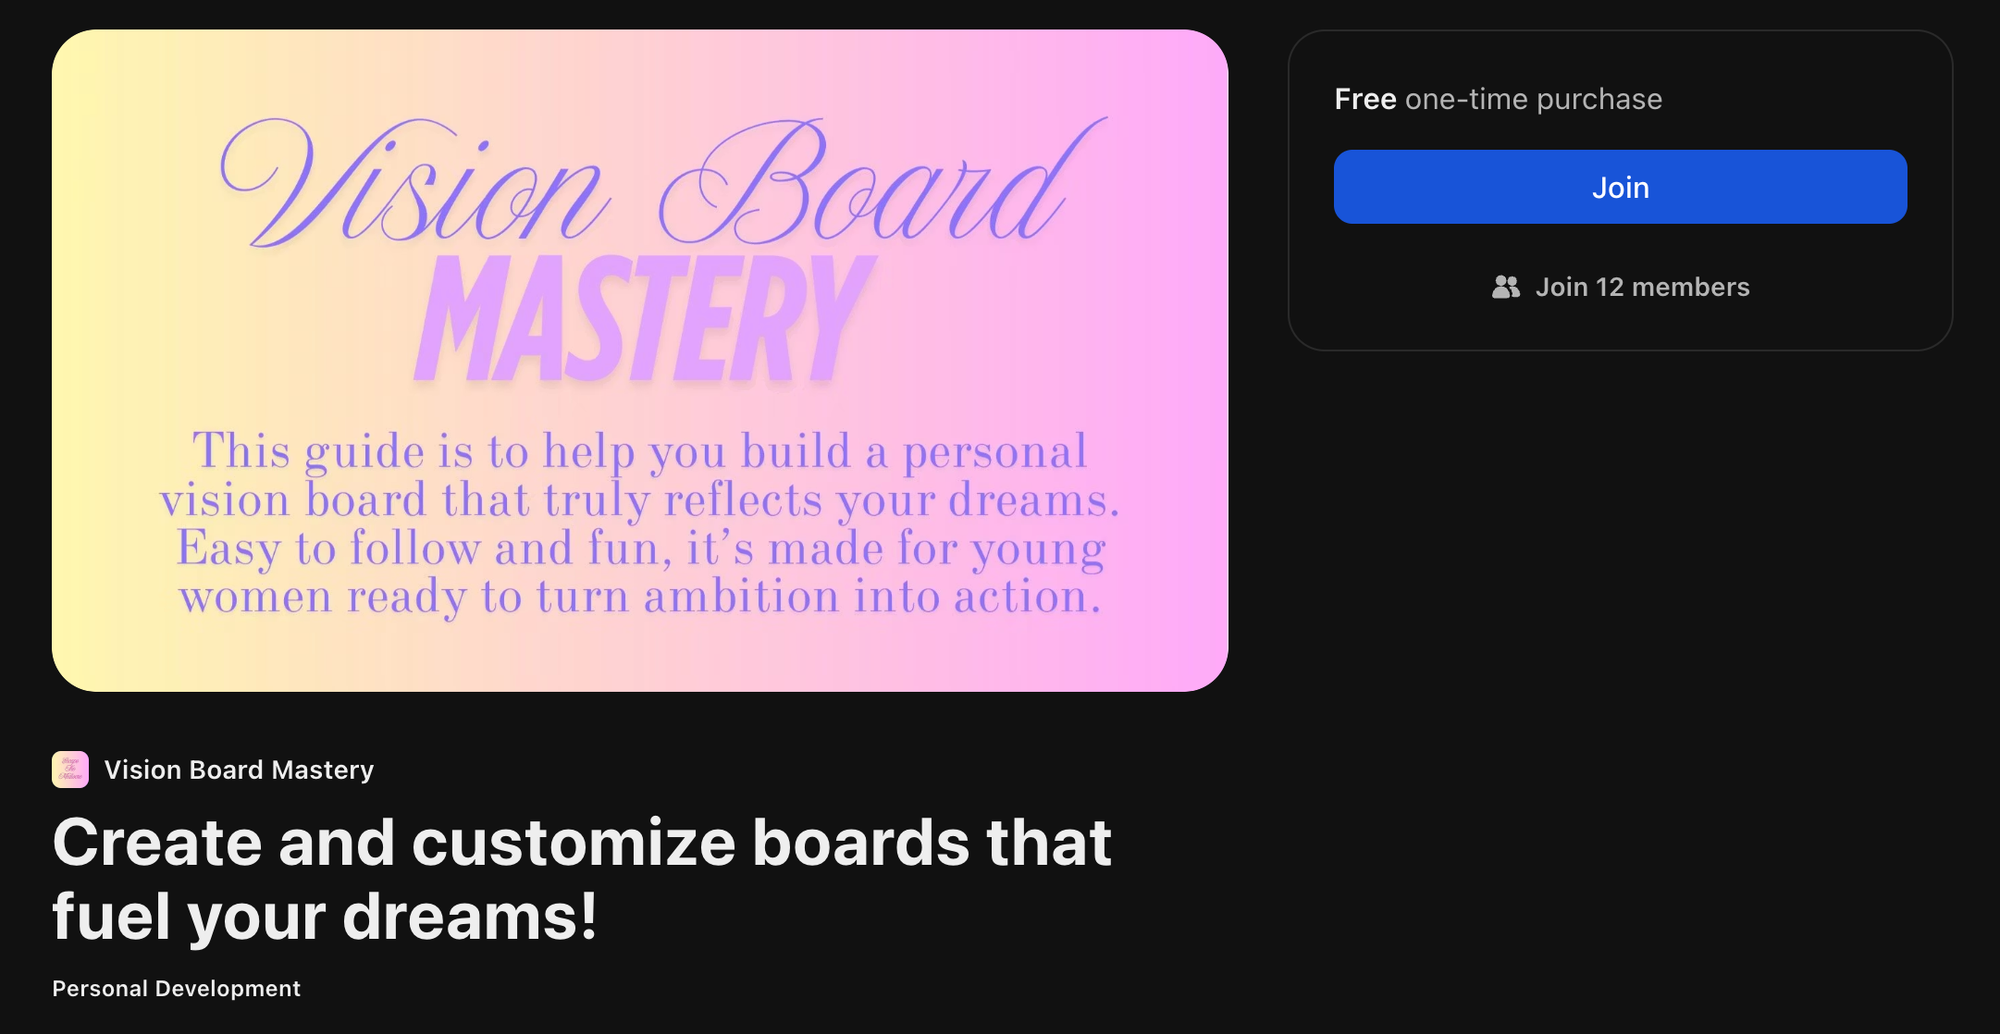
People use vision boards to imagine their ideal life. These boards train the subconscious mind to improve real-life circumstances through the (very real and proven) science of visualization.
While I love to build my own, it’s time-consuming and requires the right headspace. And if you’re not even creative, the process can be frustrating rather than enlightening.
But, if you’re like me, you could create digital vision board packs that people can personalize with their own images, quotes, and goals. You can build various themes (travel, fitness, business) in varying styles, with custom imagery, graphics, sticker options, typography, and more.
- How easy is it? Easy since it only takes time and a little creativity
- How much does it cost to start? From $0
- How much can you earn? From $5 to $30 per board sold
- Potential challenges: Explaining value and encouraging user interaction
- Skills needed: Design creativity, motivational psychology understanding, and template creation
17. Digital learning kits for kids
You can create engaging digital kits that combine printables, audio, and simple interactive elements, designed to help kids learn through sight, sound, and hands-on activities.
Perfect for parents, homeschoolers, and educators seeking dynamic and engaging educational tools. Plus, so long as you have a good grasp of elementary school knowledge, there’s no real special skills or expertise required.
- How easy is it? Easy, but requires basic design skills, simple recording equipment, or interactive PDF tools.
- How much does it cost to start? Low, mainly software subscriptions (if needed), and a microphone or smartphone for audio.
- How much can you earn? Moderate to high, depending on your niche and marketing. Some kits sell for $10 to $50 or more each.
- Potential challenges: Balancing fun with educational value
- Skills needed: Child learning knowledge, educational design, and age-appropriate content creation
Digital products that creators & influencers can sell
18. Content libraries
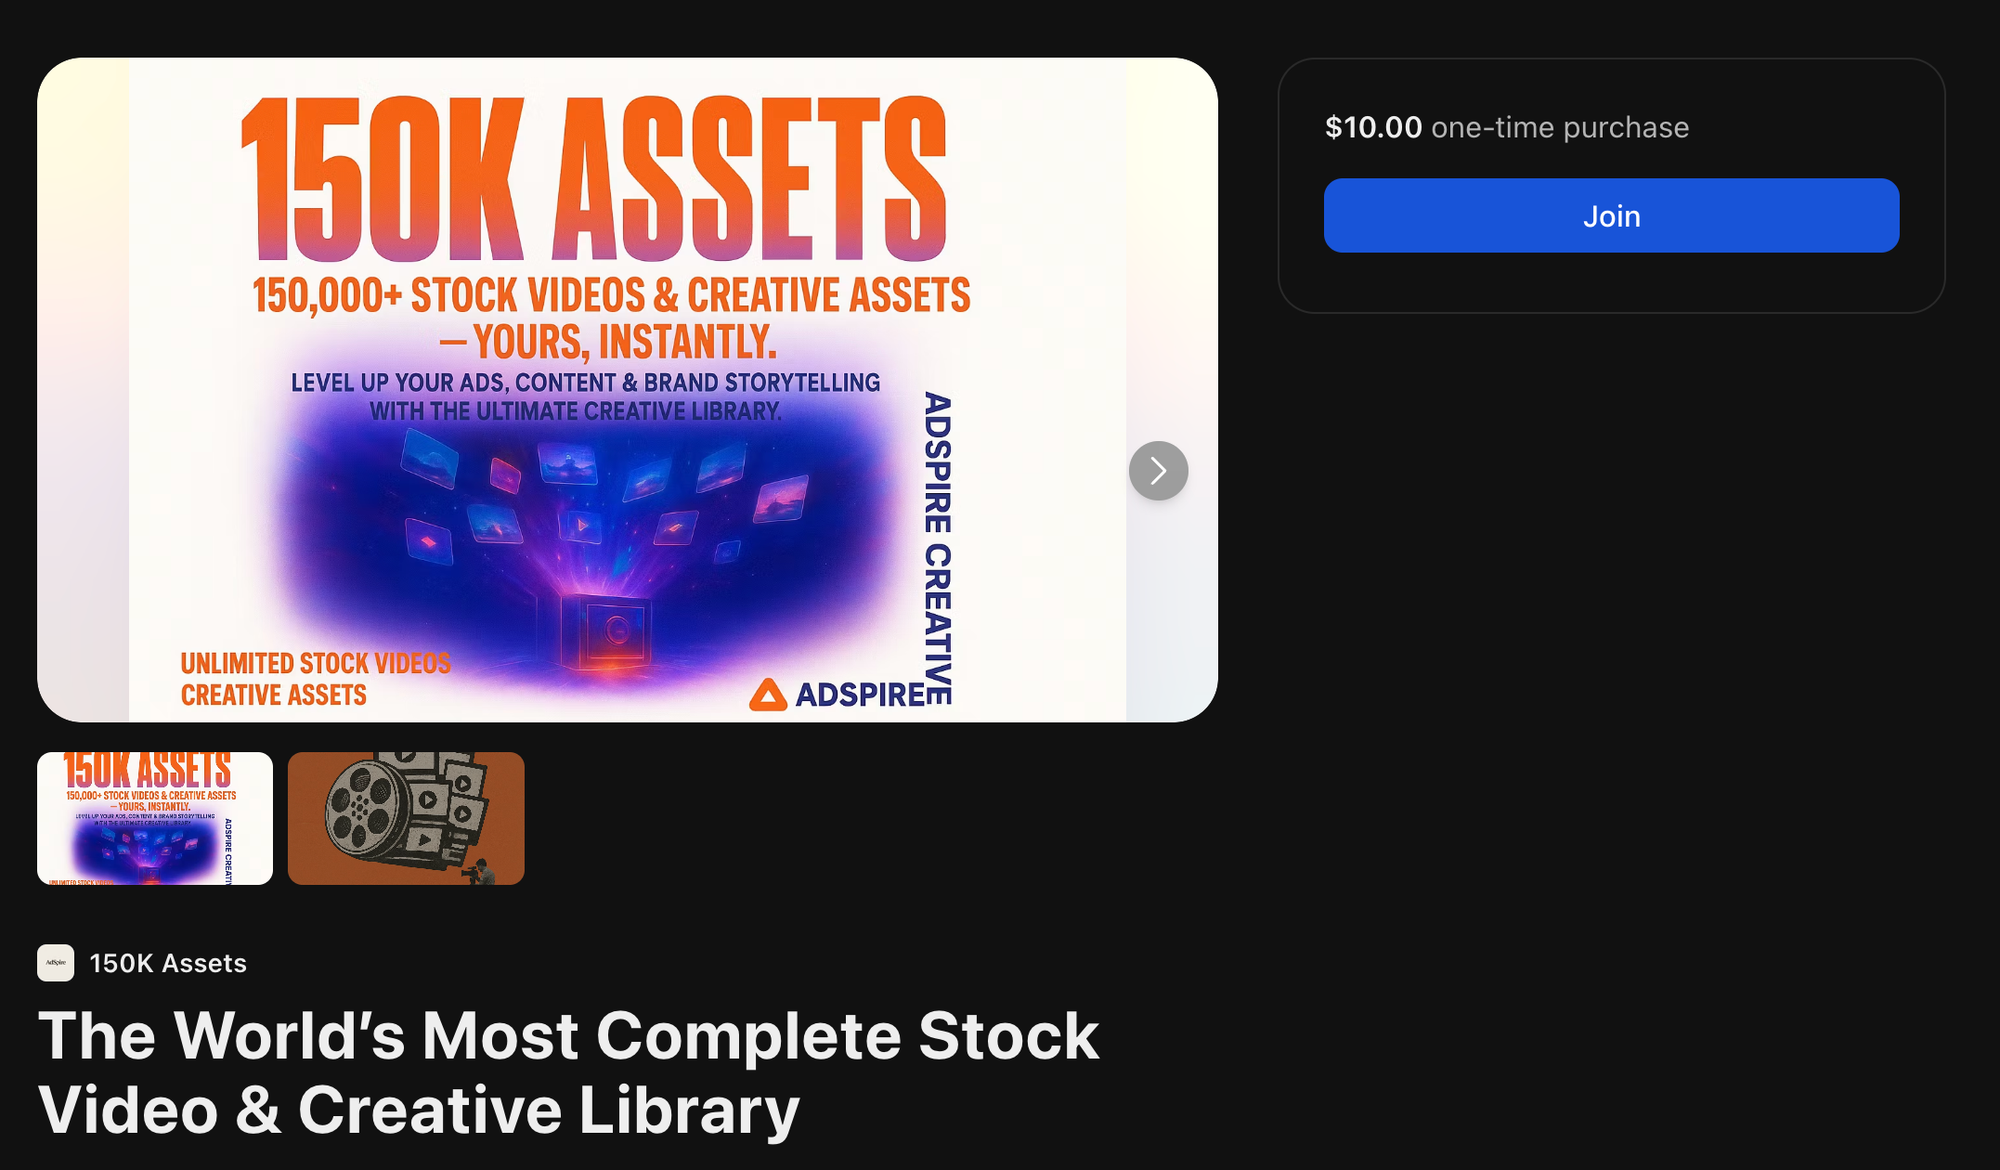
It sucks when you create a banging piece of content but have to watch it gather dust.
Instead of leaving your videos, blog posts, and guides to decay online, combine them in a content library (often known as a content vault).
People can then pay a one-off fee (or a monthly subscription) to access the content. A passive, easy way to make money online.
- How easy is it? Easy, all you have to do is to create lists of content you find interesting or helpful
- How much does it cost to start? From $0 using platforms like Whop to create the list and sell access to it
- How much can you earn? Based on the content quality and length of your list, you can sell them for $1 to $30 dollars
- Potential challenges: Organizing and updating content efficiently
- Skills needed: Content curation, organization skills, and value assessment abilities
19. Voice-over packages
Love the sound of your own voice? Cash in on it.
You can create voiceover packages for different industries and sell them over and over again. For example, you might record 10-15 minute audio recordings or meditations and mindfulness exercises, or create voiceovers for corporate videos, e-learning modules, and apps.
Even if you don't think that you have a good voice, you can still make money as a voice actor. You don't even need expensive equipment. The voice actor in the above video explains:
"You don't even need a full studio setup for this — all you need is a quiet room, a decent USB microphone, and free recording software."
- How easy is it? Easy - you only need to be able to record your voice
- How much does it cost to start? From $0 if you have a phone (bonus tip, you can use tools like Enhance Speech to clear your recording)
- How much can you earn? Depending on the project, you can earn from $10 to $500+
- Potential challenges: Matching tone and pacing to varied needs
- Skills needed: Voice acting, audio recording, and script interpretation abilities
20. Trip plans and itineraries
Everyone loves a good vacation, but not everyone enjoys the planning part.
Make life easier for travelers by creating a series of trip plans and itineraries they can download, use, or customize to suit their needs.
You can create different itineraries for different types of travelers. For example, a luxury itinerary, a budget itinerary, and a family itinerary for Costa Rica. You could even sell travel ebooks.
- How easy is it? Easy, all you have to do is some research (note that people who actually go to the locations they sell plans for outcompete you)
- How much does it cost to start? From $0
- How much can you earn? Trip plans and itineraries can sell from $10 to $40
- Potential challenges: Keeping recommendations current and location-specific
- Skills needed: Travel expertise, destination knowledge, and research abilities
21. Content calendars
Content calendars basically help overwhelmed business owners and marketers to get their ducks in a row.
The beauty is, you can create a calendar once and sell it over and over again. Think industry-specific calendars packed with key dates, promotion ideas, and content prompts to take the headache out of planning.
You can even create versions for different niches: wedding photographers, life coaches, food bloggers, etc.
The more targeted, the better they’ll sell.
- How easy is it? Easy using AI to create plans and platforms like Notion to create scheduling templates
- How much does it cost to start? From $0 using free platforms like ChatGPT and Notion
- How much can you earn? You can sell content calendars for $5 to $20
- Potential challenges: Standing out in a saturated market of low-cost templates
- Skills needed: Marketing strategy, industry knowledge, and planning abilities
22. Social media strategy worksheets
Planning social media posts is a chore. That's why businesses are willing to pay for social media guides, templates, and planners that tell them what to post and when.
You can get as detailed as you like here, with comprehensive workbooks that walk people through defining their audience, crafting their voice, and planning their content pillars.
Add extra value with sections for goal setting, competitor analysis, and metrics tracking, as well as swipe files of high-performing post examples and caption formulas.
- How easy is it? Easy/medium - you need social media management skills to create an effective social media strategy worksheet
- How much does it cost to start? Free with platforms like Google Sheets and Notion
- How much can you earn? From $5 to $25+
- Potential challenges: Teaching users how to apply the strategy, not just fill in blanks
- Skills needed: Social media expertise, strategy development, and template design
23. Social media prompts
Everyone's telling businesses they need to be on social media, but nobody's giving them the actual words to say: here’s your opportunity.
A lot of smaller businesses don’t have the time, cash, or resources to outsource their social media. They do it themselves, but usually, they need a hand.
Create extensive prompt libraries for different industries, occasions, and content types. Think daily conversation starters, behind-the-scenes prompts, and engagement questions packaged up with hashtag suggestions, best posting times, and engagement tracking sheets.
You can sell your prompts in as simple a format as a Google Doc. This is a low-cost, high-reward business you can start from home.
- How easy is it? Easy using AI
- How much does it cost to start? From $0
- How much can you earn? From $5 to $20+
- Potential challenges: Keeping prompts fresh and inspiring
- Skills needed: Content creation, industry knowledge, and engagement strategy understanding
24. Custom workout plans
There’s never been a bad time to create fitness products (the number of people who have followed a Chloe Ting video at least once is mind-blowing).
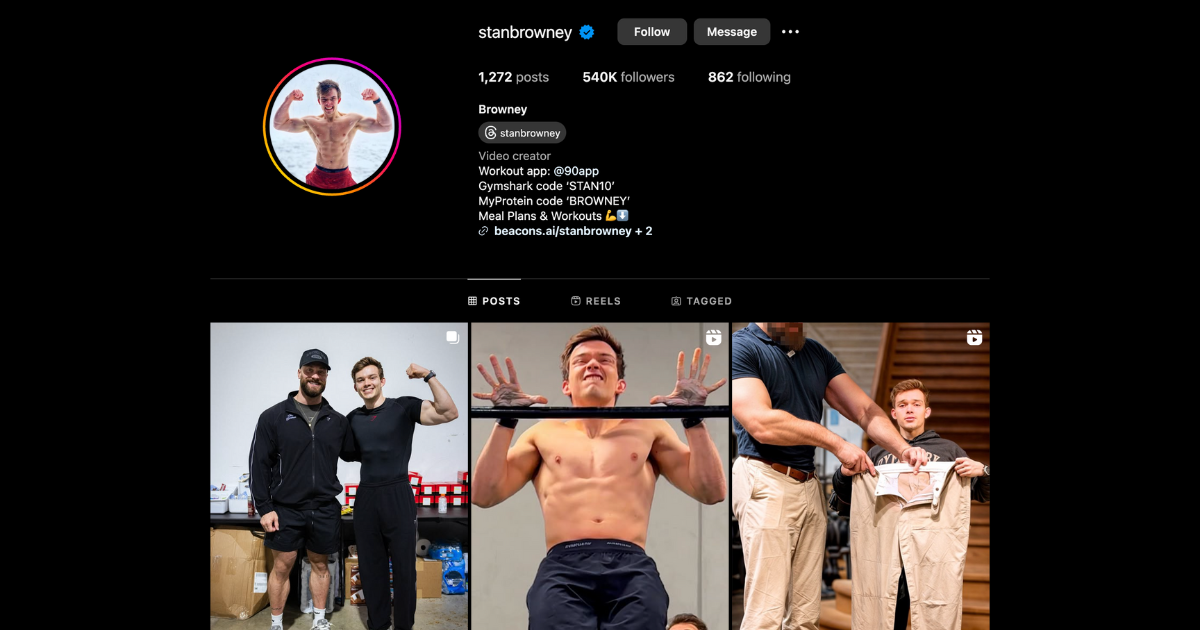
These days, though, people are tired of cookie-cutter approaches to fitness. We asked the creator above, and he said the secret to monetizing fitness content is growing a community on Whop.
The creator in the above video tells us how to monetize fitness content, saying:
"Step one: create high value content on Instagram— this is your top funnel.
Step two: create a free whop where you can plug in your services for your community like private eating plans, recipes, PDF files, tools and much more.
Then run your community with a free tier to get people in the door, then upsell high value content like coaching calls and livestreams."
- How easy is it? Easy if you're creating generic plans - medium if you're creating custom plans per client
- How much does it cost to start? From $0
- How much can you earn? From $10 to $100+
- Potential challenges: Tailoring plans to diverse fitness levels
- Skills needed: Fitness expertise, exercise programming, and anatomy knowledge
Build your fitness community on Whop
25. Podcasting resources (show notes templates, episode planners)
Everyone has a podcast these days, but running them is tough work behind the scenes.
Once creators begin to grow, they have less time and energy for things like show notes and episode planning. That’s where you come in.
You can design templates and planners to help podcasters keep everything in order, from episode outlines to marketing strategies.
Sell your templates on Whop individually or bundle them into a product suite. As your audience grows, you could offer a subscription for regular new templates or coaching to help people level up their podcast game.
- How easy is it? Easy with the help of AI
- How much does it cost to start? From $0
- How much can you earn? From $10 to $50+
- Potential challenges: Keeping things thorough yet customizable
- Skills needed: Podcast production knowledge, template design, and industry understanding
26. Customizable TikTok and Reels templates
"The best part about earning money on TikTok is if you're posting content, you're already halfway there. The next step is simply growing your account. The easiest way to do that is by simply posting consistently, following trends, and studying the competition and replicate what they do best."
-Tristan from VYRL Premium
Most creators aren’t pro editors, and hiring one is expensive. That’s your gap.
If you know video editing basics (even just using Canva or CapCut), you can build templates for things like text effects, transitions, intros, outros, and overlays. Make them easy to customize so creators can drag, drop, and post fast.
Package them by niche (beauty, fitness, business, etc.) and sell them on platforms like Whop or Etsy. And use your socials to demo the templates in action and show people what they’re getting.
- How easy is it? Easy/medium with apps like CapCut and Premiere Pro
- How much does it cost to start? From $0 to $23 (for subscriptions to CapCut premium or Premiere Pro)
- How much can you earn? From $5 to $50 per template
- Potential challenges: Staying on trend with fast-changing formats
- Skills needed: Video editing, social media trends awareness, and motion graphics
27. YouTube thumbnails
Content creation is one of the most lucrative ways to start making money online, especially if you’re making money through YouTube.
One of the most essential parts of a good YouTube channel is great thumbnails - they play a huge role in click-through rates. As marketing specialist Tim Queen says:
"YouTube thumbnails are the most important success factor for getting a high video impression click-through rate."
- Tim Queen
And while all creators know what makes a good thumbnail, executing is different. That’s where you come in.
If you're skilled in graphic design, you can offer custom thumbnail services through your own whop, or freelancing websites like Fiverr and Upwork.
- How easy is it? Medium/hard - while creating generic YouTube thumbnails is relatively easy, creating top notch ones requires graphic design skills and creativity
- How much does it cost to start? From $0 (for platforms like Canva) to $23 per month (for Adobe Photoshop)
- How much can you earn? From $10 to $100+
- Potential challenges: Designing clickable, clear images at small sizes
- Skills needed: Graphic design, visual psychology, and YouTube optimization knowledge
28. YouTube scripts
YouTube uploads hundreds of hours of video every minute, and lots of creators need scripts. Big channels often don’t have time to write themselves, so they hire scriptwriters.
To stand out, your scripts need killer hooks, smooth topic reveals, storytelling that fits the video, and calls to action that actually work. Some clients even want you to suggest visuals alongside the script.
You’ll usually get paid per script or on a monthly retainer. Find gigs on Fiverr and Upwork, or set up your service on Whop to work directly with creators.
- How easy is it? Easy if you're using AIs like ChatGPT to write scripts but hard if you're writing them yourself, thus providing unique work
- How much does it cost to start? From $0
- How much can you earn? From $10 (for AI-written) to $100+ (self-written) per script
- Potential challenges: Writing engaging long-form content that keeps audiences hooked
- Skills needed: Scriptwriting, YouTube algorithm knowledge, and storytelling abilities
29. TikTok scripts
TikTok scripts are a whole different game from YouTube. You’re writing for quick attention spans and content that vibes with TikTok’s ever-changing algorithm.
As of April 2025, TikTok’s favoring original long-form clips (up to around 10 minutes), and the Creator Rewards Program only pays for videos over a minute. So, aim for scripts that hit at least 60 seconds.
Find gigs on Fiverr and Upwork or build out a whop hub to work directly with creators.
Pro tip: Niches win on TikTok – the more focused the content, the better the engagement.
- How easy is it? Easy with AIs like ChatGPT but hard if you're writing them yourself
- How much does it cost to start? From $0
- How much can you earn? From $5 (for AI-written) to $30 (self-written) per script
- Potential challenges: Crafting short, impactful messaging with impact
- Skills needed: Short-form writing, trend awareness, and viral content understanding
30. Social media templates
Lots of people DIY their social media graphics, but honestly, it’s not easy for everyone.
And when most creators are starting, their social graphics aren’t so crash hot. So, they outsource them.
If you’ve got a good eye, you can create and sell templates for Instagram images, Stories, and Reels.
Your audience can download the templates and tweak them to their liking.
- How easy is it? Easy - especially with AI
- How much does it cost to start? From $0 with - you guessed it - AI, Canva, and Whop
- How much can you earn? Mid-level earnings, with templates selling from $10-$500 per pack
- Potential challenges: Matching trends without losing uniqueness
- Skills needed: Graphic design, social media specifications, and trend awareness
Tools, apps & plugins that developers, techies & builders can sell
31. SaaS
Building any piece of software takes effort, skill, and knowledge. But once you’ve got your product? There’s no limit to how many times you can sell it.
"I think that SaaS is a great way to make money online. Unlike physical products, SaaS businesses scale without needing to invest in infrastructure.
This means that you can keep your business very lean and grow it with a very high profit margin, which makes it possible to make money with software as a solopreneur or a small team."
-Tim Konieczny from Rapidemo
Tim Konieczny from Rapidemo
If you’re not particularly tech-savvy, you can learn some easy coding techniques, use a no-code tool to build your software product, or hire someone to help you make the initial product.
- How easy is it? Requires some basic understanding of software - made easier with AI
- How much does it cost to start? Usually starts at $10k + but can be bootstrapped, especially when using AI
- How much can you earn? Huge earning potential with SaaS
- Potential challenges: Providing reliable support and updates
- Skills needed: Programming skills, product development, and business strategy
Sell software online with Whop
32. Pre-made website templates
Sell pre-made website templates to people who want to DIY their websites without having to do the design work themselves (which is a lot of freelancers and entrepreneurs).
You can upload website templates to marketplaces like ThemeForest and Creative Market and sell them for a one-off fee.
There’s even additional money to make if your theme is good enough to charge a subscription fee for.
- How easy is it? Medium-level difficulty
- How much does it cost to start? From $0
- How much can you earn? Low to mid earning potential
- Potential challenges: Making templates easy to customize
- Skills needed: Web design, coding knowledge, and responsive design principles
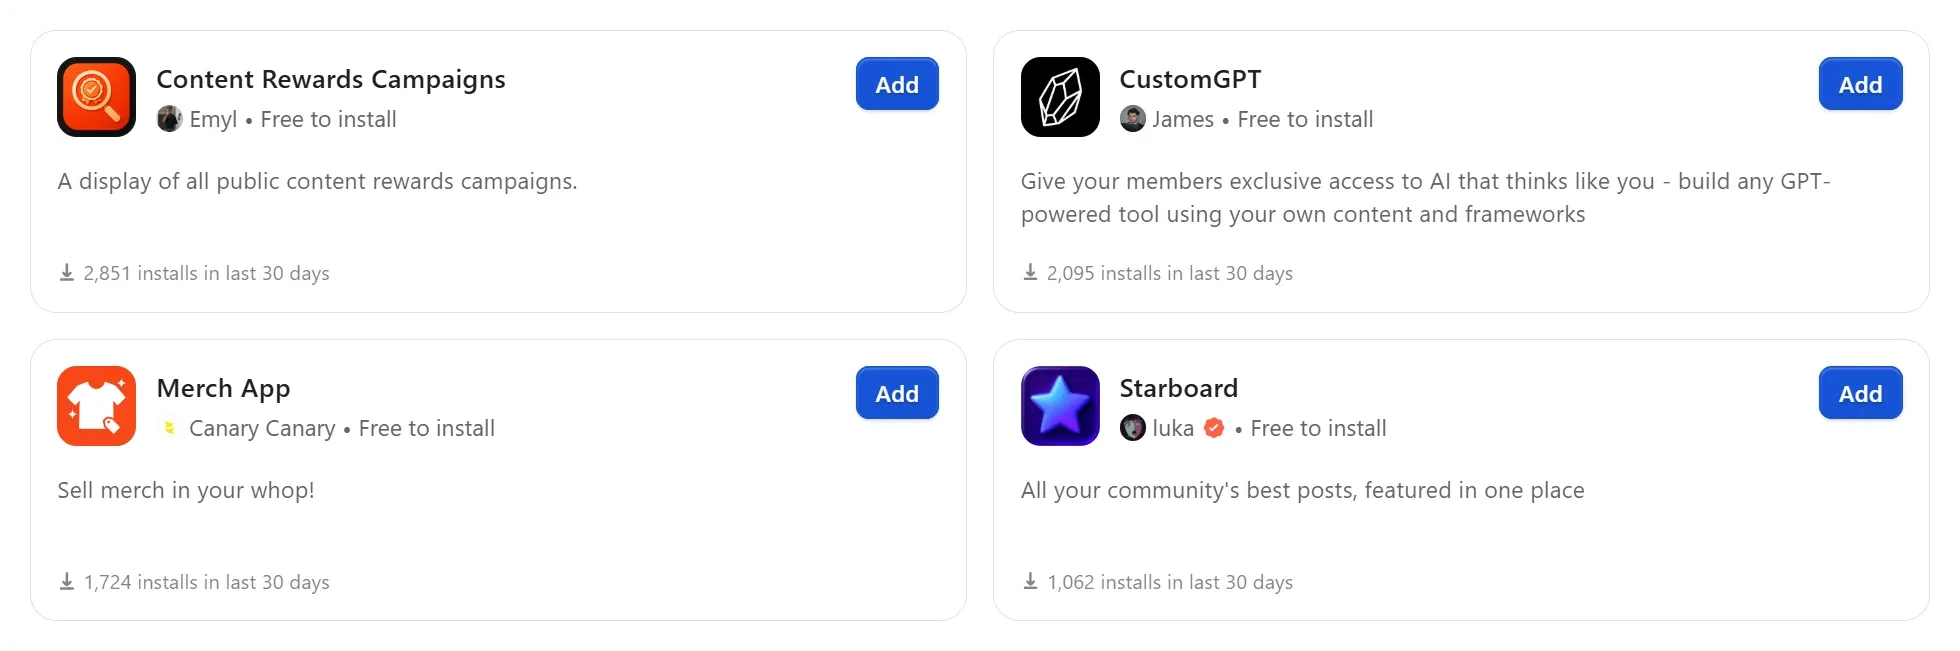
33. Apps
Create an app for a specific target audience and sell it. It’s really that simple. You can add a paid plan to generate passive income or charge for in-app purchases.
"If you're building anything, make sure it solves your own problem. Nobody is going to understand that problem as well as you do."
-Siya, developer of GenPPT, from Whop
So, how do you build an app?
The easiest way is with Whop.
By using the Whop SDK and our documentation, you can easily build apps that use Whop's systems to process payments, user authentication, distribution, and even marketing. If you're planning to follow the vibe-coding path, you can use our LLM docs and install our MCP.
- How easy is it? You can use no-code app-builders, but there is a learning curve
- How much does it cost to start? Can vary from tens to tens of thousands of dollars
- How much can you earn? Huge earning potential
- Potential challenges: Fixing bugs and keeping users happy
- Skills needed: Mobile development, UI/UX design, and programming
34. WordPress plugins
WordPress plugins help users customize their websites and add features without needing to know complex coding languages.
If you do have coding knowledge (or have someone to help), you can create plugins and sell them via the WordPress plugin marketplace or your own website.
- How easy is it? Medium-level difficulty, best suited to coders
- How much does it cost to start? From $0
- How much can you earn? Mid to high-level earnings - with a potential for huge profit
- Potential challenges: Ensuring compatibility across versions
- Skills needed: PHP programming, WordPress development, and plugin architecture
35. No-code automation templates
With new AI tools, anyone can now make automation templates without coding. Platforms like N8N, Zapier, Airtable, and Notion make it easy.
These templates can do simple tasks like finding leads and making lists, or more advanced ones like creating and posting videos on social media.
"We teach people how to build automations for businesses using a tool called n8n— it's kind of like building little robots that do the boring tasks for companies like emails, lead generation, and DMs".
-Jovan from AI Creators Club
You don’t need to know any code to create and sell them — though you can customize the code if you want.
- How easy is it? Medium-level difficulty, best suited for people with analytical thinking skills
- How much does it cost to start? From $0-$20 (for platform subscriptions)
- How much can you earn? Low to high-level earnings, depending on the project and the complexity of the templates
- Potential challenges: Ensuring correct and adaptable workflows
- Skills needed: Analytical thinking, workflow design, and platform familiarity
36. Video games
Similarly to apps, you can create a video game series for people to play on their phones or computers. You can monetize it via a subscription service, in-app purchases, or a one-off download fee.
- How easy is it? Medium to hard difficulty level
- How much does it cost to start? There's a huge variation, from $500 up to hundreds of millions of dollars
- How much can you earn? Unlimited earning potential, but it varies widely based on the type of game you produce
- Potential challenges: Balancing graphics, gameplay, and performance
- Skills needed: Game development, programming, and creative design
37. Augmented reality filters or overlays
If you’re tech-minded, try your hand at creating augmented reality filters or overlays.
Heaps of brands use custom AR filters for social media trends to drive awareness and growth, which is something you can cash in on — and you can make a lot of money.
"I create art for social media, some projects have given me the opportunity to travel, meets celebrities, be featured in a few major publications such as Forbes, Business Insider and Fast Company, but most importantly, retire my mom early and buy my second house, our dream house, fully paid off."
-Cyrene Quiamco from CyreneQuiamco LLC, The Walt Disney Company, Verizon Wireless, and more
Make money by creating AR filters and overlays that help consumers envision what a new sofa might look like in their living room or how a summer dress looks on them.
- How easy is it? Medium if you're creating simple filters with static visuals, hard if you're creating interactive mechanics (possibly with 3D objects)
- How much does it cost to start? From $0 with free software like TikTok Effect House, to a few hundred bucks with paid software like WebAR
- How much can you earn? Based on the complexity of your filters and who you create the filter for, you can sell them for hundreds of dollars
- Potential challenges: Keeping filters fun, aesthetic, and compatible with platforms
- Skills needed: AR development, 3D design, and platform-specific coding
38. Virtual reality experiences or environments
Sometimes people just need to escape, and you can help them with a virtual reality experience.
Creating VR scenes or experiences can differentiate you from the regular crowd of stock photo and video sellers because you’re offering something new and exciting.
- How easy is it? Hard - creating virtual reality experiences is a challenging task. You'll need skills like 3D modelling and scripting
- How much does it cost to start? From $0 with free software like Blender
- How much can you earn? Interactive virtual reality experiences can sell for hundreds to thousands of dollars while static ones can sell for $30 to $100
- Potential challenges: Creating immersive yet accessible experiences
- Skills needed: VR development, 3D modeling, and immersive design
39. Custom AI chatbots for specific niches
AI-powered chatbots to deliver customer support when their human teams are offline. But it can be tricky to configure a chatbot from scratch, so it helps (not hinders) the user experience.
So if you know chatbots, this is a perfect hustle. Try configuring AI chatbot templates for different niches.
You might create a bot perfect for companies selling vegan chocolate or one that helps finance companies send clients to the right resources.
- How easy is it? Medium - chatbot wrappers can be easily made but they will need configuration, training, and integration into your client's platform
- How much does it cost to start? From $0 - all you need are coding and web development skills
- How much can you earn? Depending on how secure and trained your chatbot is, you can sell them for $100 to $1,000+ (for custom trained models)
- Potential challenges: Training bots to understand niche language
- Skills needed: AI/ML knowledge, programming, and conversational design
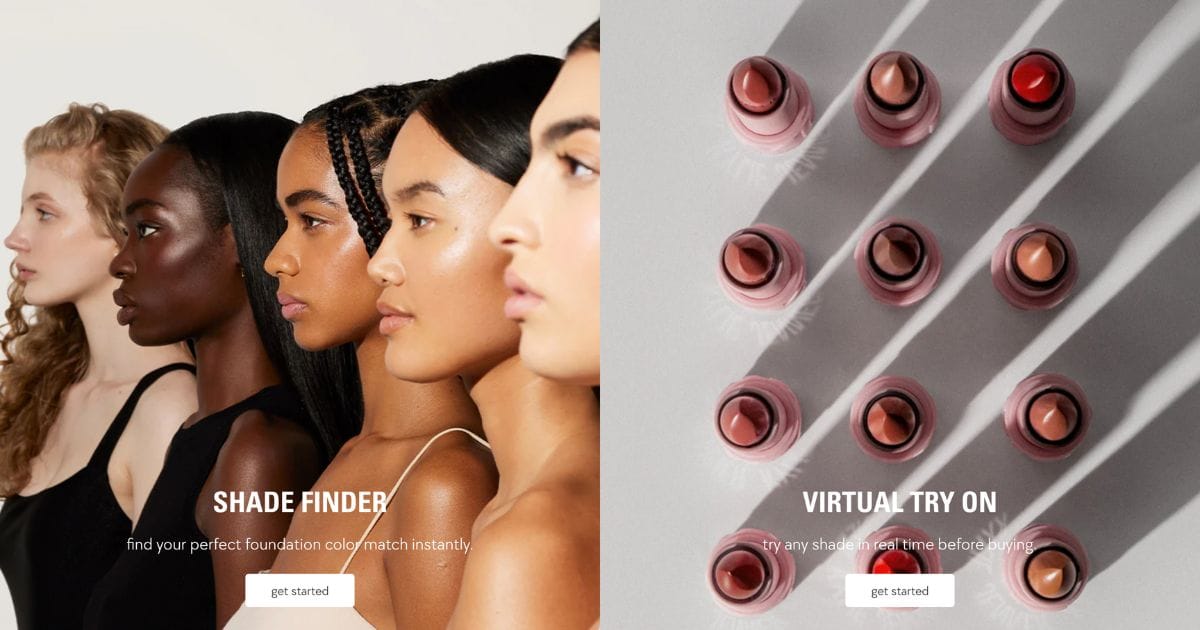
40. Online assessment tools and calculators
Turn your expertise into engaging, interactive experiences with custom online assessment tools and calculators.
You might gauge knowledge with a pre-made quiz, offer personalized health recommendations, or simplify complex financial calculations.
Once you’ve created your assessment tool or calculator, you can either charge people to access it (or, better yet, charge them to see the results) or license it out to other businesses.
- How easy is it? Easy to code with tools like ChatGPT, Bolt AI, and Lovable AI
- How much does it cost to start? From $0 (might need to subscribe to AI plans in the long run)
- How much can you earn? From $10 to $60
- Potential challenges: Ensuring accuracy and user friendliness
- Skills needed: Assessment design, basic programming, and subject expertise
41. Animated GIF packs for social media
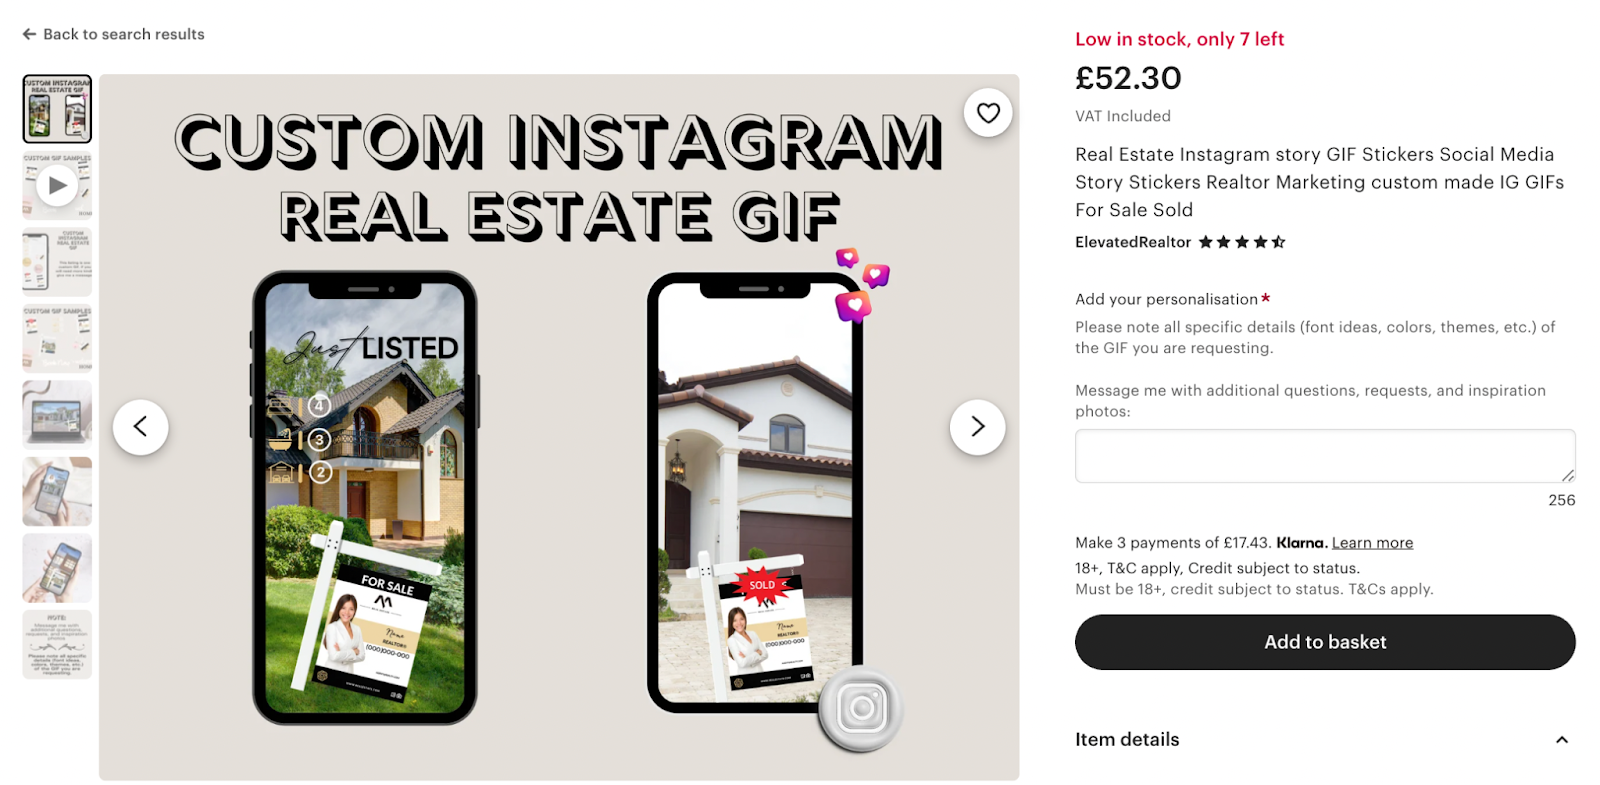
GIFs are the language of Gen Z.
Custom animated GIF packs can be used on Instagram, TikTok, and other social media platforms, and if you can create them, you open yourself up to sales from one of the fastest-growing hustles.
Shareable, visually appealing content that resonates is really hot right now, so there’s definitely a market for this kind of digital product, whether your GIFs are for branding, marketing campaigns, or just for adding a fun touch to everyday interactions.
- How easy is it? Easy, all you need is a software to create gifs
- How much does it cost to start? From $0 (with Canva) to $23 per month (with Adobe After Effects subscription)
- How much can you earn? From $10 to $50 depending on the contents of your pack
- Potential challenges: Keeping animations fresh and trendy
- Skills needed: Animation software proficiency, design creativity, and trend awareness
42. Digital city walking tours
People use digital city walking tours to explore their own cities or plan future trips in detail.
The secret is to create tours that tell a story, whether following the footsteps of famous writers in Paris, hunting down the best street art in Melbourne, or exploring hidden food gems in Tokyo.
Package them with downloadable maps, local insider tips, and restaurant recommendations.
Make them available in both audio and written formats, and throw in some landmark photography.
- How easy is it? Medium - digital city walking tours requires time and knowledge of the city you're creating the tour for. While AI can assist you in creating the tour, you will still need to put in unique content to it
- How much does it cost to start? From $0
- How much can you earn? Digital city walking tours can sell from $30 to $80
- Potential challenges: Keeping content accurate and updated
- Skills needed: Local expertise, storytelling, and multimedia production
43. Directories
Directories help people find businesses or vendors.
The key is tapping into super-specific niches where people are desperately searching for vetted resources: sustainable wedding vendors, certified pet behaviorists, or ethical fashion manufacturers.
The money isn't just in selling listings, it's in creating a comprehensive resource that includes detailed profiles, reviews, and direct booking capabilities.
- How easy is it? Easy using AI
- How much does it cost to start? From $0
- How much can you earn? Depending on the directory type and how extensive its contents are, you can sell them for $10 to $50
- Potential challenges: Maintaining current, verified listings
- Skills needed: Research abilities, data organization, and niche market knowledge
44. Niche tools
Here's where you can really geek out, if that’s your thing, and create super-specific tools that solve exact problems in your niche.
Maybe it's a podcast promotion calculator, a website color scheme generator, or a recipe cost analyzer for food bloggers. The beauty of niche tools is that they practically sell themselves when you hit the right pain point.
Also, using AI, they’re pretty easy to code and develop.
Tip: Create both basic and premium versions to capture different market segments.
- How easy is it? Medium - finding the niche to solve a problem for can be time consuming and since we're talking super-specific tools, you'll need some software/web development skills as well
- How much does it cost to start? From $0
- How much can you earn? Depending on the niche and tool, you can sell them for $20 to $200+
- Potential challenges: Tailoring features to very specific user needs
- Skills needed: Programming, problem identification, and user experience design
45. Custom website themes for platforms like Shopify or Squarespace
Maybe you don’t want to build full-on website templates, but you like the idea of creating themes for Shopify or Squarespace.
The themes that come for free with these platforms are basic, but creating themes requires less technical know-how than a full-spec website.
You can design themes for a niche or industry, or follow your style. Perfect for intermediate designers and techheads.
- How easy is it? Hard - creating custom themes for platforms like Shopify or Squarespace requires good understanding of the platforms and web development skills. While you can get help from AI, creating unique themes that sell is hard
- How much does it cost to start? From $0
- How much can you earn? From $50 to $1,000+
- Potential challenges: Ensuring compatibility and easy customization
- Skills needed: Web development, platform expertise, and design skills
46. Custom mobile wallpapers, themes and widgets
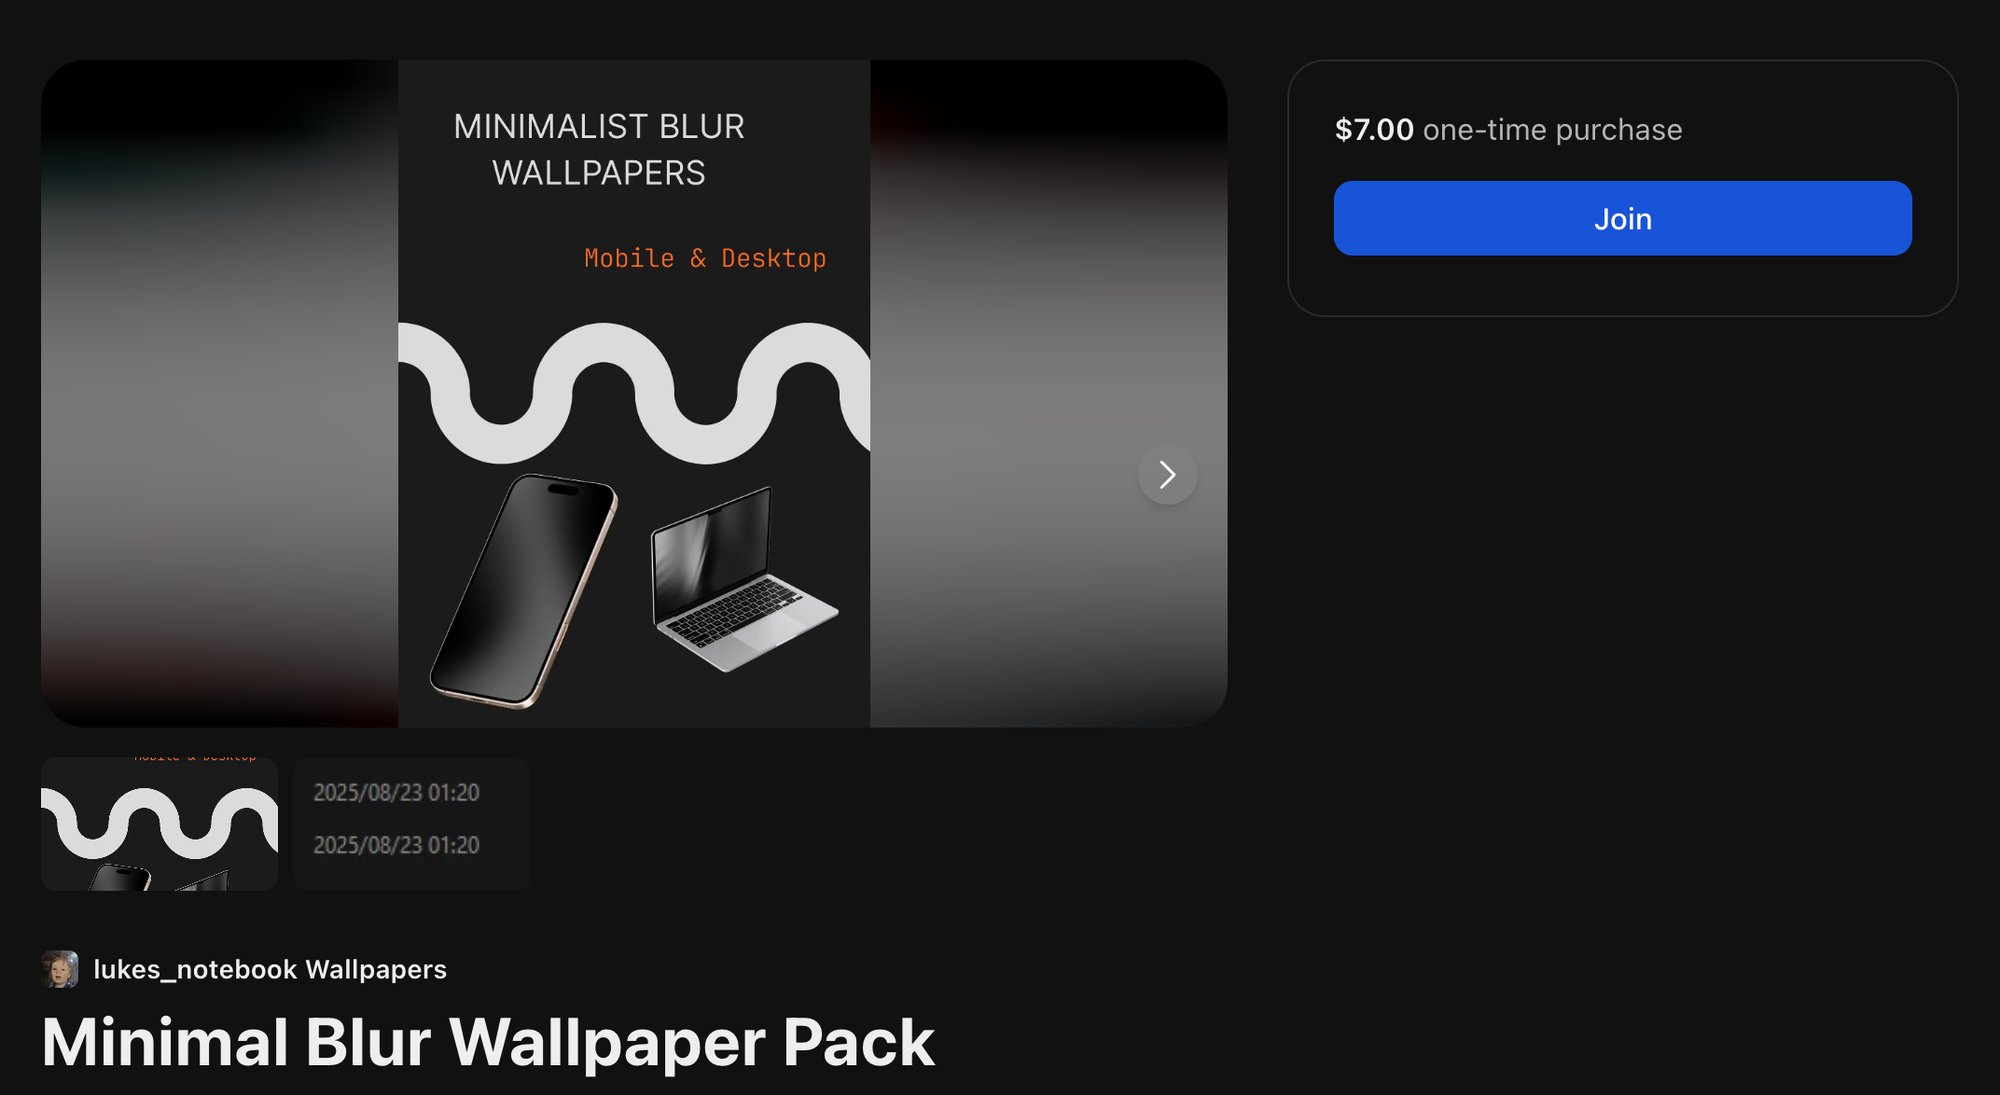
Bundle up wallpapers, app icons, and widgets into matching aesthetic packs (think boho, Y2K, clean girl).
Add some useful stuff too (weather, to-do lists, quotes.) Sell them on Whop, Gumroad, Etsy, or your website. Instagram and Pinterest are your best friends for showing them off.
- How easy is it? Easy with AI
- How much does it cost to start? From $0 to $10 per month for subscriptions to AIs like MidJourney
- How much can you earn? From $5 to $20
- Potential challenges: Designing for diverse device specifications
- Skills needed: Digital design, device specifications, and aesthetic awareness
47. 3D models
Know your way around Blender or AutoCAD? Sell 3D models.
Characters, objects, full-on digital worlds, there’s demand across gaming, architecture, VR, and Web3.
Build in public: post your designs on Instagram, Pinterest, or Behance to show what you can do. Then list them on marketplaces like Whop, CGTrader, or your own website.
Passive income with pixels.
- How easy is it? Hard - to be able to create 3D models in software like Blender, you need good 3D modelling skills
- How much does it cost to start? From $0 (since Blender is free and is one of the most popular 3D modelling software out there)
- How much can you earn? From $10 to $100+
- Potential challenges: Balancing detail with file size and compatibility
- Skills needed: 3D modeling software expertise, technical design, and rendering
48. 3D print models
3D print models aren’t the same as regular 3D models. You’ve got to think about technical stuff like normals facing the right way, surface thickness, slicing, and infill settings to make sure prints come out right.
Since 3D printing blew up around 2009, demand for ready-to-print models has been huge, and it’s still growing. If you get the tech side and know your way around Blender or Autodesk Fusion 360, this could be your sweet spot.
Start by learning about manifold meshes and the slicing process, then sell your models on sites like CGTrader, MyMiniFactory, and Whop.
- How easy is it? Hard - creating 3D print models is similar to creating 3D models but it has other specific requirements
- How much does it cost to start? From $0 with free software like Blender
- How much can you earn? From $5 to hundreds of dollars depending on the quality and complexity of the model
- Potential challenges: Creating print-ready files with minimal errors
- Skills needed: 3D modeling, print specifications, and manufacturing knowledge
49. AI prompts
If you know your way around AI, then you can create AI prompt packs to help others make the most of AI systems. Like the creator in the video above says, it's one of the most profitable offers going right now.
"I just spent the last hour comparing a list of 300 of the most profitable digital products I can sell — and the one thing that stood out is AI prompts."
You can create different prompts for different industry niches to really maximize the earning potential here.
You can easily sell AI prompts directly on Whop using the forum, files or content app. There is also a Whop app specially designed for selling AI prompts.
- How easy is it? Easy - all it takes is a little trial and error with prompts
- How much does it cost to start? From $0
- How much can you earn? Prompt packs sell for anywhere from $5 to $100
- Potential challenges: Offering prompts that work well across models
- Skills needed: AI tool knowledge, prompt engineering, and result optimization
50. Gamified habit trackers
We spend so much time online and working that building healthy habits feels impossible. Balancing work, friends, food, and fitness? Yeah, it’s a lot.
That’s where gamified habit trackers come in. They turn habit-building into a game, making goals like getting fit, staying productive, or just keeping organized actually fun and doable.
Your tracker can be anything from printable worksheets with built-in rewards to apps featuring mini-games. It’s a simple way to create passive income. Want to go further?
Build a productivity community on Whop where everyone tracks and supports each other’s habits, turning accountability into a social game.
- How easy is it? Depends on what you choose to create - a Canva worksheet is simple, an app is a little more complex, and a community is a simple product that requires continual work
- How much does it cost to start? From $0 (again, depends on what you create)
- How much can you earn? $5-50 per sale for worksheets, $5-25 per membership (recurring monthly) for an app or community membership
- Potential challenges: Keeping users motivated long-term
- Skills needed: Behavioral psychology, game design, and motivation systems
51. Interactive personality tests

Yeah, free quizzes are everywhere. But most are basic, clickbait, or worst of all, email traps. *shudder*
Build niche quizzes on astrology, fashion, career, psychology, whatever, and make the experience feel personal. Add downloadable reports, outfit recommendations, follow-up emails, or even 1:1 consults. Use AI quiz builders to speed things up, but customize the results so it feels premium, not generic.
You can host quizzes on Whop, bundle in extra resources, and promote them through TikTok, IG, or email.
- How easy is it? Easy to create the tests with AIs like ChatGPT and the platform itself with AIs like Bolt or Lovable - then, you can sell access to them by using Whop
- How much does it cost to start? From $0 to $10 (for AI subscriptions)
- How much can you earn? From $10 per access sold
- Potential challenges: Creating useful and fun assessments
- Skills needed: Psychology knowledge, quiz logic, and user experience design
52. Digital adventure maps
City guides, hiking trails, or even scavenger hunt routes that users can personalize with their own points of interest, field notes, and hidden gems.
You can create themed maps inspired by apps like Pokémon GO and Geocaching, where users search for locations and items, or complete tasks as they explore.
Use Adobe Illustrator or Canva to design your maps – or you can use platforms like Mapbox or Google My Maps for more detailed experiences and customizable paths.
- How easy is it? Easy/medium depending on the topic and difficulty of the adventure
- How much does it cost to start? From $0 to $23 per month (for Adobe subscriptions)
- How much can you earn? From $10 to $30
- Potential challenges: Making maps both beautiful and easy to follow
- Skills needed: Creative design, storytelling, and cartography basics
53. Interactive stories
Got a knack for storytelling and a cool idea? Bring it to life with AI tools like ChatGPT or Gemini, no coding required.
You can build your game as software, a mobile app, or a web app. For web apps, check out Bolt.new or Lovable AI to make the process way easier.
Once your interactive story game is ready, monetize on Whop listing it as software or a web app.
Storytelling just got way more fun and profitable.
- How easy is it? Easy using AIs like ChatGPT to write the story and Bolt or Lovable to write the app
- How much does it cost to start? From $0 to $20 (for AI subscriptions based on the complexity of the story/app)
- How much can you earn? From $5 to $20
- Potential challenges: Writing compelling narratives readers/users will enjoy
- Skills needed: Creative writing, interactive design, and user experience
Business toolkits, templates & resources as digital products
54. Downloadable checklists
Not a huge money earner, but they can be sustainable if you can market them well.
Create digital to-dos around an area of interest or put together a downloadable checklist that helps people complete a specific task.
For example, you might sell a checklist for website essentials, moving house, or a cleaning rota.
- How easy is it? Very easy with Canva and AI
- How much does it cost to start? $0 - simply use Canva, ChatGPT, and Whop
- How much can you earn? Low to mid earnings (but a great passive income earner)
- Potential challenges: Making checklists actionable, not generic
- Skills needed: Organization skills, basic design, and workflow understanding
55. Guides and worksheets
Guides and worksheets are similar to tutorials, just written. You’ll still walk people through a solution or give them a document they can fill out in their own time.
Downloadable versions of guides and worksheets can either be used online or printed out and used as a physical copy.
- How easy is it? Easy! Create a guide or sheet based on your own expertise
- How much does it cost to start? $0 with AI, Canva, and Whop
- How much can you earn? Low to mid-level earning potential with a typical sales price of $10-200 per worksheet or guide
- Potential challenges: Creating practical tools users will actually use
- Skills needed: Writing ability, instructional design, and research skills
56. Newsletters
Thanks to platforms like Substack, newsletters are back in the mainstream, baby.
People crave curated media rather than the bombardment they get on social media every day. And they’re only going to grow. It’s today’s version of the magazines your mom bought at the supermarket checkout, but there’s a niche for everyone.
And as the writer, newsletters help grow an audience and make you an expert.
There are several ways you can monetize your newsletter, including running paid ads, partnering with brands, and setting up a paid tier that goes above and beyond the regular content delivered in your newsletter.
"Email marketing is one of the most effective ways of marketing and one of the highest-converting because you can sell a product, you can sell a service, and you can even sell email marketing as a service itself."
- Kashief Henry, Whop Email
- How easy is it? Medium-difficulty
- How much does it cost to start? From $0, but as your subscriber count increases, so do your costs
- How much can you earn? Unlimited earning potential from subscribers, sponsorships, and affiliate marketing
- Potential challenges: Maintaining ongoing value and avoiding high unsubscribe rates
- Skills needed: Consistent writing, email marketing knowledge, and audience building
57. Calendars and trackers
Similar to planners and journals, calendars and trackers help people stick to a routine or plan a specific task they need to do.
You might create a tracker for journalists to help them pitch publications or a workout calendar for people looking to get healthier in the New Year.
Store them on a digital marketplace like Whop, spread the word, and sell.
- How easy is it? Easy to medium level difficulty, depending on your level of experience with the tracker you are creating
- How much does it cost to start? From $0
- How much can you earn? Low to mid level earnings - typically $15-$250 per tracker
- Potential challenges: Marketing and balancing usability with appealing design
- Skills needed: Organization knowledge, basic design, and productivity systems
58. Crisis communication templates
Half of US businesses don't have a formal, documented crisis communication plan in place. With cyberattacks and technology failures making up 40% of all crisis events (hello AWS and CloudFare), more and more businesses are starting to look for a crisis communication plan. Without one, these businesses are left floundering, wasting time wondering how to spin the crisis to the media.
That’s where you come in—offering ready-made, customizable crisis communication templates that businesses can adapt quickly and put into action when disaster strikes.
- How easy is it? Medium, best suited for people with communication and PR knowledge
- How much does it cost to start? From $0 with apps like Google Docs
- How much can you earn? $50-$500 per template, depending on the complexity and quality of the template
- Potential challenges: Making sure your templates are compliant with regulations and heavily customizable
- Skills needed: PR knowledge, crisis management expertise, and communication strategy
59. Job boards
Pull together recent job openings, list them all in one central place, make money.
As a writer, I have dreaded scrolling LinkedIn and having to pick through irrelevant jobs (even with keyword searches).
So, make it easy for people to find opportunities that are a good fit with a niche job board. Once you’ve set up the tech behind it, you can use automation capabilities to make sure it pulls in fresh opportunities every day.
You can create a job board in your whop, too.
- How easy is it? Easy but might take time
- How much does it cost to start? From $0 - you can use platforms like Whop to list your findings
- How much can you earn? From $5 per subscription to $20 for premium findings
- Potential challenges: Attracting enough employers and job seekers
- Skills needed: Web development, data aggregation, and niche market knowledge
60. Presentation templates
Presentations are hard work, and that’s before designing the dreaded slide deck.
Make people's lives easier and create reusable templates that corporate folk can use to customize presentations, whether they’re pitching for new work, presenting their latest findings, or hoping to land a new partnership.
The idea is that people can download your templates and use them in their chosen presentation tool, whatever the subject.
- How easy is it? Easy with software like Microsoft PowerPoint or platforms like Google Slides
- How much does it cost to start? From $0 with free platforms like Google Slides and starting from $13 for Microsoft 365 subscriptions
- How much can you earn? You can sell templates for a few bucks to $50+
- Potential challenges: Balancing aesthetics with clarity
- Skills needed: Design expertise, business communication, and software proficiency
61. Swipe files
Not everyone has hours to waste trawling Facebook’s ad library to find a relevant example for their next blog post.
Help them out by creating curated collections of high-performing ads, emails, and sales pages for marketers and copywriters to use.
You’re basically selling inspiration on tap and, once you’ve put in the legwork to compile it, you can sell it to hundreds of thousands of marketers.
- How easy is it? Easy - just requires time and some knowledge on social media algorithms
- How much does it cost to start? From $0 - all you need is social media accounts and a platform like Whop to sell your files
- How much can you earn? From $20 to $50+
- Potential challenges: Offering fresh, actionable examples regularly
- Skills needed: Marketing knowledge, content curation, and trend analysis
62. Recorded webinars
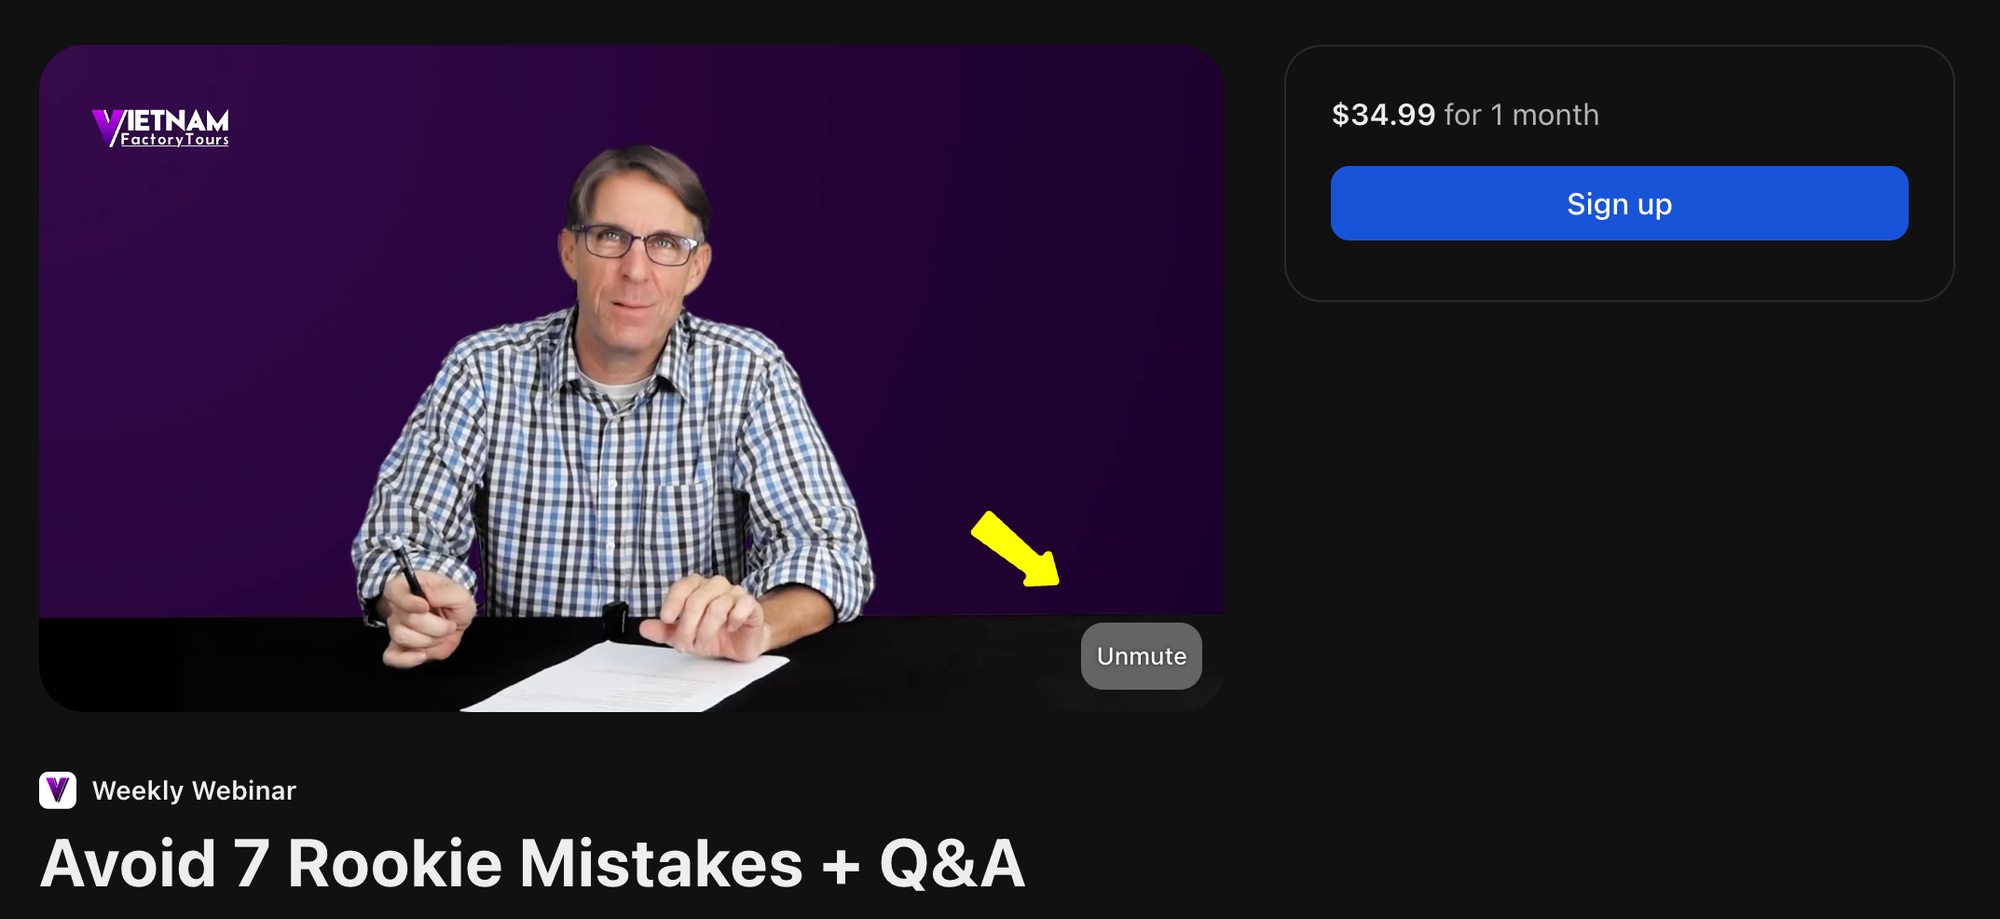
Webinars are such an overlooked digital product. Once you’ve run a live webinar, simply package up the recording and sell it as a separate product.
Not only does this build trust and authority with your audience, but it means you can repurpose content and use it over and over again.
- How easy is it? Medium/hard - to sell a recorded webinar with valuable content, you need extensive knowledge on the topic
- How much does it cost to start? From $0
- How much can you earn? Depending on your expertise on the topic, your webinars can range from $40 to $200+
- Potential challenges: Maintaining interest without live interaction
- Skills needed: Subject expertise, presentation skills, and video production
Create and sell live and recorded webinars with Whop
63. Virtual trade show booths
Virtual trade show booths recreate the trade show experience digitally with interactive elements and photorealistic visuals designed to mimic the physical experience.
The interesting features you can include in your virtual trade show booths are videos, online brochures, demos, live calls or chat, and downloadable content - of course, you can go beyond using your creativity.
- How easy is it? Medium, requires design skills and knowledge on virtual events
- How much does it cost to start? From $0 with free design tools
- How much can you earn? $200-$1,000+ by selling templates (the price depends on the complexity, features, and quality)
- Potential challenges: Being able to create layouts that can work on many different virtual event platforms
- Skills needed: Virtual event design, 3D visualization, and interactive media
64. Email workflows
Good email marketing brings in sales, customers, and associations. Annoying email marketing is a death sentence.
By creating and selling pre-built email workflows, you’re offering businesses a shortcut to better engagement and higher conversions.
You can create workflows for multiple scenarios, including abandoned cart sequences, welcome sequences, and post-purchase sequences.
- How easy is it? Easy if you have experience in email communication (as brands, creators, etc.)
- How much does it cost to start? From $0 - all you need is a platform like Whop to sell your workflows
- How much can you earn? From $5 to $10
- Potential challenges: Crafting sequences that actually convert
- Skills needed: Email marketing expertise, automation knowledge, and copywriting
65. Productivity sound environments
Carefully curated soundscapes, like calming nature sounds and stimulating ambient music, are designed to create the perfect auditory backdrop for any task.
Developing these sound environments gives you an “in” into the wellness and productivity market, where you can license your sound environments on different platforms and to different companies.
- How easy is it? Medium - you either have to source the sounds or record them yourself and compose them using software like Audacity or Adobe Audition
- How much does it cost to start? From $0 (with Audacity) to $23 per month (Adobe Audition subscription)
- How much can you earn? You can sell your sound environments for $20 to $50
- Potential challenges: Designing sounds that enhance focus, not distract
- Skills needed: Audio production, sound design, and wellness knowledge
66. Professional templates and documents
If you have experience in professional industries, you could create bundles for different professional needs: contracts for freelancers, proposals for agencies, and invoices for service providers.
The key is making them both legally sound and beautifully designed. Package them with customization guides, usage tips, and regular updates as laws or industry standards change.
Try how-to videos for easy customization, boosting your sales value.
- How easy is it? Easy using AI and free platforms like Google Docs and Sheets
- How much does it cost to start? From $0 to $20 (for AI subscriptions in the long run)
- How much can you earn? Depending on how extensive the template/document is from $5 to $50+
- Potential challenges: Ensuring legal and industry accuracy
- Skills needed: Business knowledge, legal understanding, and document formatting
67. Business card templates
Business cards are a non-negotiable, but when you’re just starting, it’s just an annoying extra expense.
But here’s the thing: most free business cards look like junk. If you know your way around Canva or Illustrator, fill the gap.
Create templates that actually look good in different styles (clean, bold, fun, whatever.) Sell business card packs on your site or marketplaces.
People pay not to look basic.
- How easy is it? Medium - to be able to create unique business card templates, you'll need graphic design skills and know how to use software like InDesign or Canva
- How much does it cost to start? From $0 (for platforms like Canva) to $23 per month (for software like Adobe InDesign)
- How much can you earn? From $10 to $50
- Potential challenges: Standing out while maintaining professionalism
- Skills needed: Graphic design, business branding, and print specifications
68. Resume and cover letter templates
Sure, Canva has resume templates. But here’s the thing – everyone’s using them now, and nobody is standing out.
People are struggling enough to write their own resumes, let alone design them. So if you’re good with layout design, why not create templates for others (or commission customs)?
You’ll need to post your work on social media, create content around it, and funnel viewers to an online storefront or intake form (for commissions).
- How easy is it? Easy with platforms like Canva but uniqueness is very important
- How much does it cost to start? From $0
- How much can you earn? From $10 to $20 per resume
- Potential challenges: Creating templates that pass applicant tracking systems
- Skills needed: Career knowledge, design skills, and professional formatting
69. Budgeting templates
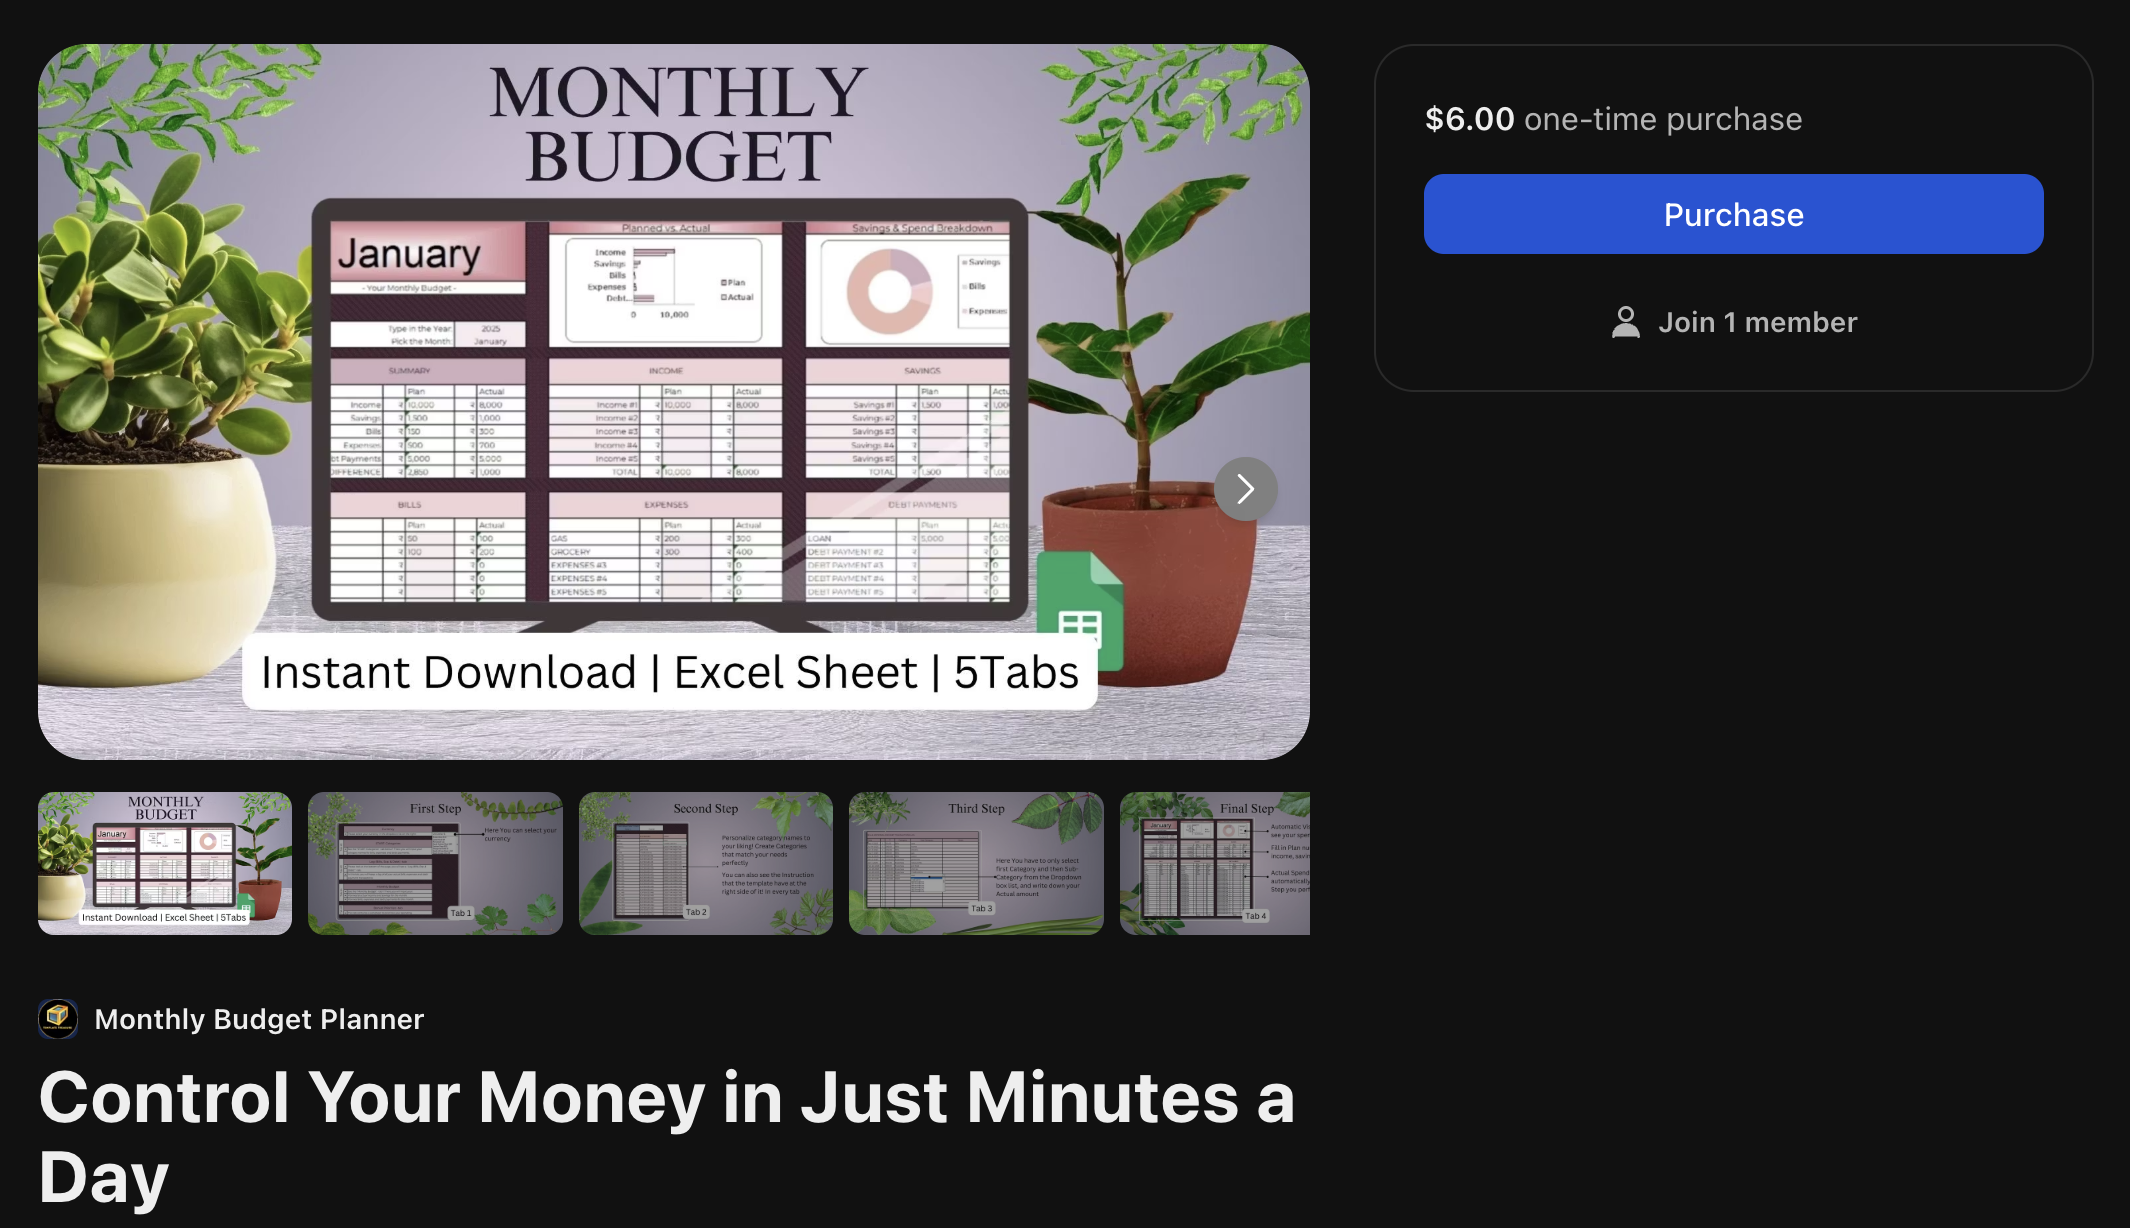
Managing money sucks for a lot of people, but sound budgeting can fix that.
If you’re a spreadsheet wizard who knows formulas (or even macros), build easy-to-use budgeting templates to help folks track income and expenses without the headache.
Google Sheets and Excel are your best bets (Notion’s cool but not great for auto-calculations like budgets).
Sell your templates on Whop or Etsy, and if you want to level up, create a chat space on your whop so customers can ask for custom tweaks or get help.
- How easy is it? Medium - to be able to create good budgeting templates, you need to know how to use Excel or Google Sheets, their formulas, and possibly macros
- How much does it cost to start? From $0 with free platforms like Google Sheets and starting from $13 for Microsoft 365 subscriptions
- How much can you earn? From $10 to $50
- Potential challenges: Making finance simple and approachable without losing accuracy
- Skills needed: Financial planning, spreadsheet expertise, and formula creation
70. Virtual co-working sessions
Virtual co-working is perfect for creators, freelancers, and entrepreneurs who need a focus boost and some accountability online. Set up your whop and run these sessions using livestream features to help people stay on track.
You can sell access as one-offs, bundles, or a subscription membership. For even bigger bucks, target a specific niche (think writers, ADHD entrepreneurs, or startup founders.)
Add some structure, like goal setting or check-ins at the end. You’re not just hosting co-working, you’re building a thriving, money-making community.
- How easy is it? Medium: easy to host, requires consistent scheduling
- How much does it cost to start? $0 if you already have a webcam and use Whop
- How much can you earn? Moderate to high depending on your audience and niche
- Potential challenges: Maintaining accountability and energy remotely
- Skills needed: Session facilitation, productivity coaching, and community management
71. Brand voice or tone-of-voice guides
Brand voicing guides are powerful tools for business owners who want consistent, scroll-stopping content across every platform.
These documents help a brand carve out its voice, whether that’s cheeky and casual or polished and professional.
You can create custom guides for clients or sell templates they can fill in themselves. This type of product is ideal for copywriters, marketers, and brand strategists looking to make money with their skills.
- How easy is it? Easy: especially if you already offer brand strategy or copywriting
- How much does it cost to start? Nothing but your time
- How much can you earn? Medium: custom guides can fetch $$$, and templates sell passively
- Potential challenges: Making abstract comms concepts practical for clients
- Skills needed: Brand strategy, copywriting expertise, and communication design
72. Customizable media & business kit templates
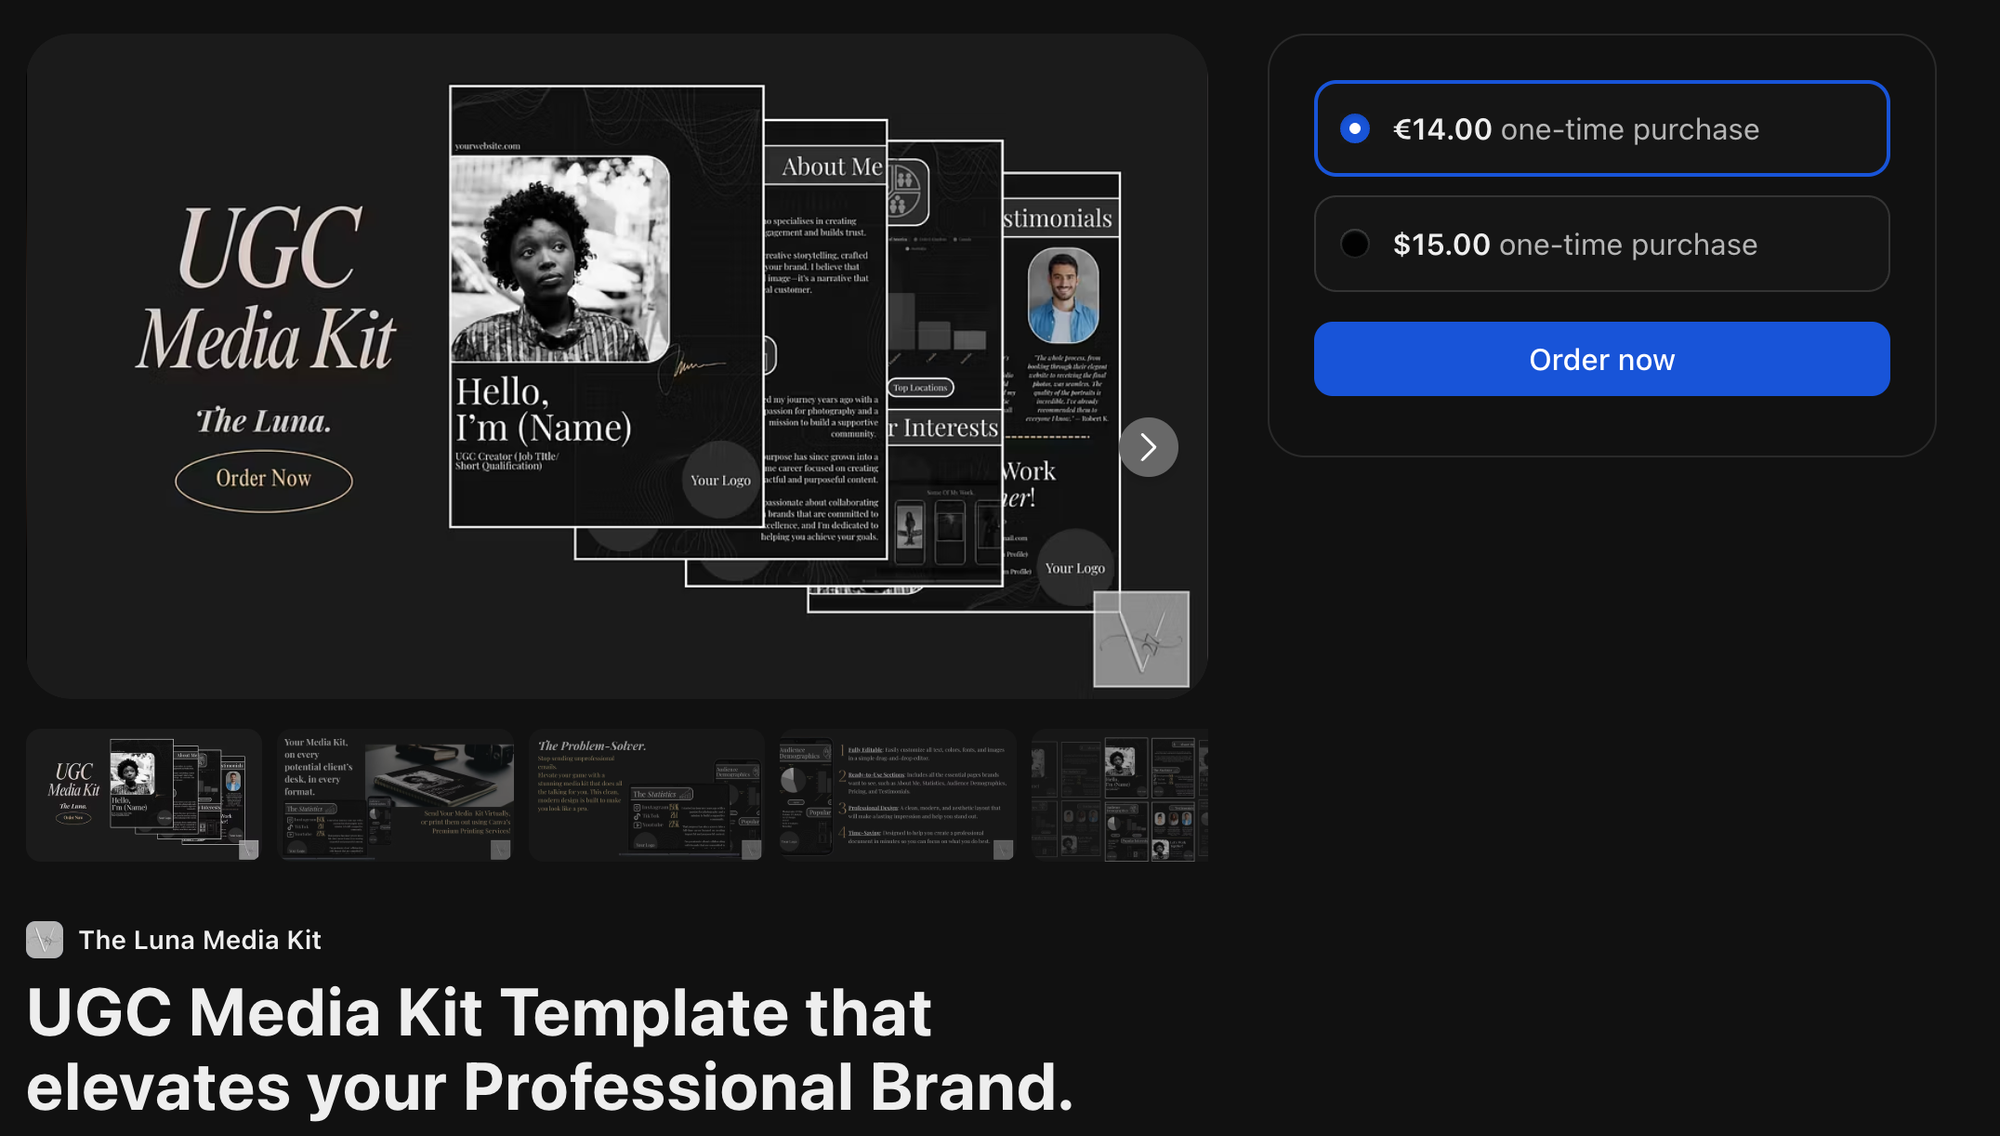
Sell customizable kits designed to help creators, startups, and small businesses present themselves professionally.
Think press kits for influencers and musicians, brand kits for startups, financing pitch decks, one-pagers for investors, and media sheets for speakers or podcasters. These can be built in Canva, Notion, or Google Slides and sold as editable files.
Many entrepreneurs don’t have the time or skills to make these from scratch, so sleek, pre-designed templates are a win.
- How easy is it? Easy, just need design skills and a template platform.
- How much does it cost to start? Low using free or low-cost tools like Canva.
- How much can you earn? $20-$100+ per kit or bundle.
- Potential challenges: Adapting templates for a diverse range of industries
- Skills needed: Business communication, design skills, and industry knowledge
73. Done-for-you Notion workspaces
Is your workspace organization often the envy of your office coworkers?
Sounds like you’re the right person to build and sell complete Notion setups for specific use cases — think content planning, freelance business management, habit tracking, or personal finance dashboards.
People love Notion but hate setting it up, so if you're good at making things look clean, you're in. These templates are perfect for creators, freelancers, students, or anyone trying to get their life together.
- How easy is it? Easy, especially if you already know and use Notion.
- How much does it cost to start? Very low, just time and a Notion account.
- How much can you earn? $10-$100 per workspace, depending on complexity.
- Potential challenges: Designing intuitive and flexible setups
- Skills needed: Notion expertise, workflow optimization, and productivity systems
74. Spreadsheets
Spreadsheets are a pain for most people, but if you know your Excel formulas, you can actually make decent money helping people ease the pain by creating spreadsheets for specific industries.
- How easy is it? This depends on how easy you find Excel!
- How much does it cost to start? From $0 with Whop and an existing Excel subscription
- How much can you earn? Mid-level earning potential, with spreadsheets typically selling between $15 and $100 dollars
- Potential challenges: Designing spreadsheets that aren’t boring or confusing
- Skills needed: Advanced Excel/Sheets proficiency, formula creation, and business processes
Creative digital products for artists & designers to sell
75. Prints
Art prints are one of the most sellable digital products, tbh. If you’ve got a creative streak, enjoy drawing, or love to design, you can turn your creativity into sales.
With print-on-demand platforms, you can upload your artwork to and have it transferred onto mugs, t-shirts, notebooks, and other physical products — or you can sell it as a wall print.
Karina sells digital art as a side hustle, and in the video above she explains how to get started — from creating a portfolio, to finding your style, getting known on Instagram, X and Pinterest.
"You don't have to just post your artworks — you can create videos from your content, and look to other artists for ideas".
-Karina Egle from Whop
The digital art marketplace is worth a whopping USD $5.8B.
- How easy is it? If you're reselling existing designs or using AI, easy. If making your own designs, some skill is required
- How much does it cost to start? $0 with print-on-demand platforms or digital print sales
- How much can you earn? A modest amount, typically $3-$300 per print
- Potential challenges: Standing out among mass-produced options
- Skills needed: Artistic design, software proficiency, and print specifications
76. Planners and journals
Here’s an easy one: digital planners. You can make digital planners on Canva, InDesign, Figma, or just buy PLR templates and customize them.
Planners are popular; they’re all over social media, and you can cash in by helping people stay organized.
Create standard organizers arranged by month and week, or you can sell planners and journals for specific purposes, like for small business owners, people developing their spirituality, or travel planners.
- How easy is it? Easy if reselling PLR planners, medium if making from scratch
- How much does it cost to start? From $0 - varies on platforms used
- How much can you earn? Modest earnings of $10-50 per planner
- Potential challenges: Creating unique, functional layouts people want to pay for
- Skills needed: Basic design skills, productivity knowledge, and template creation
77. Stock photos
Are you a natural behind the camera?
If friends and family are often asking you to shoot their weddings, birthdays, and baby showers, start monetizing your skills.
You don’t have to become a photographer for events, portraits, or corporate gigs, either. You can just sell your stock images.
Some popular image types include:
- Landscape photos
- Flat-lay photos of desk spaces
- City scenes
- Business-related snaps of meetings and offices
- Still-life pics of flowers and objects
Stock photo sites like Shutterstock, Unsplash, and Getty Images pay photographers each time someone downloads their image.
- How easy is it? Easy - all you need is a camera and computer
- How much does it cost to start? From $0
- How much can you earn? Typically a low earning potential of a few hundred - to a few thousand - dollars
- Potential challenges: Competing with free and cheap image libraries
- Skills needed: Photography skills, editing proficiency, and market awareness
78. Stock videos
Or maybe, you’re better at filming video footage than taking stills.
Same principle: consider selling your scenes on stock video sites. These are becoming increasingly common as people start to experiment more with social videos like Instagram Reels and TikTok.
- How easy is it? Easy, you just need recording equipment and a way to upload your videos
- How much does it cost to start? From $0
- How much can you earn? Typically a low earning potential of a few hundred - to a few thousand - dollars
- Potential challenges: Producing consistent, high-quality footage
- Skills needed: Video production, editing expertise, and technical equipment knowledge
79. Digital artwork
We covered prints, but you can also sell digital artwork that stays on screen.
Think desktop wallpapers, phone backgrounds, vectors, stickers for messaging apps, icon art, cover images for socials, and more. You could even commission custom artwork for creators on Whop and YouTube to improve their storefronts and branding.
- How easy is it? Easy for artists, non-artists will need to brush up on their skills
- How much does it cost to start? From $0
- How much can you earn? Low to mid earning potential as this is a low-cost product
- Potential challenges: Preventing unauthorized copying or redistribution
- Skills needed: Advanced artistic abilities, digital software mastery, and creative vision
80. Fonts
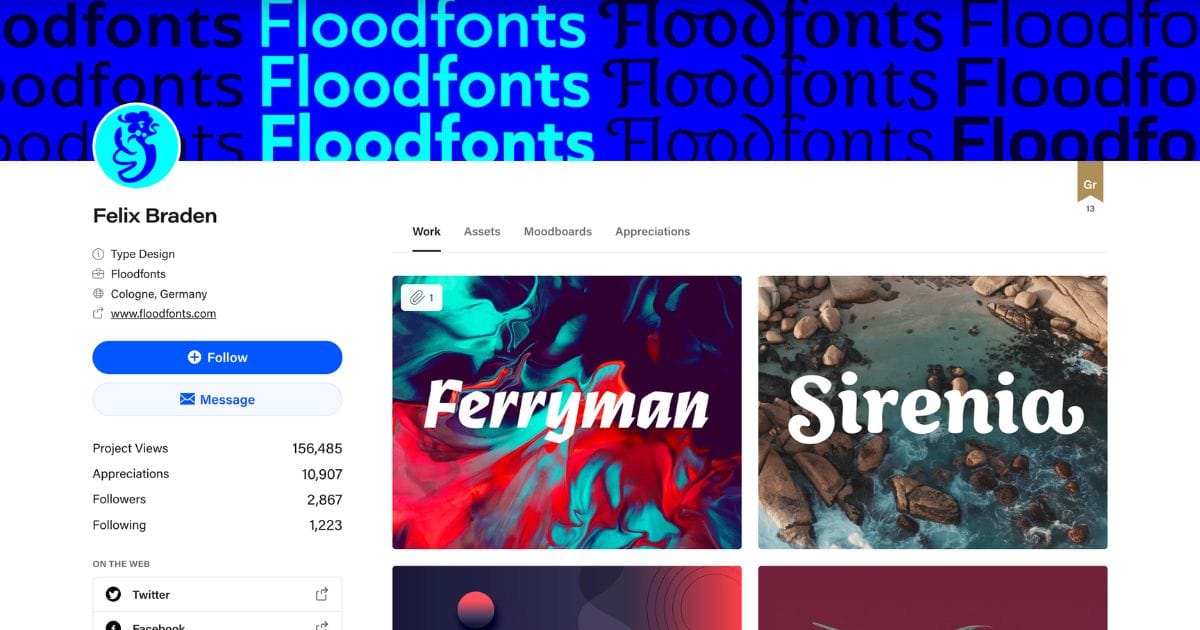
Designers listen up: you can make a sweet side income (or go full-on type designer if you choose) selling fun text styles and unique fonts for your audience.
Sites like 1000 Fonts and DaFonts have a bank of browsable fonts that people can download either for free or for a fee.
Licensing fonts can become big business, especially if your work becomes popular or gets used by a large company with high volumes of visitors.
Social media and design platforms like Behance are great places to promote your work.
- How easy is it? Medium-level difficulty, best suited to existing designers
- How much does it cost to start? From $0
- How much can you earn? Average cost of a font is $30
- Potential challenges: Designing original fonts that stand out and fit industry design trends
- Skills needed: Typography design, font creation software, and character development
81. Printable board games
Board games are an easy way to have a fun night with your family and friends, but after some time, you might run out of games that really play into your group's interests. This is why people buy printable board games online.
If you have fun game idea and you believe in your game design skills, you can come up with printable board game ideas, design them on platforms like Canva, and sell them digitally.
- How easy is it? Easy to do especially with the help of AI
- How much does it cost to start? From $0
- How much can you earn? $10-$50+
- Potential challenges: Creating unique game ideas and mechanics
- Skills needed: Game design logic, graphic creation, and rule development
82. Icon sets
Icons are just graphics that people can use on their websites, social media, and landing pages.
They can either work as clickable buttons or simply be a decorative addition to a webpage.
Sites like Iconmonstr and Iconfinder have libraries of icons users can browse, and you can charge a fee for people to download yours.
- How easy is it? Easy to do with software, or, you can draw your own
- How much does it cost to start? From $0
- How much can you earn? Low to mid earnings, from $10-$250 per set
- Potential challenges: Offering enough variety
- Skills needed: Vector design, consistency in style, and software proficiency
83. Photoshop brushes
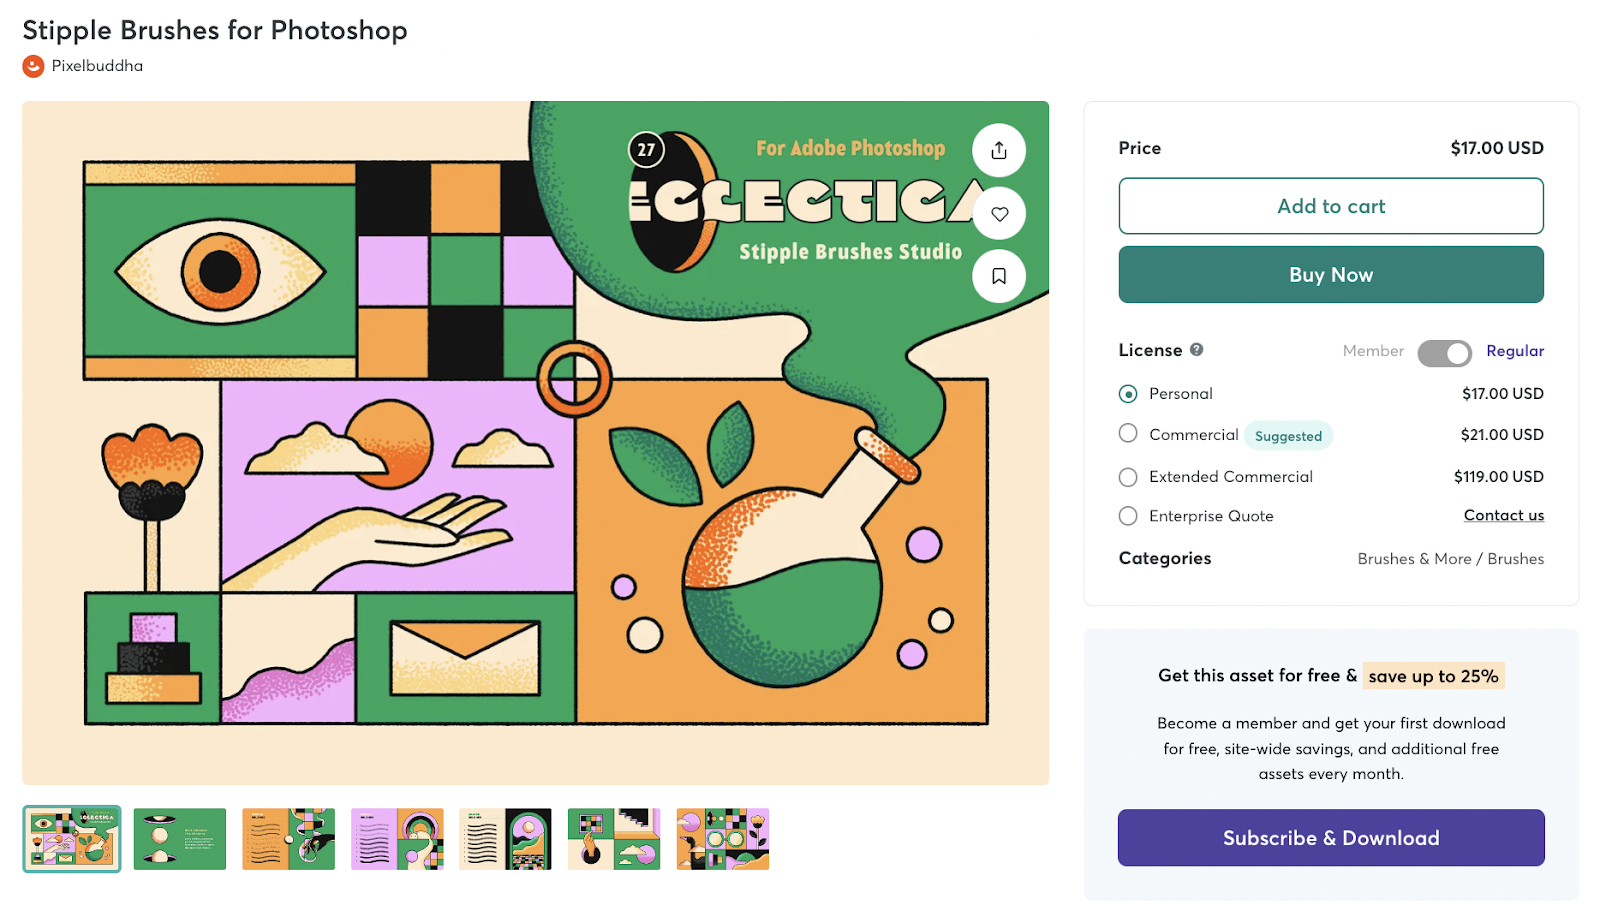
Photoshop brushes help users create unique designs and add their own mark to the photo editing process. Create downloadable brushes that people can add to Photoshop and charge a one-off fee or tiered package prices for multiple brushes at once.
- How easy is it? Difficult - you need to already have experience
- How much does it cost to start? From $0
- How much can you earn? Low to mid level earning potential here, with brushes selling from $5 to $150
- Potential challenges: Requires strong design skills, familiarity with photoshop’s brush engine, and the ability to create tools others find useful
- Skills needed: Digital art expertise, Photoshop proficiency, and brush creation techniques
84. Printable coloring sheets
Turn your artwork and patterns into coloring sheets for adults or children. You can charge a one-off fee for an instant printable download, or you can turn it into a subscription service that delivers fresh coloring sheets every month.
- How easy is it? Easy, especially with PLR products and Canva
- How much does it cost to start? From $0
- How much can you earn? Low earnings here, with most coloring sheets selling for under $10
- Potential challenges: Designing sheets that can appeal to all ages and demographics
- Skills needed: Artistic design, line art creation, and age-appropriate content
85. Audiobooks
If you’d rather talk about your knowledge than write about it, turn your hand to creating audiobooks. You can write a short story (for kids or adults) and record yourself reading it to sell to customers.
This can work particularly well for children’s books or relaxing content that can be consumed before bedtime. You can even sell audiobooks on Whop!
- How easy is it? Easy using AIs like ChatGPT to write and ElevenLabs to voice
- How much does it cost to start? From $0 (you might need to subscribe to AIs as you scale)
- How much can you earn? Ranging from $10 to $50 based on the length and content of your audiobook
- Potential challenges: Producing high-quality recordings that hold attention
- Skills needed: Voice recording, audio editing, and storytelling abilities
86. Songs and licensed music
If you’re a keen lyricist or songwriter and want to get paid for your creativity, sell your songs online.
When you license your tracks, people pay a fee to use them in films, videos, and social media, giving you passive income every time someone chooses your song.
Plus, it gives your music more exposure. (Who knows, you might catch the attention of a label.)
- How easy is it? Hard - composing music is a hard skill to learn and master
- How much does it cost to start? You'll need software to compose (like Ableton, which starts from $99) and possibly composing equipment which can range from a couple hundred to thousands of bucks
- How much can you earn? Songs and licensed music can be sold for up to thousands of dollars based on your client and the quality of your work
- Potential challenges: Licensing and copyright compliance
- Skills needed: Music composition, audio production, and licensing knowledge
87. Branding kits

Every business needs a brand, but not every business has the resources or creative know-how to build its own (or hire someone to do it for them).
But if you’ve got a good design eye, you can create brand bundles that include logo templates, color palette ideas, and font inspiration.
You’re essentially offering a business-in-a-box solution that saves entrepreneurs from the dreaded “designer’s block” and the expense of hiring a full-time creative team.
- How easy is it? Medium - you need to be creative and have the graphic design skills to come up with kits that actually sell
- How much does it cost to start? From $0 (with platforms like Canva or software like Gimp) to $20 per month (Adobe Creative Cloud Photography plan)
- How much can you earn? Branding kits can sell for $20 to $200+ (providing commercial licenses will increase the price)
- Potential challenges: Creating complementary, customizable visuals adaptable for clients in varying roles and industries
- Skills needed: Brand design, visual identity creation, and design consistency
88. Knitting and sewing patterns
If you’re good with a needle (two, actually), turn your skill into sales and create knitting and sewing patterns.
You can package up your favorite jumper, hats, or animal stuffies into an easy-to-use pattern that other keen knitters can buy.
Sell your patterns on your own website or use a platform like Whop to promote your products and fulfill orders.
- How easy is it? Medium/hard - knowing knitting and sewing enough to create patterns people can follow is a difficult skill to obtain
- How much does it cost to start? You can start from $0
- How much can you earn? From $3 to $10
- Potential challenges: Providing clear instructions for all skill levels
- Skills needed: Textile expertise, pattern drafting, and instruction writing
89. Digital sheet music or tablature for musicians
Can you read music? That's your sign, another niche skill, and niche = money.
Turn sheet music into downloadable files that musicians can store on their devices or print out to play live.
You’ll need some musical skills here, especially if you’re transforming sheet music from one instrument to another. If you’re feeling really bold, you can also create your own songs for people to download.
- How easy is it? Hard - being able to create music sheets and tablature requires good understanding of music theory and a good musical aptitude
- How much does it cost to start? From $0 with software like MuseScore studio
- How much can you earn? You can sell each sheet from $1 to $10 - custom ones can even go for higher
- Potential challenges: Formatting for easy reading and use
- Skills needed: Music theory, composition, and notation software proficiency
90. Podcast intro and outro music packs
Podcasts are obviously huge, with many consumers citing them as their favorite way to consume content on the go.
Developing music packs for podcast hosts to use in their intros and outros is a lucrative opportunity to cater to this rapidly growing community.
By supplying quality, royalty-free music to a range of different podcast niches, you can help creators polish their production.
- How easy is it? Medium - you need to be able to compose music to create intro and outro packs
- How much does it cost to start? From $0 (with Audacity) to $23 per month (Adobe Audition subscription)
- How much can you earn? Intro and outro packs can sell for $5 to $20 - you can even bump up the price if you do custom work for clients
- Potential challenges: Creating memorable but not distracting jingles and tunes
- Skills needed: Music composition, audio production, and branding understanding
91. Custom emoji or sticker packs for messaging apps
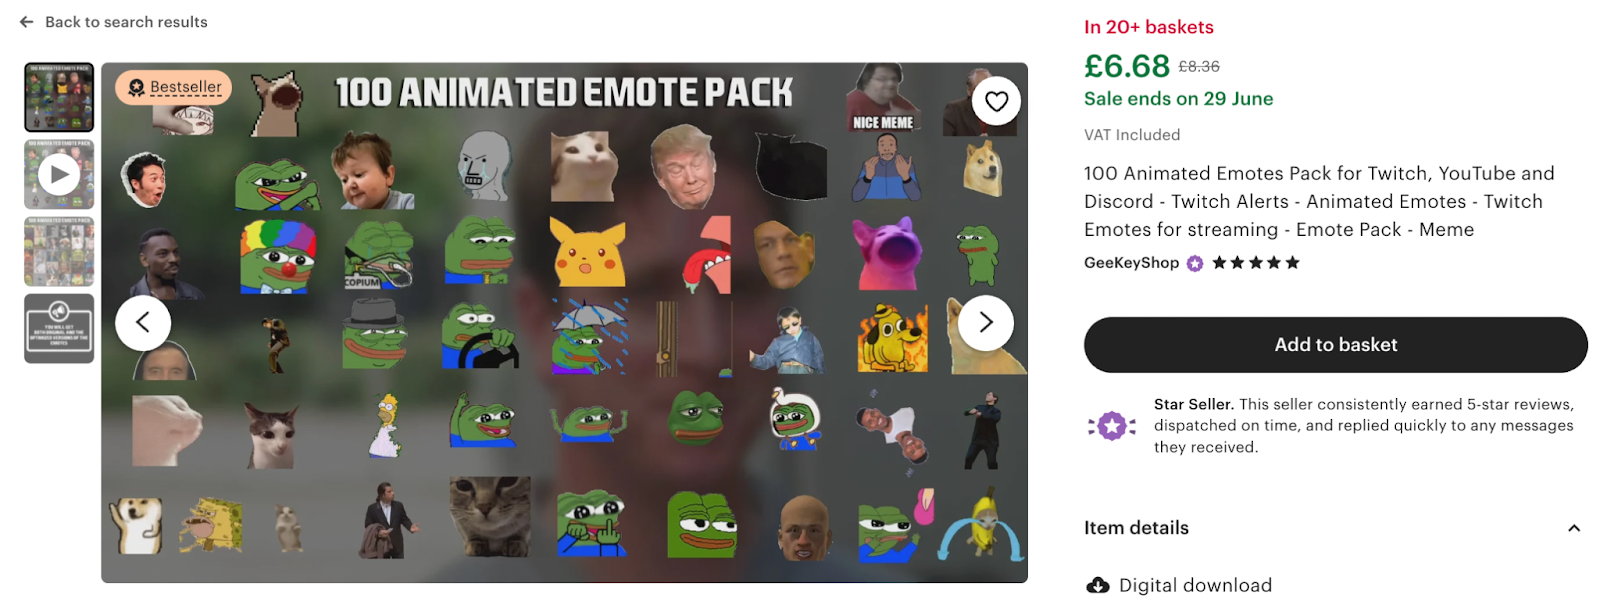
Transform everyday conversations into vibrant expressions with custom emojis and sticker packs. These bespoke packs can help users or companies inject personality and creativity into chats.
You can create a series of packs for different niches or different types of users that you can sell over and over again.
- How easy is it? Easy but takes time
- How much does it cost to start? From $0
- How much can you earn? You can sell emoji/sticker packs for $5 to $10
- Potential challenges: Making emojis expressive and broadly usable
- Skills needed: Character design, digital illustration, and platform specifications
92. Activity packs
Activity packs can work in multiple scenarios, from professional team-building exercises to digital bundles that parents can use to keep their kids occupied.
Here are some ideas:
- Weekly STEM challenges for 8-12 year olds
- Mindfulness activities for college students
- Holiday-themed craft bundles
- Company team-building scavenger hunts
The best part is, you can keep adding to your activity pack library to generate more sales.
- How easy is it? Easy using AIs like ChatGPT
- How much does it cost to start? From $0 (graphics can be made for free using Canva)
- How much can you earn? You can sell packs for $5 to $20
- Potential challenges: Keeping activities engaging across age groups and workplaces
- Skills needed: Educational design, age-appropriate content, and creative planning
93. Template libraries
Creatives and business owners need professional-looking materials, but they don’t always have the time or skills to create them from scratch.
Give them a hand by creating libraries of useful templates, like Instagram Story templates, email newsletter templates, or Canva templates.
You can group together similar template bundles into niche-specific libraries and sell them as a whole.
- How easy is it? Medium - depending on the template type you're selling, you might need different skills like graphic design or web development. The content can be made using AI
- How much does it cost to start? From $0 with free platforms like Canva
- How much can you earn? Template libraries can be sold from $5 to $40+
- Potential challenges: Organizing templates for easy selection
- Skills needed: Design expertise, organization skills, and market understanding
94. Meditation audios
Create a themed meditation series that targets specific life moments or challenges.
You could create a calming series for stressed individuals, a sleep series for people with insomnia, or a mindfulness series for kids having tantrums.
The key is professional sound quality and unique background music (properly licensed, of course). You can sell the audio files with printable journals, habit trackers, and maybe even some beautiful artwork for an extra bump of revenue.
- How easy is it? Easy/medium - to compose meditation audios, you'll either source them from the internet or record some audio yourself. Then, you'll need to compose them using tools like Audacity or Adobe Audition
- How much does it cost to start? From $0 (with Audacity) to $23 per month (Adobe Audition subscription)
- How much can you earn? From $10 to $50
- Potential challenges: Crafting soothing yet engaging sessions
- Skills needed: Mindfulness knowledge, voice recording, and audio production
95. Sound effects
From podcast producers to app developers, meditation teachers to online course creators, everyone needs quality audio.
The key is creating packs that solve specific needs. Zen, ambient sounds, or retro gaming effects, for example.
You can sell your sound effects on stock sound websites, create your own website, or sell directly to your audience on Whop.
- How easy is it? Easy/medium - you need some sound editing skills to create usable sound effects
- How much does it cost to start? From $0 (with Audacity) to $23 per month (Adobe Audition subscription)
- How much can you earn? From $1 to $20 per sound effect
- Potential challenges: Offering high-quality and versatile sounds
- Skills needed: Audio production, sound design, and technical recording
96. Craft patterns
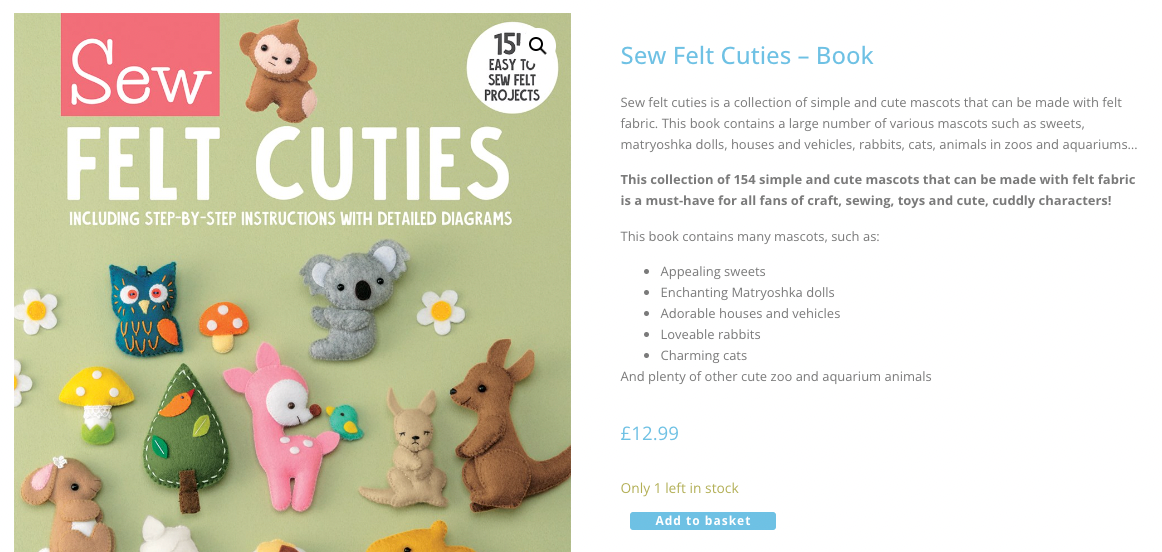
Tap into the craft market by selling patterns with crystal-clear instructions and lots of how-to photos.
Create patterns for trending items (like chunky knit pullovers) but with a unique twist (cottage-core style) and package them with video tutorials, size variations, and material calculators.
- How easy is it? Easy/medium - creating craft patterns requires craft and graphic design knowledge. While the graphic design part isn't extensive, you should have craft skill that's good enough to create patterns
- How much does it cost to start? From $0
- How much can you earn? From $10 to $40 per pattern (depending on the complexity)
- Potential challenges: Writing instructions clear enough for beginners
- Skills needed: Crafting expertise, pattern drafting, and instruction writing
97. Ezines and digital magazines
Like newsletters, the secret to successful ezines is creating highly targeted content that readers can't find anywhere else.
So industry deep-dives, expert interviews, and exclusive how-tos with downloadable resources, templates, and actionable worksheets.
You can even create annual collections and special editions or offer white-label versions that businesses can customize for their own audiences.
- How easy is it? Easy using AI and spending a bit of daily time researching
- How much does it cost to start? From $0 to $43 (for platforms like Beehiiv)
- How much can you earn? From $5 to $20 per month
- Potential challenges: Retaining readership and avoiding content overload
- Skills needed: Publishing, content curation, and design layout
98. Digital art commissions (customized digital portraits or illustrations)
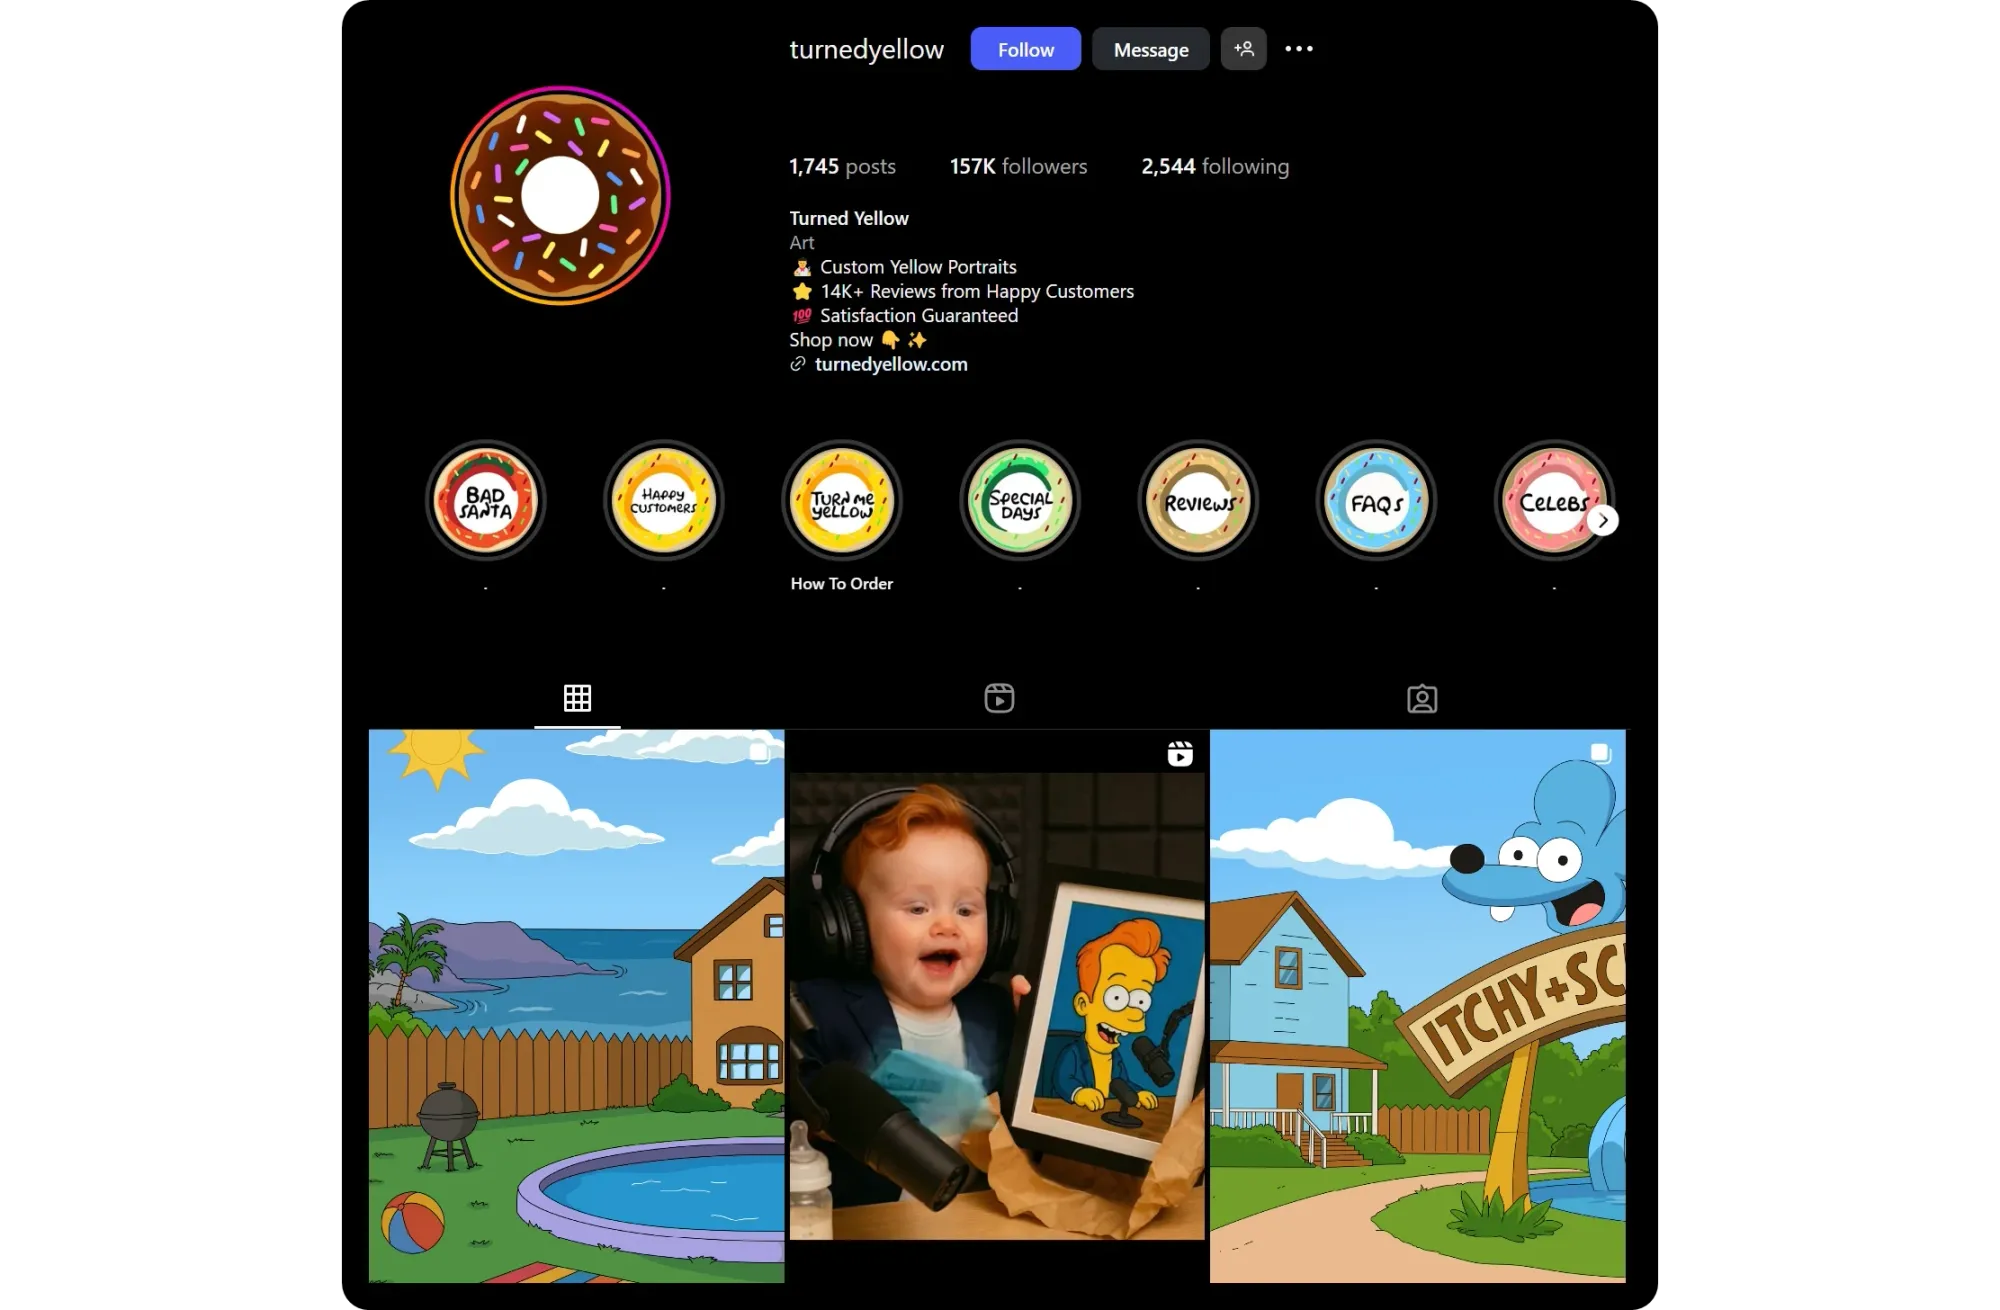
Let’s go back to illustration for a second: why not offer custom portraits and illustrations in your own style?
Portraits and personalized artwork make for great gifts, and doing custom work allows you to charge a higher price than you can for prints.
You can grow a following by posting your art on social media and collaborating with accounts of a similar style. Then, use a digital marketplace to offer customs and commissions.
- How easy is it? Easy if using AI, hard if creating art commissions yourself
- How much does it cost to start? From $0 to $10 (for subscriptions to AIs like MidJourney)
- How much can you earn? From $5 (AI-made) to $100+ (self-made)
- Potential challenges: Managing client expectations and revisions
- Skills needed: Advanced artistic abilities, client communication, and custom design
99. Virtual styling consultations (personalized fashion advice)
We’ve all seen those color consultation Reels popping up on our feeds, right?
Personalized fashion advice is having a big moment now, from wardrobe styling to color theory.
To offer personalized advice, coaching, or consultations, you need to be somebody people listen to. Curate your social media to reflect your style, and create content around personalized advice.
- How easy is it? Medium/hard - to be able provide good consultations, you need a really good understanding of fashion and styling
- How much does it cost to start? From $0 with platforms like Whop
- How much can you earn? From $50 to $500+
- Potential challenges: Building trust without in-person meetings
- Skills needed: Fashion expertise, personal styling, and visual communication
Make it effortless for clients to book and pay for a personal styling call with you. Offer customizable time slots — all managed in one place with the Whop Calendar Bookings app
100. Digital mockups for product designs
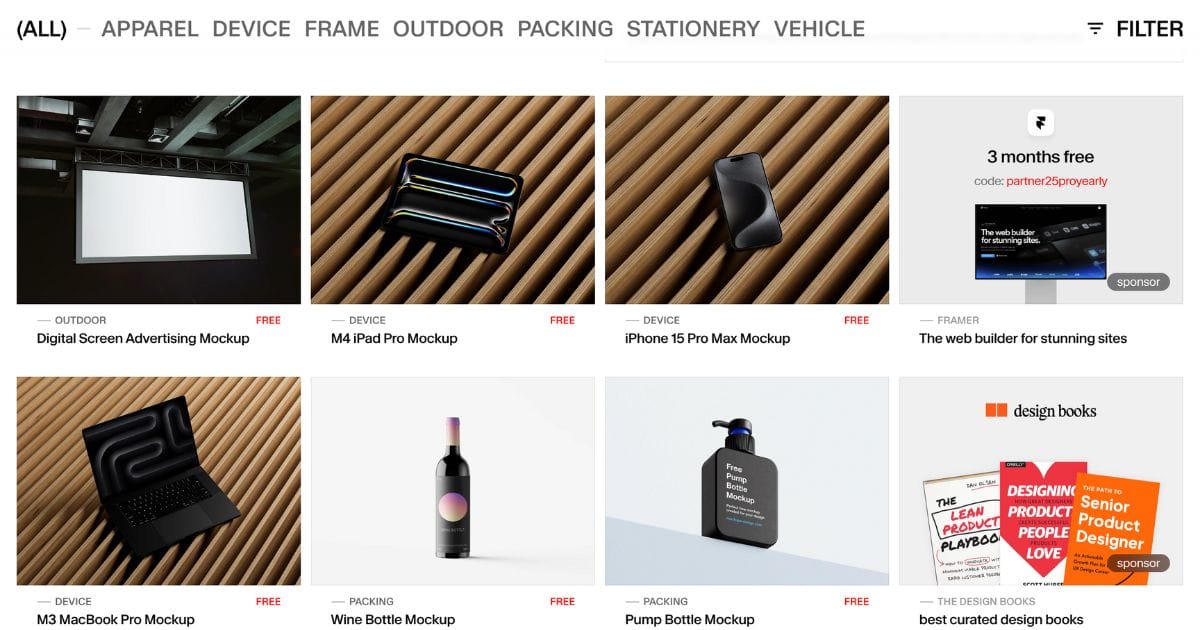
Every designer uses mockups, from branding to product design, packaging to billboards.
If you're skilled at design, you can curate a whole storefront of mockups to help designers and creators present their work in the best light (without needing to photograph the real thing).
You can offer different settings for lighting, contrast, shadows, and effects within the mockups to give your customers various options – check out YouTube for tutorials.
Once you build a collection you’re happy with, you can sell them on marketplaces like Whop, or your website.
- How easy is it? Easy if you're creating AI-made mockup but medium/hard if you're creating mockups in 3D environments yourself
- How much does it cost to start? From $0 to $20 (for generative AIs)
- How much can you earn? From $10 to $150+
- Potential challenges: Showing products realistically and attractively
- Skills needed: 3D design, product visualization, and technical rendering
101. Custom animated logos or intros for videos
Think of your favorite YouTuber’s intro – chances are, somebody was commissioned to create it.
From animations to 3D rendering, cartoons to type effects, you can create many kinds of intros, so long as you know your way around basic graphic and video editing software.
Set up an online storefront and promote your work on social media sites like Pinterest to show off your skills.
- How easy is it? Medium - creating animated logos requires animation and software (like After Effects) skills
- How much does it cost to start? From $23 per month (for software like Adobe After Effects)
- How much can you earn? From $50 to $200+
- Potential challenges: Creating smooth, professional-quality animations
- Skills needed: Animation, motion graphics, and brand design
102. Digital art challenges and prompts for artists
Illustration challenges are enormous on social media, but most are half-baked, offering no feedback, vague prompts, and zero community. You can fix that.
Create downloadable prompt packs to help other creatives get unstuck. Include daily or weekly drawing challenges, detailed briefs, creative exercises, and bite-sized tips (like color combos, composition hacks, or how to add texture).
Sell them on Whop and market through a social media funnel.
Bonus: if you host on Whop, you can build a private group chat for buyers to share progress, swap ideas, or get direct feedback from you, turning a simple product into a full-on creative community.
- How easy is it? Easy using AIs like ChatGPT
- How much does it cost to start? From $0
- How much can you earn? From $1 to $5 per challenge/prompt
- Potential challenges: Keeping challenges engaging over time and worth paying for
- Skills needed: Creative prompting, artistic knowledge, and community building
103. Stream overlays
If you watch online streams, you’ve seen those cool graphics around the streamer’s cam or during scene switches, yeah? They’re called stream overlays.
While some creators DIY, most pay artists to design overlays that boost their channel’s vibe and make them memorable.
You can find gigs on Upwork or offer your services through Whop.
Remember, creators want overlays that stand out, not some generic template. So bring your A-game.
- How easy is it? Medium if you're going to create static overlays and hard if animated
- How much does it cost to start? From $0 (for platforms like Canva or Gimp) to $23 per month (for software like Adobe Photoshop)
- How much can you earn? From $20 to $100
- Potential challenges: Keeping designs eye-catching, memorable, and on-brand
- Skills needed: Graphic design, streaming platform knowledge, and branding
104. Music sample packs
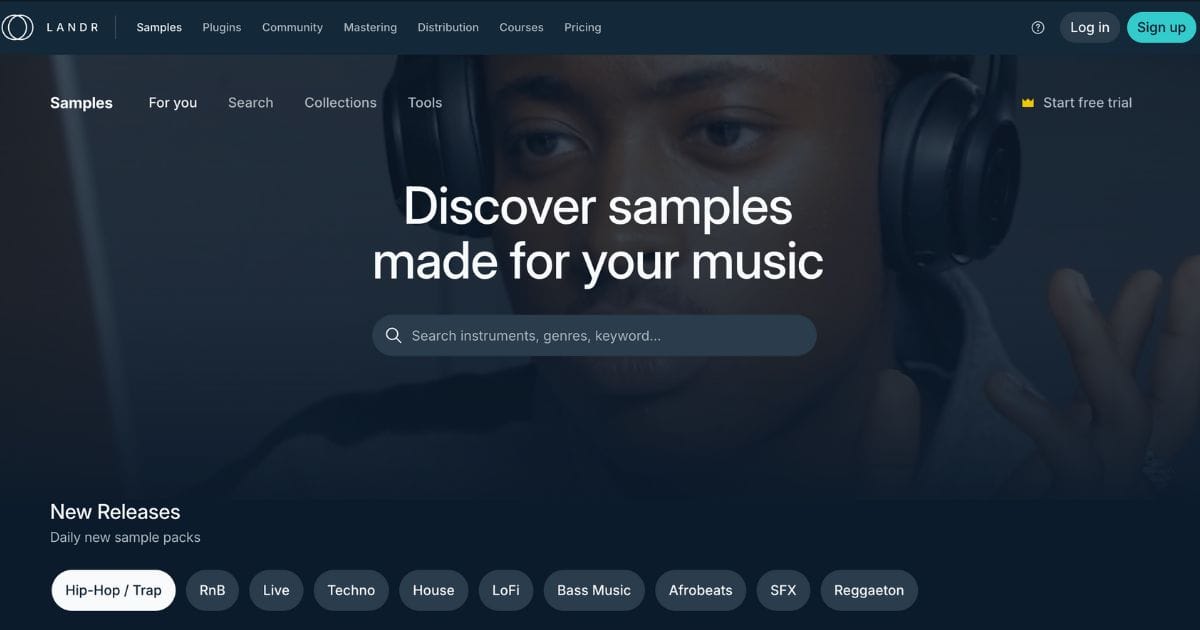
Samples can make or break a track. Take Havoc’s legendary sample from Kitty With the Bent Frame by Quincy Jones – that’s a big reason Shook Ones Pt. II by Mobb Deep became such a hip-hop classic.
Or look at Otis by Kanye and Jay-Z, which famously flipped an Otis Redding sample into pure gold.
If you’ve got the musical chops and tech skills, create and sell your own sample packs on platforms like Landr and Loopmasters.
- How easy is it? Medium - to be able to create unique sample packs, you need to have musical aptitude and audio editing skills (in most cases)
- How much does it cost to start? From $0 (for software like Audacity) to $23 per month (for software like Adobe Audition)
- How much can you earn? From $10 to $50
- Potential challenges: Ensuring samples are unique and high-quality
- Skills needed: Music production, audio engineering, and genre knowledge
105. Digital escape room kits
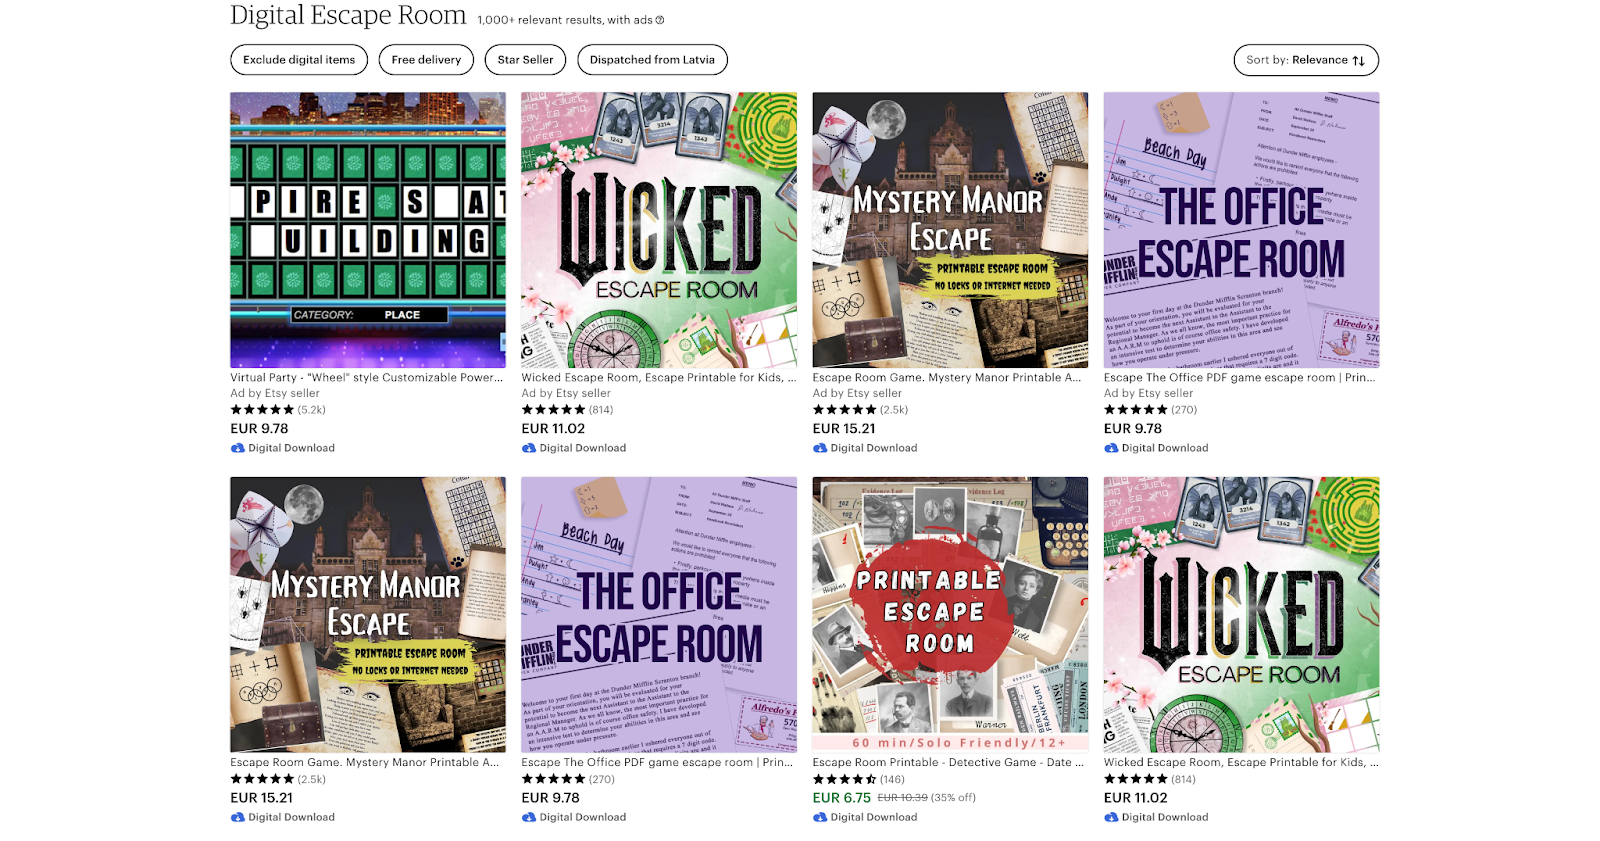
Want to give people the thrill of an escape room without leaving home? Digital escape room kits combine puzzles, codes, and immersive storytelling into a downloadable adventure.
They’re perfect for virtual team-building, family nights, or online game parties. Once you’ve made a kit you can sell it again and again. Add printable clue cards, countdown timers, and even optional leaderboards for extra fun. Seasonal or themed updates can keep your customers coming back for more.
- How easy is it? Medium - you’ll need to design puzzles, write the story, and package it digitally, but one kit can be reused indefinitely.
- How much does it cost to start? $0–$100 for design tools or web hosting if using an interactive format.
- How much can you earn? $10–$100+ per kit, with higher rates for corporate or multi-room packages.
- Potential challenges: Balancing puzzle difficulty to keep it fun, and producing enough variety to attract repeat buyers.
- Skills needed: Puzzle design, storytelling, and interactive media creation
106. Greeting videos
A text or card can be nice, but a personalized video? That’s unforgettable. Greeting videos let you deliver heartfelt, hilarious, or even over-the-top custom messages for birthdays, weddings, or milestones.
Whether you’re filming as yourself, in character, or with a creative theme, these videos give customers something unique they can’t find anywhere else. They’re also quick to make and easy to customize for different buyers.
- How easy is it? Easy to start - all you need is a camera, your personality, and an idea.
- How much does it cost to start? $0 if you already have a smartphone and free editing tools.
- How much can you earn? $20–$500+ per video, depending on complexity and your personal brand.
- Potential challenges: Standing out in a crowded market and maintaining quality for every custom request.
- Skills needed: Video recording, personality presentation, and basic editing
107. Animated greeting cards
Think traditional greeting cards, but with movement, music, and magic. Animated e-cards let buyers send personalized, interactive greetings for birthdays, holidays, weddings, and more.
Add names, photos, or short messages to make them feel one-of-a-kind. You can design them once and sell them forever, releasing seasonal collections to keep your store fresh year-round.
- How easy is it? Easy, because it requires basic animation or motion graphics skills, or ready-made templates.
- How much does it cost to start? Free with basic design tools, or up to $50 for premium assets.
- How much can you earn? $5–$50 per card, with bundles and holiday packs boosting sales.
- Potential challenges: Keeping designs fresh and finding niches that aren’t oversaturated.
- Skills needed: Animation skills, design software proficiency, and creative storytelling
108. Personalized astrology & birth-chart reports
Astrology is booming online, and buyers love anything that feels custom-made.
Personalized birth-chart reports blend mystical insight with technology, delivering detailed PDFs or interactive charts based on a customer’s date, time, and location of birth. Add interpretations, compatibility readings, and lifestyle tips to increase value — and give customers reasons to come back for more.
- How easy is it? Easy with astrology software or chart-generation tools, most of the process is automated.
- How much does it cost to start? $0–$50 for astrology tools or design templates.
- How much can you earn? $20–$200+ per report, with upsells for additional readings.
- Potential challenges: Standing out among free astrology resources and ensuring reports feel truly personalized.
- Skills needed: Astrology knowledge, chart interpretation, and personalized writing
109. Children’s books
Kids’ stories never go out of style. By creating your own characters and adventures, you can publish illustrated children’s books in digital format or through print-on-demand.
Parents, teachers, and gift buyers are always looking for fresh, engaging books - and you can grow your brand with sequels, coloring books, or educational spinoffs.
- How easy is it? Medium - advanced - requires writing, illustration, and formatting skills, or collaboration with artists.
- How much does it cost to start? $0–$200 depending on whether you create the art yourself or outsource it.
- How much can you earn? $5–$50+ per copy, with higher earnings for deluxe illustrated editions.
- Potential challenges: Marketing to stand out in a crowded children’s book market.
- Skills needed: Creative writing, illustration abilities, and child development understanding
110. Custom cursor packs and UI sound effects

Cursor packs and UI sound effects are niche, but profitable. They add personality to online experience. Cursor packs like animated pointers, hover effects, or themed cursors are designed with specific aesthetics to meet a website or app.
Meanwhile, UI sound effects include button clicks, notifications, error sounds, loading chimes, and transition swooshes.
Both are micro-products with low creation barriers but high demand from web designers, game developers, and no-code app builders who want to add detail without hiring sound designers or motion designers.
- How easy is it? Easy/medium - cursor design requires basic animation skills (After Effects, Figma); sound effects need audio editing (Audacity, GarageBand) or can be sourced and packaged
- How much does it cost to start? From $0 (with Audacity and free design tools) to $23 per month (for Adobe Creative Cloud)
- How much can you earn? From $5 to $50 per pack
- Potential challenges: Creating assets that work across different platforms and browsers
- Skills needed: Motion design for cursors, audio editing for sounds, understanding of web/app specifications
111. Discord bot templates
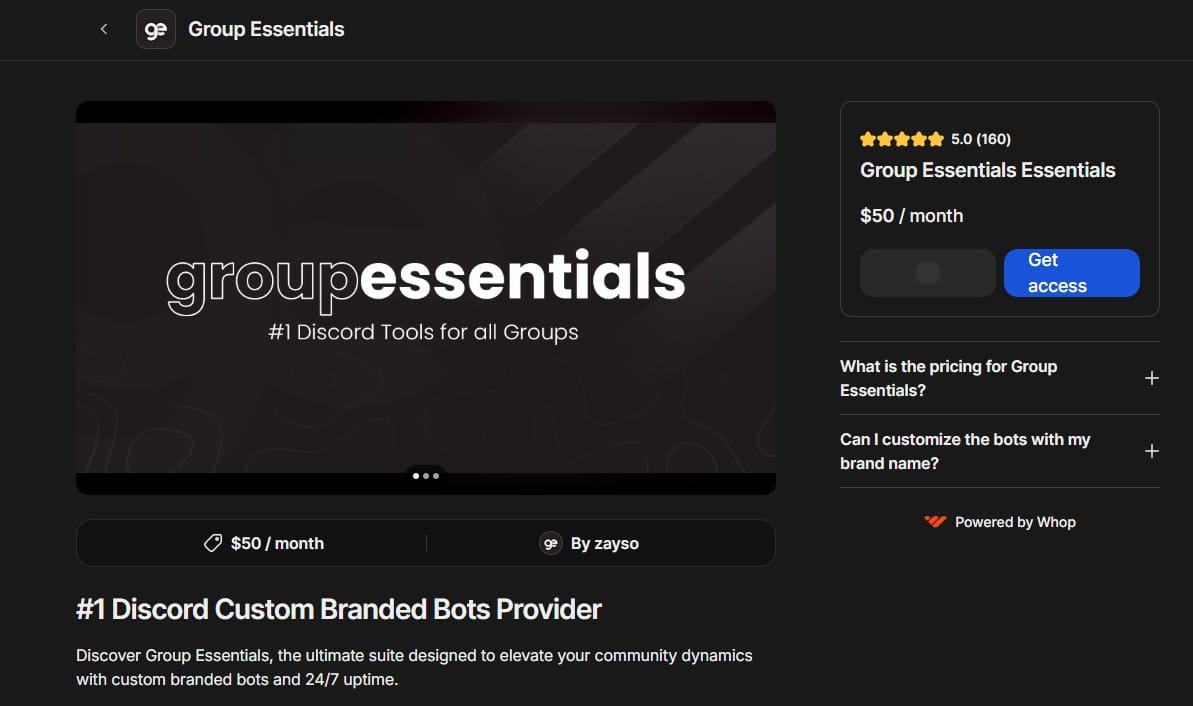
Pretty much all of the biggest Discord communities use bots, but the server owners don't necessarily want to set them up themselves. That's where you come in.
You can create pre-made Discord bots, or offer custom-branded bots, and set them up. You can also sell access to your bot on a monthly subscription basis, which is really the best way to make passive income. Make it, set it up, maintain it, collect the cash.
Some of the most common bot use cases include auto-moderation, engagement tracking, welcome sequences, and game-related bots. But the more you can niche down, the more you can charge for a bot that can do it all.
The best way to make money like this is to set up your own whop. Offer video tutorials, live support, and custom upgrades.
- How easy is it? Medium - requires basic coding knowledge, but many no-code bot builders now exist
- How much does it cost to start? From $0 with free hosting options like Replit
- How much can you earn? $20-$500+ per template, with recurring revenue if you prefer that
- Potential challenges: Keeping bots updated with platform API changes
- Skills needed: JavaScript/Python basics, bot framework knowledge, and community management understanding
112. Community server templates
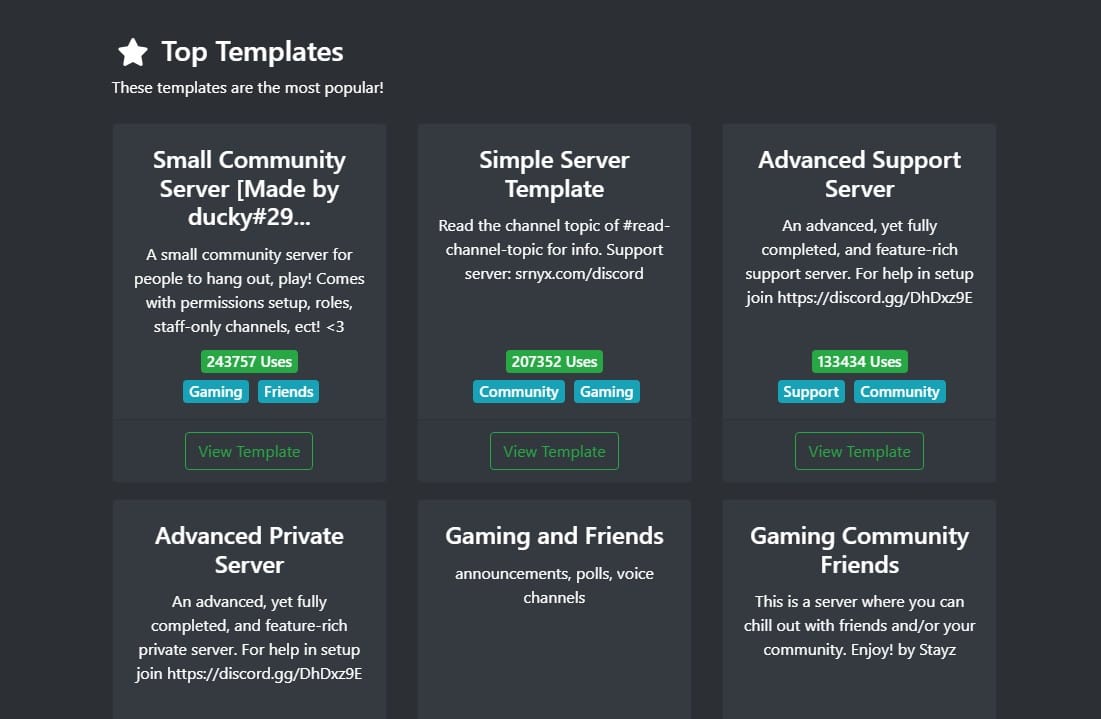
This one is kind of similar to the one mentioned above, but it's a lot more chill. Instead of making bots for Discord servers (which requires some basic coding knowledge), you can make whole plug-and-play server templates. And yes, they do sell.
Setting up a Discord server can be a pain. Digging through roles, permissions, channel clutter, and so on takes hours. If you're good at it, though, it's less of a chore and more of a moneymaker.
A great kit can include channel + category layouts, role hierarchies, permission presets, onboarding messages, rules templates, auto-mod settings, welcome messages, reaction role copy, and even ready-made announcement + event templates. Bonus points if you bundle niche versions (gaming, fitness, study servers, creator communities, coaching, and so on).
You can sell these as a one-time thing or add a premium tier for managing someone else's servers for them or introducing regular updates. Both options are easy to do with Whop.
- How easy is it? Easy - you just need to be good at using Discord
- How much does it cost to start? $0
- How much can you earn? From $10 for basic kits up to $100+ for specialized kits
- Potential challenges: Being able to stand out from other people who sell templates
- Skills needed: Discord know-how, community structure instincts, and attention to detail
113. PLR and MRR bundles
Time flies by, and the hype around PLR (Private Label Rights) and MRR (Master Resell Rights) digital products doesn't seem to be dying down. While this hustle isn't in its infancy anymore, you can still get in on it and earn a nice passive income with a bit of an initial time investment.
You create or buy a digital product, such as a set of Notion templates, planners, social media post templates, or just about anything else, and sell the legal rights for the buyer to rebrand it and resell it as their own. It's the ultimate plug-and-play business model.
- How easy is it? Easy if you're reselling an existing MRR product; easy to medium if you're designing it yourself
- How much does it cost to start? $0 to create your own from scratch
- How much can you earn? From $5 to $500+ per bundle, depending on the product
- Potential challenges: Standing out in a saturated market and building a brand
- Skills needed: Digital marketing, basic graphic design, trend awareness
114. TTRPG adventures and game content
Tabletop roleplaying games like Dungeons & Dragons are bigger than ever. They're loads of fun for everyone involved, but one person in particular gets to do a lot of the work involved in setting them up: the person who is running them.
Those people are often hunting for ready-made content to set up game night without a million hoops to jump through. Maybe it's a creative crisis, or maybe just a lack of time; one way or another, if you know your way around a game system, you can make money with these fun digital products.
You can create one-shot adventures, battle maps, character sheets, encounter packs, and even homebrew monsters or items.
The buyers here can be really loyal, too, which is why setting up a subscription service can get you some nice passive income.
- How easy is it? Easy/medium - writing a solid one-shot takes game knowledge and good structure, but no special software
- How much does it cost to start? From $0 with free layout tools and map-making software like Dungeondraft's free alternatives
- How much can you earn? From $5 to $100 per product, with bundles and ongoing subscriptions pushing that higher
- Potential challenges: Standing out in busy marketplaces and keeping content balanced across player levels
- Skills needed: Deep knowledge of a game system, creative writing, and clean document formatting
By now, your brain’s probably buzzing with digital product ideas ready to go.
If you’re pumped to get started, hit the button below and start selling on Whop today.
Not quite ready? I get it – keep reading for more tips on creating and selling digital products like a pro.
How to create digital products

Ready to start selling? Here’s how to create digital products.
1. Identify your audience
Before creating a digital product, figure out exactly who you’re making it for. It’s way easier to sell if you know your audience.
Don’t just say “women” or “students.” Get specific. For example: “20-25-year-old women who love yoga but don’t have the time or cash for weekly classes.”
Ask yourself:
- How old are they?
- Where do they live?
- What do they like?
- What daily problems bug them?
- What are their biggest struggles?
- Why would they want your product?
Getting this clear helps you make stuff people actually want—and nails your marketing so it hits the right crowd.
What is a target persona and how do you create one?
2. Brainstorm product ideas
Now that you know who you’re creating for, start thinking about what to make.
Did anything on this list catch your eye? Go with a format you actually vibe with (if being on camera isn’t your thing, skip the video courses and masterclasses).
But remember, it’s not just about you. Your audience’s needs matter most. Think about their challenges and interests. Use those to brainstorm products that fit them perfectly.
Like, busy 20-25-year-old women who can’t hit yoga classes might love a membership with weekly online sessions they can squeeze in anytime.
Check out which digital products are in demand.
3. Create your digital product
Alright, you’ve got your audience and your idea. Now let’s build.
If it’s a one-off product like a masterclass or an app, map out your plan first. Who can help? What research do you need? Don’t wing it.
Use online tools to make your digital product look slick and professional. Some faves:
- Canva
- Creative Market
- Loom
- Notion
Also, figure out where your product will live. Do you need a whole website, or can you sell on existing platforms like Whop, Creative Market, or Etsy?
4. Promote your digital product
Your product’s ready, now it’s time to make some noise.
If you’ve already got followers, awesome. If not, no worries. Most creators start with zero.
Focus on just one or two platforms where your audience actually hangs out. For example, those yoga classes for 20-25-year-old women? TikTok and Instagram are your best bets.
Here are some easy ways to promote a digital product:
- Drop Instagram Reels and Stories with links
- Create a freebie (lead magnet) to grow your email list
- Share in relevant Facebook groups
- Run social media ads
- Upload your product to searchable marketplaces
- Build a website and write content to get found on Google
Try stuff, track what works, and double down on it. Less is more.
5. Monitor and learn from your results
The best way to create a killer digital product? Trial, error, and learning as you go.
You probably won’t make millions on day one, and that’s totally normal.
But if you listen to your customers, tweak your product to solve real problems, and keep improving, you can build a solid passive income stream.
Who knows? Maybe millions.
Where to sell digital products
Not trying to flex, but Whop is the no-brainer for selling digital products. Whether it’s courses, ebooks, templates, memberships, or community access, you can build and sell it all here.
Ready to get started? It’s really easy to sell your digital products on Whop:
- Create an account on Whop.com
- Create your own whop (this is a hub for your digital products and community)
- Add apps to your whop for the products that you want to sell (you can add as many or few as you like)
- Manage your whop products by setting up access settings (private, public, free, or paid)
- Go through the handy launch checklist and voila! Your digital product is ready to go out into the world
Learn how to create your whop
How to market digital products
The hardest part of selling a digital product isn’t coming up with your idea or even creating it. It’s getting people to actually buy it, and people are very interested in digital products. According to Mastercard, digital product transactions rose nearly 70% from 2022 to 2024.
If you don’t have a big audience hyped and ready, you’ve got to put in the work to promote your product/s.
Here’s how to start marketing like a pro:
- Run paid ads: Get quick eyeballs by running ads on social media platforms where your audience hangs out.
- Partner with affiliates: Team up with influencers, big or small, to promote your product in exchange for a cut of each sale. Affiliate marketing = more reach, less hassle.
- Collect testimonials: Real reviews and social proof go a long way. Share them on socials and your product page to build trust.
- Optimize your website: Use smart keywords and SEO tricks to get your product showing up in search results when people are looking for what you offer.
- Use social media: Build your presence on the platforms you vibe with. Post engaging content, and always drop your product link in captions and your bio.
- Film YouTube videos: Tutorials, walkthroughs, or behind-the-scenes content can hook viewers and drive them straight to your product.
- Start an email newsletter: Build real connections by collecting emails and sending your audience useful, relevant updates that keep them coming back.
- Sell on popular marketplaces: Whop already has customers browsing for stuff just like yours, so apply for the Discover page as soon as you launch to get your product in front of them.
Start selling digital products today with Whop
Listen, digital products aren't slowing down anytime soon.
More people are ditching physical goods for digital experiences, and creators who tap into that shift are earning serious passive income without the overhead or the hassle.
On Whop, the average creator makes over $7,300 a month selling digital products and services — that's more than $2,100 above the median monthly income reported by the Bureau of Labor Statistics.
Whop has everything you need in one place. You can create, host, and deliver your products, process payments, and reach a built-in audience of buyers — without extra tools, plugins, or platforms.
If you want to make real money with digital products and actually keep things simple? Whop is the move.
Digital product FAQs
What are digital products?
Digital products are items you sell or share online — things people download, stream, or access on a device. Examples include ebooks, templates, software, courses, memberships, and apps.
Why sell digital products?
Because they’re profitable, scalable, and low-maintenance — you create them once, and sell them forever.
What are the different types of digital products to sell?
Popular options include ebooks and guides, templates and planners, online courses and masterclasses, memberships and communities, and software or tools.
How much money can you make selling digital products?
Earnings vary depending on your effort and niche. On Whop, creators earn an average of around $7,300 a month. Beginners often make $100 to $1,000 per month, while advanced creators can earn $5,000 to $150,000 or more.
What are the easiest digital products to sell for beginners?
The easiest products for beginners are Notion templates, digital planners, printables, social media templates, and short ebooks. They’re quick to create and simple to sell.
Do I need technical skills to create digital products?
No. Most digital products can be made using easy tools like Canva, Notion, or Whop. Technical skills are only needed for building software or apps.
How long does it take to create and sell a digital product?
You can create simple products like planners or templates in a few days, while courses or software might take a few weeks or months. Many creators make their first sale within 24 to 48 hours of launching.
Can you really make passive income with digital products?
Yes — once created and automated, digital products can earn while you sleep. Expect upfront setup and light ongoing updates or marketing.
Do I need an audience before selling digital products?
No — platforms like Whop, Etsy, or Gumroad let you start without followers. You can build your audience as you sell through content and SEO.
Legal and compliance considerations for selling digital products
When selling digital products, you need to understand the legal landscape to protect your business and stay compliant. Expand each section below to see what you need to be on top of.
Tax obligations
- Sales tax: Digital products are subject to sales tax in most US states, with rules varying by location.
- International VAT: EU customers require VAT collection on digital sales—use platforms that handle this automatically.
- Income reporting: Track all revenue and expenses for accurate tax filing, especially across multiple platforms.
- Business registration: Consider forming an LLC or corporation once revenue becomes sustainable.
Intellectual property protection
- Copyright your work: Register original content (ebooks, courses, artwork) for stronger legal protection.
- Trademark consideration: Protect brand names and logos if building a recognizable business.
- Usage rights: Clearly define personal vs. commercial use for your products.
- Attribution requirements: State if customers must credit you when using templates or assets.
Terms of service and policies
- Refund policy: Digital products often follow stricter or different rules than physical goods.
- Usage restrictions: Specify prohibited uses (reselling, redistributing, claiming ownership).
- Disclaimer clauses: Include disclaimers for educational, advisory, or health-related content.
- Privacy policy: Required if you collect personal information like email addresses.
Platform compliance
- Marketplace rules: Each platform (Etsy, Amazon, Gumroad, etc.) has unique seller requirements.
- Payment processing: Learn chargeback policies and fraud protection measures.
- Content restrictions: Avoid prohibited categories (adult content, copyrighted works).
- Age restrictions: Some platforms require sellers to be 18+ or have parental consent.
International considerations
- Export regulations: Certain software or encryption tools may face export restrictions.
- Data protection: GDPR compliance is required for EU customers, even for US-based sellers.
- Consumer rights: International buyers may have stronger refund protections.
- Currency regulations: Some countries restrict digital payment processing.
Content liability
- Accuracy disclaimers: Essential for educational, financial, or health-related content.
- Professional boundaries: Don’t offer licensed professional services unless qualified.
- User-generated content: Moderate responsibly if you allow community contributions.
- Accessibility compliance: Consider ADA compliance, especially for educational products.
Quick compliance checklist
- Set up a proper business entity and tax tracking
- Create clear terms of service and refund policies
- Register copyrights for original content
- Understand sales tax obligations in your markets
- Include appropriate disclaimers and limitations
- Choose platforms that handle international compliance
- Keep records of all transactions and customer communications
- Consider professional liability insurance if offering advisory content
⚖️ Important note: This is general guidance only. Always consult qualified legal and tax professionals for advice specific to your situation, especially before launching high-revenue products or expanding internationally.