
The Whop API lets you create checkout links, embed payments on your site, charge customers off-session, and more. Here's how to get started.
Key takeaways
- Whop API enables developers to programmatically manage the entire payment lifecycle from checkout to refunds.
- You can accept payments through checkout links or embedded checkouts integrated directly into your website.
- Saved payment methods allow businesses to automatically charge customers off-session for recurring revenue models.
Whop API can be used to programmatically accept payments, issue refunds, handle disputes, create invoices, and send payouts.
The API system handles the entire payment lifecycle of your business, whether you're running your business on Whop or using it as a payments service.
In this guide, I'm going to walk you through how to get your API keys, create checkout links, embed checkouts on your website, save payment methods, and charge customers off-session using the Whop API.
Getting started with the Whop API
Getting started with the Whop API is easy, but just in case, let's go over some basics:
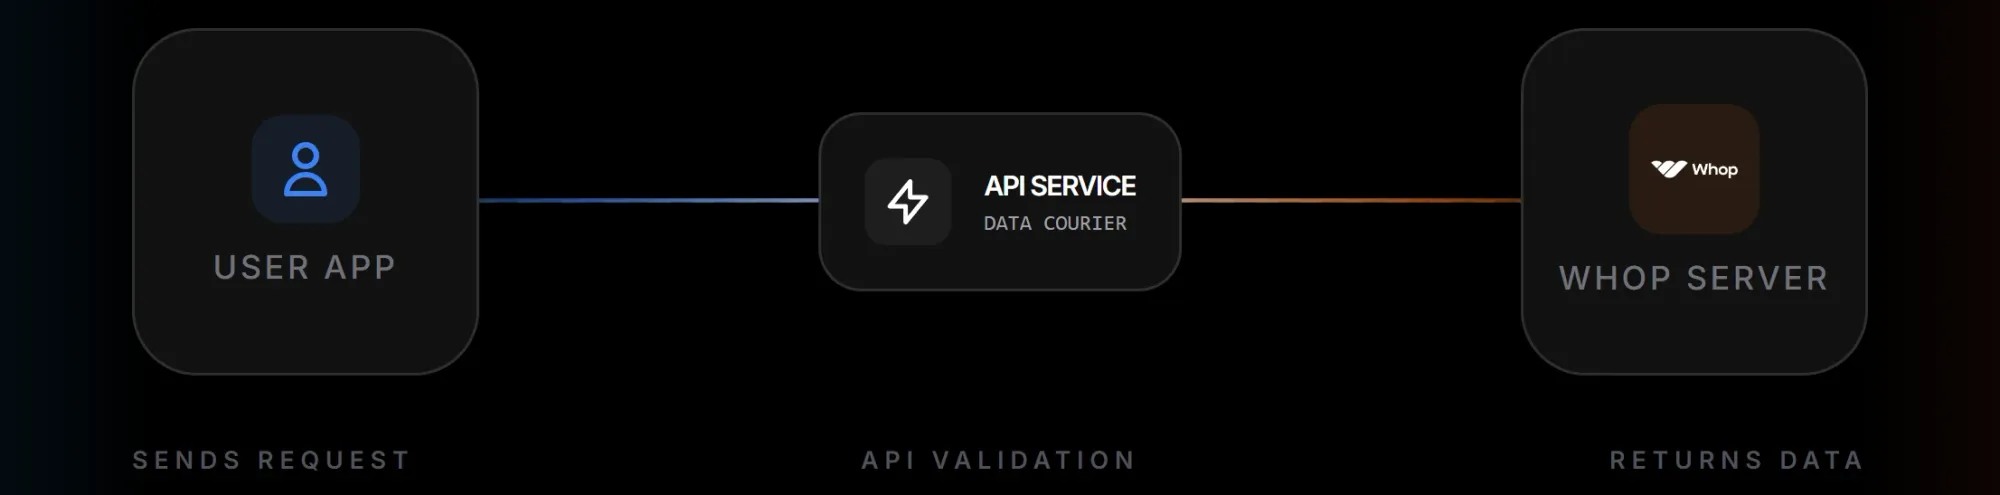
- What is an API? An API is the courier between you or your system and the server, which is Whop in this case. You tell the courier (API) what you want (like the details of a plan on your whop), it goes to the server and retrieves the data, and brings it back to you.
- What does "programmatically" mean? It means using code to complete actions instead of going on Whop.com, clicking buttons, and manually checking everything.
Using the Whop API makes it easy for developers and sellers to automate everything, customize the payment lifecycle of their business, and integrate the Whop payments into their existing systems.
Here are some key things you need to know before using the Whop API:
- The base URL of the Whop API is https://api.whop.com/api/v1. This is where you'll send your API calls.
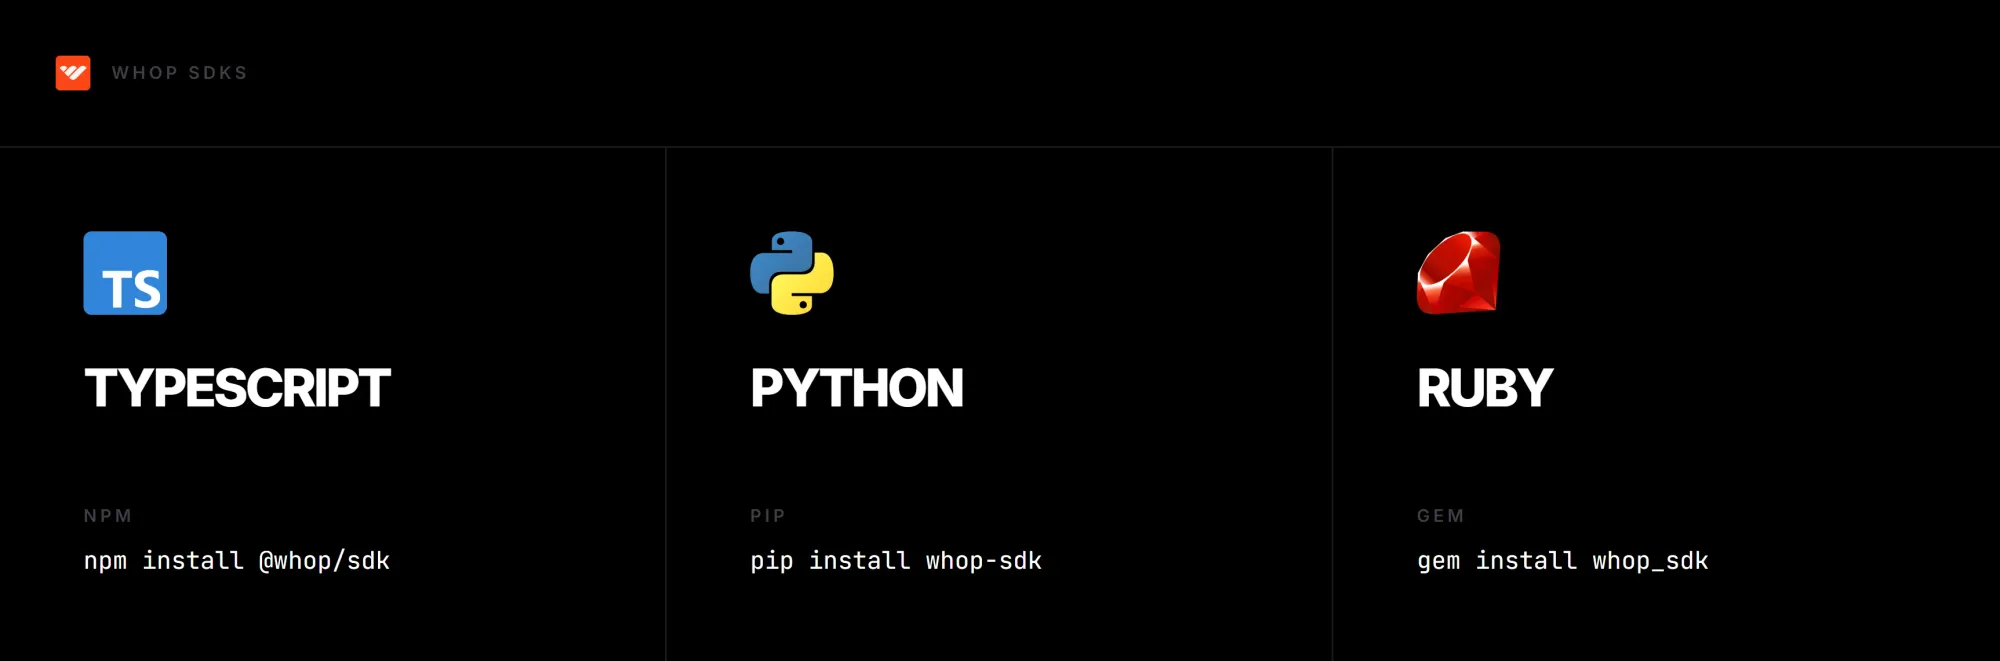
- There are three Whop SDKs (software development kits) you can use: JavaScript/TypeScript (can be installed via
npm install @whop/sdk), Python (viapip install whop-sdk), and Ruby (viagem install whop_sdk). They help you make API calls programmatically. - There are two types of API keys you're going to use: Company API key for accessing company data, and an app API key for accessing data across all the companies that use your Whop apps.
Before making API calls, get your company API key:
- Go to the Developer section of your Whop dashboard
- Find the Company API keys section at the top of your screen
- Click the Create button at the top right and customize its settings
- Click Create at the bottom right of the popup
Here, you'll see all the details about the API key you'll work with. You can customize its name, manage its permissions, and reset the key, and copy it to your clipboard.
You can use your company API key to make API calls regarding your company, like getting the details of a checkout link or plans.
As a rule of thumb, you should never store your API keys in places where other people can access them. The best practice is to always store them in an environment file or table - never hard-code them (writing the key directly in your code) into your codebase.
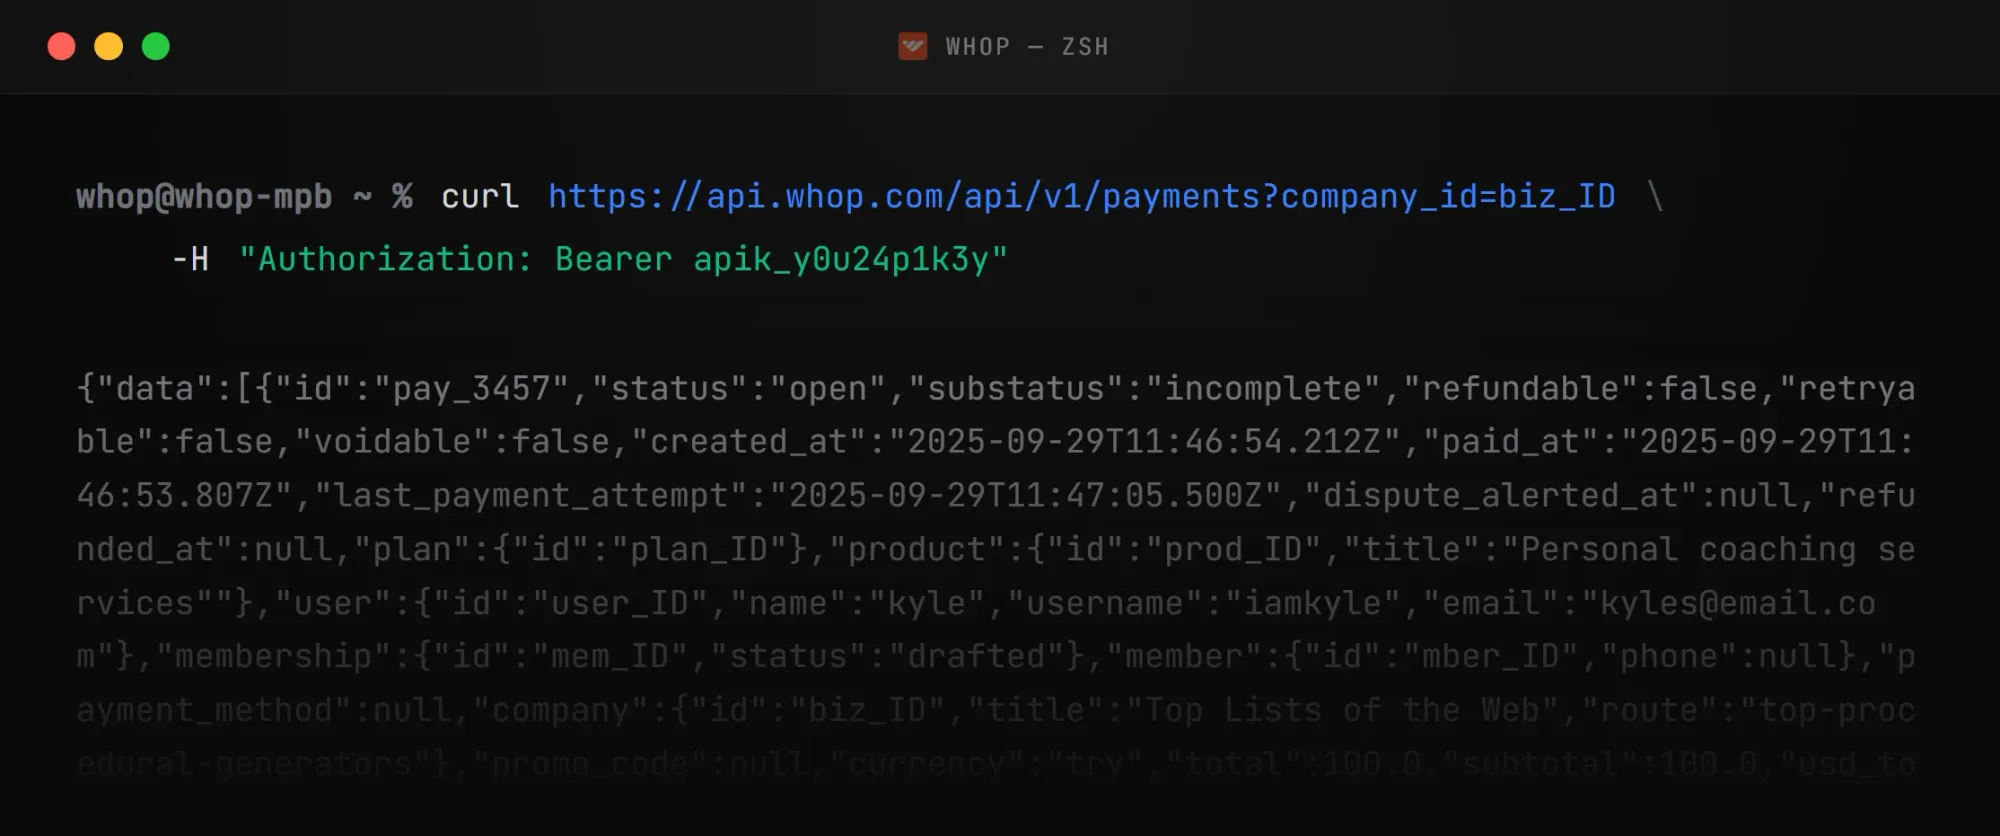
Now that you have your API key, let's give it a try to see if it's fine. First, make a cURL (a command line tool for making HTTP requests) call to get payment options and their user information. You can make the cURL call in any command line you have, whether it's the macOS terminal or PowerShell on Windows. After pasting the code below into your terminal or command line, you're going to have to replace two things:
- The
YOUR_BIZ_IDpart with your company ID - go to the Whop dashboard, make sure you're viewing the right company using the selector at the top left, and copy the part of the URL starting withbiz_ - The
YOUR_COMPANY_API_KEYpart with your company API key you got earlier
curl https://api.whop.com/api/v1/payments?company_id=YOUR_BIZ_ID \
      -H "Authorization: Bearer YOUR_COMPANY_API_KEY"
If you see a long JSON response that details your plans, their users, and other information, all your keys are correct and you're good to go.
If you see a response with the message "Authentication failed," however, you should double check your business ID and your company API key.
If you'd rather skip the terminal or command line, you can test the API directly using the API Explorer in the Whop documentation. Go to any API Reference page in the docs and click the "Try it" button to open an interactive testing ground for that endpoint.
cURL is useful for testing, but SDKs make it easier to integrate Whop into your codebase. To get the same result, but using JavaScript/TypeScript, you can use the snippet below after changing the placeholders WHOP_API_KEY, app_xxxxxxxxxxxxxx, and biz_xxxxxxxxxxxxxx:
import Whop from "@whop/sdk";
const client = new Whop({
  apiKey: process.env["WHOP_API_KEY"], // This is the default
  appID: "app_xxxxxxxxxxxxxx", // Only required when building an app
});
const page = await client.payments.list({ company_id: "biz_xxxxxxxxxxxxxx" });
const paymentListResponse = page.data[0];
console.log(paymentListResponse.id);
You should always use secure environment tables and files to store and reference to your API keys.
If you want to see more examples of SDK initialization (like Python and Ruby), check out the Getting started page of our developer documentation.
Accepting payments using the Whop API
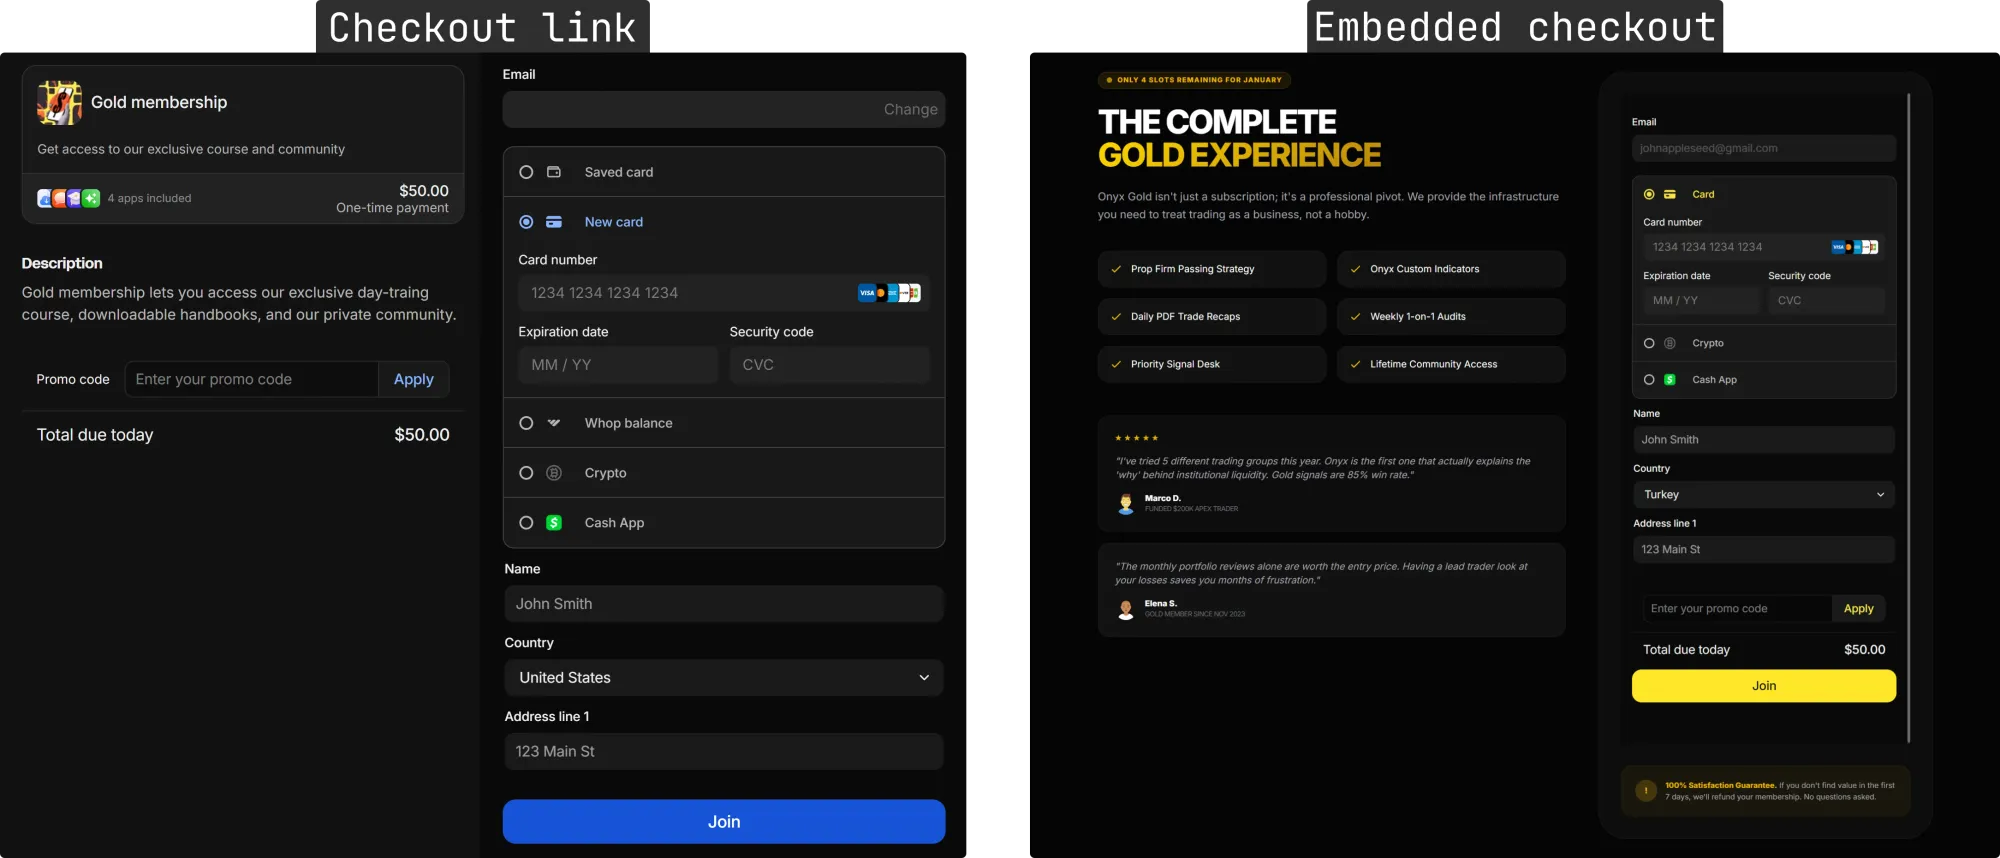
There are two main ways to accept payments using the Whop API:
- Checkout links - create plans and share the URL of the plan with your customers
- Embedded checkouts - create checkout boxes in your website and let customers complete purchases from your site
Embedded payments: ultimate guide for platforms, marketplaces and SaaS
Creating and using checkout links
Checkout links are URLs that display payment pages. When you send a customer your checkout link, instead of going through a marketplace page (like Discover), the user directly sees a checkout page.
To create a new checkout link, you can use the create method and pass in some customizable details for your checkout link. The company_id and product_id fields are required so that the API knows which company and its product to create the checkout link for.
As I mentioned before, you can get your company ID by going into your dashboard and copying the part of the URL starting with biz_. To get the product ID, follow the steps:
- Go to the Products section of the Whop Dashboard
- Click on the context menu button (three-dot button on the right-side of the product)
- Hover over the Details button. This will display the ID of the product
- Click on the product ID to copy it to your clipboard
Now that you have the essentials, here's the code snippet you can use to create a checkout link via the API (keep an eye out for the comments in the snippet starting with //):
import Whop from '@whop/sdk';
const client = new Whop({
  apiKey: process.env['WHOP_API_KEY'], // Replace with your company environment key for your API
});
const plan = await client.plans.create({
  company_id: 'biz_xxxxxxxxxxxxxx', // Replace with your business ID
  product_id: 'prod_xxxxxxxxxxxxx', // Replace with your product ID
  plan_type: 'renewal', // Options: renewal, one_time
  currency: 'usd', // Replace with the currency you want to use
});
console.log(plan.id);
The response you'll get from running this code will include the purchase_url data, which is the checkout link. There are many more parameters you can include in your request like billing_period, description, image, and stock. To see all available parameters and a list of the response lines you're going to get, check out the Create plan page of our developer documentation.
Another way of getting checkout URLs is using the Create checkout configuration action via the API. Unlike the Create plan action, which requires you to get a product ID, the Create checkout configuration action can create its own plans on the fly and supports more customization like metadata campaigns and order IDs.
Creating embedded checkouts
If you're sending checkout links to your customers via emails or other systems, checkout links are enough for you. However, if you have a website and want to directly embed a Whop checkout into it, you should create an embedded checkout.
Lowering the number of clicks is essential for conversion and with embedded checkouts, your customers never leave your website. The best part? They're easy to create.
The two main ways of embedding a Whop checkout into your webpages are using React components or a basic <script> tag. No matter which option you prefer, you're going to need a plan ID.
You can get a plan ID by following these steps:
- Go to the Checkout links section of the Whop Dashboard
- Click on the context menu button (three-dot button on the right-side of the checkout link)
- Hover over the Details button. This will display the plan ID of the checkout link
- Click on the plan ID to copy it to your clipboard
Embedded checkouts in React setups
Now that you have the plan ID, here's how to create an embedded checkout in your React setups. First, download Whop's checkout package using the following npm command - this allows you to easily create checkout embeds with an iframe:
npm install @whop/checkoutAfter installing the package, you can move on to adding the iframe to your setup. First, in your React project, import the checkout element by adding the line below at the top of your file:
import { WhopCheckoutEmbed } from "@whop/checkout/react";Then, add the iframe anywhere on the website you want, like the code snippet below. After pasting, make sure to customize the planId and returnUrl parameters:
- Replace the
plan_XXXXXXXXXpart with the plan ID you got in the previous steps. - Replace the https://yoursite.com/checkout/complete URL with the URL you want to redirect your customers after they complete their purchase
export default function Home() {
  return (
    <WhopCheckoutEmbed
      planId="plan_XXXXXXXXX"
      returnUrl="https://yoursite.com/checkout/complete"
    />
  );
}
You can add additional controls to your embedded checkout like getAddress to require customers to enter their address or configure properties to change the theme of the checkout, attach an affiliate code, hide the price, and more.
To learn more about additional controls and properties you can add to your embedded checkout on React projects, check out the React setup section of the embedded checkout guide in our developer documentation.
Embedded checkouts in other websites
If you're not using a React setup, you should follow different steps, but they're just as easy. First, add the checkout loader script to the <head> of your webpage. This will allow you to call the Whop checkout with a simple <div>:
<script
  async
  defer
  src="https://js.whop.com/static/checkout/loader.js"
></script>
Once you've added the script to the webpage, it's now time to mount the checkout. You can do so by pasting the code snippet below - make sure to replace the plan_XXXXXXXXX with your actual plan ID and the https://yoursite.com/checkout/complete with the URL you want to redirect your customers to after successful payment:
<div
  data-whop-checkout-plan-id="plan_XXXXXXXXX"
  data-whop-checkout-return-url="https://yoursite.com/checkout/complete"
></div>
Just like the React setup, you can add more programmatic controls like attaching an ID to the checkout container or getting their emails of your customers and configuration attributes like checkout themes or accent colors.
To find out all the options you have for customizing your embedded checkouts, check out the Other websites section of the embedded checkout guide in our developer documentation.
Saving payment methods for later
Some businesses use a recurring pricing system - like Netflix, ChatGPT, and YouTube Premium. These platforms don't require you to open up the platform every month to manually renew your membership, they automatically charge customers off-session.
To do this, they need customers to set up their payment information - and you can do the same thing with the Whop API. I mentioned checkout configurations before, and you can use it to save payment information of your customers:
const checkoutConfiguration = await client.checkoutConfigurations.create({
  company_id: "biz_XXXXXX", // Replace the string with your business ID
  mode: "setup", // Don't charge, just save
  redirect_url: "https://yoursite.com/checkout/complete", // Redirect your customers after action
  metadata: {
    customer_id: "my_internal_user_id" // Replace the user ID argument with the actual user ID
  }
});
Selecting setup as the mode makes the action just save the payment information and link it with the user ID (which you can get from several actions like retrieve user).
After creating the checkout configuration, you should direct the customer to the checkout page. You can either redirect them to the purchase_url the API will return to you with:
window.location.href = checkoutConfiguration.purchase_url;Or you can use an embedded checkout by following the steps I covered earlier.
After the user saves their payment method, your system needs to be aware of it - this is done via webhooks. You can think of them as automated notifications from Whop that let your system know when actions are made. In this case, Whop will send the setup_intent.succeeded webhook to the webhook URL of your choice.
The webhook message contains some data like the payment_method.id, which you need to charge users in the future. To learn more about the webhook lifecycle on Whop, check out the Webhooks section of our developer documentation.
Charging users off-session
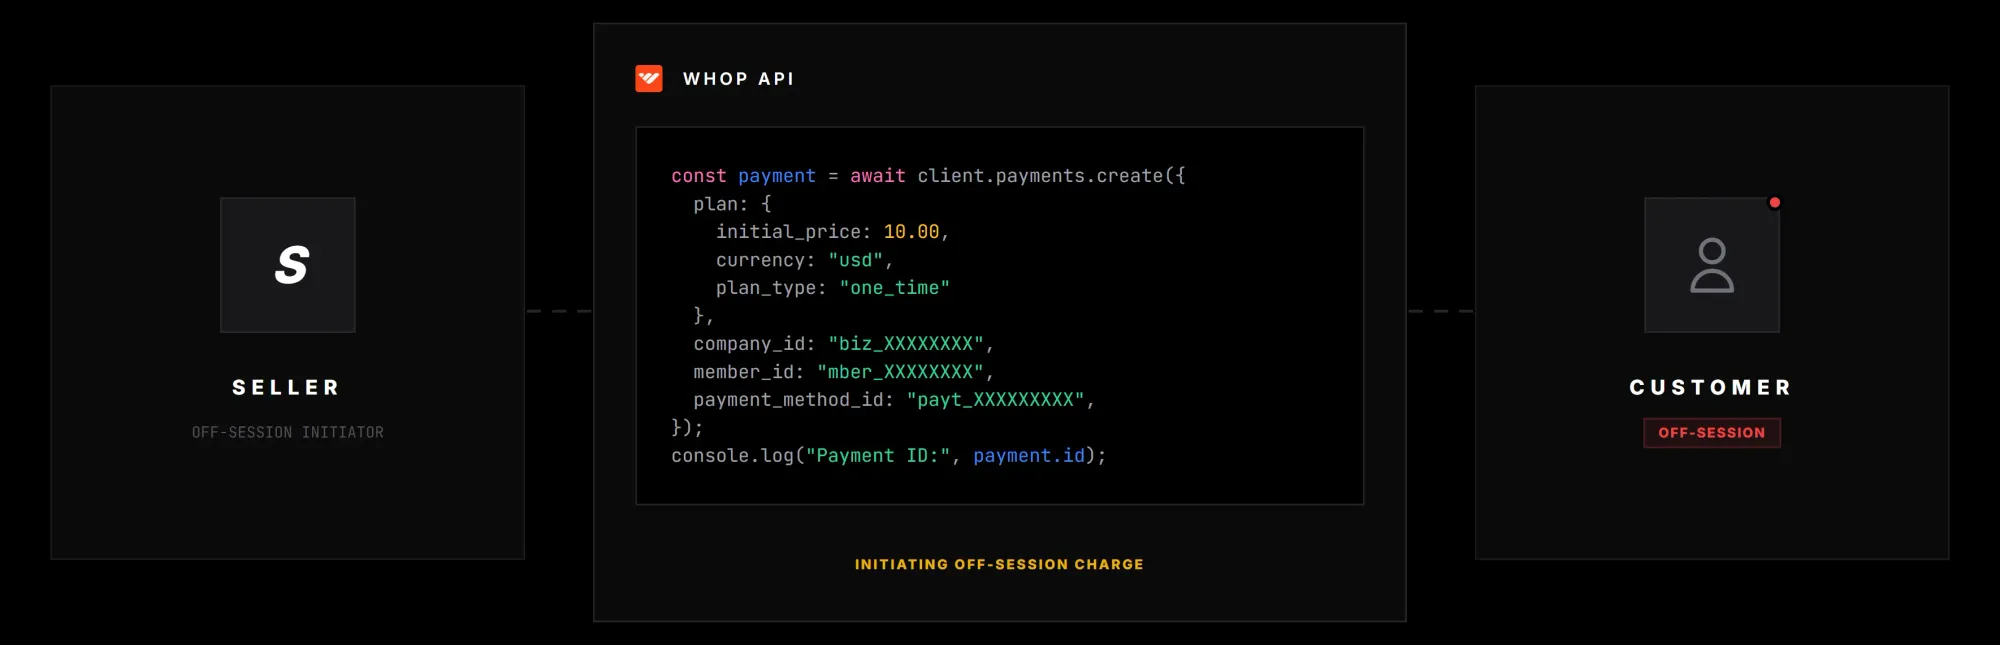
If you have products or setups that require you to charge your customers off-session, like when they aren't actively on your website and following a bunch of steps to make a purchase, the Create payment action in the Whop API is perfect for you.
The Create payment action lets you use an existing plan or create a new one on the fly and charge your users whenever you want. Since I covered saving payment methods for later, you have the information you need to charge users.
The code you'll need to use is as follows:
const payment = await client.payments.create({
  plan: {
    initial_price: 10.00,
    currency: "usd",
    plan_type: "one_time"
  },
  company_id: "biz_XXXXXXXX",
  member_id: "mber_XXXXXXXX",
  payment_method_id: "payt_XXXXXXXXX",
});
console.log("Payment ID:", payment.id);
But running this code doesn't mean the charge is successful. Whop returns a payment object with the status "processing," and then attempts to charge the card and waits for the card network to process the payment.
Depending on the result, Whop sends one of two webhooks:
- If the charge succeeds, you'll receive
payment.succeeded- use this to fulfil the order and return a 200 status to Whop, confirming you received the webhook - If it fails, you'll receive
payment.failed, which you can then use to let your member know via email or a notification
Ready to accept payments with the Whop API?
On top of the things I've talked about in this article, the Whop API also lets you manage withdrawals, promo codes, disputes, refunds, and interact with Whop apps. If you want to learn more, head to the Whop documentation to see all the capabilities of the Whop Rest API.
And if you're ready to give it a try, go to your Whop dashboard, grab your API keys, and start making requests.


