Learn the art of creating multi-level membership tiers on Discord. From role creation to permissions and integration with Whop, our guide covers it all. Get started now!
Key takeaways
- Multiple membership tiers let customers pay only for features they need, expanding your server's appeal to more buyers.
- Discord roles and private categories control which content each membership tier can access through permission settings.
- Whop automates role assignment when customers purchase, making tiered Discord memberships simple to set up and manage.
As you may already know, setting up a membership system to monetize your Discord server can be a very profitable idea. However, where many Discord server owners fall short in this industry is with membership tiers. Many people will only set up one membership tier and leave it at that, but setting up a multi-tier system can benefit both the server owner and the consumer. Multiple membership tiers allow consumers to pay only for what they need to access, compared to a larger price when they only need a few of the features offered.
Simply put, multiple membership tiers can make your Discord server appeal to more people, potentially boosting your member count. But if something seemingly simple can make such a big difference, why doesn’t everyone do it? Well, they likely haven’t thought about it or don’t understand how to do so. Fortunately, thanks to the power of Whop, we can set up multiple membership tiers for our Discord server in minutes.
Creating roles in Discord
Members of your Discord server on different membership tiers will need different roles so you can fine-tune which channels/categories they can access. The first step is to create the roles that your members will be assigned when they access your Discord server.
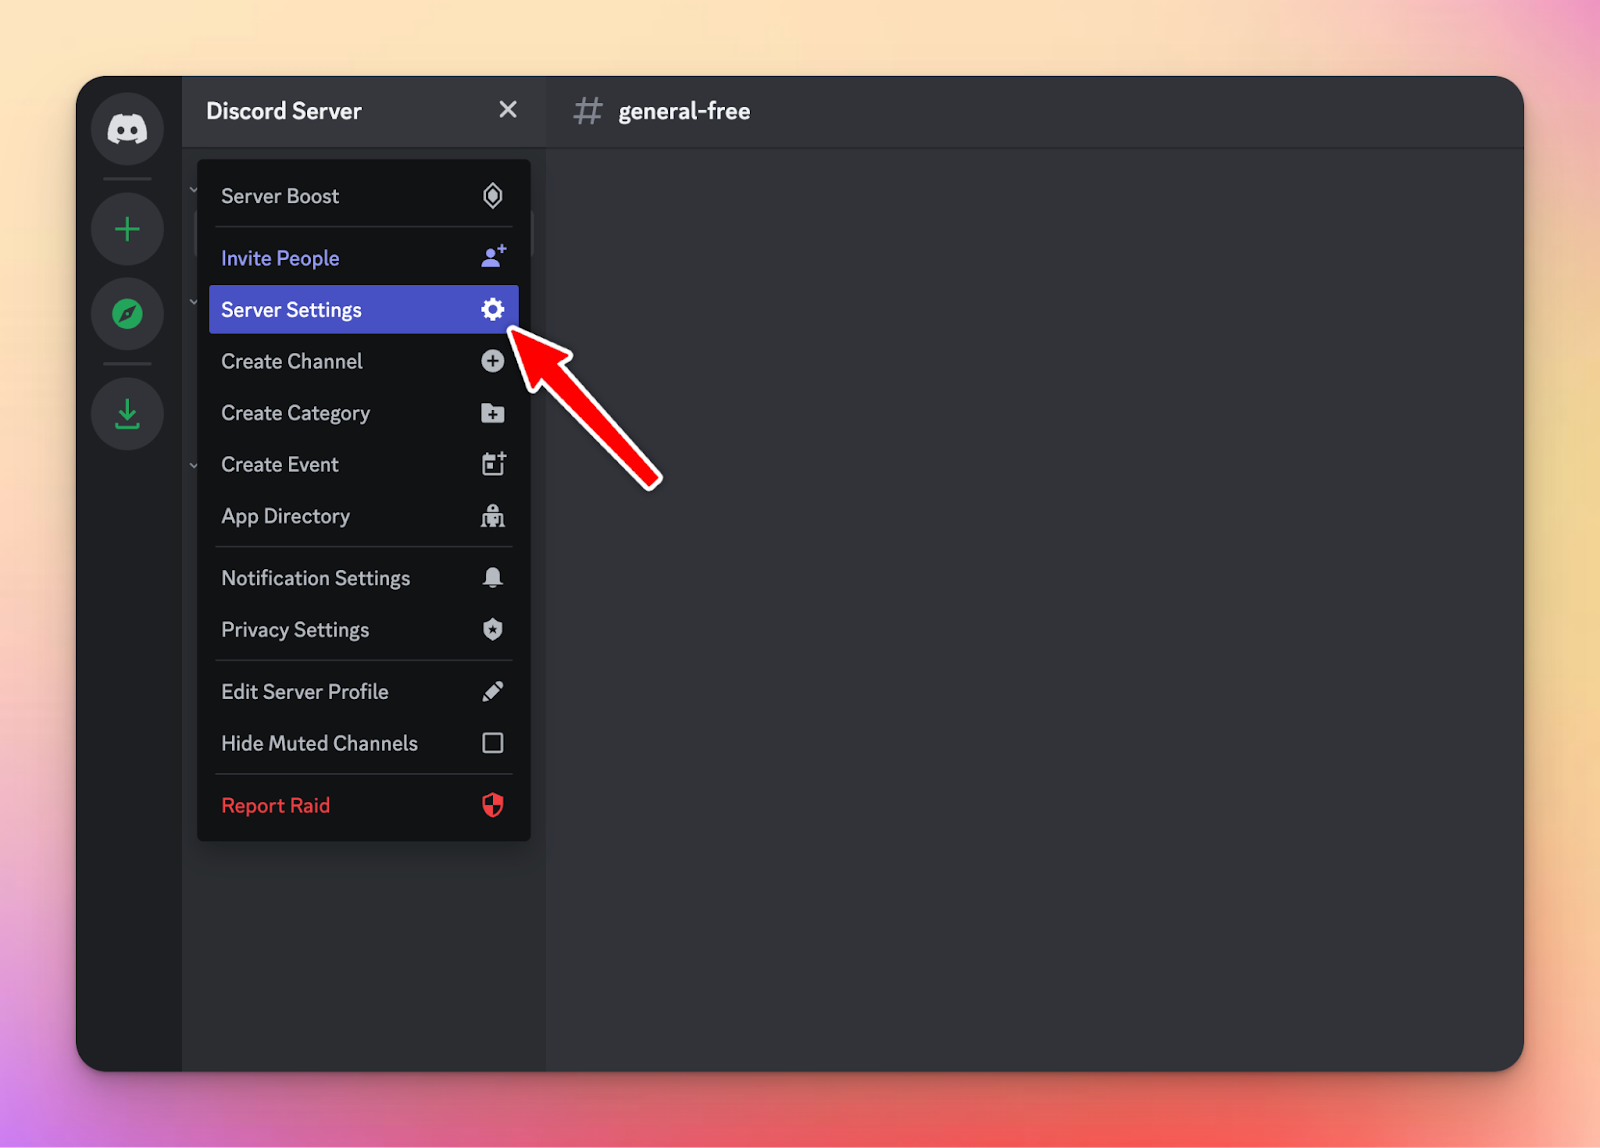
Step 1: Navigate to your Discord server’s settings by clicking the server’s name in the top-left and then the “Server Settings” button.
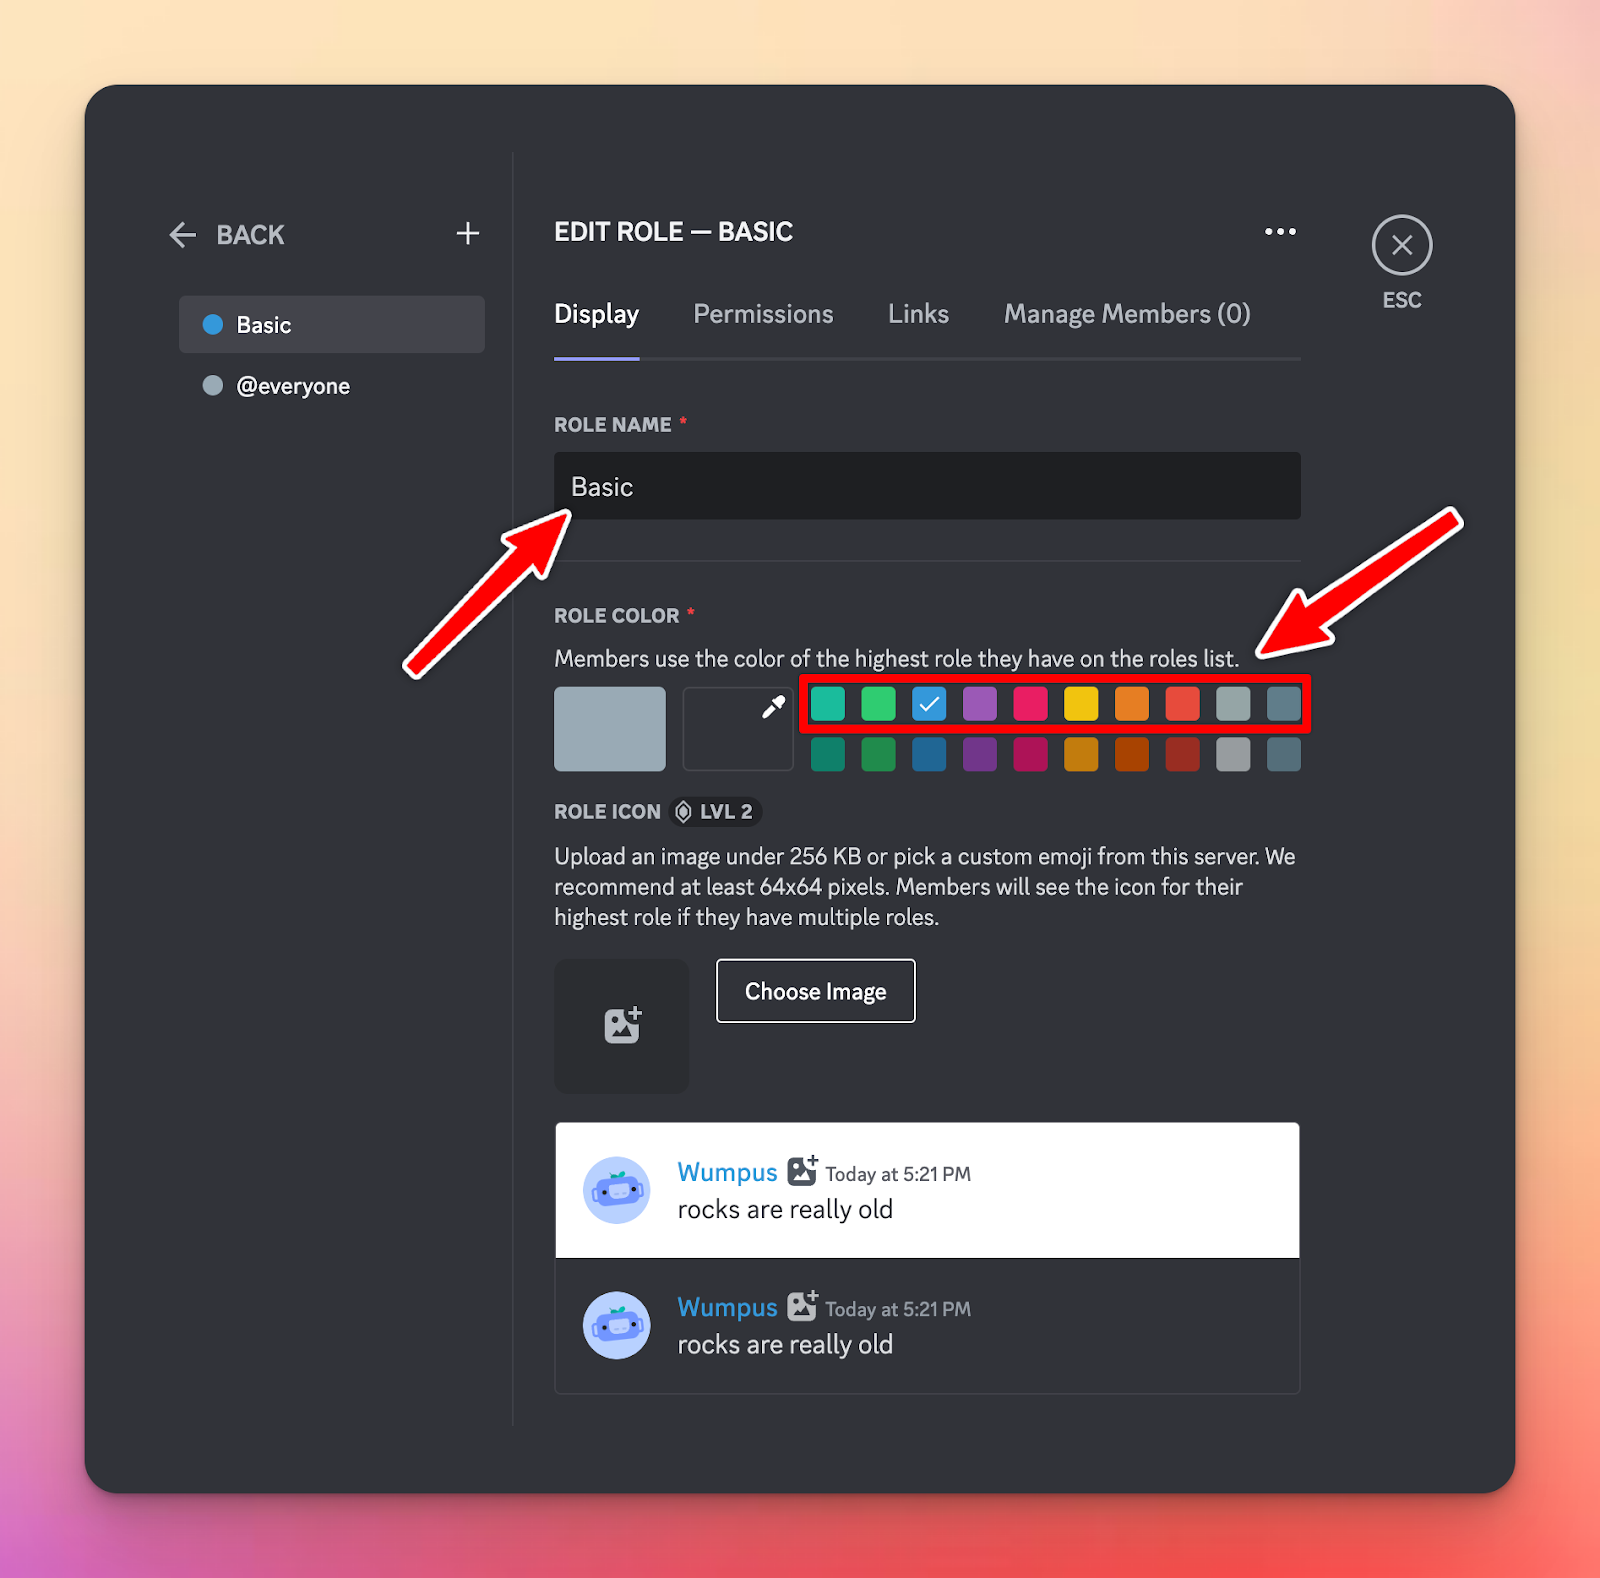
Step 2: Navigate to the “Roles” tab and hit the “Create Role” button. This will create a new role and allow you to configure the role name, color, permissions, etc.
Step 3: Give your role a suitable name and color. Ideally, the role name should be self-explanatory and easily understood by anyone who sees it. The role color doesn’t matter much, but we’d recommend using brighter, more appealing colors as the role color will also change members’ name color.
Step 4 (optional): In most cases, we’d recommend configuring the two options shown on the “Display” tab to the following:
- Display members separately from online members - ENABLED ✅
- Allow anyone to @mention this role - DISABLED ❌

For demonstration purposes, we have created a “Basic” role and a “Pro” role, where the former will be our more affordable plan, and the latter will be our premium top-tier plan.
Setting up permissions
Now that we have our roles set up, we need to tweak permissions within our Discord server so members with these roles can only access what we want them to. There are multiple types of permissions: permissions for roles, text channels, voice channels, categories, etc. However, we will focus on category/text channel permissions, as that will allow us to fine-tune who can access what.
For demonstration purposes, we have created a category called “Basic” and another called “Pro” for the respective roles we created in the previous step.
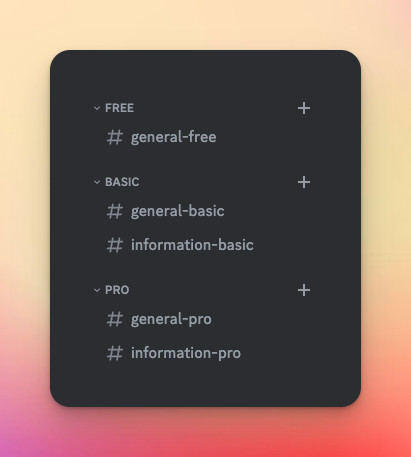
We want individuals with the “Basic” role to be able to access all channels under the “Basic” category but not the “Pro” category. We also want members with the “Pro” role to be able to access all channels under the “Pro” category and the “Basic” category. In our example, pro members would be paying more money to access all the features the basic plan offers and even more features on top of that. Setting this up may sound tedious, but Discord makes this very simple for us to do, and we can do it in just a few steps:
Step 1: Firstly, we need to make both categories private. Doing this will restrict access to these categories to only the roles (or individuals) we specify. To do this, right-click on the category you wish to make private and click “Edit Category.” Then, head to the “Permissions” tab on the left and enable the “Private Category” option.
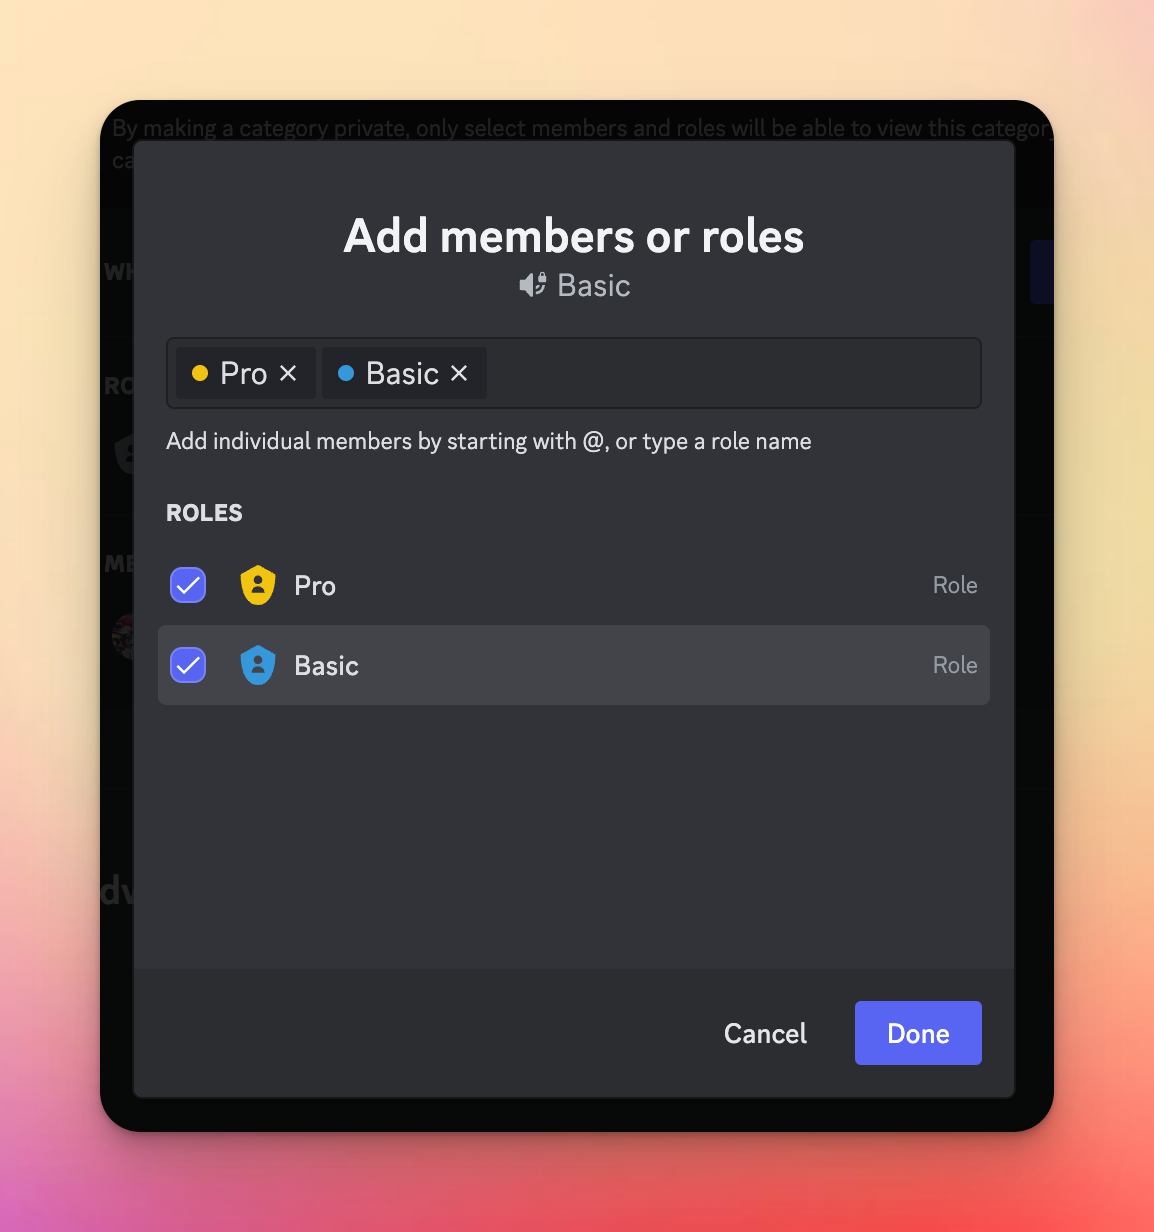
Step 2: Next, we’ll add both the “Basic” and “Pro” roles to the allowlist of our “Basic” category. Doing this will allow both roles to view all channels within this category. Assuming you’re on the same page as the previous step, click the “Add members or roles” button and select both roles.
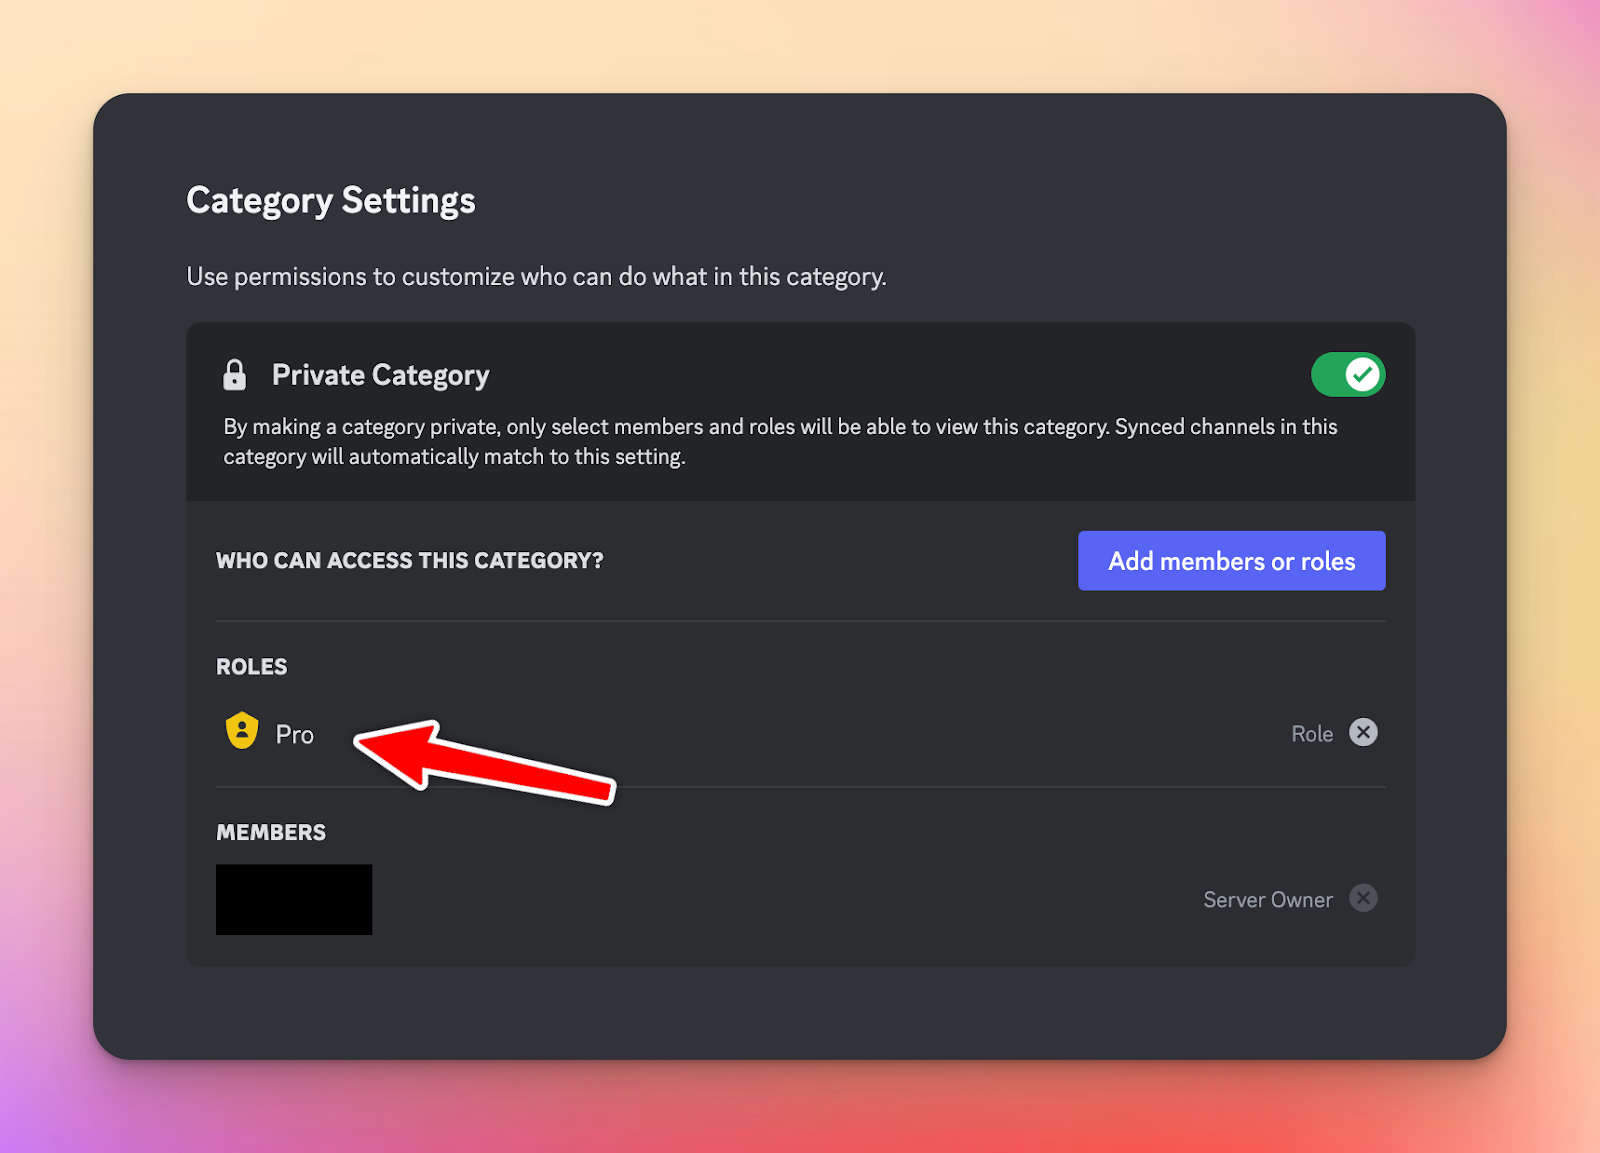
Step 3: Follow the previous steps for the “Pro” category, but this time, only allow the “Pro” role to access the category and not the “Basic” role.
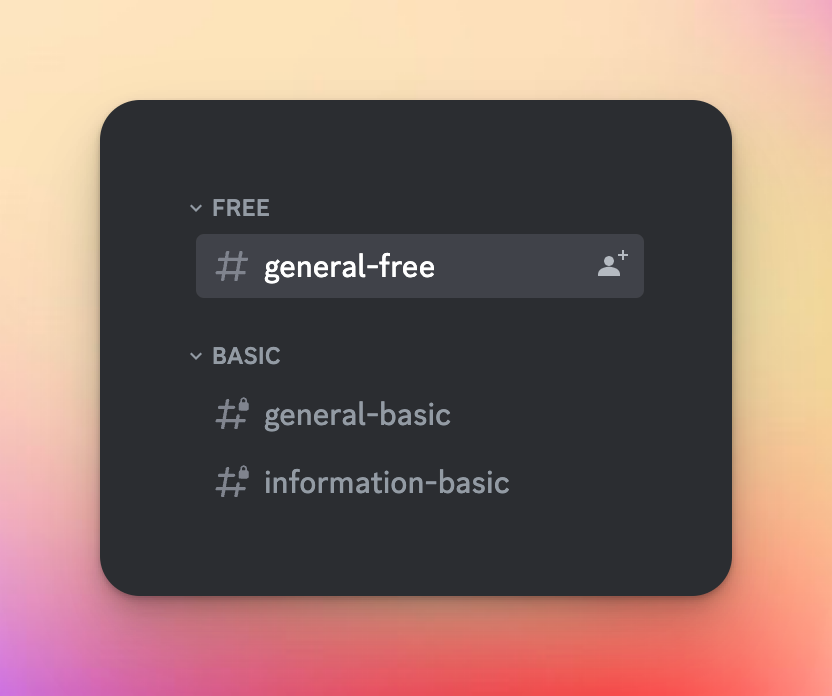
We’ve set up our two roles accordingly, and members with each role can only access what we’ve allowed them to. If you don’t want more different membership tiers to have access to the content other tiers have, simply don’t add their role to the category of the other tiers (in our example, you wouldn’t add the “Pro” role to the “Basic” category). To ensure we’ve set up our category/channel permissions correctly, we can head to the “Roles” tab in our Discord server’s settings and click “View Server As Role” next to the role we’d like to view the server as.
Basic:
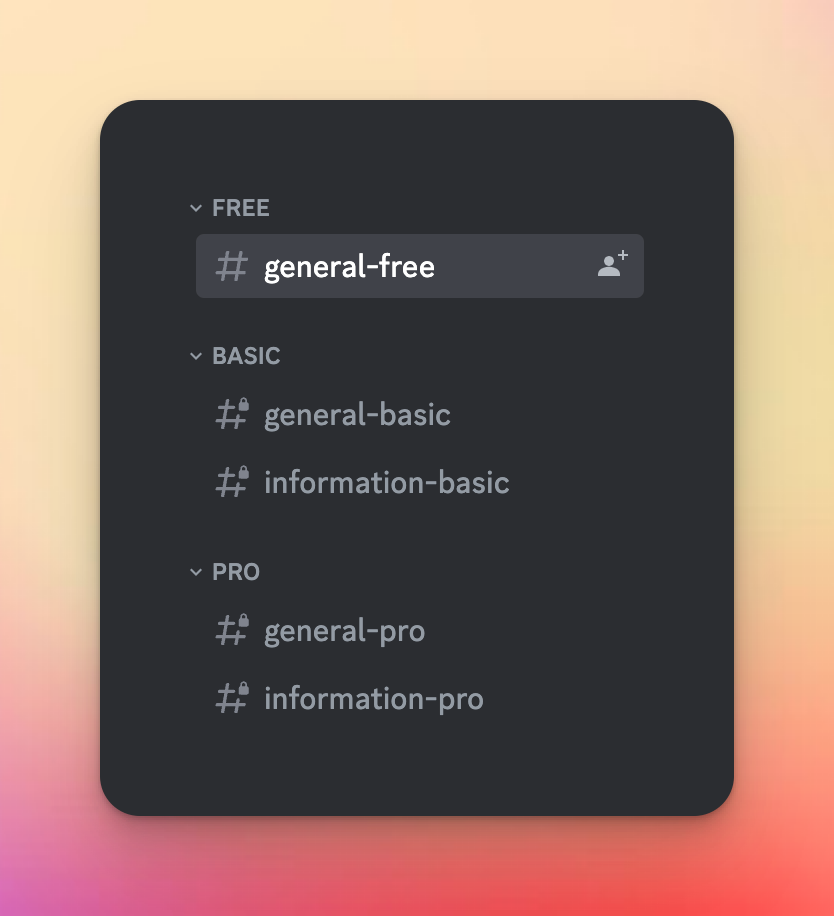
Pro:
Remember also to set up permissions for each role and channel specifically so that you can keep an organized, structured community.
Setting up on Whop
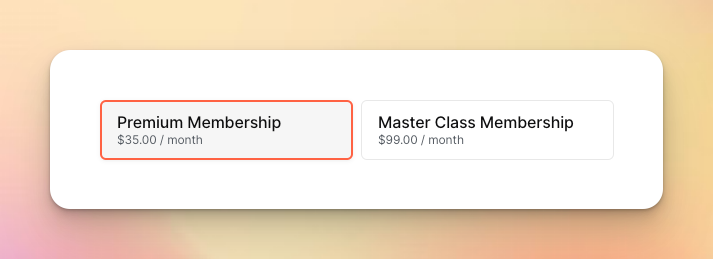
Once you have created an account on Whop, you’re ready to create a new product for people to purchase. When setting up membership tiers, each product will be a membership tier. So, in our case, we will have a “Basic” product and a “Pro” product.
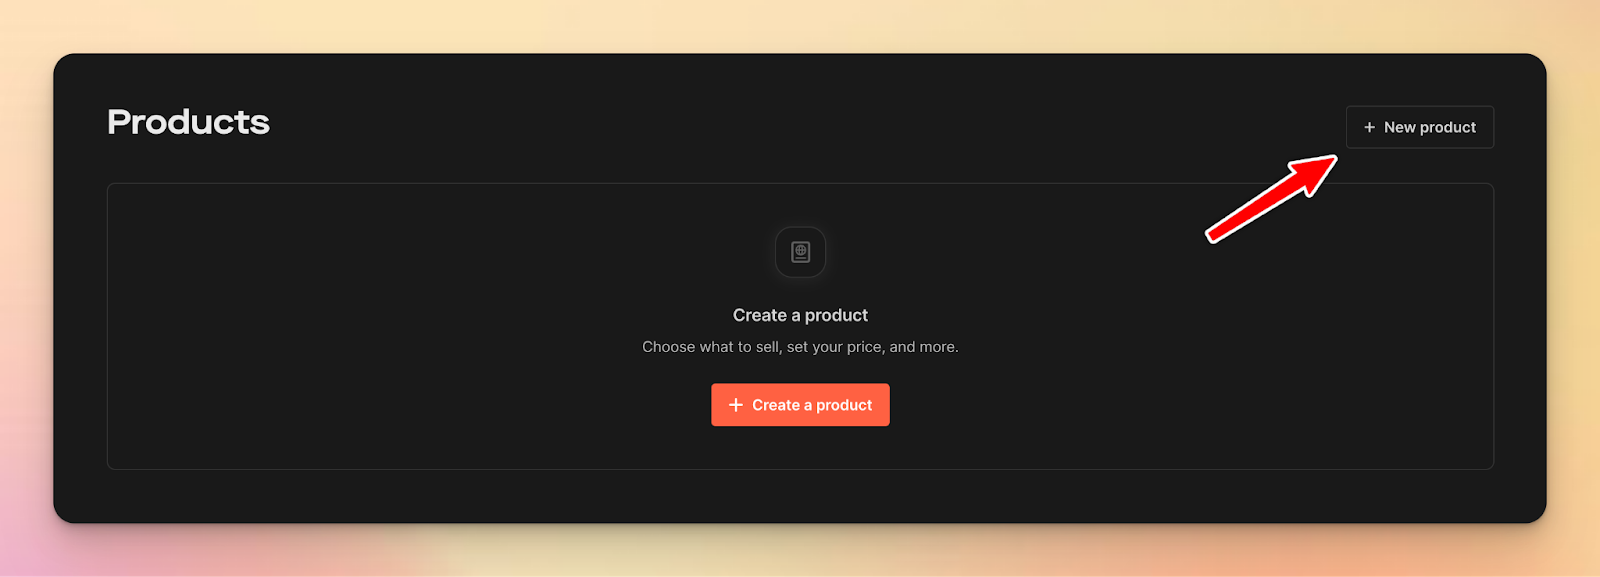
Step 1: Navigate to the “Products” page on Whop’s dashboard and click the “New Product” button in the top-right (or the “Create a product” button if it’s your first product on Whop).
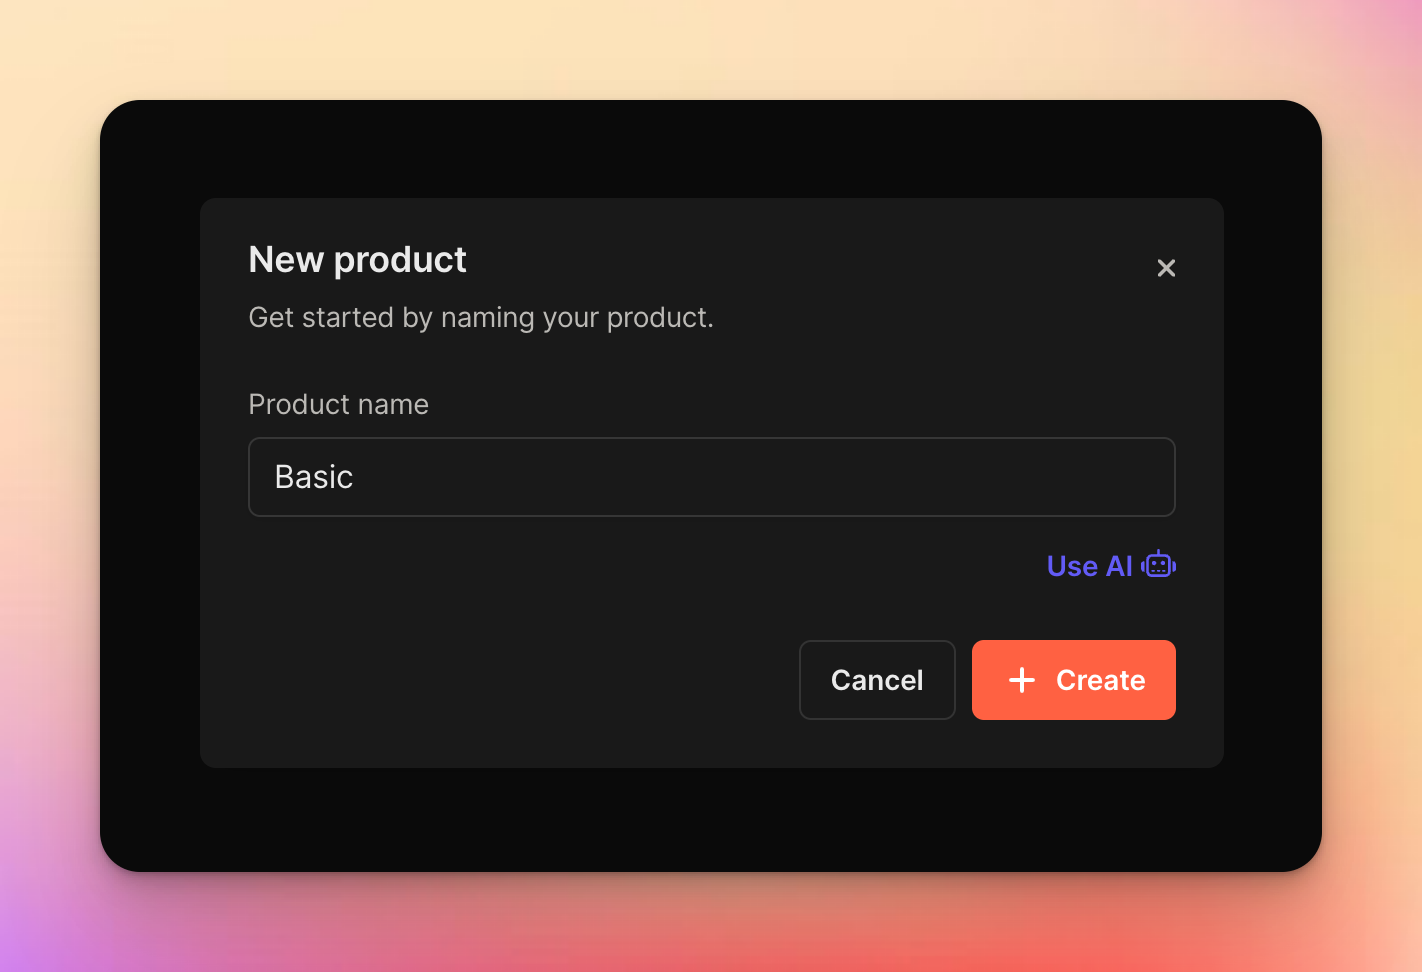
Step 2: Give your product an appropriate name and then hit the “Create” button to create the product.
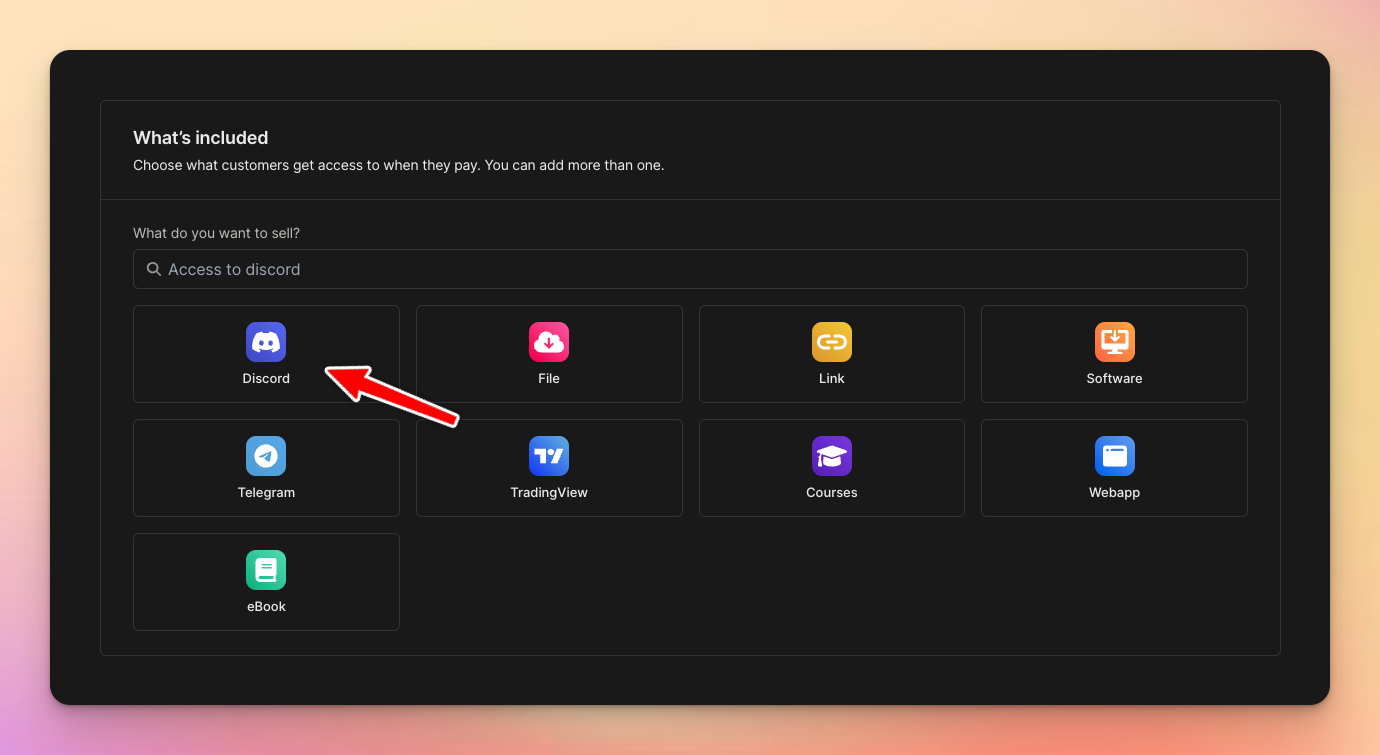
Step 3: Click the Discord logo under the “What’s included” section to add Discord access as a perk of your product. You may be prompted to add Whop’s Discord bot to your Discord server; if so, simply follow the steps it provides.
Step 4: Select the roles that you want the product to include. Again, in our case, we want the “Basic” product only to have the “Basic” role, whereas with the “Pro” product, we want both the “Pro” and “Basic” roles to be included.

Step 5: Now that your roles are configured, you can set a price and description as usual. See our “Optimizing your Whop Dashboard” article or YouTube video for more information about these options.
And that’s it! That’s all it takes to add membership tiers to your Discord server. Surprisingly simple, right?
Tips and tricks
In our example, we set up permissions for channel categories, which the sub-channels will inherit/follow. However, when setting up a Discord server (and roles), you should always spend some time configuring permissions for each role and text/voice channel. For example, you may have an announcements channel in which you only want staff members to send messages, but you want members with a particular role to view. By default, all members would be able to type in this channel, so it’s essential to configure roles and channels properly. Don’t forget to use the “View Server as Role” option so you can experience each role first-hand and tweak everything to your liking.
As with many things, having a variety of membership tiers is excellent; however, make sure to do it appropriately. Too many options can lead to unnecessary complexity and make it difficult for potential customers to pick which tier they’d like to purchase.
“Simplicity, simplicity, simplicity! I say, let your affairs be as two or three, and not a hundred or a thousand…”
- Henry David Thoreau
Conclusion
As this article demonstrates, setting up membership tiers for your Discord server is a piece of cake. There’s a high likelihood that membership tiers can be beneficial for your Discord server and attract even more clientele.
👉 With the powerful duo of Whop and Discord, it’s never been easier to set up a community with tiered memberships. So what are you waiting for? Set up membership tiers for your Discord server in no time with Whop.