Ready to sell products from your whop? Read this short guide to understand how to create the perfect storefront for your whop.
Key takeaways
- Customizing your store page with compelling visuals and descriptions directly impacts conversion rates and buyer trust.
- Meeting marketplace listing requirements (title, headline, description, logo, gallery images) unlocks exposure to 2.5 million weekly visitors.
- Advanced features like popup promotions, custom CTAs, and video galleries help your store page stand out from competitors.
Whop is home to thousands of creators selling digital products and services.
Ready to join them?
Then it's time to create your own whop, set up your business, and start making money online.
In this guide, we’re going to take a look at what a whop store page is and how you can customize yours.
What is a whop store page?
Your whop store page is the front of your business, showing what you sell and who your whop is for.
All whops have a store page by default, and customizing your whop store page is part of the onboarding process.
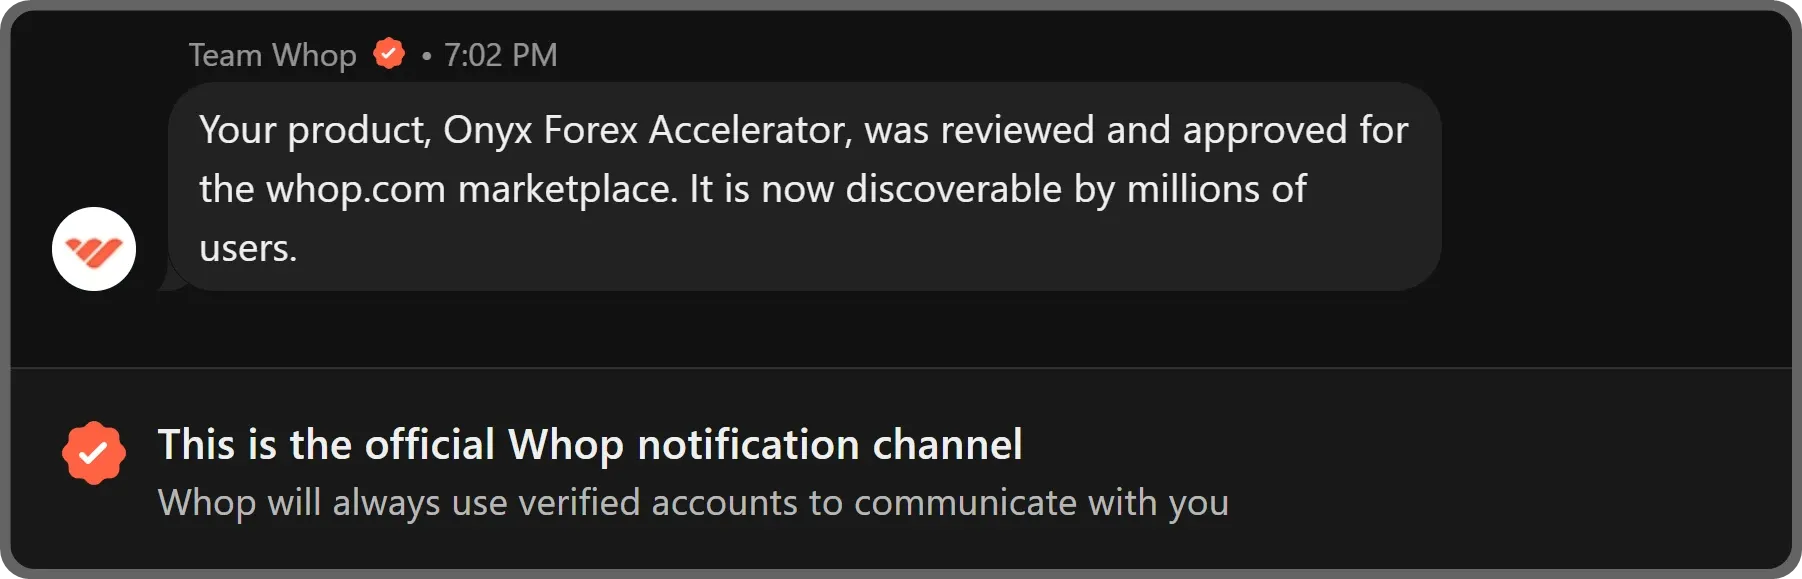
When your store page is ready, you'll receive a message from the Whop team about your whop being listed in the marketplace where millions of potential buyers will see it.
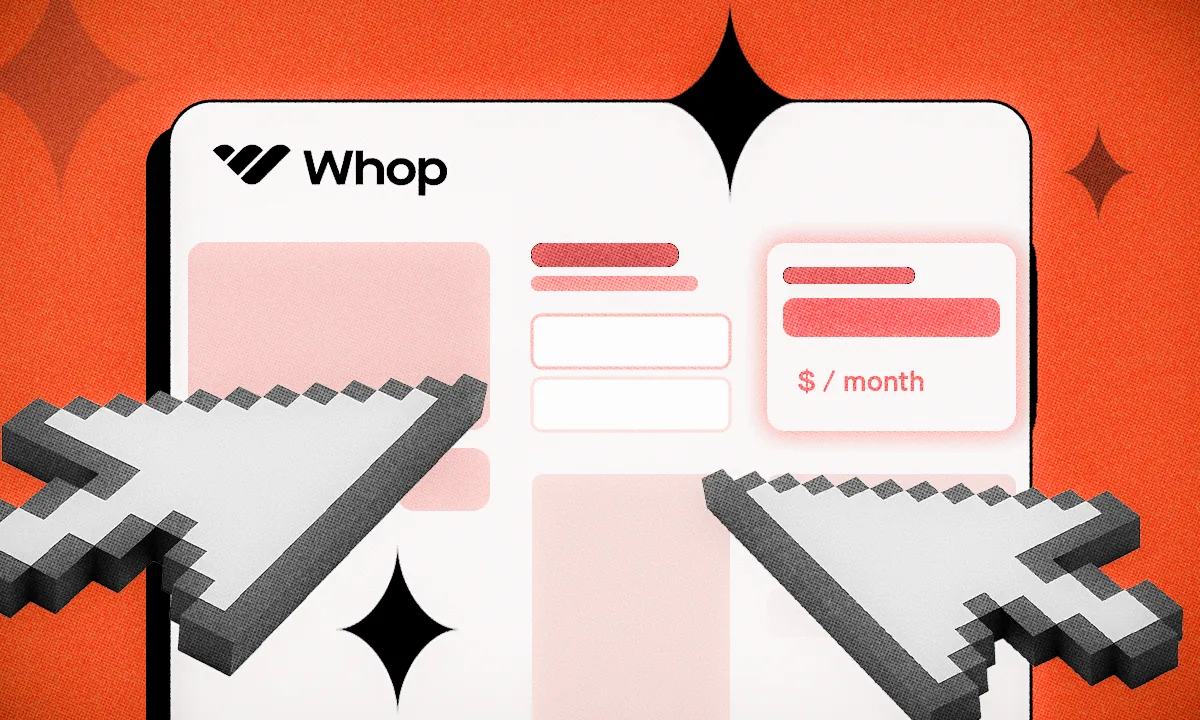
While you don't have to fill out your store page to start selling, customizing it will have a big impact on your conversion rate.
No one likes a mostly empty page with a product name and a dollar sign next to it. Make your store page appealing so that everyone will want to buy what you're selling.
Editing your store page
Alright, by now, you know that the store page is really important—but how do you create yours?
Well, you don’t really create a store page since it’s integrated into your whop. If you have a whop, it has a store page. What you want to do is to edit your whop's store page so that it aligns with your brand.
But first, let's make sure you know the difference between the store page of your whop and the store page of a product of your whop.
If you don't have any products yet, don't worry, we'll touch on that, too.
Editing your whop's store page
You can think of your whop's store page as a catalog for your products - it's a simple portal that's designed to direct your members to the right product.
To see what it looks like and edit it, click the Dashboard button under the admin area of your whop and go to it's My store section.
In the My store page, you're going to see your business details and products on the left and the preview of your store page on the right.
Clicking on the Edit button of your business details will allow you to change:
- Your business name (whop's name)
- Store URL
- Business description
- Social links (including custom website URLs)
The products section will list all the products you have in your whop with toggle buttons next to them which controls if they're visible on the store page or not. If you don't have products, yet, you'll see the Create product button instead.
Now that we've covered editing the store page of your whop, now it's time for the real deal - the product store pages.
Editing a product's store page
Product store pages are where members make purchases, so it's important to make them as marketable as possible. If you don't have products yet, you can click on the Create product button in My store page of your dashboard.
This will take you to the product editor where you can both create a product and edit its store page.
Alternatively, you can go to the Products page of your whop using the Products button under the admin area and use the Create product button at the top right of your screen.
This will also take you to the product editor where you can both create a product and edit its store page.
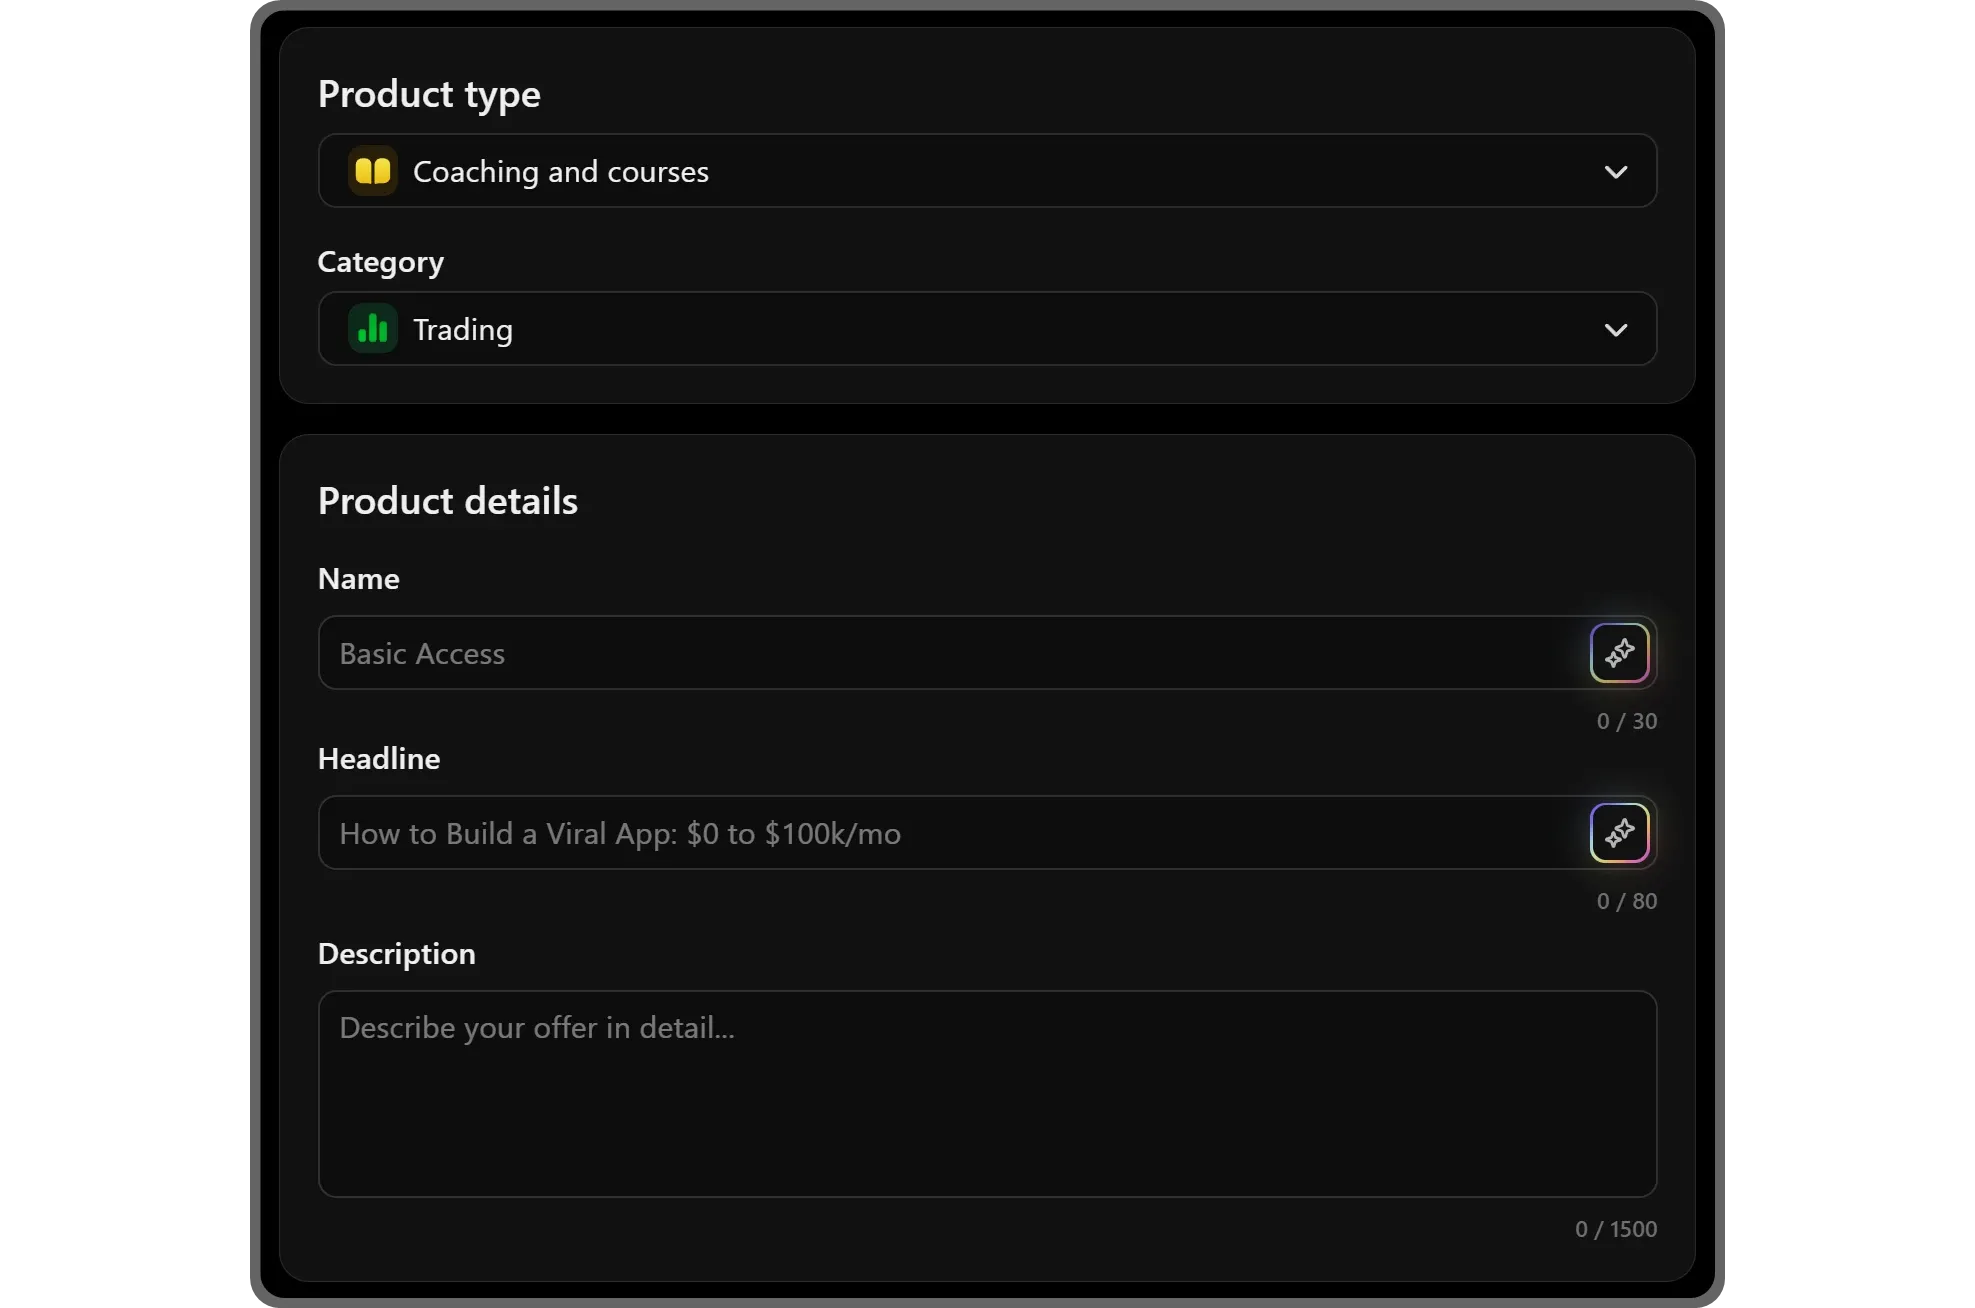
In the product editor, you're going to see nine fields that control your store page - as you edit them, your store page will reflect the changes. Let's break them down together.
The first field you're going to has the Product type and Category settings. These will help Whop users find your whop, while you can always change them, it's important to select the type and category that best matches your product.
In the product details field, you should give your product a name, a headline, and a description. Not sure about them yet? Use the Generate with AI button on the right side of the input fields. But remember, being unique is a plus.
Keep in mind that these fields are required to get your whop listed on the marketplace.
Pro tip: If you want to learn how to create a headline that sells, check out our How to write an offer headline guide.
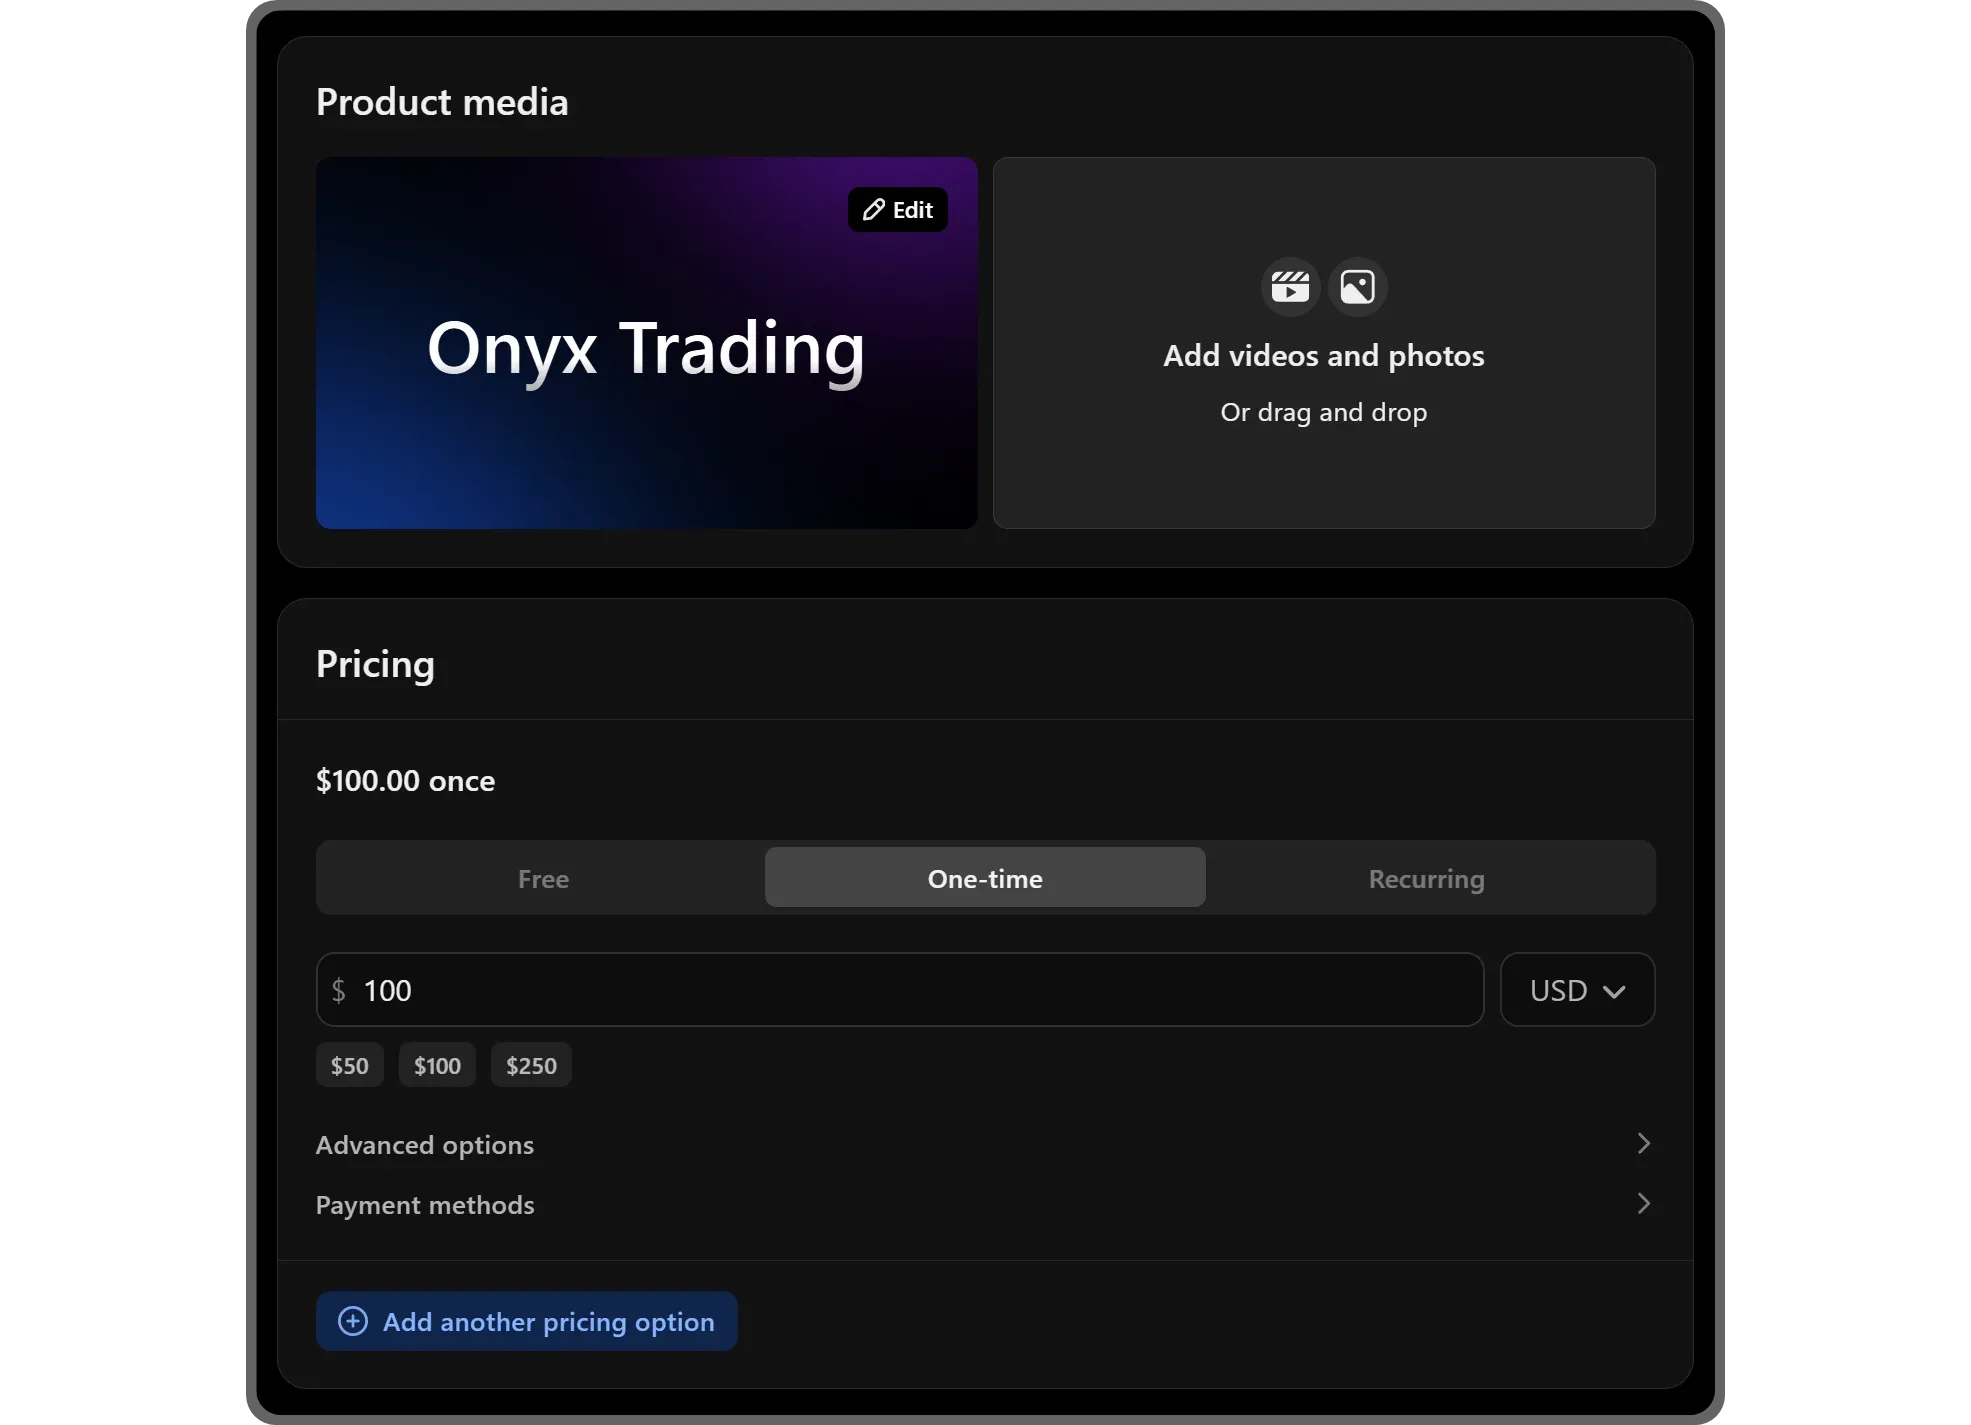
Next fields are Product media and Pricing.
A picture is worth a thousand words, and so by adding videos and photos into the product media field will help you grab attention fast. Plus, to get on the marketplace page, you must have gallery images.
In the Edit gallery popup, you're going to see the Upload media button, which asks you to choose a file to upload. After selecting a file, you'll be able to see it in the popup, drag it to reorder, or remove it if needed.
Pro tip: Adding a video to your gallery will make your store page stand out more.
The Pricing field is one of the most important ones. As you can see in the image below, there are three types of pricing available on Whop: Free, One-time, and Recurring.
Each has different setting related to them and you can switch between the pricing types by clicking on them.
Make sure to check out the Advanced options and Payment methods dropdown menus to further customize your product's pricing.
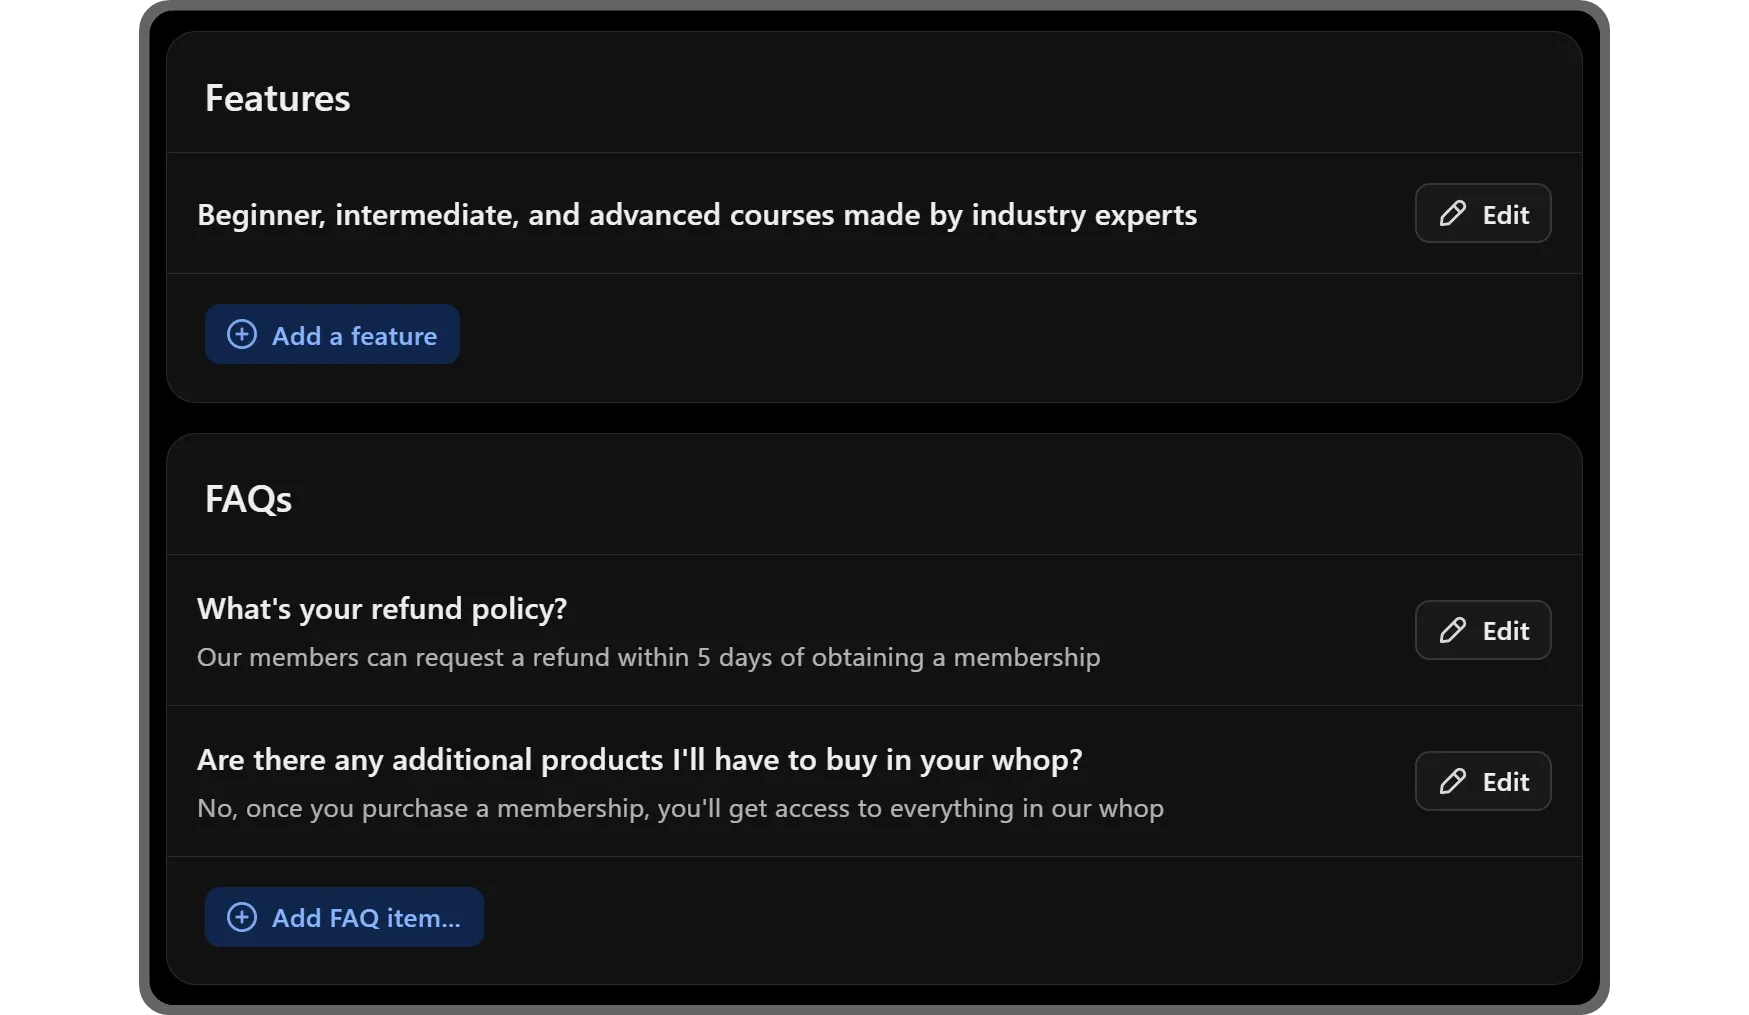
The Features and FAQs fields, as their name suggests, allow you to list your product's features and FAQs. These are great to fill the empty space in your store page and help your members get more information before they make a purchase.
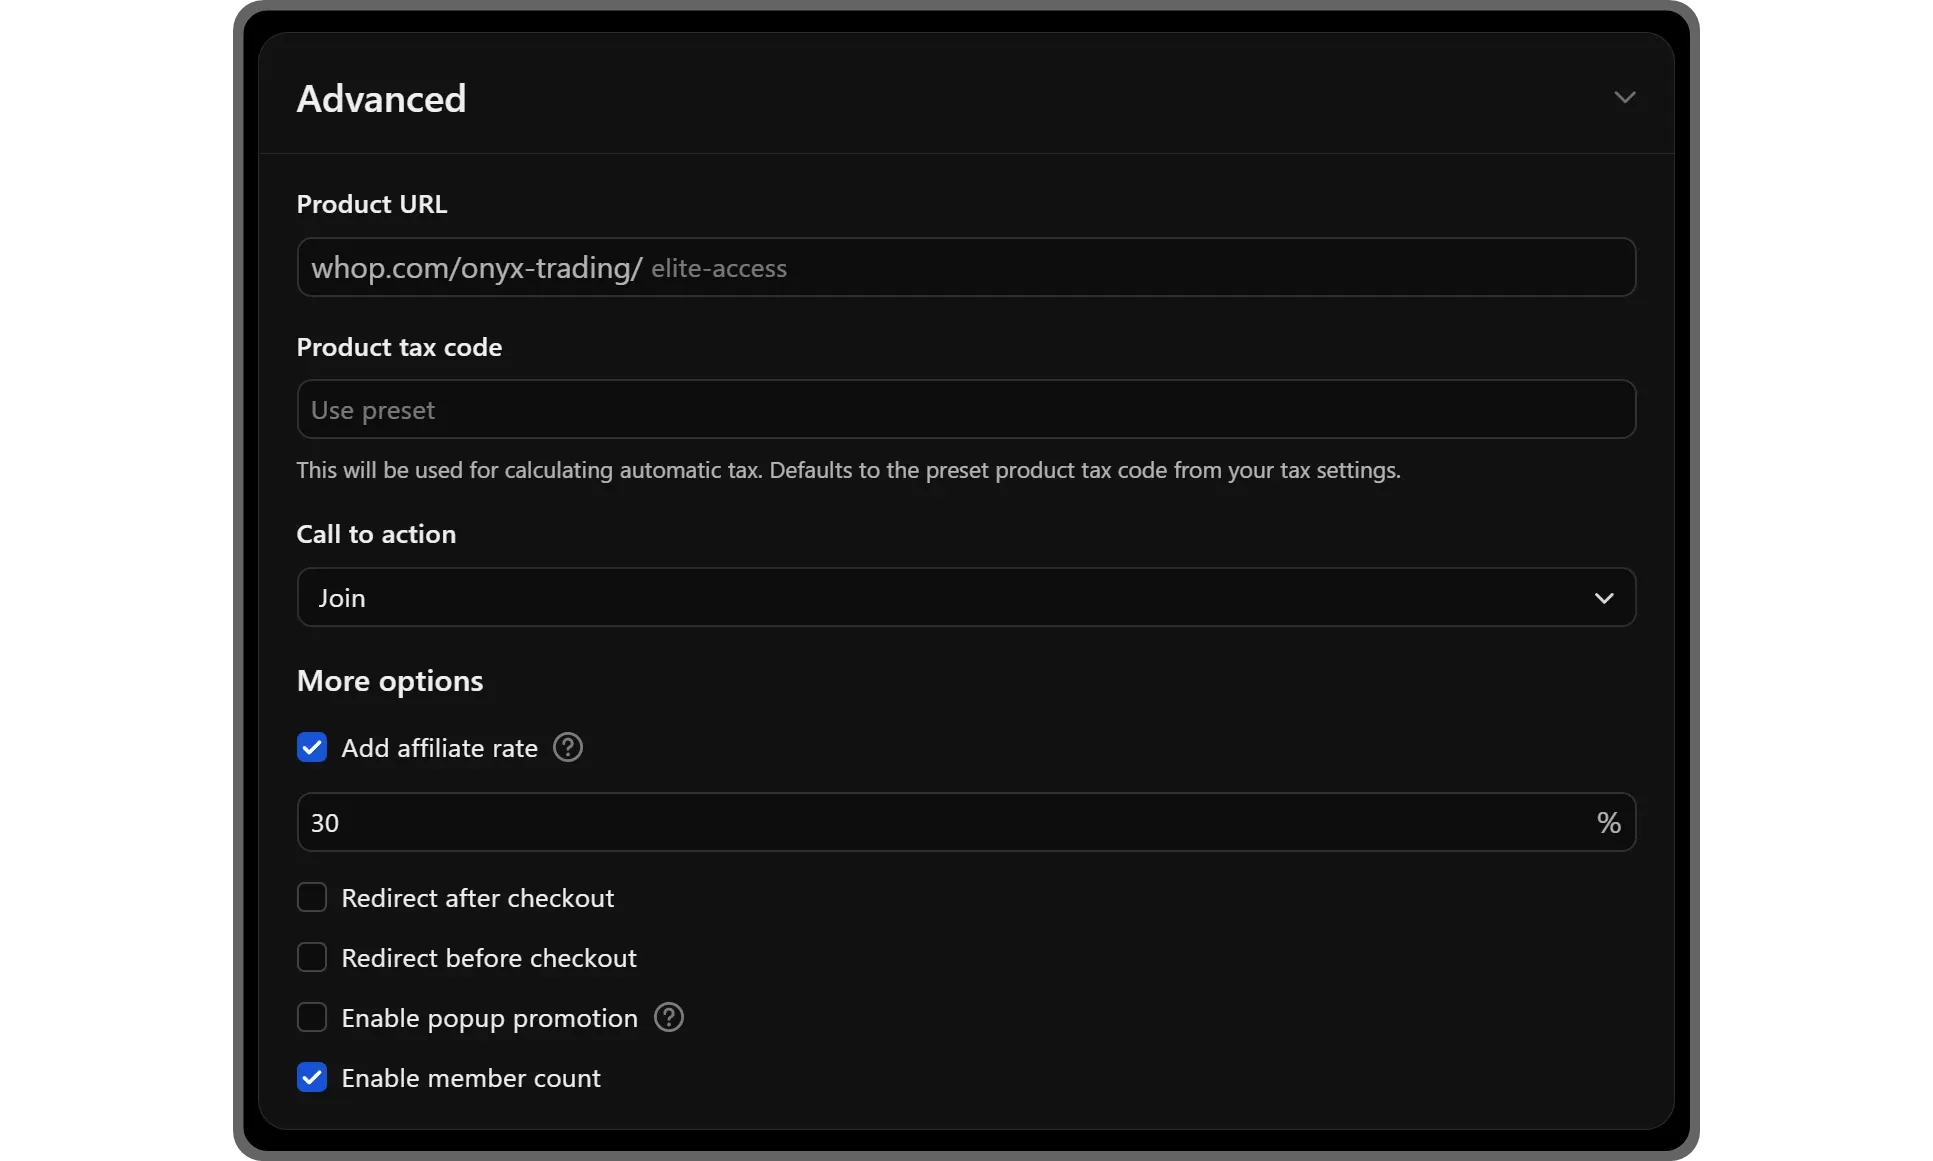
The Advanced field home to eight settings that further improve your store page:
- Product URL: Customize your whop's URL
- Product tax code: Unused for calculating automatic tax
- Call to Action: Customize your CTA button text
- Redirect after checkout: Redirect your customers to a custom link after checkout
- Redirect before checkout: Redirect your customers to a custom link before checkout
- Enable Popup Promotion: Offer discounts to anyone who spends more than 45 seconds viewing your store page or moving their mouse outside of it
- Enable member count: Display or hide the number of people who're members of your whop
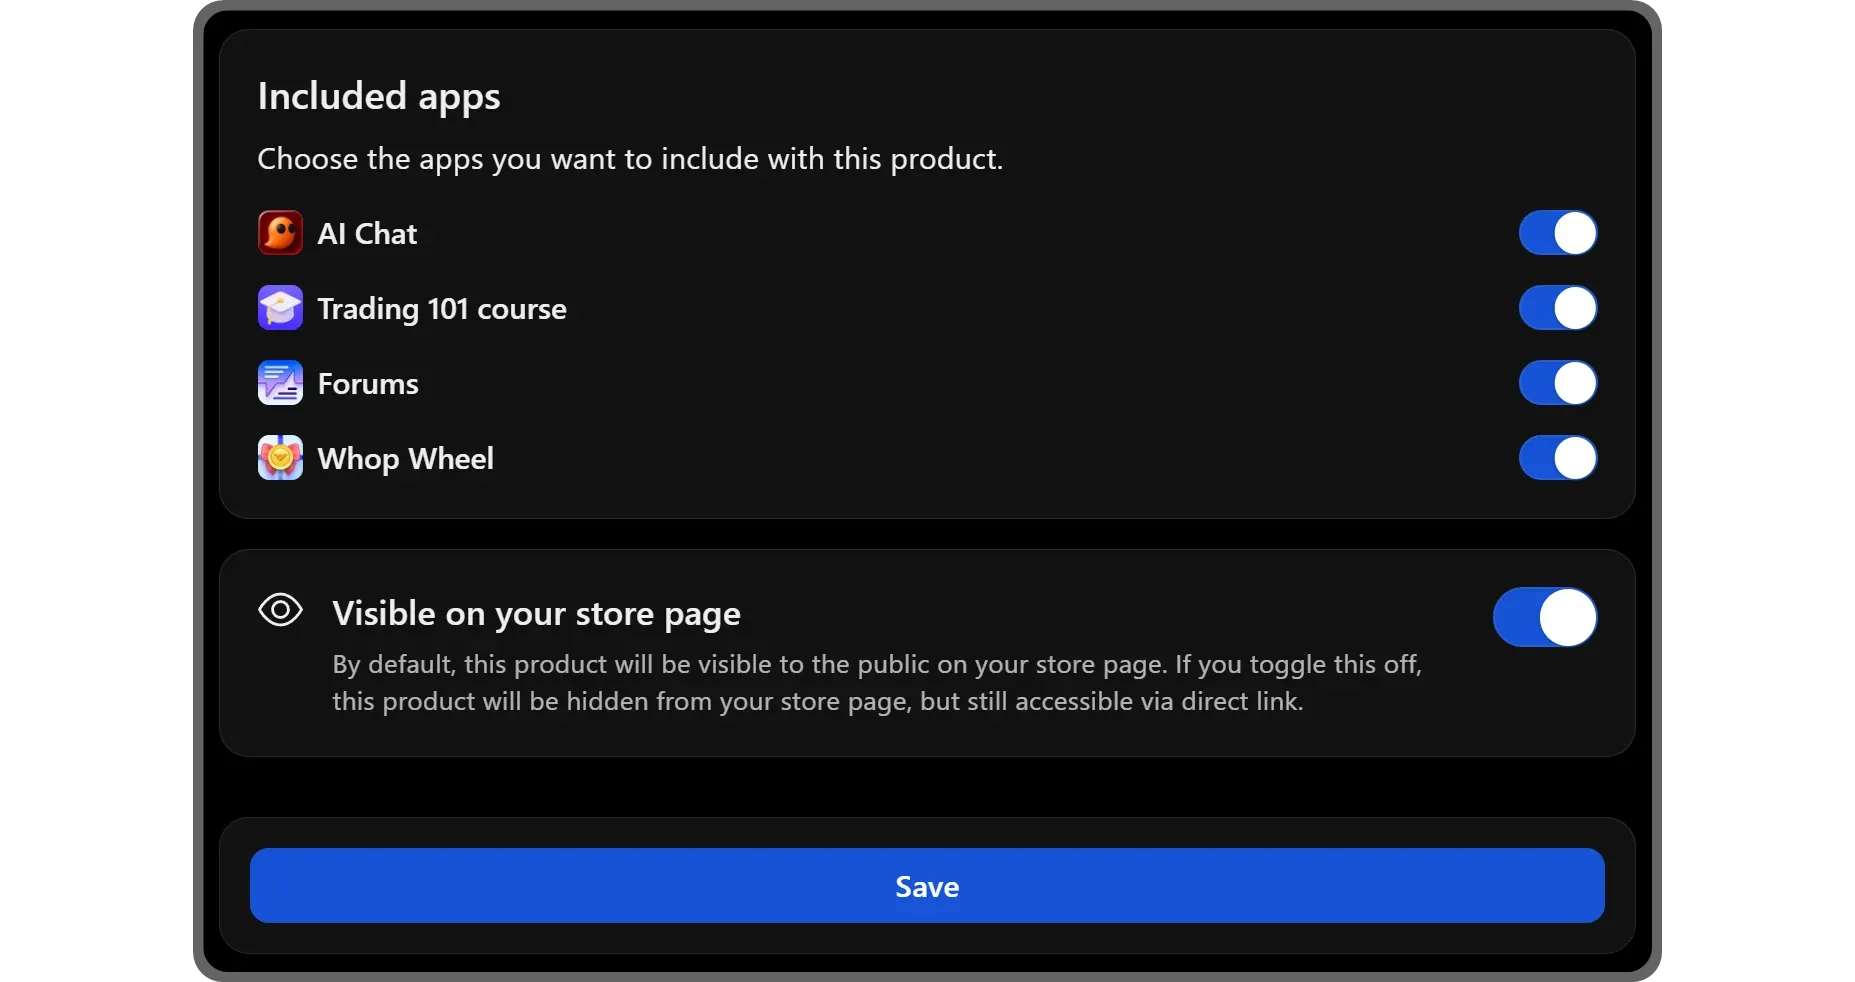
The last two fields are the Included apps and Visible on your store page.
In the first field, toggling the apps means giving the product access to those apps. When a user buys the product, they will be able to access the apps you toggle on.
The Visible on your store page toggle option, on the other hand, should be enabled by default and as its name suggests, it controls whether the product is listed on your whop's store page or not.
Once you're done with all the settings in the product editor, take a look at the great work you've done via the preview on the right, and save your changes by clicking the Save button at the bottom left.
Getting listed on the marketplace
With your store page ready, it's time to get listed on the marketplace. The marketplace gets more than 2.5 million weekly visits, and you can get in front of them.
There are a couple of requirements for your products to be listed on the marketplace:
- A title, headline, and description
- A logo
- Gallery images (preferably videos)
- At least one available pricing option
Once all of these are complete, you'll receive a message from Team Whop about your product being listed on the marketplace. If any issues arise about the listing, you'll also get notified via the same chat.
Start making money with Whop
If you've followed every step in this guide then you will have a complete whop store page. Now, it's time to start bringing in paying members!
If you want to learn more about Whop, consider checking out our other Whop guides.


