YouTube Studio is YouTube's creator dashboard where creators upload videos, track analytics, engage with viewers, and monetize their channel. Read this guide to learn how to use it to grow an audience.
Key takeaways
- YouTube Studio is the all-in-one dashboard where creators upload, edit, track analytics, and monetize their channels.
- To monetize through YouTube Partner Program, you need 1,000 subscribers and 4,000 watch hours over 12 months.
- Engaging with your audience through comments and optimizing upload timing based on viewer location boosts algorithmic reach.
YouTube Studio is YouTube’s all-in-one dashboard for managing your channel, tracking performance, and monetizing your videos.
If you’ve ever wanted to turn your videos into a business, this is where it all starts.
Video content is still king: people are 52% more likely to share videos than any other type of content, and 75% of viewers watch on mobile.
Hundreds of thousands of creators use YouTube Studio to upload and edit videos, understand what their audience loves, and earn money from their work.
In this guide, we’ll show you how to set up your account, navigate the dashboard, dive into analytics, and start monetizing your content (even if you’re a total beginner).
What is YouTube Studio?
YouTube Studio is a backend dashboard for creators to manage their channels, upload and edit videos, monitor analytics, and engage with audiences.
It helps creators track all video metrics, view and respond to comments, and optimize their content for better reach.
Once signed in to YouTube, creators can navigate to their studio and find a variety of features and tools that are key to not only creating, but refining and even promoting their YouTube content:
- Real-time video performance metrics
- Comment dashboard
- Customization options
- Detailed analytics
- Editing tools
But let’s talk dollars. Because for most creators, earning even a side income (if not enough to replace their full-time job) is the long-term goal.
Good news: YouTube Studio makes it easier for creators to monitor earnings, check monetization status, and access revenue reports, helping you turn your passion into a potential income stream.
What is YouTube Studio used for?
YouTube Studio is used to manage every part of your YouTube channel in one place.
With it, you can:
- Upload and edit videos
- Track views, watch time, and other performance metrics
- Analyze your audience and see what content works best
- Respond to comments and engage with viewers
- Manage monetization, ad revenue, and memberships
- Customize your channel and playlists
Basically, YouTube Studio helps you streamline channel management, understand how your videos perform, and interact with your audience, within one dashboard.
Below, I'll break down each of these features step by step so you can start using them with confidence.
Managing your channel
One of the primary uses of YouTube Studio is to manage your channel settings.
Once you navigate to YouTube Studio, you can customize your channel’s appearance, adjust privacy settings, and set up monetization features (we’ll get into this a bit later).
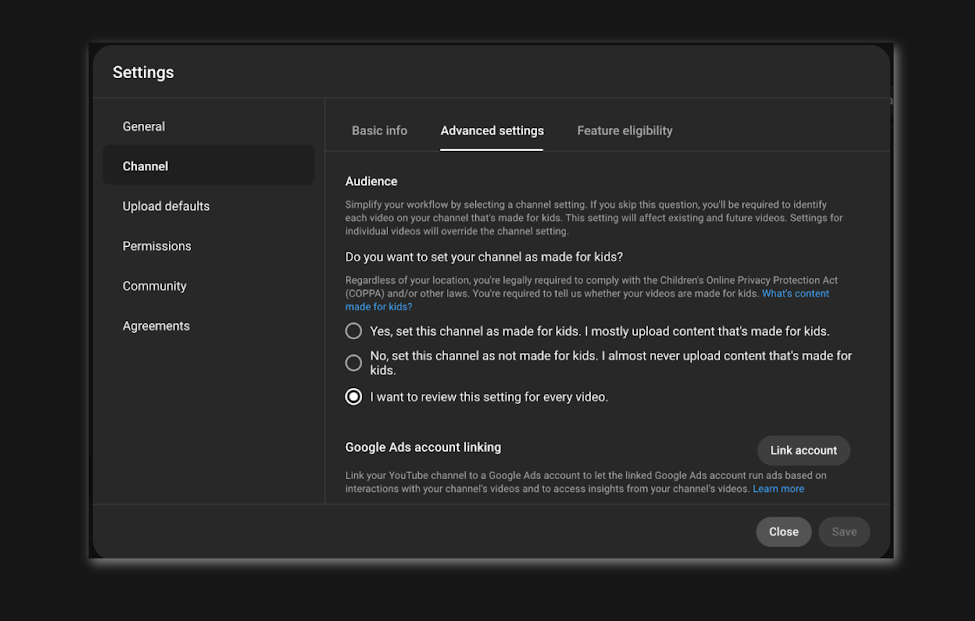
You can add channel art, update your profile picture, and edit your About section. This is where you ensure your channel represents your brand effectively and remains aligned with your goals.
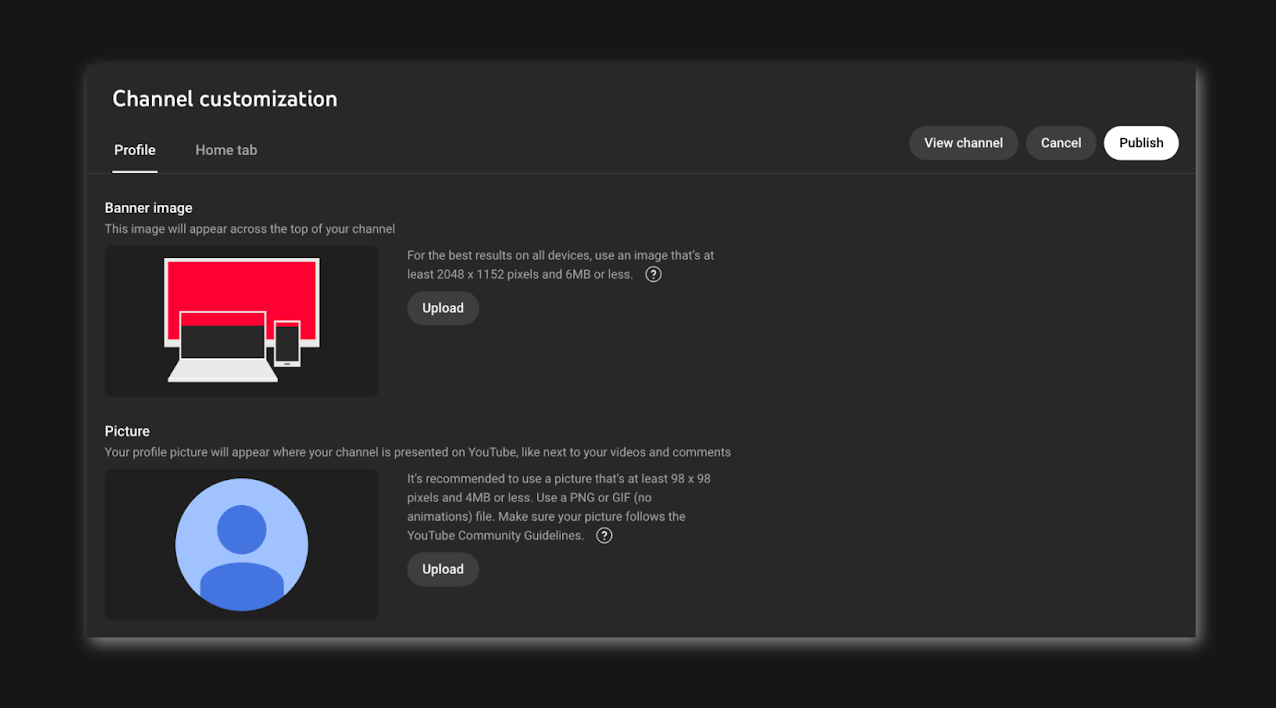
Pro tip: Having an aesthetically pleasing profile picture, banner, and thumbnails can go a long way in boosting your exposure. The more people scroll past your thumbnails, the less YouTube is going to recommend your videos.
Until you get the hang of designing (or can pay somebody else to do it), you can use software like Canva to design visual assets for your channel – they have templates for design novices, and you can even save your brand colors, logo, and imagery into a brand kit!
Uploading and editing videos
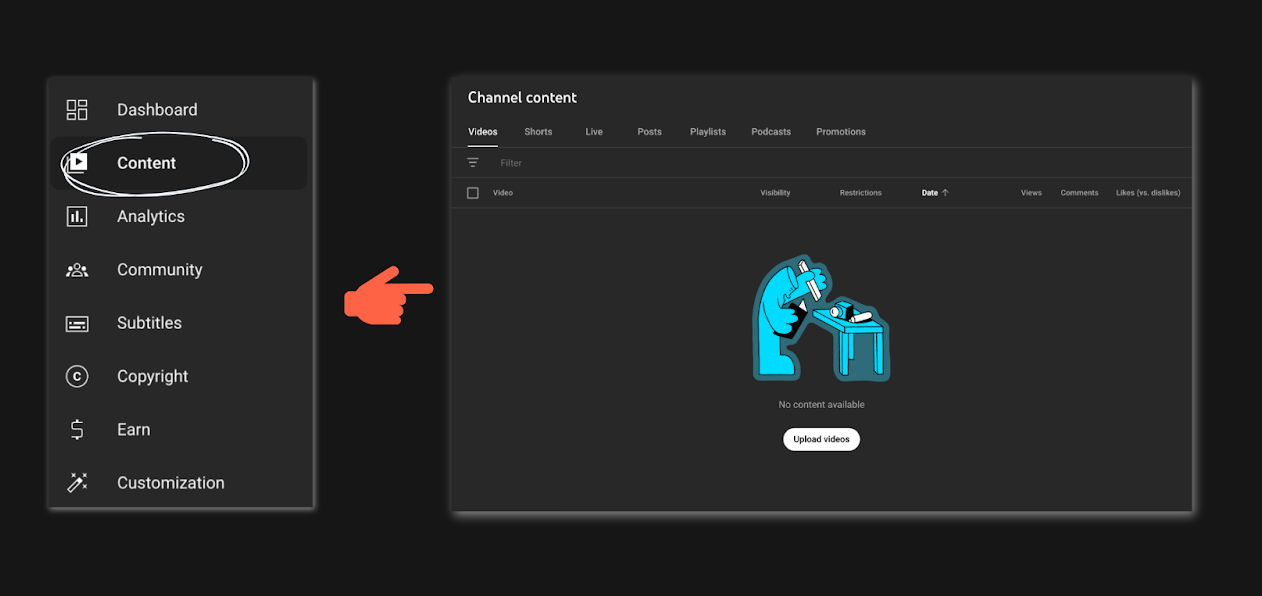
YouTube Studio allows you to not only upload but also edit and even organize your video content.
When uploading videos, you can adjust the title, description, tags, and thumbnail directly within the platform. You can also set video visibility settings, such as public, unlisted, or private, depending on how you want to share your content with the world.
For most of you, public is the way to go. If you’re selling masterclasses or access to bonus content, you can consider unlisted videos that require a URL to access.
And yes, you can edit your videos directly within YouTube Studio too, which is awesome for beginners who don’t know their way around more advanced video editing software.
Editing features like trimming, adding end screens, and adjusting video details make it easier to perfect your content right on the platform.
Monitoring your performance
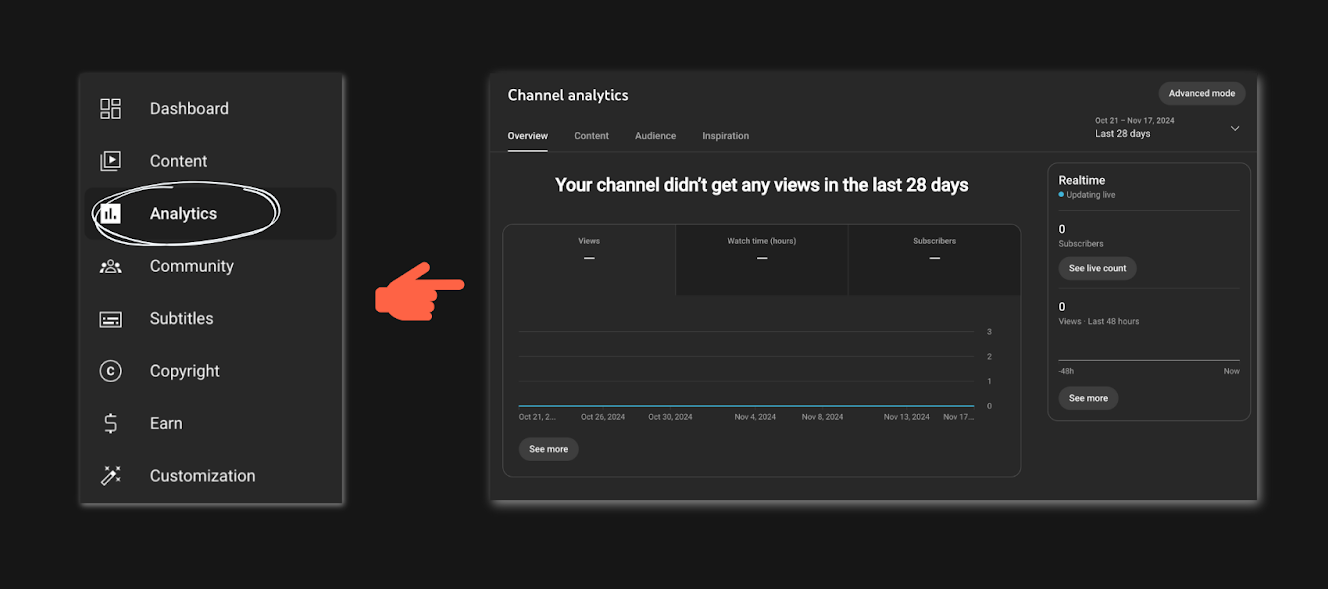
Your YouTube Studio analytics dashboard lets you track the performance of your videos by showing key metrics such as views, watch time, subscriber growth, and engagement rates.
Understanding these statistics is essential for creators to optimize their content strategy and determine what resonates with their audience.
For example, you might notice your watch time is much higher on certain styles of video, and lower on others, meaning you now know where to focus more of your time and energy. It’s also handy to know where most of your viewers reside because it might not always be your home country.
Pro tip: Posting when people are online and active boosts your exposure in the algorithm by increasing your clicks and views. Find out where most of your audience is, find out when they’re online, and work this into your upload schedule.
Engaging with your audience
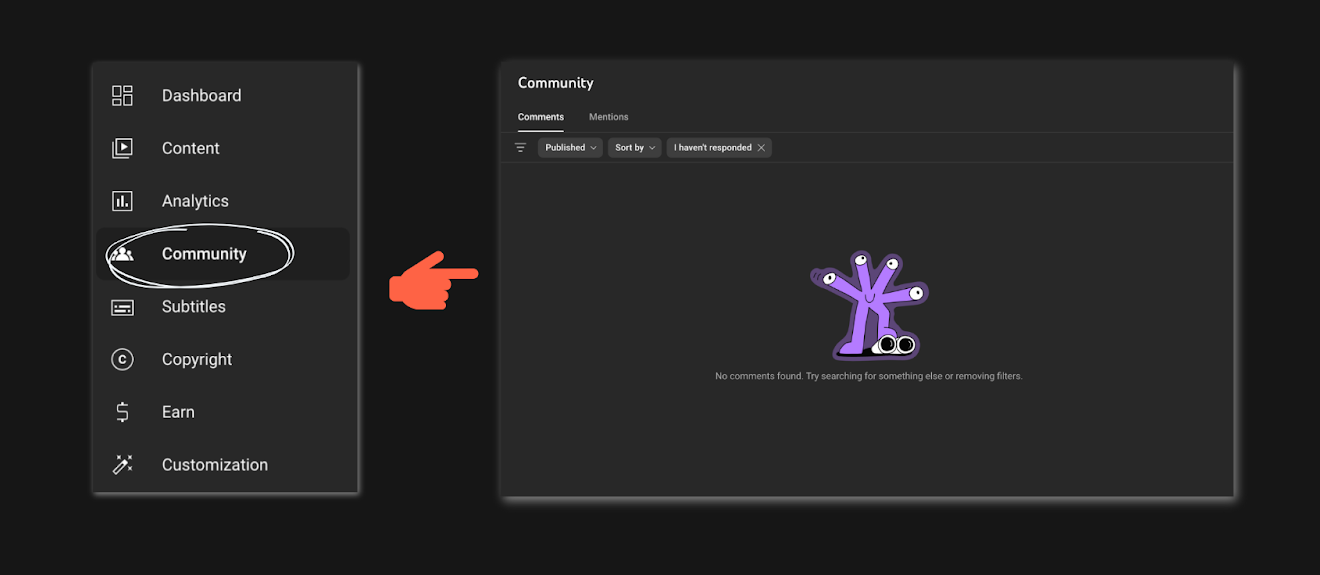
YouTube Studio isn't just about uploading videos and tracking performance; it's also a space for fostering a community.
You can use your YouTube Studio dashboard to view and respond to comments, communicate with your subscribers, and manage feedback.
So many creators forget about the whole, you know, social aspect of social media.
If you want a supportive audience, you need to be a supportive creator, and that means engaging back with the people who watch your content.
Remember, these are the people who give you the ability to eventually monetize your YouTube content, so you want to keep them happy!
Monetizing your content
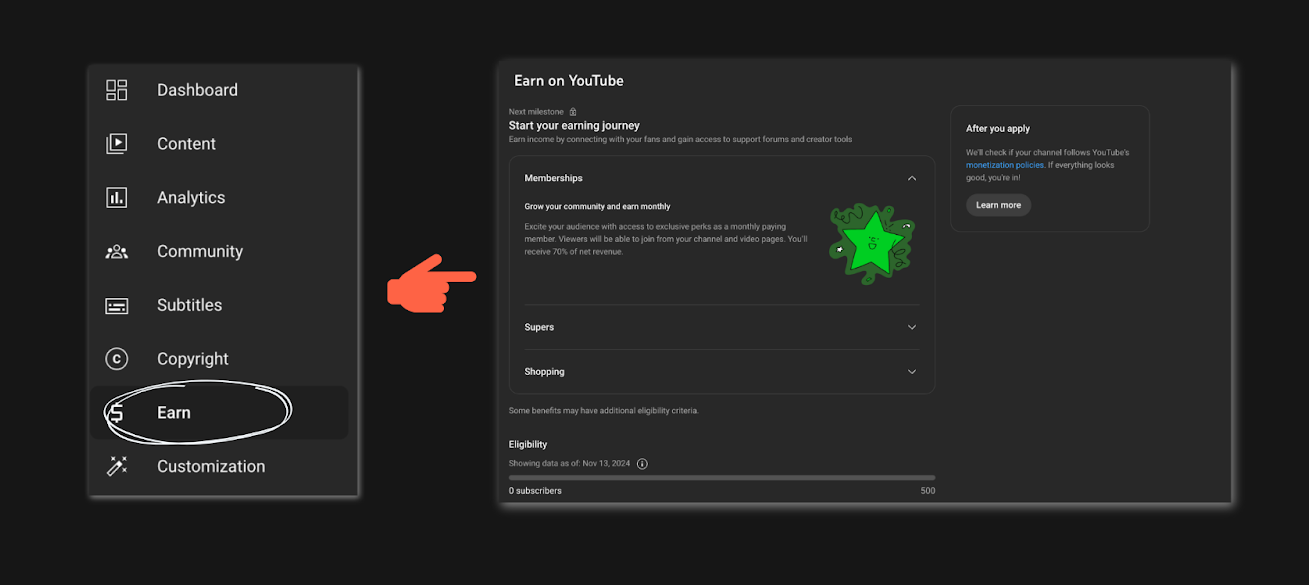
Finally, YouTube Studio is the place you’ll go for monetizing your content.
After meeting YouTube’s eligibility criteria, you can apply for the YouTube Partner Program (YPP) directly within YouTube Studio.
In the US, the eligibility criteria include having at least 1,000 subscribers and 4,000 hours of watch time over the last 12 months, along with adhering to YouTube's community guidelines and terms of service. For other countries, you can check the requirements here.
Once you're accepted into YPP, you can enable ads, offer memberships, and start generating income through YouTube’s built-in monetization features. Psst – we break these features down one by one later on.
So wait, what’s the difference between YouTube and YouTube Studio?
YouTube is the platform itself where users watch, upload, and engage with video content. It’s where you, as a viewer, go to discover new videos, subscribe to channels, like, comment, and share content.
YouTube Studio, on the other hand, is the creator’s backend or command center. It’s a tool designed specifically for YouTube content creators to manage, optimize, and grow their channels. YouTube Studio is where you upload and edit videos, monitor performance through analytics, interact with your audience, and manage monetization efforts.
Where is YouTube Studio, and how do I find it?
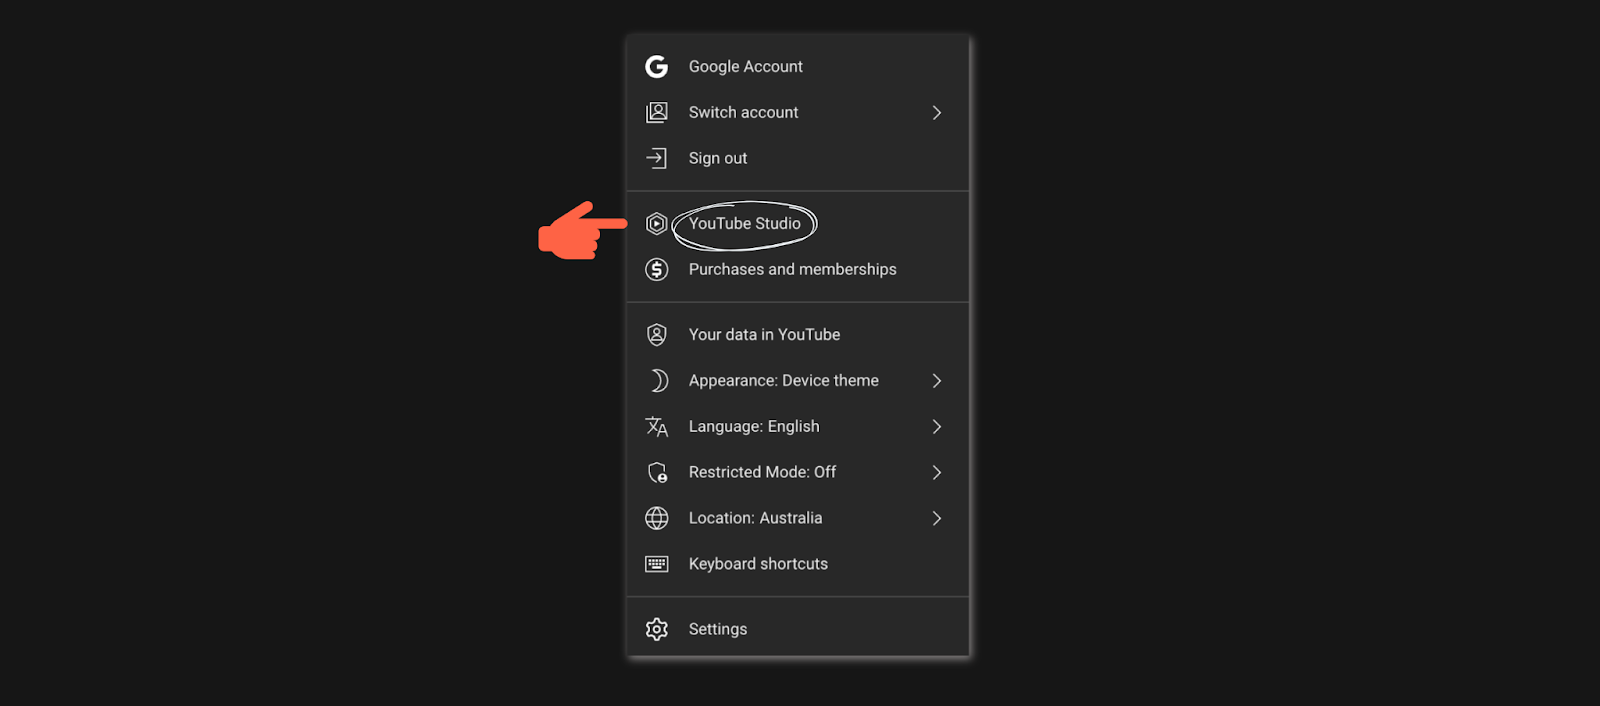
Sign in to your YouTube account and click on your profile icon in the top right corner of the screen.
From the dropdown menu, select YouTube Studio to open the dashboard.
Alternatively, you can also visit YouTube Studio by entering https://studio.youtube.com directly in your browser.
Once you're in YouTube Studio, you’ll find all the tools needed to manage your videos, track performance, and interact with your audience.
How to use YouTube Studio: A beginner’s guide
Using YouTube Studio is pretty easy, even if you are a beginner. From creating your account to checking analytics, here's a step-by-step guide:
1. Create your YouTube account
Before you can dive into YouTube Studio, you need to create a YouTube account.
If you already have a Google account, you’re in luck! YouTube is tied to Google, so you can use your existing credentials to sign up. Here’s how you can create your YouTube account:
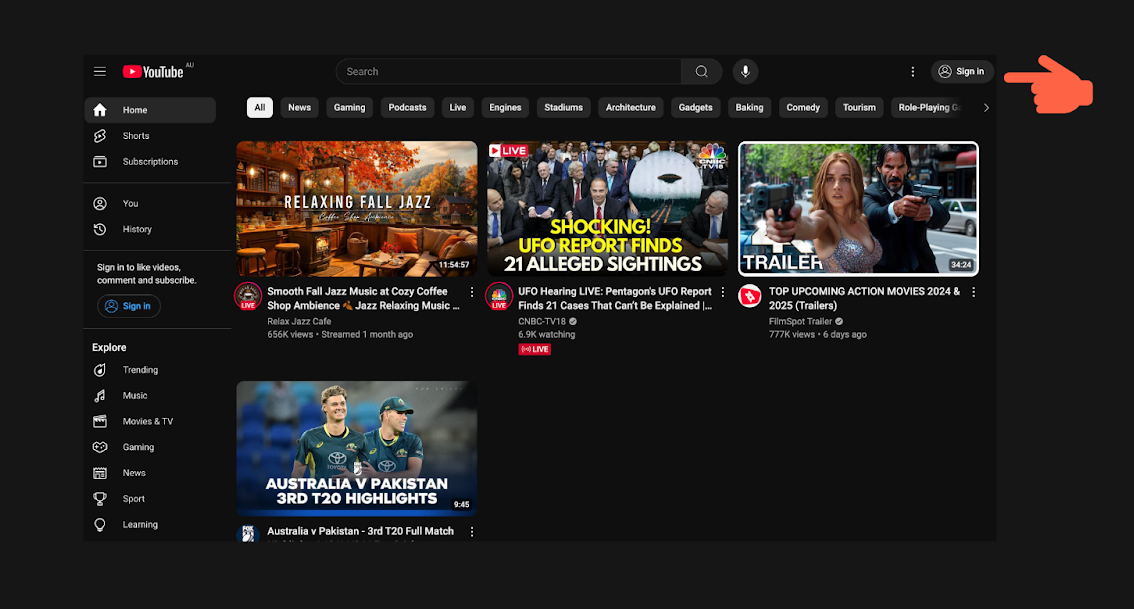
Go to YouTube and sign in
Head to YouTube’s homepage. In the top right corner, you’ll see a "Sign in" button. Click that, and enter your Google account details (if you have them).
If not, you can complete the sign-up process manually.
2. Create your channel
After signing in, you’ll be prompted to create your YouTube channel. Click on your profile icon in the top right, and then select Your Channel.
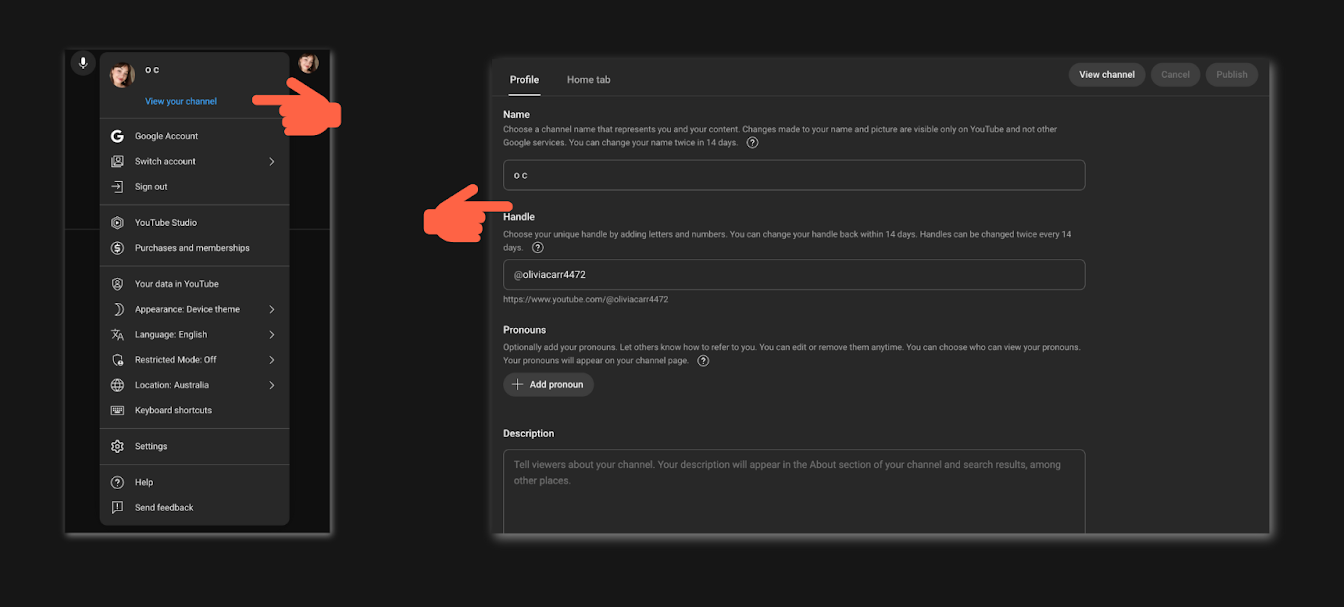
If this is your first time, you’ll be asked to create a name for your channel. Choose something that reflects the content you plan to create. You could use your name, or come up with a brand.
Remember, you can always change your channel name down the line, so don’t put too much pressure on it to begin with.
Once you’ve created your channel, it’s go time! I.e, you’re ready to move on to YouTube Studio and begin uploading your content.
3. Upload a video to YouTube Studio
Now that you have your account set up, let’s upload your first video. Here’s how:
Go to YouTube Studio
You can access YouTube Studio by clicking on your profile icon in the top right corner and selecting YouTube Studio, or by going directly to studio.youtube.com.
Click the upload button
In YouTube Studio, you’ll see a camera icon with a plus sign at the top right of your dashboard. Click this and select Upload Video.
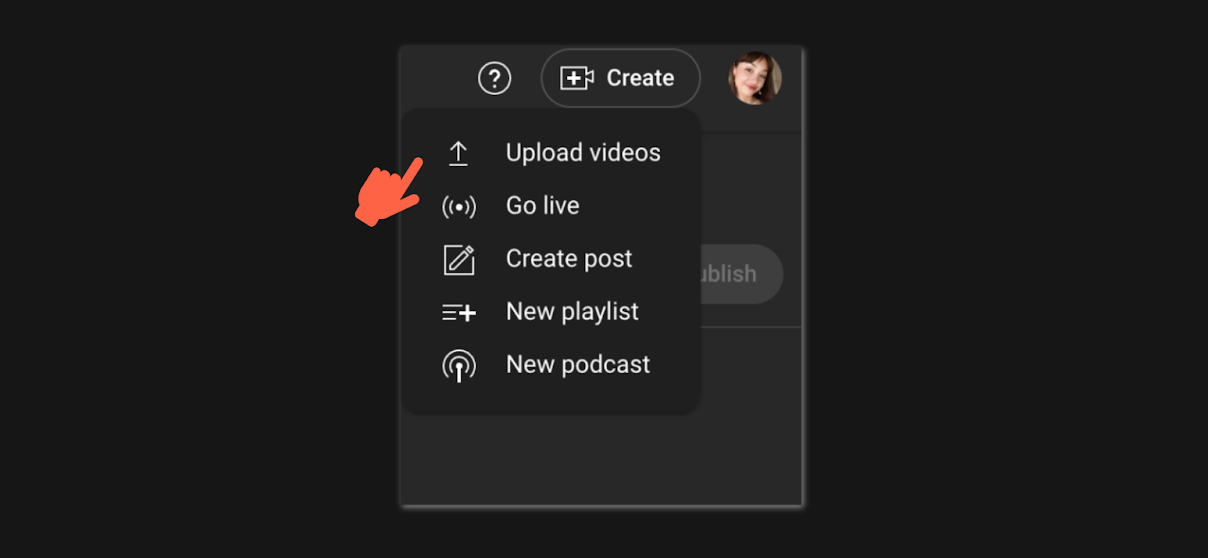
Select your video
You’ll be prompted to select a video from your computer to upload. Once you pick your video, it will start uploading to YouTube.
Fill in video details
After your video uploads, YouTube Studio will prompt you to add details. This includes the video’s title, description, and tags.
While many new creators overlook the importance of these finer details, they matter.
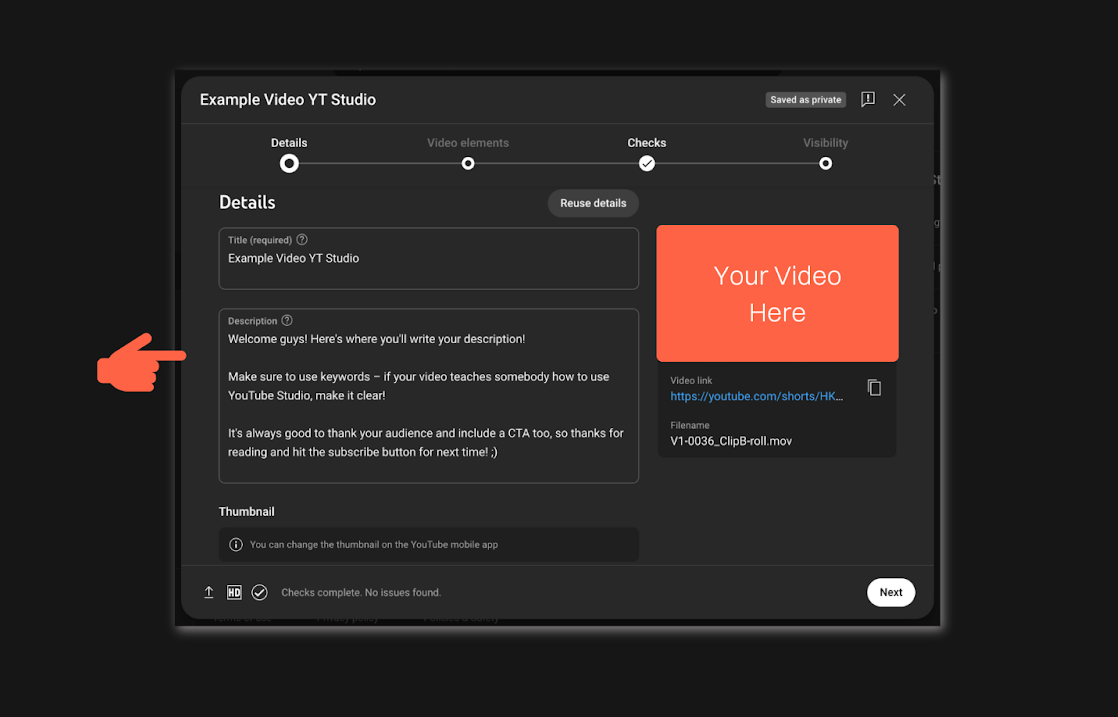
Try to use keywords in your title, and keep it concise. When it comes to descriptions, more detail is good – you can even include things like timestamps to guide your audience through and know what to expect, particularly for longer videos.
If you’re posting YouTube Shorts, keep captions short and sweet with a few keywords – and yes, hashtags work on YouTube shorts! They can significantly boost your reach to the right people.
Choose privacy settings
You can decide if you want the video to be public, unlisted, or private. Public means anyone can view it, while private or unlisted restricts the audience.
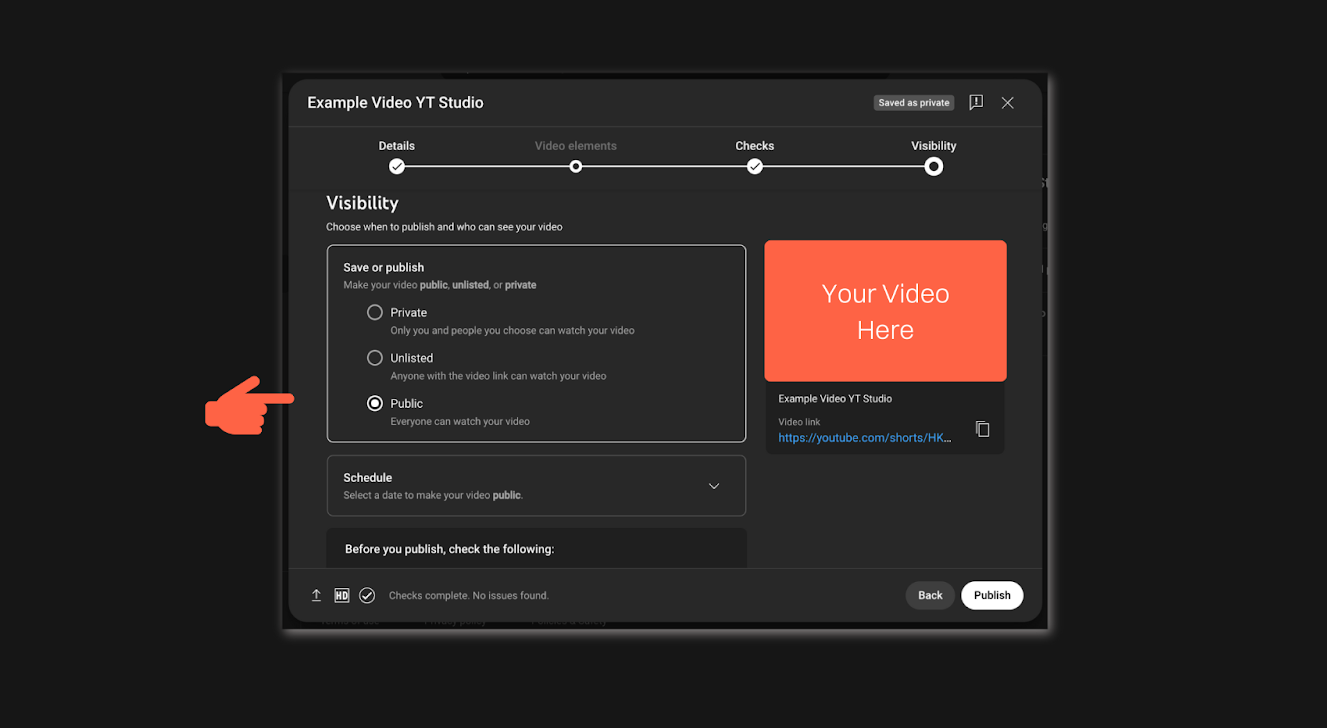
While most of your videos are likely to be public (this is the only way to grow your audience), you can use private or unlisted for a few reasons, too:
Practice: It’s nerve-wracking uploading content for the first time. You might wish to upload private or unlisted videos to watch back yourself, get comfortable with seeing yourself on camera, and even send to a few trusted friends for feedback.
Paid access: Some YouTubers will sell paid access to unlisted or privately listed videos and provide customers with the URL to view them.
Add to a playlist
If you have playlists on your channel, you can choose whether to add uploaded videos for better organization and discoverability.
Publish
Once all the details are added, click Publish to make your video live.
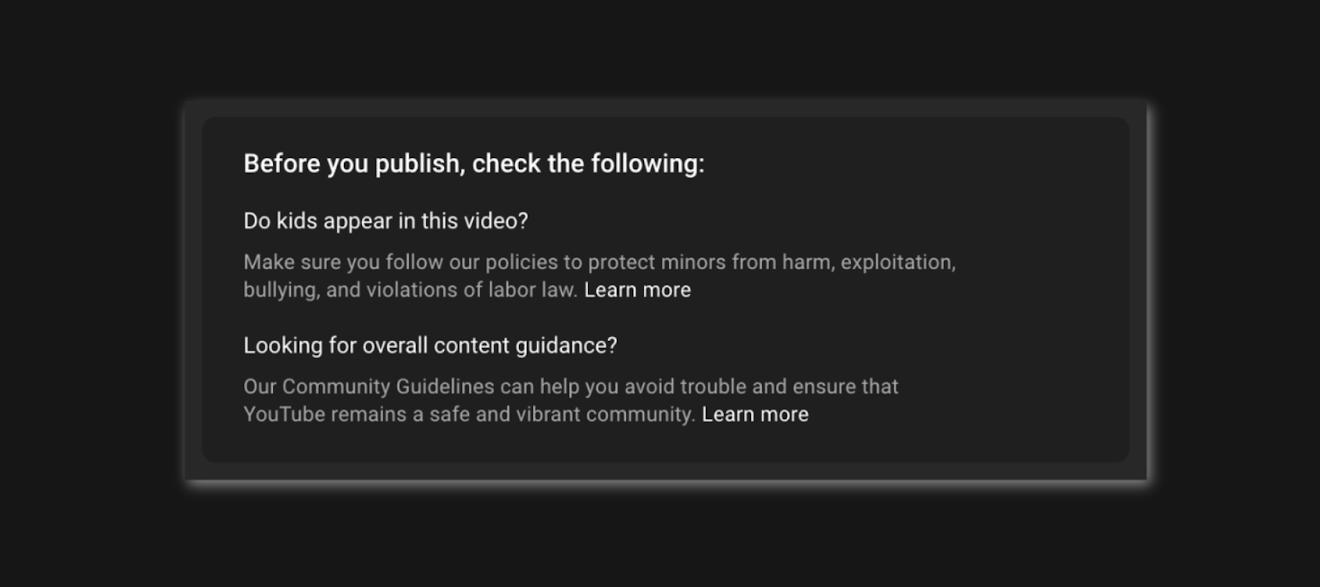
That’s it! Your video is now uploaded to YouTube, and you can manage it through YouTube Studio.
4. Edit your videos in YouTube Studio
As I promised, you can even use YouTube Studio to edit videos directly on the platform without needing external editing software.
Here’s how:
Access your video
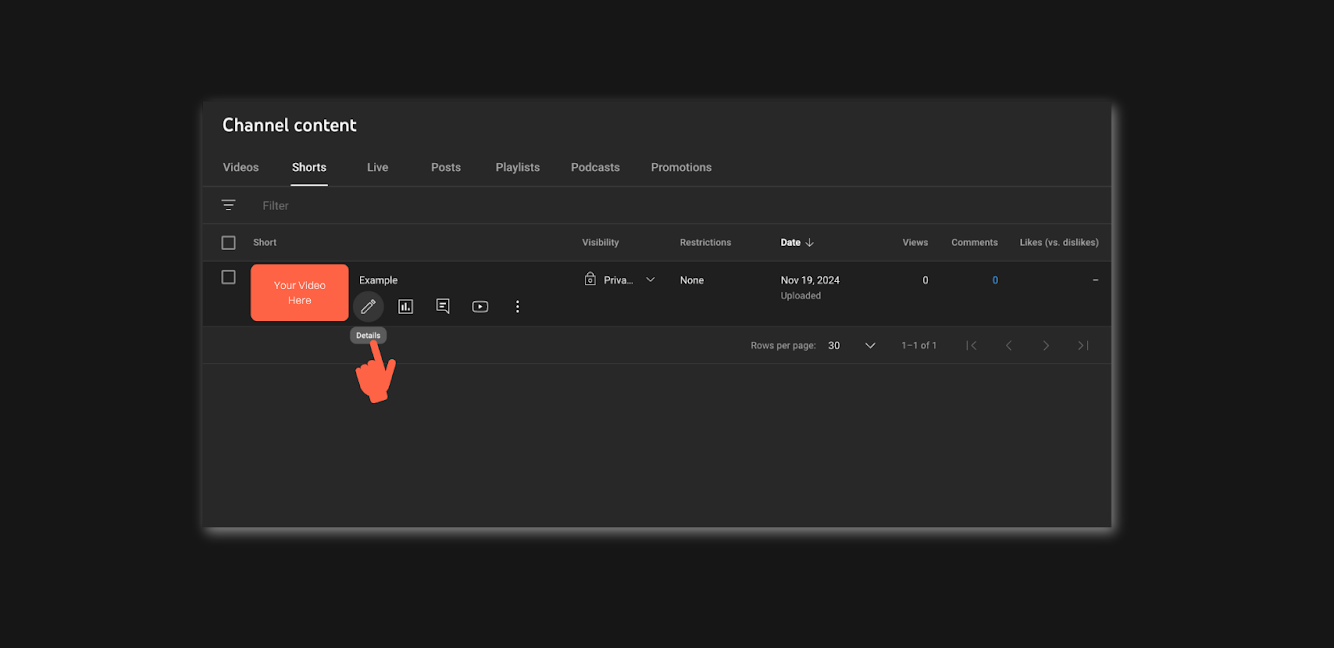
Go to Content on the left sidebar in YouTube Studio. This is where all your uploaded videos are stored. Find the video you want to edit and click on it.
Click the pencil icon
This will open the Video Details section, where you can edit the title, description, and more.
Edit thumbnail
You can also upload a custom thumbnail or choose one from the automatically generated options.
Trim or cut
Under the Editor tab, you can trim your video to remove unwanted parts. This is especially useful if you need to cut out a section or shorten your video.
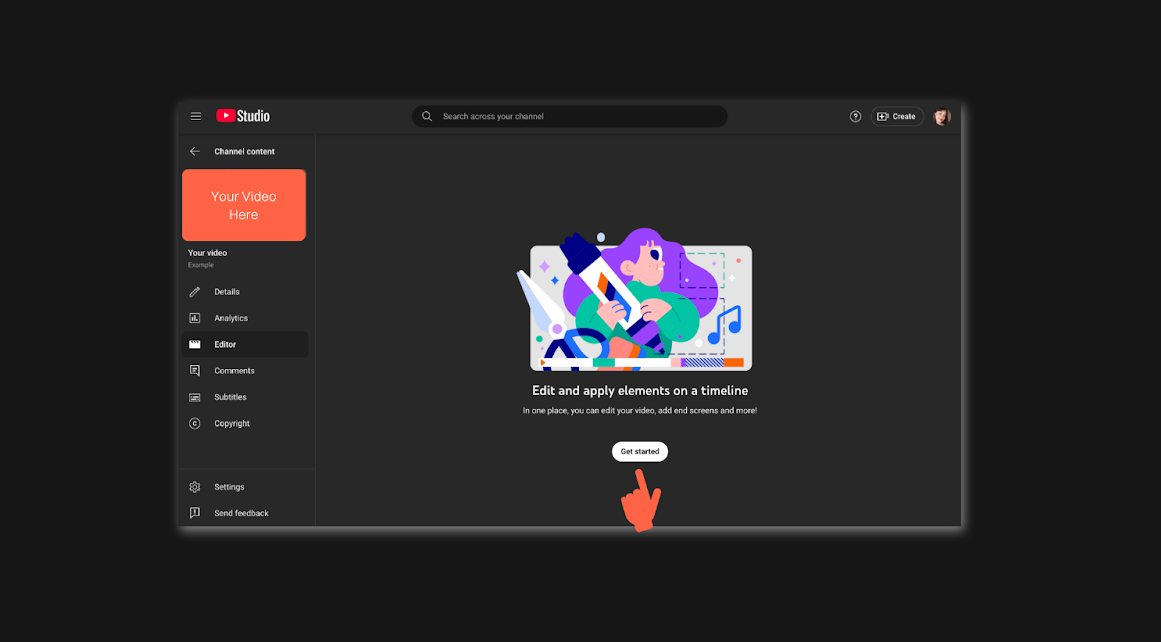
Add cards and end screens
These are interactive elements you can add to encourage viewers to check out more of your videos, subscribe, or visit external links.
Save changes!
After making your edits, be sure to click Save to apply the changes to your video.
As you can see from the screenshots above, YouTube Studio’s editing tools make it easy to tweak your videos as you’re uploading them without advanced software or skills.
Navigating your YouTube dashboard and understanding your analytics
YouTube Studio's Dashboard and Analytics sections give you a deeper look into how your videos are resonating with your audience and provide valuable data to help you grow your channel.
The YouTube Studio dashboard
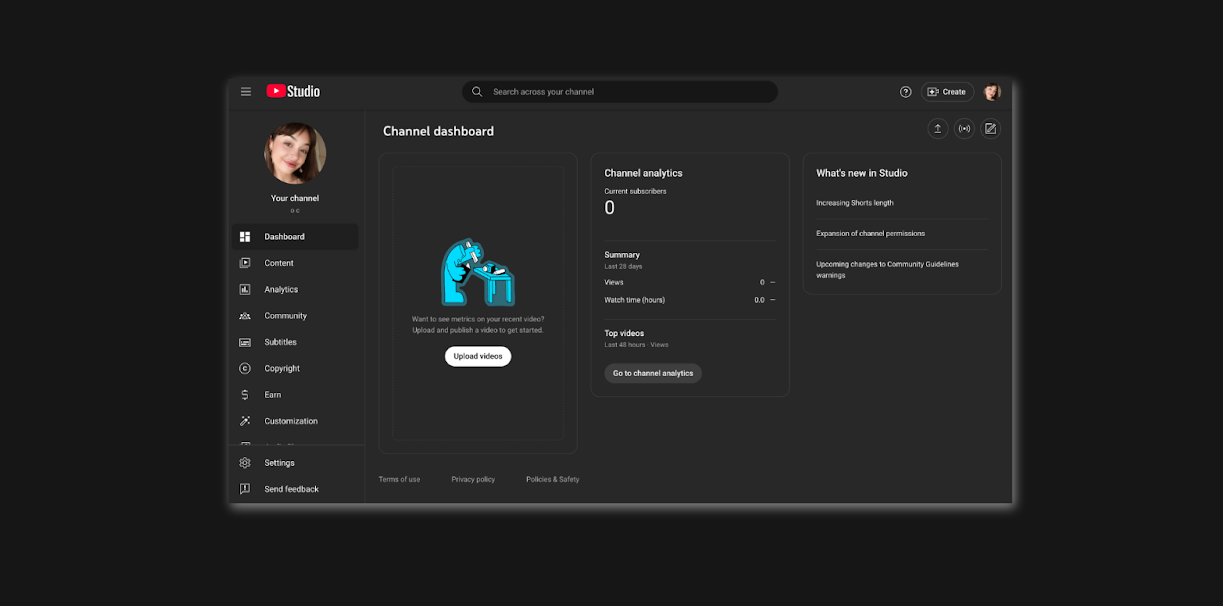
The Dashboard provides an overview of your channel’s recent activity, video performance, and key updates. It gives you a quick look at how your content is doing without needing to dive into deeper analytics.
You’ll see key performance indicators such as views, subscribers, and any updates or alerts from YouTube.
These alerts can include new comments on your videos, notifications about community guidelines strikes, and other important information that may require your attention.
You’ll also see a summary of the most recent videos and their performance, so you can easily track how new content is being received.
The subscriber count and view totals are prominently displayed in the top left corner, helping you keep tabs on your channel’s growth.
YouTube Studio analytics
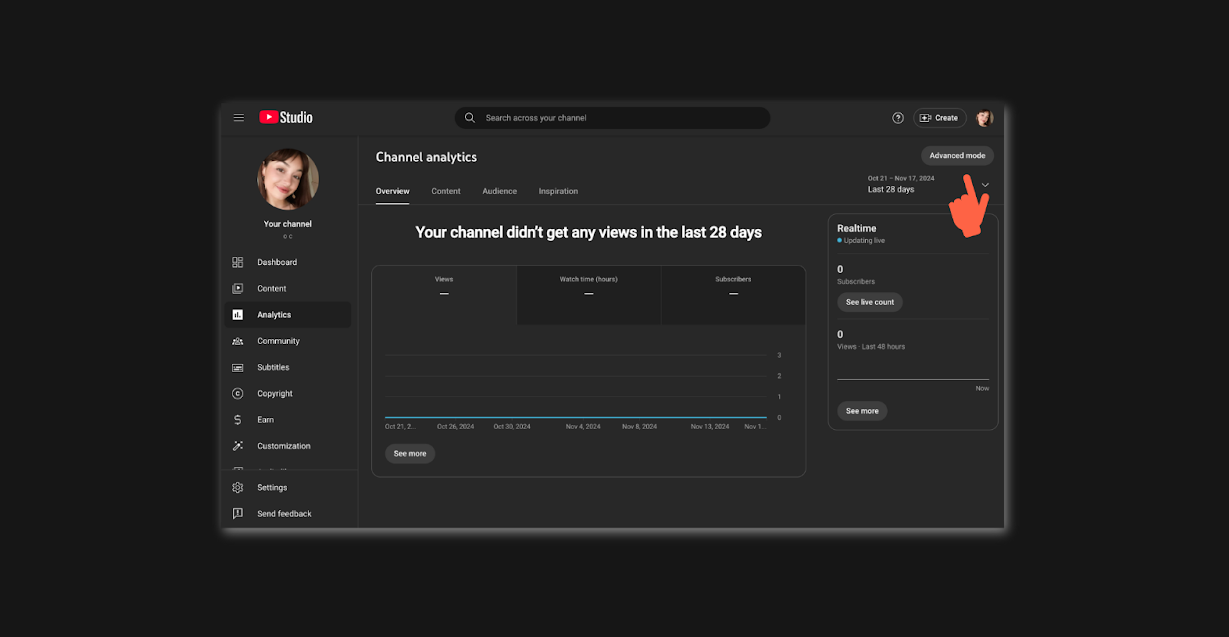
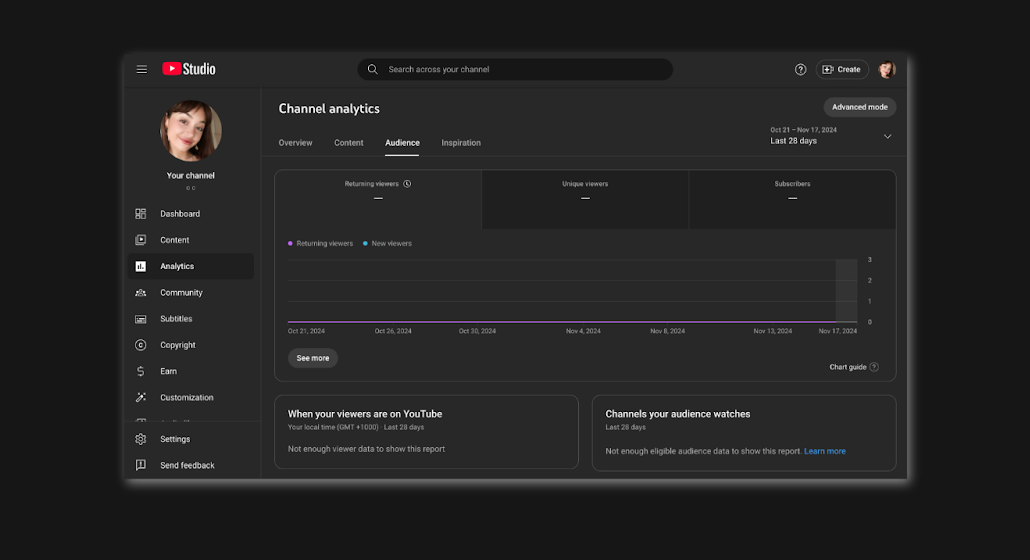
The Analytics tab in YouTube Studio is where you can really start to understand what’s working and what’s not.
This section gives you a detailed breakdown of how your videos are performing in several key areas:
- Overview: Provides a high-level summary, showing you total views, watch time, and revenue (if you're monetized). It’s here you can get a snapshot of your channel’s overall performance over a selected time.
- Advanced Settings: This tells you how people are finding your content, including metrics like Impressions and Click-Through Rate (CTR).
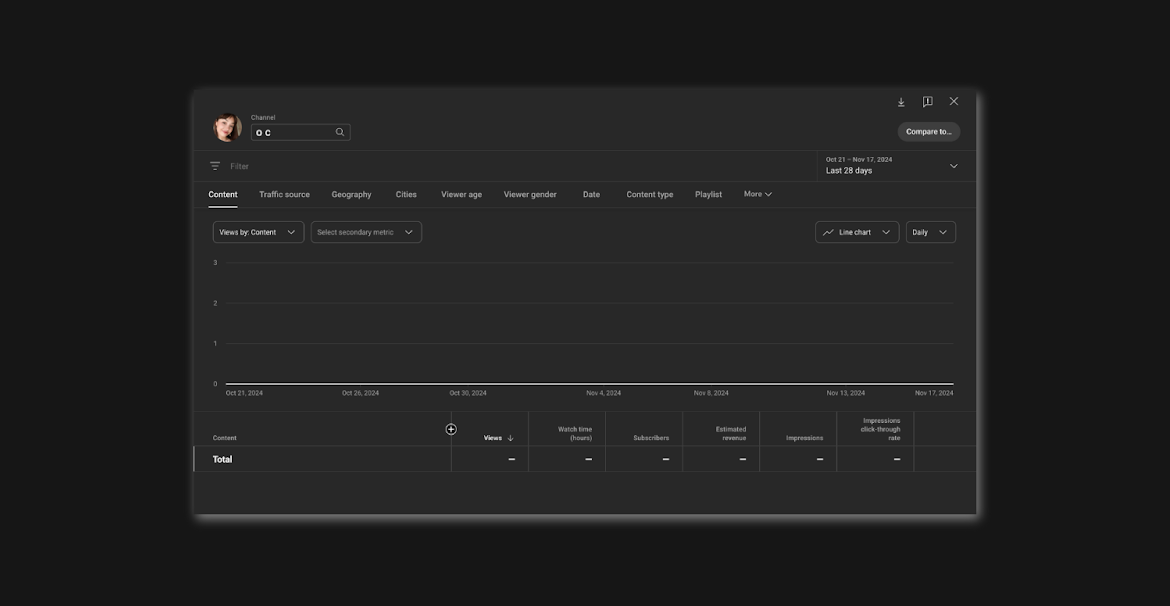
Impressions show how often your video thumbnail was shown to potential viewers, while the CTR tells you what percentage of people actually clicked on the video after seeing the thumbnail.
- Audience: Provides demographics, showing you who is watching your videos, their ages, genders, and locations. Also tells you how many of your viewers are returning versus new viewers.
Managing comments and engaging with viewers
Another critical element of the YouTube Studio is the Comments section, where you can interact directly with your audience.
We said it earlier: building a relationship with your viewers is a must if you want to grow your channel. A super simple way to build a relationship with your audience is by simply responding to comments.
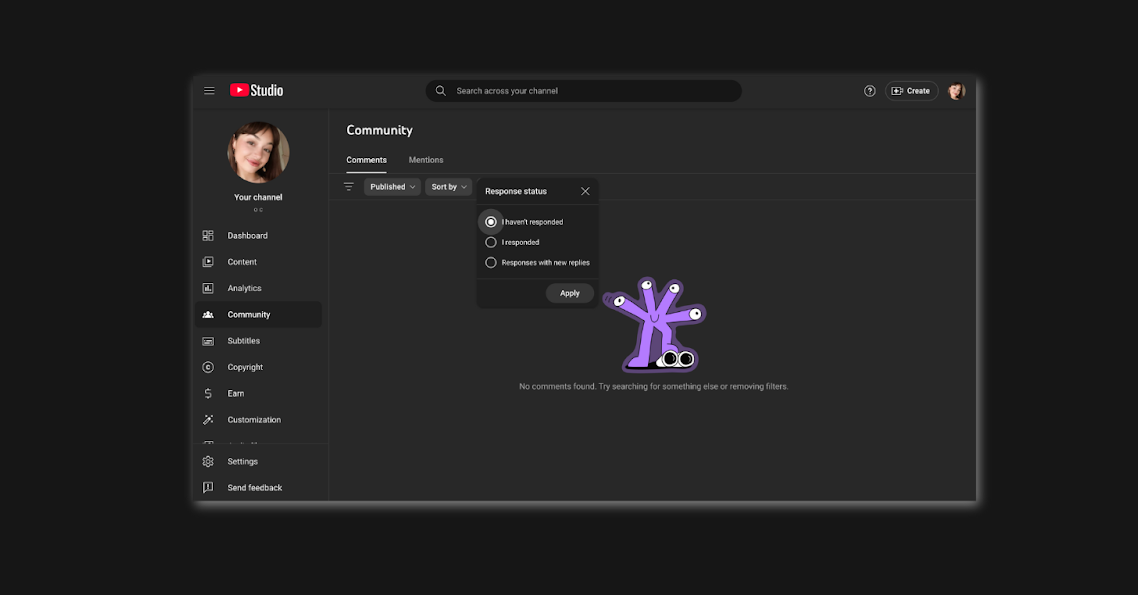
This section gives you a full overview of all the comments on your videos in one place, making it easy to monitor and respond to feedback.
You can also filter comments to see the ones that are most relevant to you, such as those that need a reply, or comments that are potentially spammy or inappropriate.
Can you make money with YouTube Studio?

Yes! Not only can you, but YouTube Studio is how your favorite creators make money directly on YouTube. Well, that, and leveraging their audience externally (which I’m getting to).
But first, let’s cover making money with YouTube Studio. Once you start uploading content regularly and building an audience, YouTube offers several ways to earn money directly from the platform:
Ad revenue
One of the most popular ways for YouTubers to earn money is through ads placed on videos.
YouTube offers several ad formats, including display ads, overlay ads, skippable video ads, and non-skippable video ads.
These ads appear before, during, or alongside your video content, and you earn revenue based on views and engagement.
Channel memberships
If you have over 30,000 subscribers, you can enable channel memberships, which allow viewers to become paying members of your channel.
Memberships give them access to perks such as exclusive badges, emojis, and members-only content. This is a great way to build a community and generate recurring income. But, YouTube can take pretty hefty cuts of membership earnings.
Pro tip: Consider moving your subscribers over to another platform where you can share private video content, create member communities, host live videos, and more – like Whop. Plus, when you funnel your audience externally to your whop hub, we only take 2.7% + $0.30 of your earnings.
Super chat and super stickers
Super chat allows your viewers to pay to highlight their messages, while super stickers let them purchase animated stickers to show support during live broadcasts.
Both are effective ways to engage your audience and monetize live content.
YouTube Premium revenue
YouTube Premium subscribers pay for an ad-free experience, and you, as a creator, earn a share of the revenue generated from Premium subscribers who watch your content.
This is a passive form of income that’s based on the watch time of YouTube Premium members.
Merchandise shelf
You can use the merchandise shelf feature in YouTube Studio when you reach 10K followers, which lets you sell your own branded merchandise directly through YouTube.
You can partner with platforms like Teespring or Spreadshop to display your products on your channel page and videos.
Monetize your YouTube channel with Whop
YouTube Studio helps you monetize your content, but its built-in tools take a chunky cut of your earnings.
Whop lets you take control and earn more by turning your YouTube audience into paying customers directly.
With Whop, you can:
- Sell digital products like courses, eBooks, templates, or tutorials.
- Offer exclusive memberships with perks that go beyond YouTube’s standard memberships.
- Manage subscriptions and payments directly, keeping more of your revenue.
By funneling your viewers from YouTube to your Whop, you can monetize in ways YouTube doesn’t allow (all while building a closer relationship with your audience).
Move beyond in-platform monetization and fully leverage your YouTube content with Whop.
FAQS
What is YouTube Studio used for?
YouTube Studio is a platform that helps creators manage their YouTube channels. It allows users to upload videos, monitor performance analytics, interact with viewers through comments, and customize channel settings.
Creators can also manage monetization options, edit video details, and optimize their content to improve their reach and engagement.
Can anyone use YouTube Studio?
Yes, anyone with a YouTube account can access YouTube Studio. However, you must be at least 13 years old (or the minimum age required in your country) to create a YouTube account.
YouTube Studio is available in most countries, but some features (like monetization) may not be available in certain regions due to local laws or YouTube’s policies. Additionally, YouTube will likely restrict access to accounts that have violated community guidelines.
How do I access YouTube Studio?
To access YouTube Studio, sign in to your YouTube account, click on your profile icon in the top-right corner, and select YouTube Studio from the dropdown menu.
Alternatively, you can go directly to studio.youtube.com for easy access, or simply enter it into Google and click the first result.
Can YouTube Studio be used to edit videos?
Yes, YouTube Studio offers basic video editing features, such as trimming, adding music, or blurring parts of your video.
For more advanced edits, creators typically need to use external video editing software before uploading to the platform.
How can I see my YouTube video analytics?
In YouTube Studio, go to the Analytics tab to view detailed insights about your videos. You can track metrics like views, watch time, audience demographics, and traffic sources, helping you measure performance and optimize your content.


