Ready to make money online? Discover how to create and sell a digital planner and start making passive income with ease.
Key takeaways
- Targeting a specific niche audience like ADHD, fitness, or students shapes your planner's content and marketing strategy.
- Start with beginner-friendly tools like Canva or Google Slides, then upgrade to advanced software as skills grow.
- Structure your planner logically from yearly overviews to daily pages, testing the flow with real users before finalizing.
People are busier than ever which has a knock-on effect: they need to be more organized, but paper diaries just aren’t cutting it—enter the digital planner.
Digital planners offer a unique blend of flexibility and functionality that lets users customize their experience in ways that traditional paper planners can’t. As a result, they’re in high demand.
The digital planner app market was valued at $7.8 billion in 2023 and is projected to reach $25.6 billion by 2031—a staggering 17.1% annual growth rate.
By making your digital planner, you’re not just helping people stay organized, you’re tapping into a growing market and creating a passive income stream.
How do digital planners work?
Much like a paper planner, digital planners help users manage their time—you can jot down notes, track tasks, and manage schedules, just like you would with a paper planner.
Digital planners can be used on tablets, mobile devices, laptops, and computers and often sync to the cloud so you can access everything from anywhere.
They typically come with pre-designed layouts that you can plug and play, like daily, weekly, or monthly calendars, to-do lists, habit trackers, budget planners, goal trackers, and more.
Unlike a traditional paper planner, digital planers let you add or remove pages as needed and rearrange layouts to create something more personal.
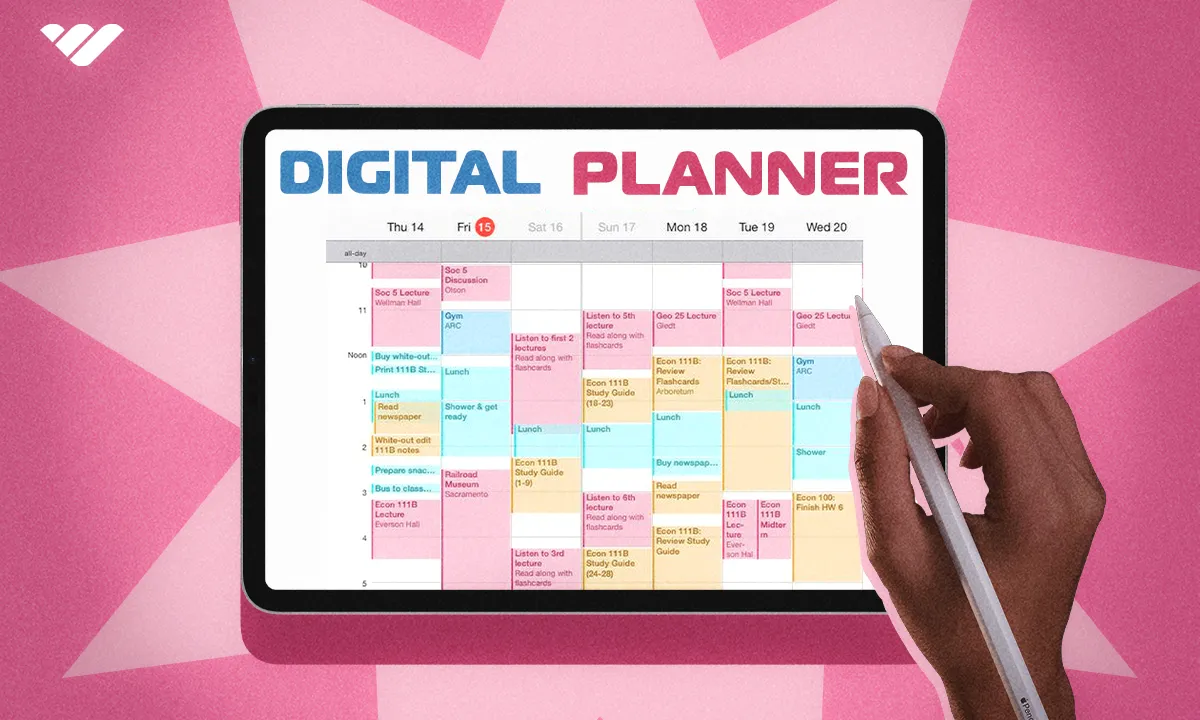
It’s the features and flexibility that are the biggest differences between paper planners and digital planners. Some digital planners include interactive elements, like hyperlinks that let users jump between sections and searchable text.
How to make a digital planner in 3 steps
Creating a digital planner can feel like a huge task, but if you break it down into manageable steps it suddenly doesn’t seem so overwhelming.
Before we dive into the nitty-gritty details, here’s a bird’s-eye view of the main points to consider while crafting the perfect digital planner.
- Identify your target audience. Understanding who’s going to use your planner will help you design it and create content to meet specific needs.
- Decide what your planner will be about. Choosing a clear theme or purpose for your planner will give you a sense of purpose when you start designing.
- Map out your planner design. Sketching out the layout and structure of your planner lets you visualize how different sections will flow together.
- Choose a design program. Picking the right software to actually create your planner will impact the final design and functionality.
- Put together your digital planner. Assemble all your design elements, content, and interactive features into a cohesive digital product.
- Upload and sell your digital planner. Once your planner is complete, you can upload it to an online platform or marketplace to make it accessible for people to buy.
Let’s dive into more detail.
1. Choosing a niche for your planner
Digital planners aren’t one-size-fits-all. A student planning their semester timetable needs different planner features than someone organizing a weekly cooking schedule and vice versa.
This is where niche comes in—who are you creating your digital planner for? Will it be busy parents trying to juggle three kids with extracurricular activities? Will it be spiritual college students who want to set lofty goals?
Your audience will determine the layout of your digital planner, but they’ll also heavily inform how you market it.
Consider:
- Demographics. How old is your target audience? Where do they live?
- Interests. What does your audience hope to achieve with a digital planner?
- Psychographics. What challenges are stopping your audience from achieving those goals?
Let’s take a look at some popular niches to highlight how the audience drives content.
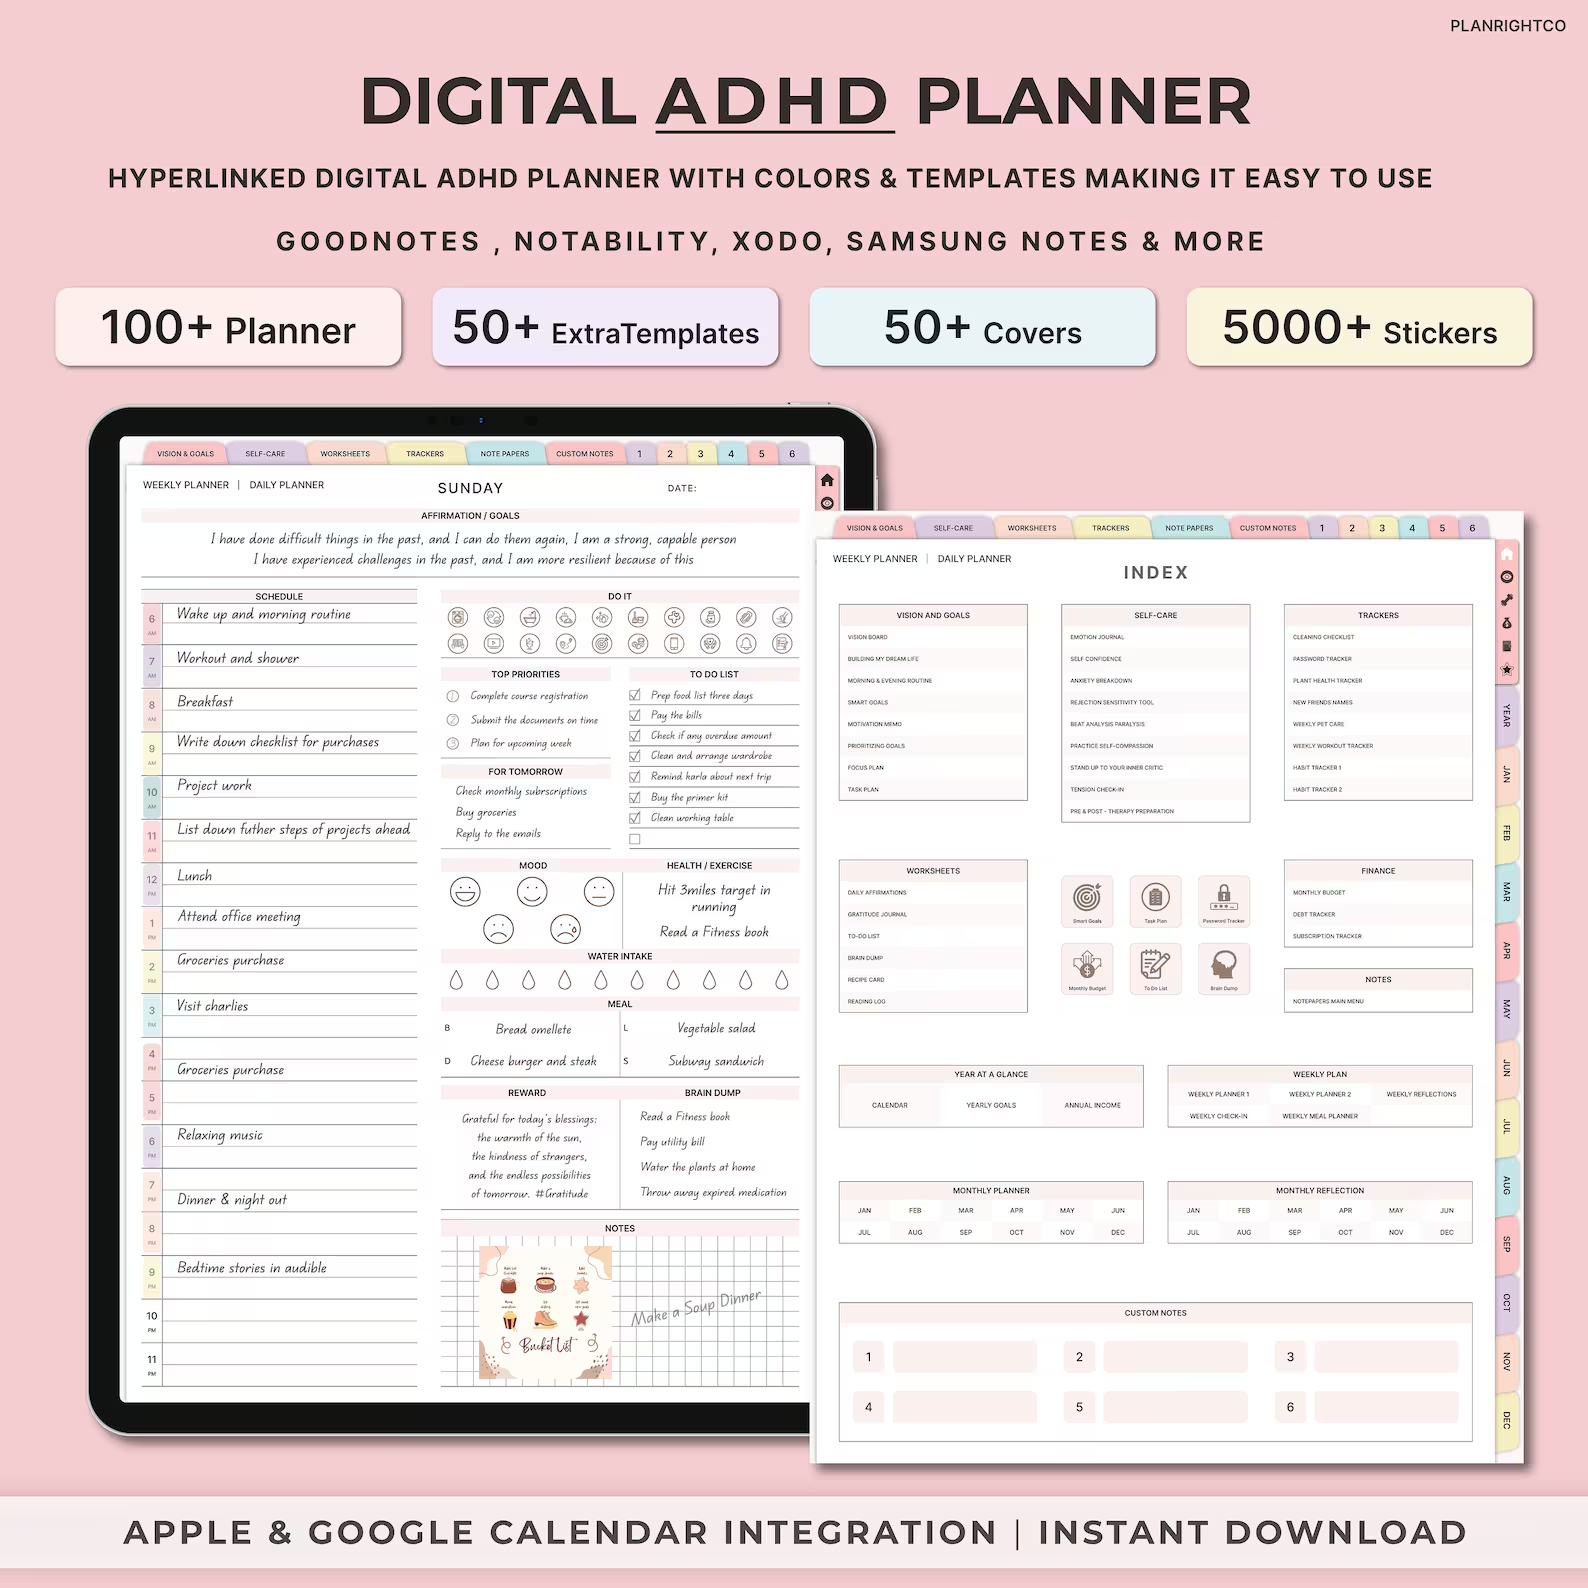
ADHD planners
For folks with ADHD, staying organized can be a real struggle. A digital planner can help them stay on top of tasks and manage their time more effectively with:
- Simple, clutter-free layouts to minimize distractions
- Task breakdown sections to make big projects overwhelming
- Time-blocking tools to help manage hyperfocus and time blindness
- Mood and symptom trackers to spot patterns and triggers
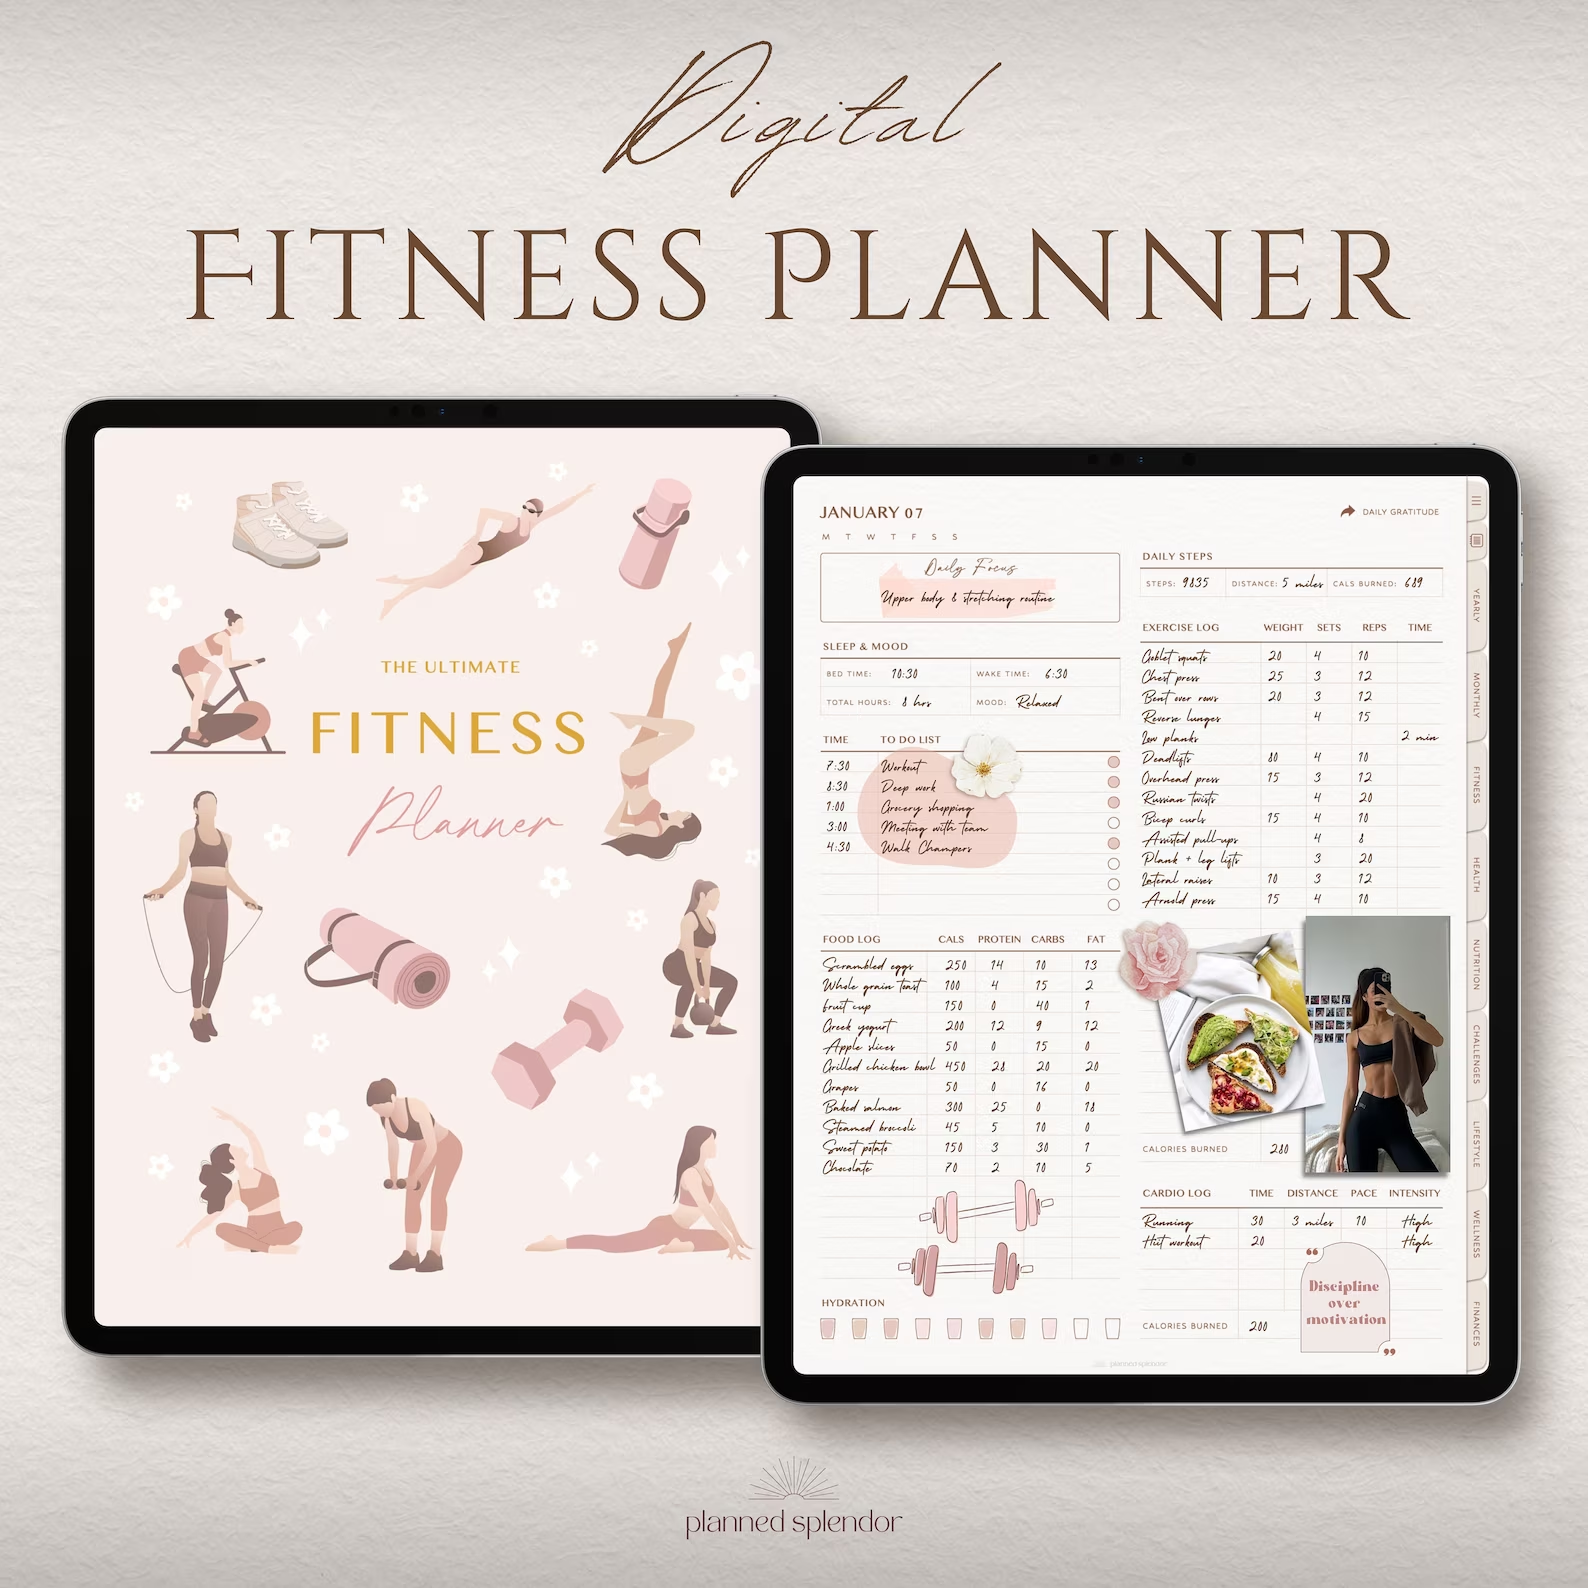
Fitness planners
Gymgoers and fitness enthusiasts often track their workouts and personal bests. A digital planner aimed at this audience might include workout logs to track reps, meal planning sections for those counting macros or calories, progress photo spaces, and goal-setting pages.
Student planners
For busy students, a digital planner can be a lifesaver. If you plan to target this audience, consider including assignment trackers to help them juggle multiple classes and deadlines, study schedule templates, grade calculators, and extracurricular activity planners.
You can make money selling guides and planners:
Sell study guides for your hardest classes
- Fatimah, college student making money with Whop
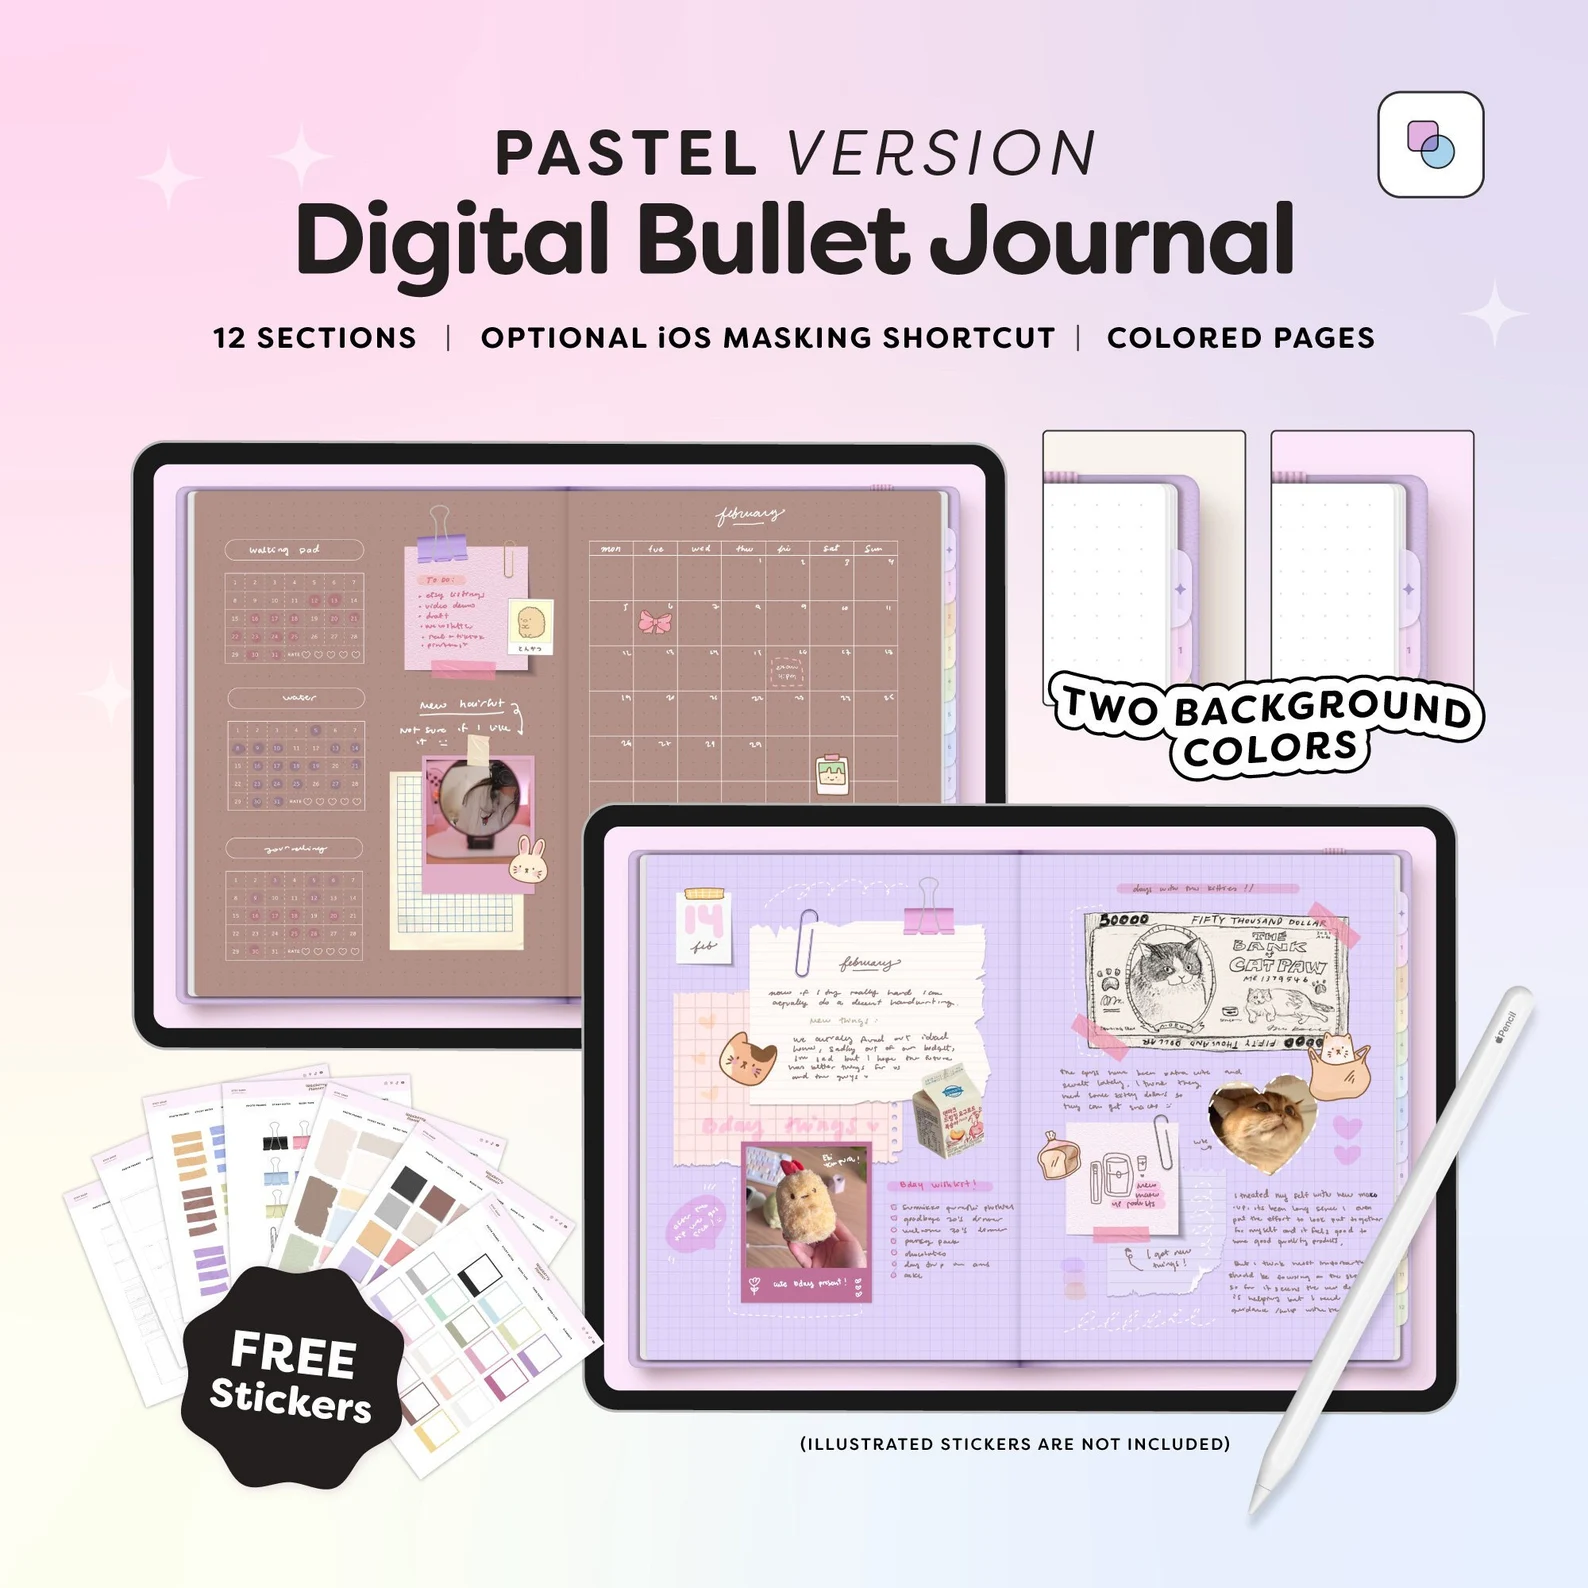
Bullet journal planners
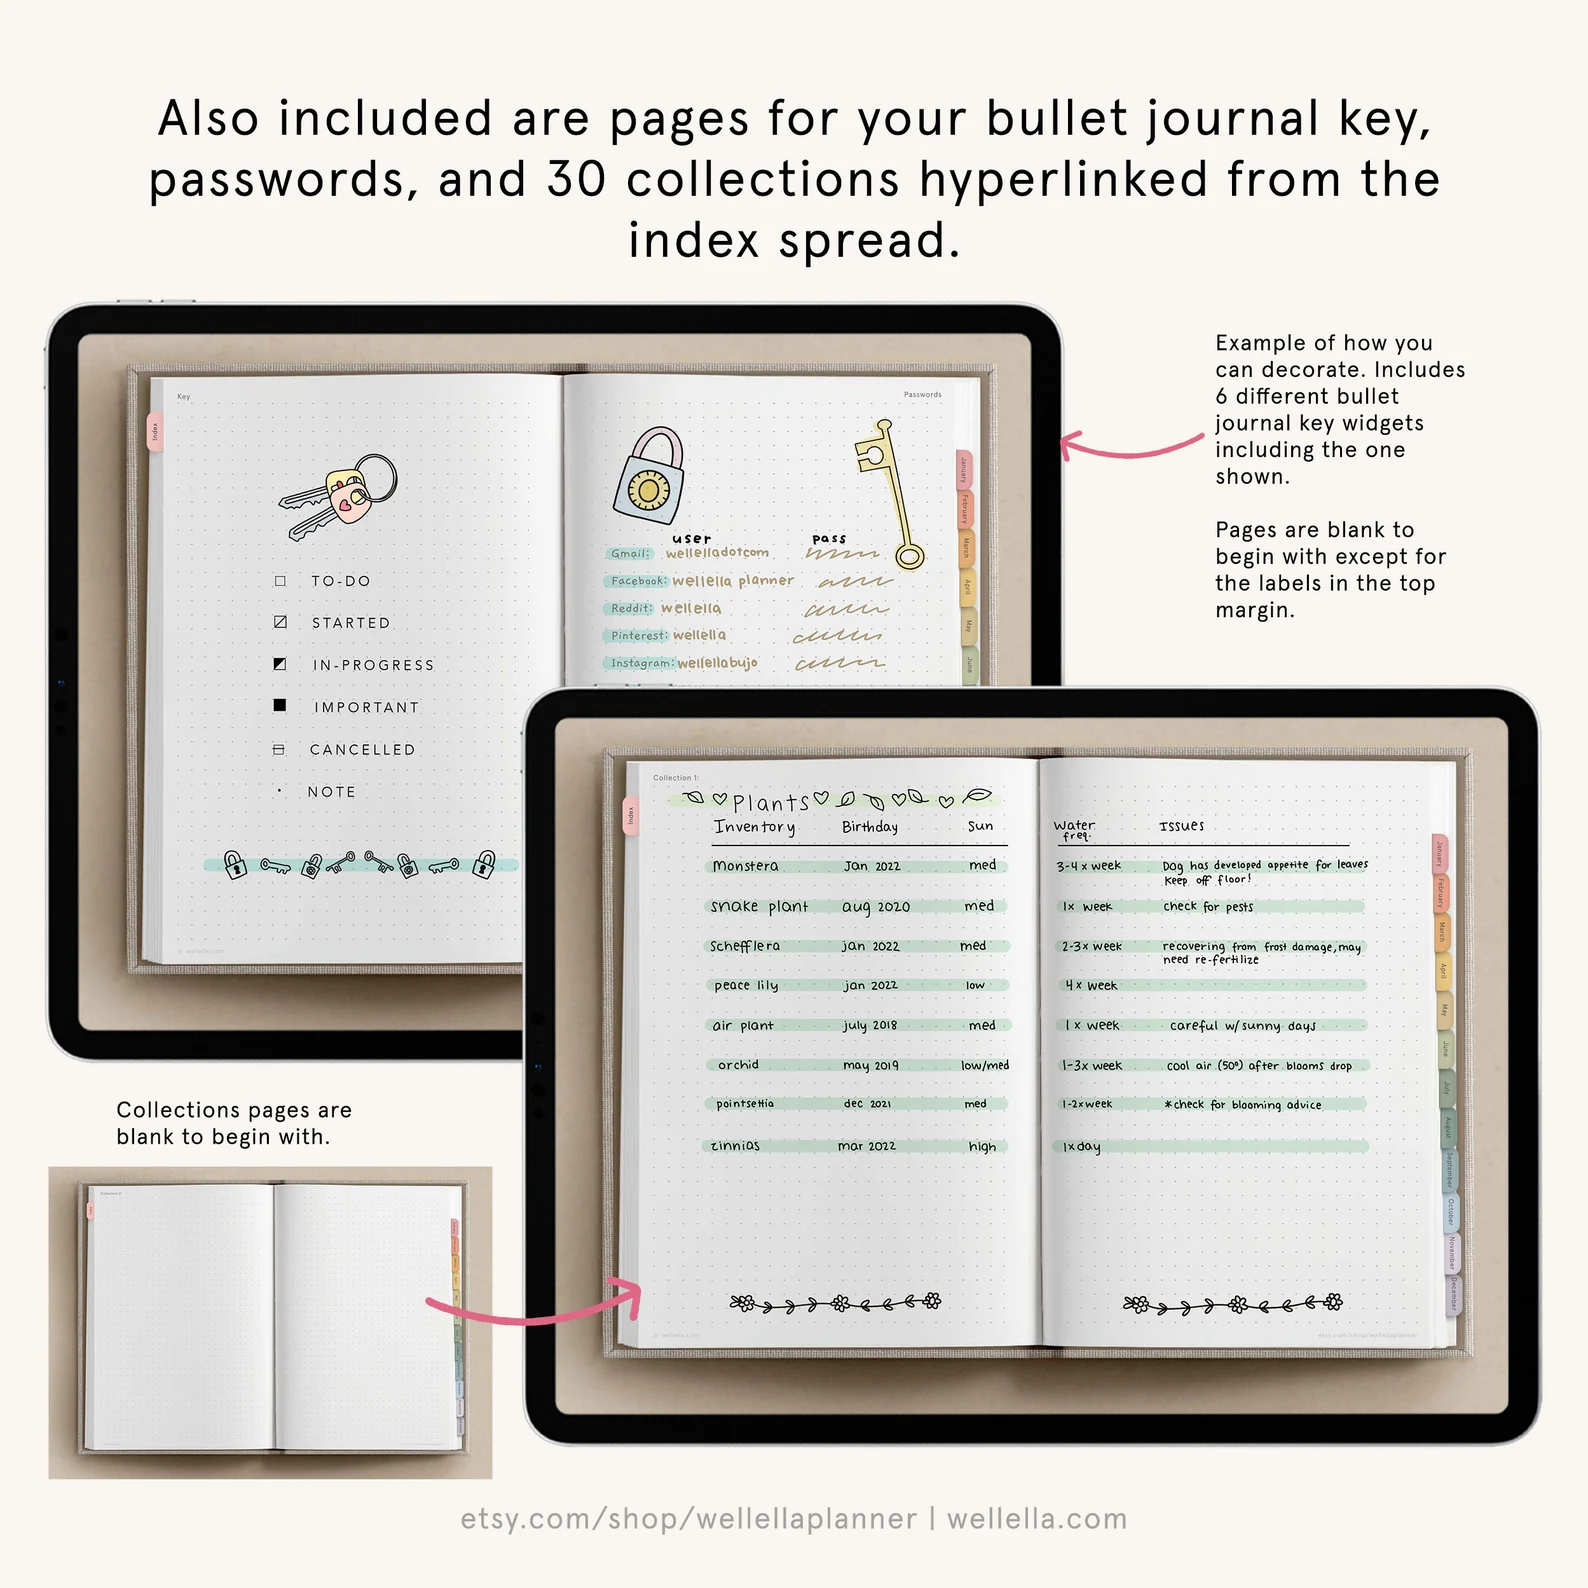
A bullet journal combines the key features of a planner, a diary, and a to-do list in a single notebook. They’re often filled out using symbols that indicate different tasks or statuses. These planners might include dotted or grid pages, habit trackers, and mood mandala templates.
Business and entrepreneurship planners
Hustlers and side-giggers often rely on digital planners to keep themselves in check. These might include project management tools, income and expense trackers, marketing campaign planners, and networking contact logs.
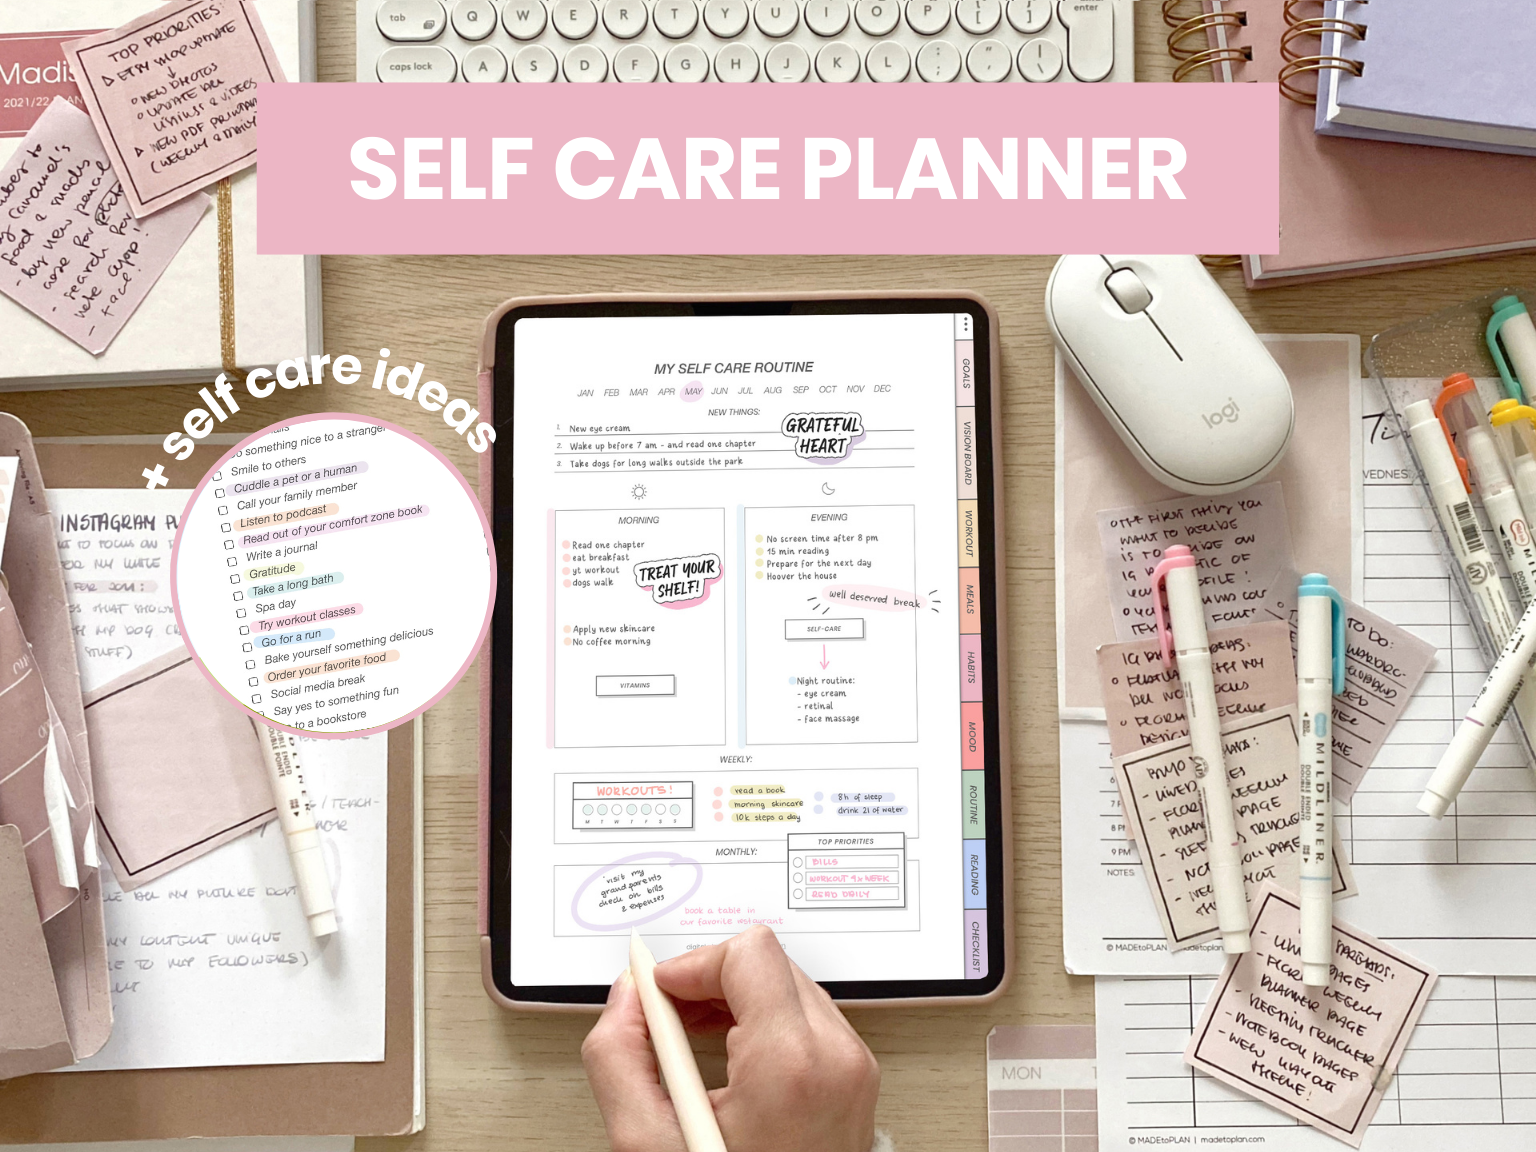
Mental health and self-care planners
For those prioritizing their well-being (which should be all of us, really), mental health and self-care planners can help maintain discipline. These often include gratitude journals, mood trackers, self-care checklists, and spaces to jot down therapy session notes.
2. Finding the right digital planner design program
Once you’ve decided on your niche and what your planner will center around, it’s time to get to the fun bit—actually making it. Unless you have mad design skills, chances are you’ll need the helping hand of a digital planner design program. These are helpful pieces of software that can bring your vision to life.
When choosing your design program, think about:
- How easy it is to use—you don’t want to spend more time figuring out the software than actually designing your planner.
- Its features—look for things like hyperlink capabilities, custom page sizes, and the ability to create master pages or templates.
- How compatible it is with your device.
- How much it costs.
- What kind of learning curve it requires—unless you’re a tech whiz, you’ll want something that’s relatively easy to get started with.
Here are some popular choices:
Canva
Canva is super user-friendly and ideal for design newbies. It comes with tons of free templates you can use on the free version. It’s also cloud-based, so you can work from anywhere.
The downside is it’s not as flexible for complex layouts and the hyperlink feature is a bit basic. But for a quick and pretty planner, it’s hard to beat.
Here's how you can create with Canva.
Adobe InDesign
Adobe’s InDesign software is a bit more advanced. It’s incredibly powerful and versatile, and comes with professional-grade features for layout and typography. It’s excellent for creating complex, multi-page documents and has decent hyperlinking capabilities.
Here’s the rub—it’s expensive and has a pretty steep learning curve. Unless you design planners for a living, it might be overkill.
Affinity Publisher
Affinity Publisher is a lesser-known tool that comes with professional-level features at a fraction of Adobe’s price. It runs off a one-time purchase instead of a subscription and is ideal for creating detailed, customized layouts.
There’s obviously still a learning curve and, because it’s not as widely used as Adobe and Canva, it can be hard to find tutorials.
Google Slides
This might seem like an odd choice, but hear me out. Google Slides has a lot of perks—it’s free and cloud-based, so you can use it from anywhere, and it’s really easy to use if you’ve ever made a presentation.
It’s great for collaboration if you’re working with a team. But the downside is it’s not built for planner design, so you might find yourself wishing for more advanced layout tools.
The “right” program ultimately depends on your skills, needs, and goals. If you’re just dipping your toes in, maybe start with something like Canva or Google Slides. As you get more serious, you might want to level up to Affinity Publisher or InDesign.
3. Creating your planner’s content
This is where your digital planner starts to come to life. It’s time to map out what pages you’ll include and how it will all work together.
Step 1: Organize your planner pages
Start by brainstorming all the sections you want in your planner. Monthly spreads? Weekly layouts? Habit trackers? Goal–setting pages? Make a note of all the things that will be helpful for your target audience (revert back to your niche research here if you need to).
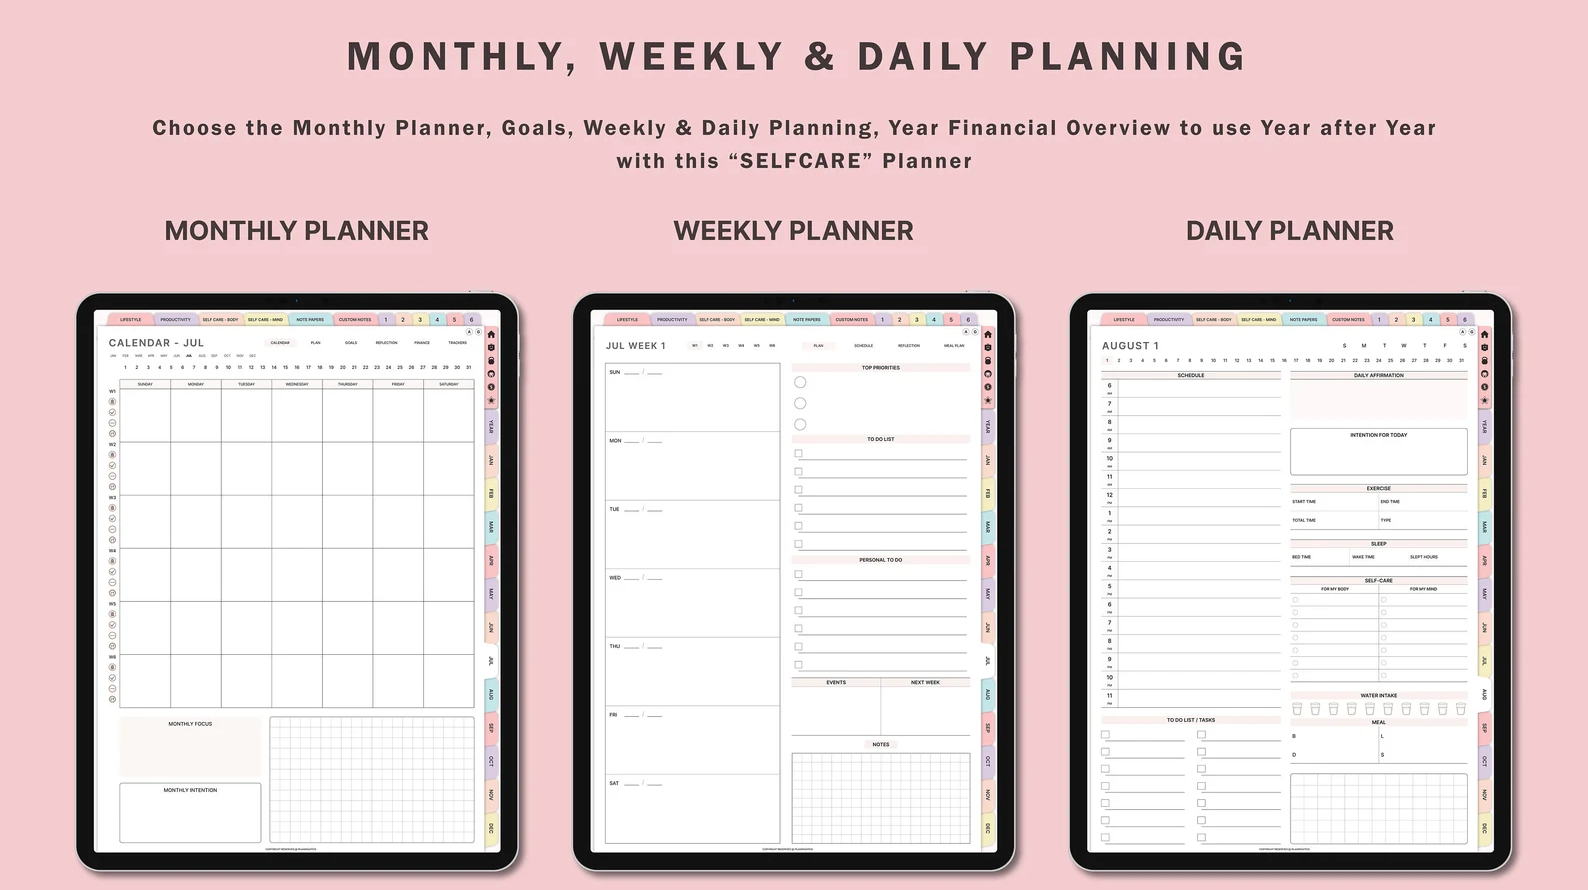
Once you’ve got a list of sections, start to create some kind of order. Think about how you’d naturally use your planner. For example, most folks like to start with a yearly overview, and then move into monthly spreads, followed by weekly or daily pages.
Tip: Create a table of contents. This will give you a birds-eye view of the structure of your planner and help you identify any gaps.
Here’s a sampling of pages you might want to consider:
- Yearly overview. A high-level view of the entire year, with space for major events, goals, and deadlines.
- Monthly spreads. A calendar format that breaks the year into months so users can plan out key dates, appointments, or deadlines.
- Weekly layouts. For more detailed planning—offer a closer look at tasks, goals, and projects for the week ahead.
- Daily pages. Give users a space to record specific to-do lists, appointments, notes, or to track their habits in more depth.
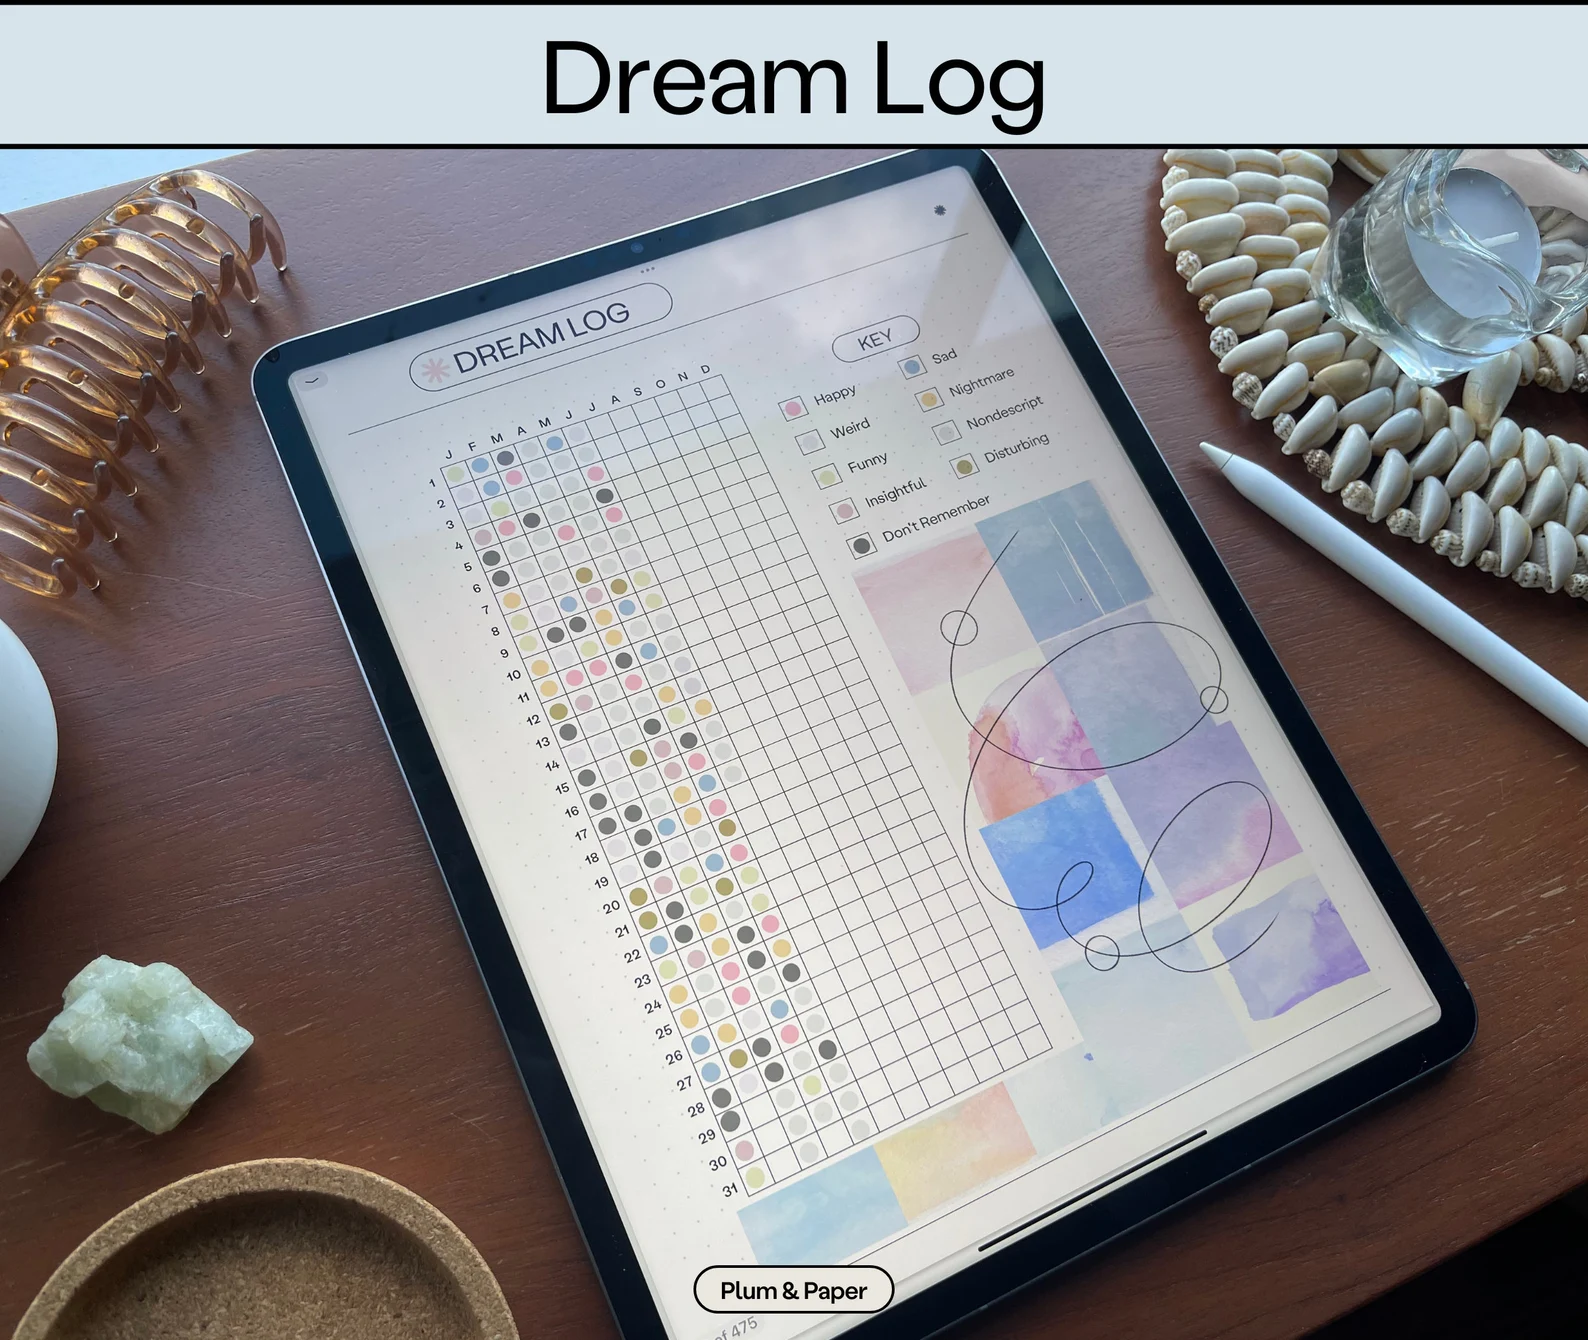
- Habit trackers. These are visual tools to monitor things like exercise, water intake, or productivity.
- Goal setting pages. Leave some space for users to break down long-term goals.
- Notes section. Create a flexible place where users can jot down random ideas, meeting notes, or brainstorming sessions.
- Speciality sections. Depending on your niche, you might include budget trackers, meal planning pages, or project-specific planners.
Use your niche research to add any sections that address specific pain points your target audience has. For example, freelancers might benefit from project planning pages or client trackers, while fitness enthusiasts may appreciate workout logs or nutrition trackers.
Step 2: Test the flow of your planner
Before finalizing your design and adding images, do a mock-up or walkthrough of how someone might use the planner. If you have access to potential uses (like clients or people in your niche), ask them for feedback. Is the page order intuitive? Do the sections flow naturally from one to the next?
You can then refine your digital planner based on the feedback. Small tweaks to the layout can make a big difference, and you might find that certain sections work better in different places or that some pages are completely unnecessary.
Step 3: Add your images
There are a lot of digital planners on the market, so it’s important yours stands out. The easiest way to do this is by adding pops of color, images, and branding.
When choosing your images, think about the vibe you’re going for. Do you want something calm and soothing? Then go for soft, pastel colors and images of nature scenes. But if you want to provide a more motivational feel, try using bold, bright colors and inspiring quotes.
Don’t forget about functional images here too.
Calendar grids, checkbox icons, and arrow designs can all make your planner more user-friendly and visually appealing. If you’re not a dab hand at design, use tools like Unsplash, Pexels, or Canva’s built-in image library to find high-quality, free images.
Step 4: Create a digital planning ecosystem
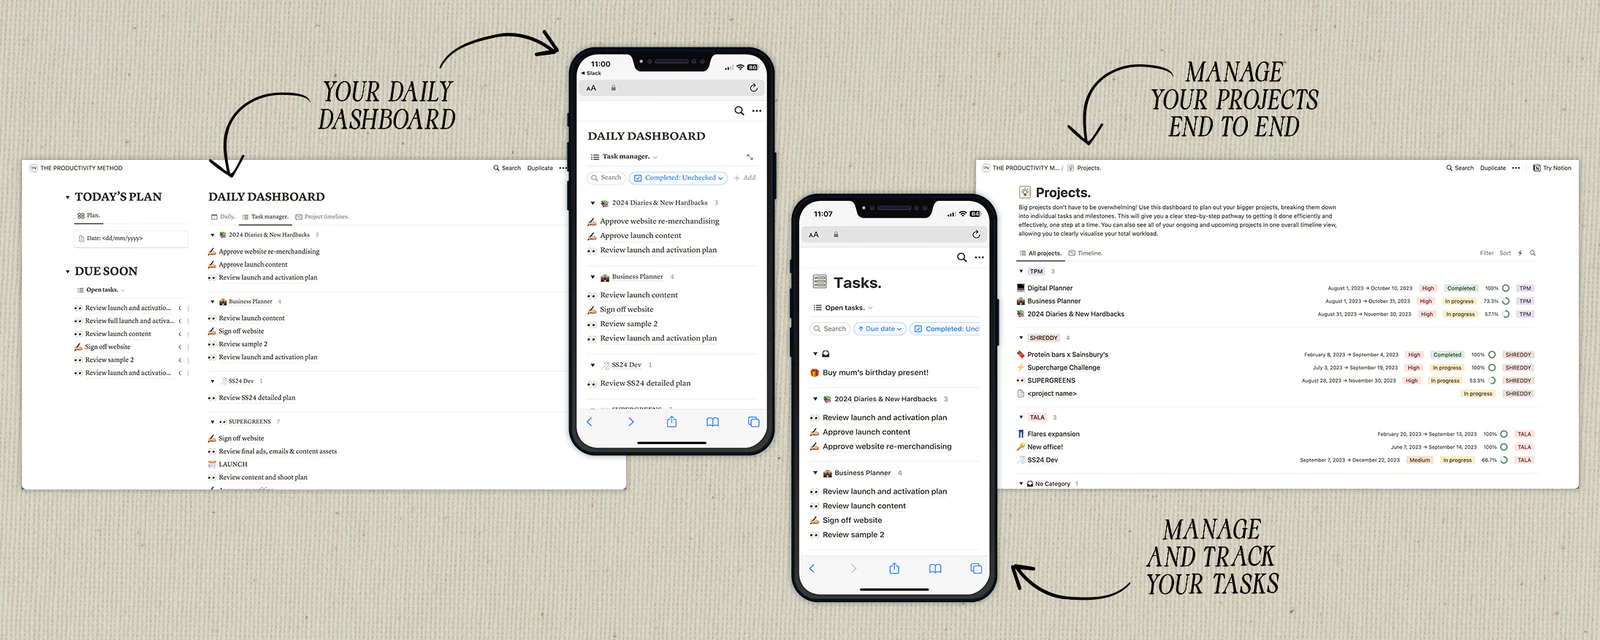
This is the part that sets digital planners apart from their traditional paper planner counterparts. When building out your digital planner, think about how users will navigate through it—this is largely done with links and navigation bars.
Start with the basics. Link your table of contents to each section so users can comfortably find every section they need. Then, consider how your target audience will use the planner and create ways for them to easily move around.
This might include:
- Linking the monthly overview to each weekly spread.
- Creating a “home” button on each page that takes users back to their main dashboard.
- Setting up a “brain dump” section and linking to it from every page for any random thoughts that pop up.
Tip: Create a navigation bar with icons for the most-used sections and stick it on every page.
The best places to sell digital planners
Once you’ve created your digital planner and you’re happy with how it all flows together, the next step is figuring out where to sell it.
Fortunately, several platforms cater specifically to digital products.
Let’s explore three of the best.
Whop
Whop was built especially with digital creators in mind, so you’ve got all the tools and features you need to sell digital products with ease.
We know that digital planners come in all shapes and sizes—with Whop, you can sell subscription-based planners, set up freemium offers, and create tiered access to different versions of your planner.
Whop also has baked-in community features where your customers can share tips, showcase their planner layouts, and support each other as they work towards their goals.
Plus, you can push fresh planner updates to all your subscribers with just a few clicks to make sure everyone has the latest version.
Etsy
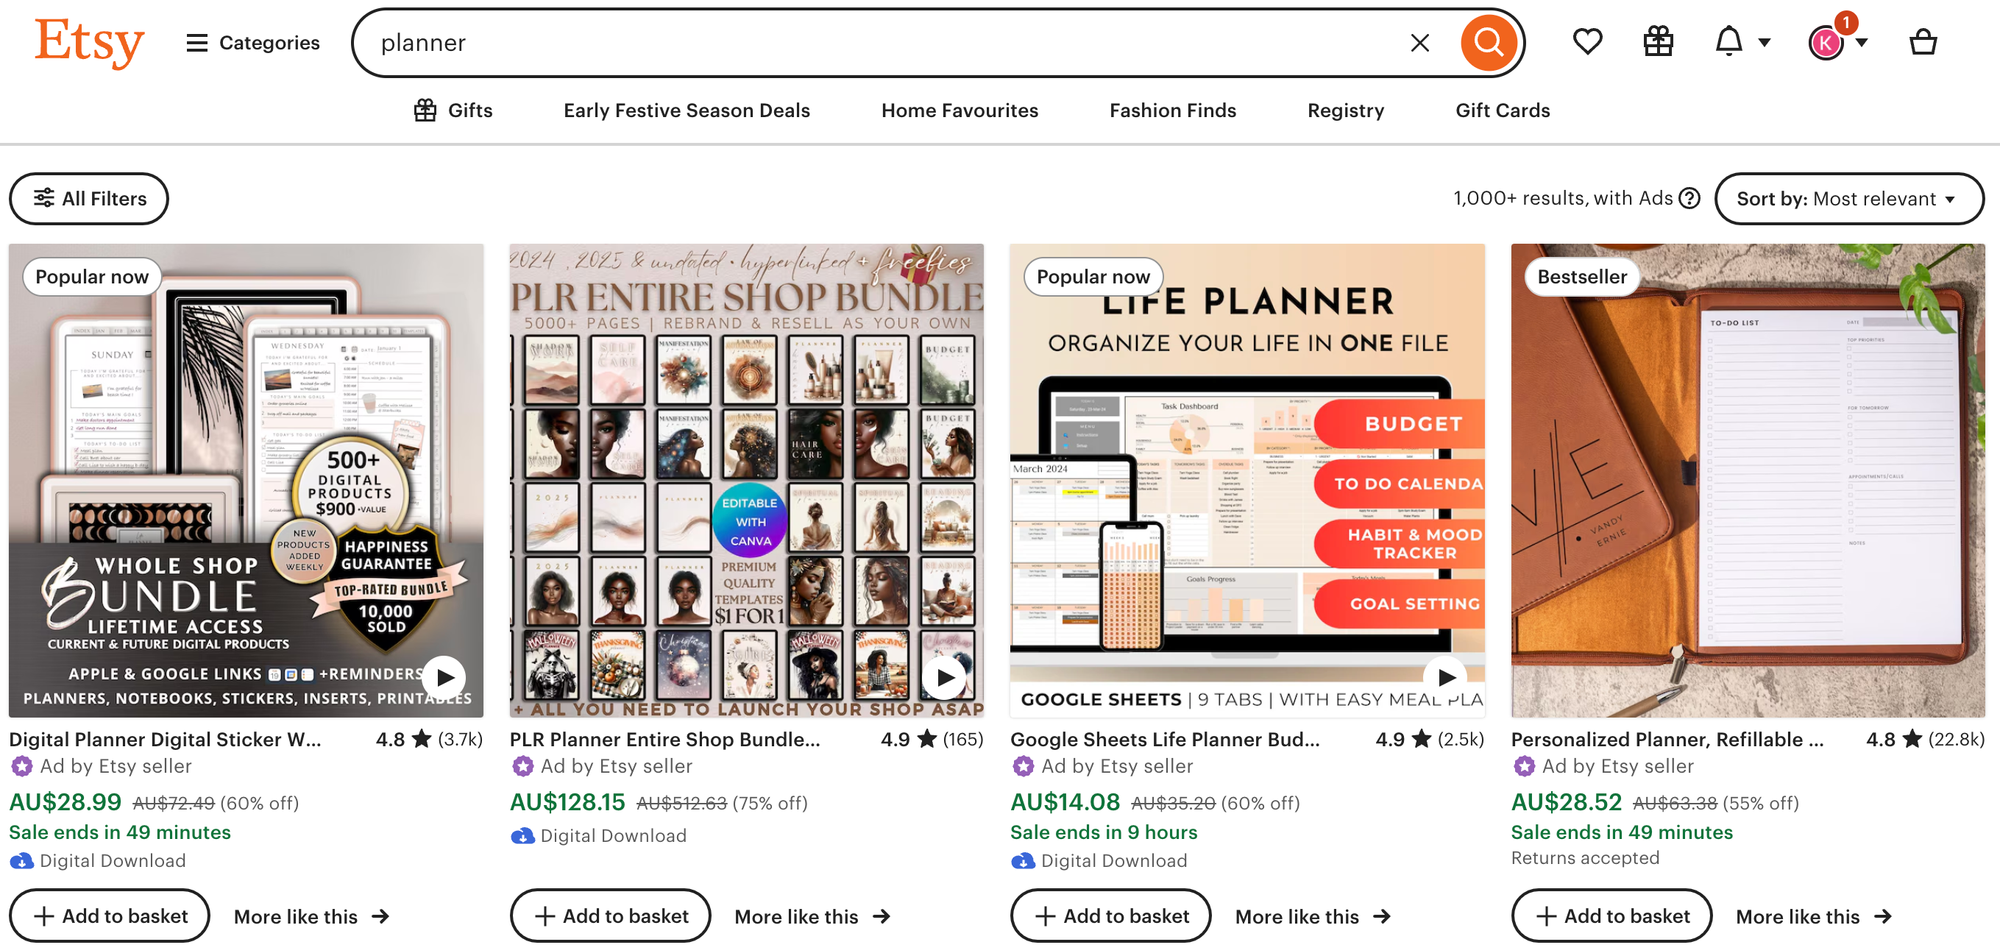
Lots of people use Etsy to sell their planners. You simply upload your file and publish it to your Etsy store, which you can market on your own channels or make use of Etsy’s search function. It’s easy to use and gives you access to over 89 million buyers who are already using Etsy.
The downside is the fees—Etsy takes a 6.5% cut of every sale, which can add up over time and eat into your profits.
Your own ecommerce store
If you want complete control over your branding and sales process, setting up your own ecommerce store is the way to go. With this approach, you can create a unique shopping experience and enjoy the freedom of building everything yourself.
The obvious downside of this is that it takes time and skill to build a successful ecommerce website from scratch. And, while you won’t have to share profits with a third-party platform, you’ll still have to pay transaction and hosting fees.
How to market your digital planner
For people to buy your digital planner, they need to know it exists—and that means marketing it in the right places.
Put your digital planner on a marketplace
Start by making your planner available where people are already searching for them. Online marketplaces like Whop and Etsy are great places to start because they have built-in audiences who are specifically looking for digital products.
To make sure your planner is visible in the search results on these marketplaces, optimize your listing with keywords.
Think about what terms your audience might search for, like “digital planner for entrepreneurs” or “goal-setting digital planner”. The more specific the better.
You can even use a keyword tool to figure out which search terms have the highest volume—this can also increase your chances of showing up Google’s search results too.
Share your digital planner on social media
Social media is a great way to reach large numbers of people for free. Whatever your preferred platforms are, promote your planner’s link regularly using hashtags and other built-in visibility features.
Here are some ideas for inspiration:
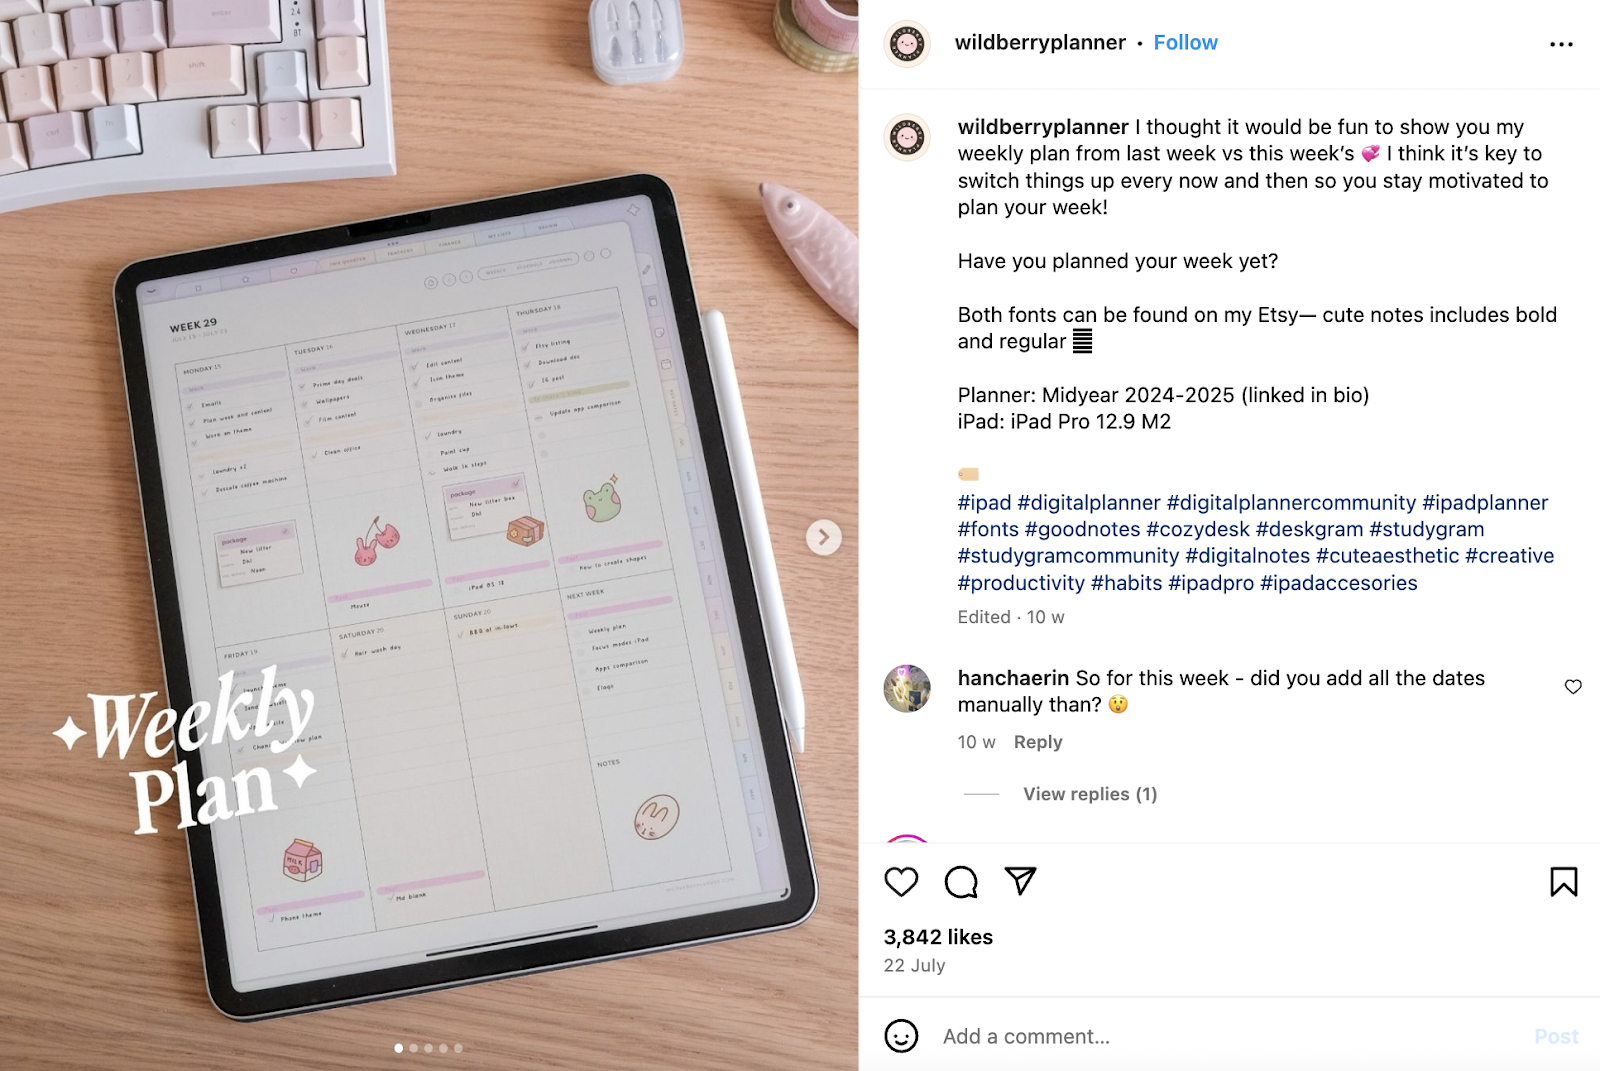
- Instagram. Share beautiful mockups of your planner in use, create Reels that show a “day in the life” with your planner, or run giveaways to build excitement. Use hashtags like #digitalplanner or #plannercommunity to reach a broader audience.
- Pinterest. Create eye-catching pins that link back to your product page and use keywords in your pin descriptions.
- TikTok. Create short videos showing people how to use your planner and highlight how it helps solve common problems.
- Facebook. Share mockups of your digital planner or, if you’re part of any niche Facebook groups, subtly mention your planner when relevant (just be mindful of group rules around promotion).
Tip: Create a content calendar around your planner launch. Build anticipation with sneak peeks, countdowns, and testimonials from early users. This way, your audience knows when the planner is coming and why they should be excited about it.
Share your digital planner in blogs and newsletters
Get more eyeballs on your planner (and, hopefully, downloads) by promoting it to your own blog audience and other audiences. Secure guest spots in newsletters with high subscriber counts and write a handful of blog posts that highlight the pros of your digital planner.
On your own blog, you can write posts about productivity, organization tips, or time management, and organically mention how your digital planner can help. A well-placed call-to-action (CTA) with a link to buy will guide readers to your planner.
If you don’t have a big audience yet, buddy up with other bloggers and write guest posts for their blogs (just make sure they have a similar audience to yours). For example, if your planner is for freelancers, offer to write a post for a freelancer blog and mention your planner as a helpful resource.
Tip: Create a freebie to draw people in. You might offer a downloadable sample of your planner (like a free weekly layout or goal-setting page) in exchange for an email address. This builds your email list and gives you the chance to nurture your audience until they’re ready to buy.
Collaborate with influencers and affiliates
Partnering with like-minded influencers is a great way to expand your reach. You’re basically tapping into a pre-built pool of followers where trust has already been established. Start by identifying influencers who share your target audience and offer them a free copy of your digital planner in exchange for a review or feature on their platforms.
You don’t need to choose influencers with millions of followers. Sometimes, smaller influencers with 5-10k followers have more engaged audiences than bigger names—plus, they’ll usually be more affordable or even willing to collaborate for free.
Alternatively, you can set up an affiliate program where other creators can earn a small commission when they recommend your planner. The key here is to be strategic about who you partner with—choose influencers who genuinely align with your brand and audience.
Run paid ads
Once you’ve established some organic reach, you might want to experiment with paid ads. Facebook and Instagram ads allow you to target highly-specific demographics, interests, and behaviors, so you can get your planner in front of people who are most likely to buy. For example, you can serve ads to 25-35-year-old women who live in New York and have an interest in yoga.
There are three key places you can run paid ads:
- Facebook and Instagram. Target by age, location, interests (like “productivity” or “time management”) and behaviors.
- Pinterest. Planners and organization tools tend to do well on Pinterest because it’s so visual.
- Google. Target specific keywords that are relevant to your planner so you show up at the top of the search results.
Before running ads, make sure your sales page is optimized with clear benefits, testimonials, and a strong call to action. Ads will bring traffic, but it’s the page that will convert browsers into buyers.
How much can you make with digital products?
The earning potential from digital products is unlimited. There’s no ceiling. Some Whop users make upwards of $7,000 a month.
Ultimately, the amount you make depends on your product and price point. If your planner sells for $50 a pop and you sell 100 a month, that’s $5,000 in one month.
If you’re selling your planner at a lower price point—say $18—then selling 100 in one month will net you $1,800. If you have multiple digital planners and sell 100 of each version every month, that number will be even higher.
Selling digital products? Sell with Whop
It’s never been easier to create and sell digital products online. If you’ve got a knack for helping people — whether that’s with fitness, productivity, or time management — why not turn your ideas into a digital planner?
With Whop, you can sell and market your planner (or any digital product) for free. Setting up your store takes minutes, and you’ll get instant access to powerful tools like affiliate programs, analytics, community features, and subscriptions.
Whatever your niche, Whop makes it simple to launch and grow your digital product business.
Here’s how easy it is to get started:
- Create your free account on Whop.com
- Set up your whop (your hub for products and community)
- Add apps for the digital products you want to sell
- Customize access settings — private, public, free, or paid
- Run through the launch checklist, and you’re live!
Ready to launch your first digital product?
FAQs
How do you add hyperlinks in Canva?
Adding hyperlinks in Canva is pretty straightforward. First, select the element you want to turn into a link, like a piece of text or an image. Then, look for the link icon in the top toolbar or right-click and choose "Link" from the menu.
A dialog box will appear where you can enter the URL or choose a page within your document to link to.
For page links in multi-page documents like planners, select "Link to page" and choose the specific page number. Hyperlinks will only function when your Canva project is exported as a PDF or published online, not in the editing interface itself.
How do you organize pages in Google Slides?
Look at the left sidebar where you'll see thumbnails of all your slides. You can easily rearrange them by clicking and dragging a slide to a new position.
If you need to group related slides together, you can create sections by right-clicking between slides and selecting "Add section."
To rename a section, just double-click its name. For more complex organization, you can duplicate slides by right-clicking and choosing "Duplicate slide," or move slides between presentations by copying and pasting.
Can you actually make money selling digital planners?
Yes, you can make money selling digital planners, and many people have turned it into a successful business. Digital planners are popular because they're convenient, customizable, and eco-friendly.
You'll need to create attractive, user-friendly designs that meet different needs—like academic planners, budget trackers, or goal-setting tools.
The key is to find a niche, make high-quality products, and market them effectively. Some sellers earn a few hundred dollars a month, while others make it their full-time job, earning thousands. But like any business, it takes time, effort, and some skill to build a customer base and stand out.
How many pages should a digital planner have?
The number of pages in a digital planner can vary widely depending on its purpose and design, but there's no fixed rule. A typical digital planner might include 50 to 200 pages or more.
This usually covers a full year with monthly, weekly, and daily spreads, plus extra sections like goal-setting pages, habit trackers, note pages, and specialized planning tools. Some planners are more minimal with just monthly and weekly layouts, while others are extensive with daily pages for the entire year.