
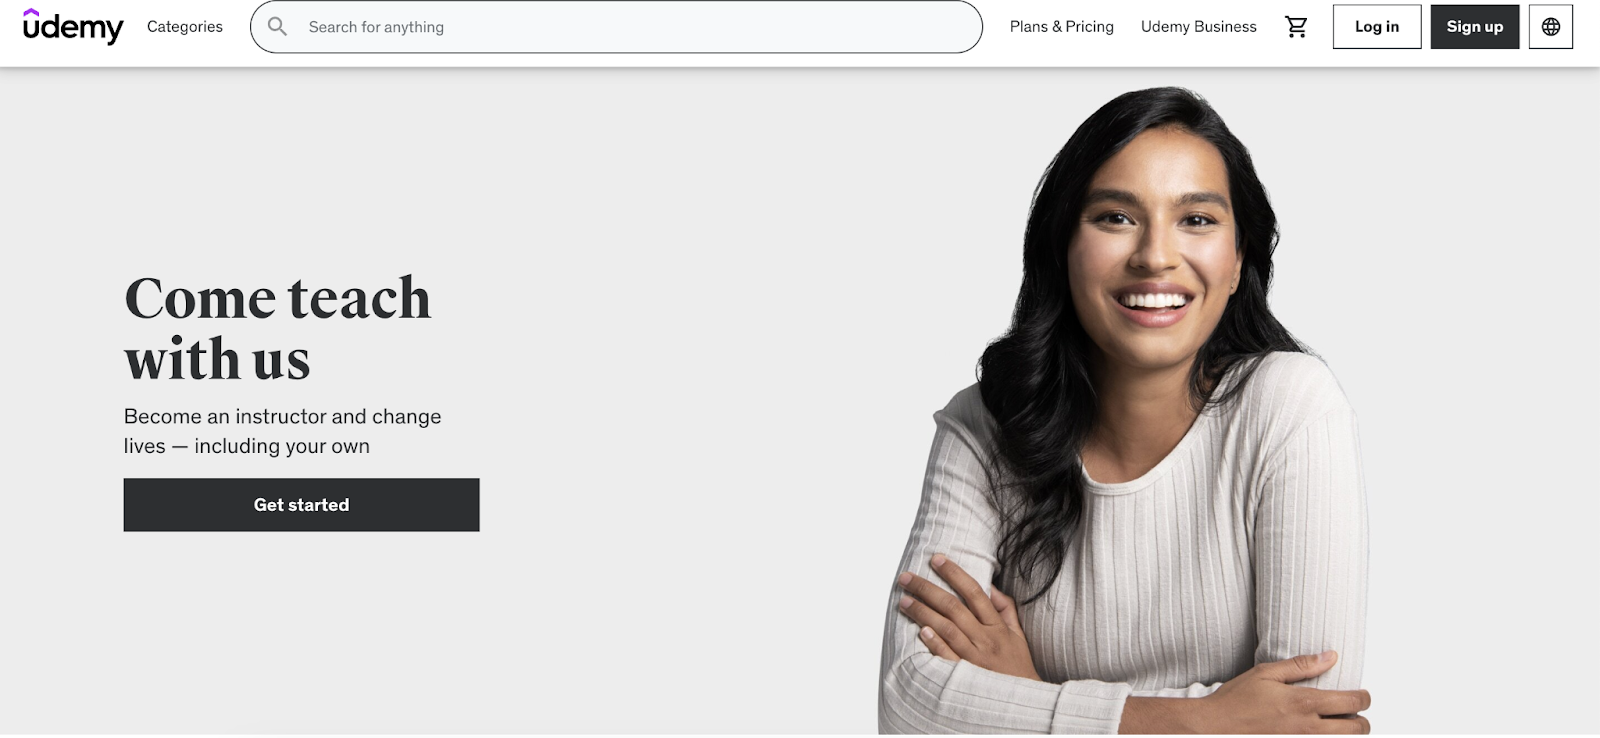
Ready to sell your course online? Here's a step-by-step guide to selling courses on Udemy, along with some alternatives to explore.
Key takeaways
- Instructors keep 97% of fees using personal referral codes versus only 37% when students find courses through Udemy's marketplace.
- Courses must meet quality requirements including 30+ minutes of 720p video, 5+ lectures, and clear audio to pass review.
- Standing out among 220,000+ courses requires choosing a specific niche and adding your unique perspective or experience.
With over 220,000 courses on Udemy, it’s no surprise that more and more instructors are flocking to the website. But how do you sell courses on Udemy?
Udemy is an online learning platform that allows you to sell courses for free, or you can charge a fee. It lets you teach millions of students around the world without having to bother about creating a website, paying for web hosting, or advertising your course. Everything is handled by Udemy.
Ready to get started? All you have to do is concentrate on developing the best course possible on the subject you want. Here's how you can use Udemy as an instructor, along with some alternatives in case it doesn’t work for you.
What you need to know before you get started as an Udemy instructor
Now you understand what Udemy does, you're probably ready to get started on your course. However, before signing up to become an instructor, you should learn about some other aspects of the platform - here's what you need to do before you sign up with Udemy.
Choose a niche for your course
There are so many courses available on Udemy in every category you can imagine, including business, science, technology, art, personal and professional growth, etc.
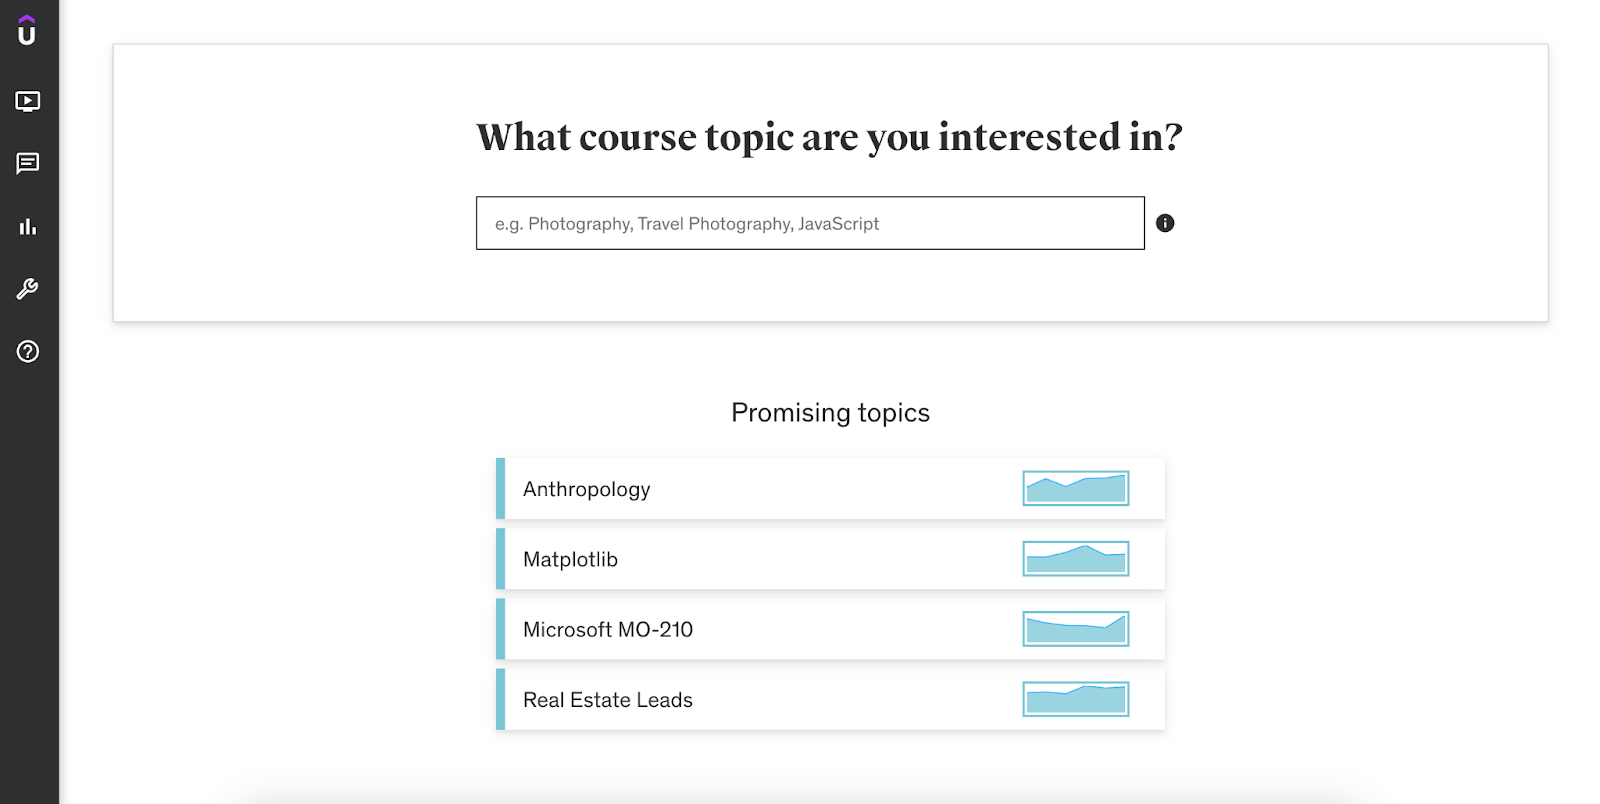
You can teach anything except for the `subjects that are listed as restricted`. Of course, you should choose a subject you're passionate about and have expertise in. Try and search for content around the keywords you've selected to make sure you're not reproducing the same course as others. You can also identify similar course subjects that might be relevant for your intended learners by using Udemy's Marketplace Insights tool.
Depending on your topic, this can also help you modify your course depending on student demand. Since the market is so competitive, it allows you to find a way to stand out with what you offer.
Once you're set on the topic, you can start designing your first course but keep in mind what your students want.
Identify your course's USP
There are already hundreds and thousands of courses on Udemy and with millions of learners on the site, you need to focus on who you want to sell to.
If you are genuinely passionate about a subject and know exactly how you will include your specific viewpoint, you can create a course topic that already has competition. No matter the subject, you must add your own twist and share your experience.
You can even use Google Analytics to look at trends so that you can pick what specific sub-topic works for you.
Understand the course requirements of Udemy
Although Udemy lets you create a course on almost any subject imaginable, you also need to align with their internal requirements.
To get your course through their quality review team, you should follow the basic checklist such as:
- Your videos should be at least 30 minutes long
- Your course should have a minimum of 5 lectures
- Whatever you're producing should be considered useful and educational
- The video quality should be 720p or 1080p
- Your audio should be clear and in tune with the video
- You should also have a landing page with course and instructor details
If the course doesn't meet the team's requirements, you may have to review it again. You should also check whether your content overlaps with others and ensure that there are no promotional links within the course except in cases where it's allowed.
Get to know Udemy's revenue structure
You can join Udemy and sell your courses for free, but if you want to create paid courses (as a premium instructor), you'll be charged a commission fee. These fees can be quite substantial, so it's worth understanding them before you set up your course, as you may even want to choose an alternative platform for your courses.
Here's how Udemy's revenue structure works
If a student discovers your course via the Udemy marketplace directly, Udemy charges a 63% commission fee on the sale price. This can happen due to a user clicking on an advertisement on Udemy or looking through the course list on the platform. If it was through the Udemy iOS or Android apps, you will be required to pay Google or Apple an additional 30%.
However, with Udemy, instructors have their special code for referrals, so if the sale is made through this code the platform only charges a 3% fee. That's a huge difference - to recap, if a customer finds you through Udemy you keep 37% of the sale, if they find your course through your own marketing you keep 97% of the course fee.
Now, this part is even more complicated. If you're joining Udemy for Business as an instructor, you are paid monthly based on how engaged your students are.
The instructor revenue pool receives a monthly allocation from Udemy of 20% of its total monthly membership revenue from the Udemy for Business platform. Assuming you have a 6% engagement in Udemy Business courses, your share of the pool's revenue will be limited to 6%. So, you could end up earning only 6% of 20%- not a great amount.
Plus, you can only be invited to join this program, so most instructors will be earning revenue through the Premium Instructor model.
Selling courses on Udemy: A complete walkthrough of the instructor process
Before you start the sign-up process, you need to determine whether you want to be a regular or Premium Instructor.
If you’re looking to create free courses, you can sign up for free as a regular instructor. But you'll have to upgrade to a Premium Instructor if you wish to charge students for your courses. Luckily you don’t have to pay anything, and the application process takes about two business days to finish.
But what you need to know about the process is that signing up is the same for both, with just a few tweaks.
Sign up on the platform
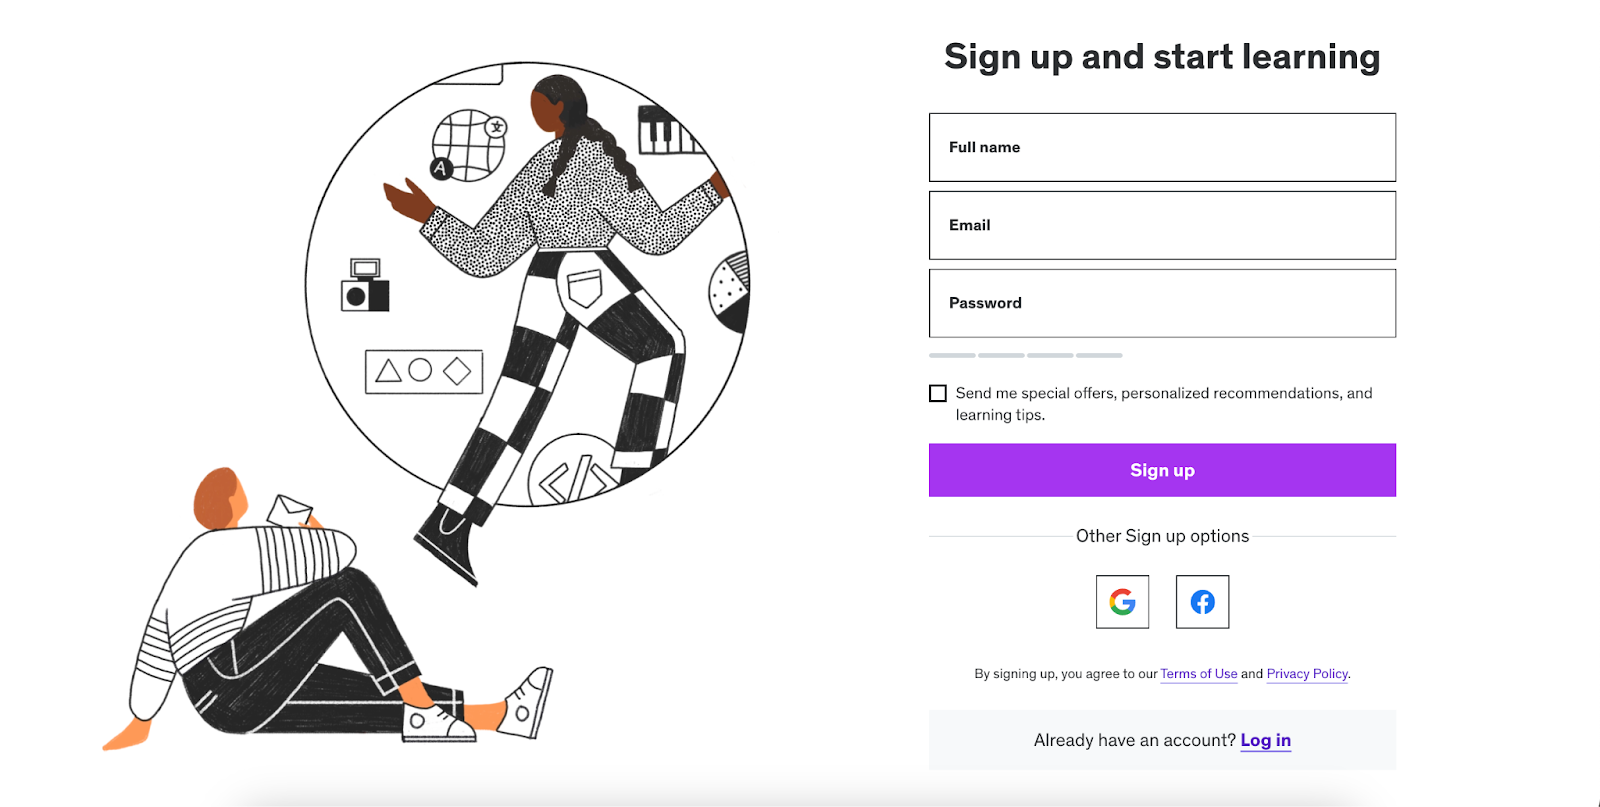
Go to the Udemy login page to start your instructor process and put in your email address, name, and password as shown below.
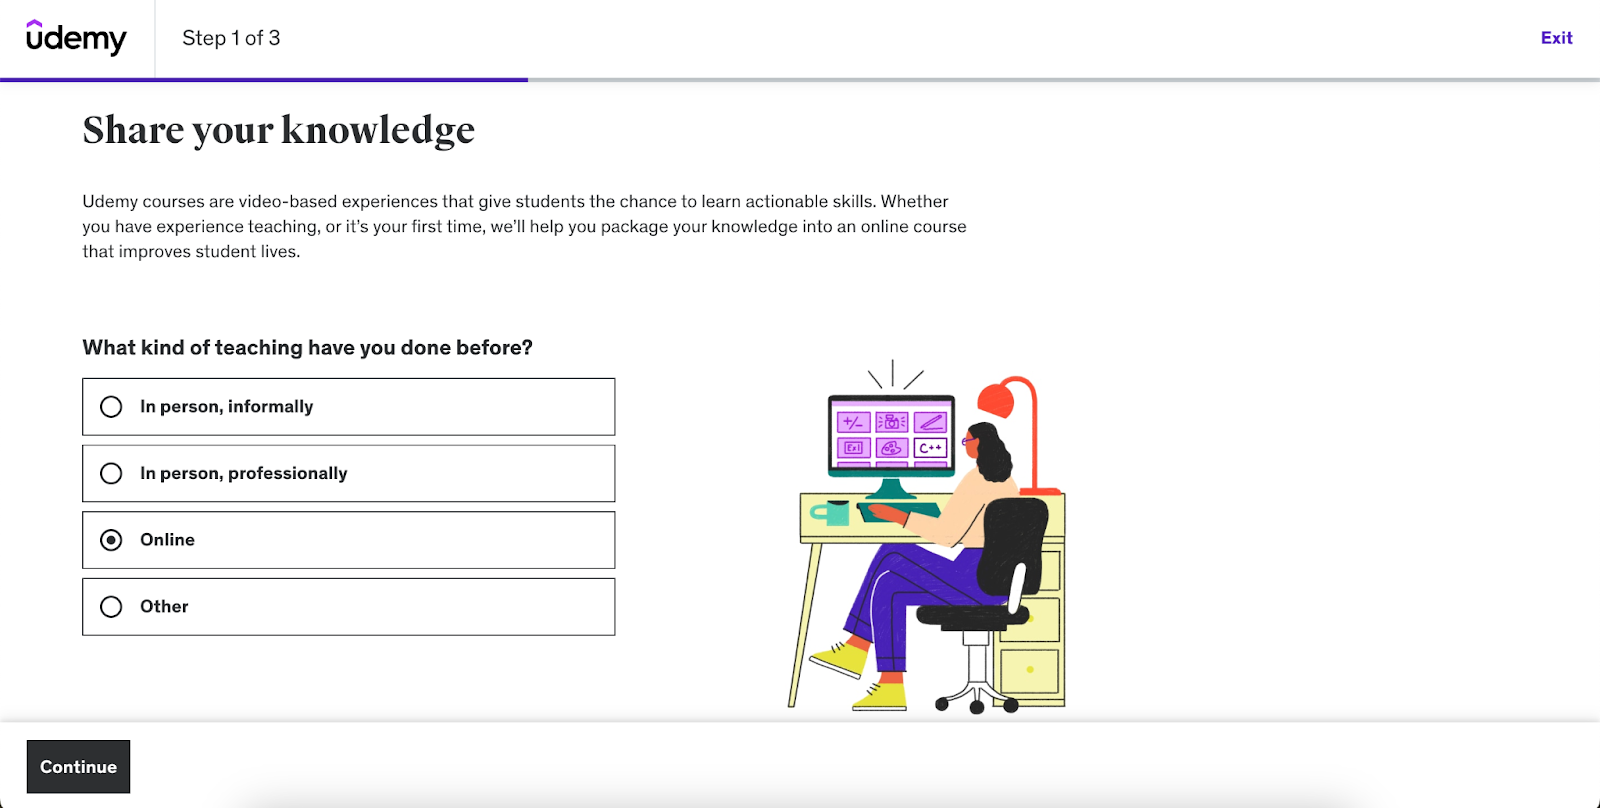
Once you’ve done that, you’ll have to choose what kind of medium you’ve taught as an instructor. For this example, we picked “Online’ as an option here, but you can choose what fits best for you.
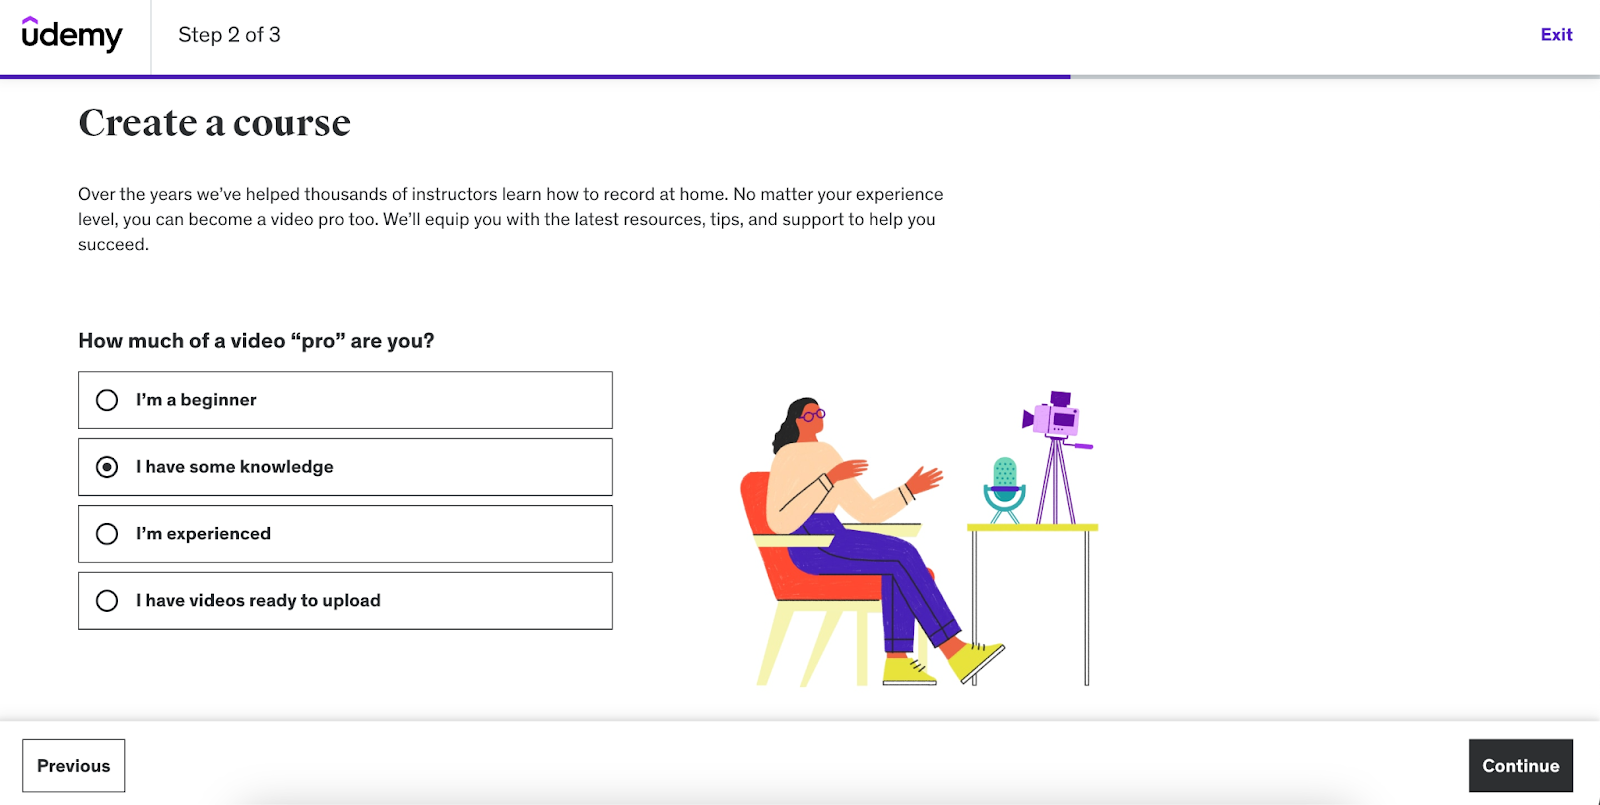
Next, you’ll be prompted to choose how you’d categorize your video creation experience. Why is this so important? Well, you’ll need a video to accompany your course so your answer will determine what support you'll get from the Udemy team. Here, we’re choosing that we have some knowledge about making videos.
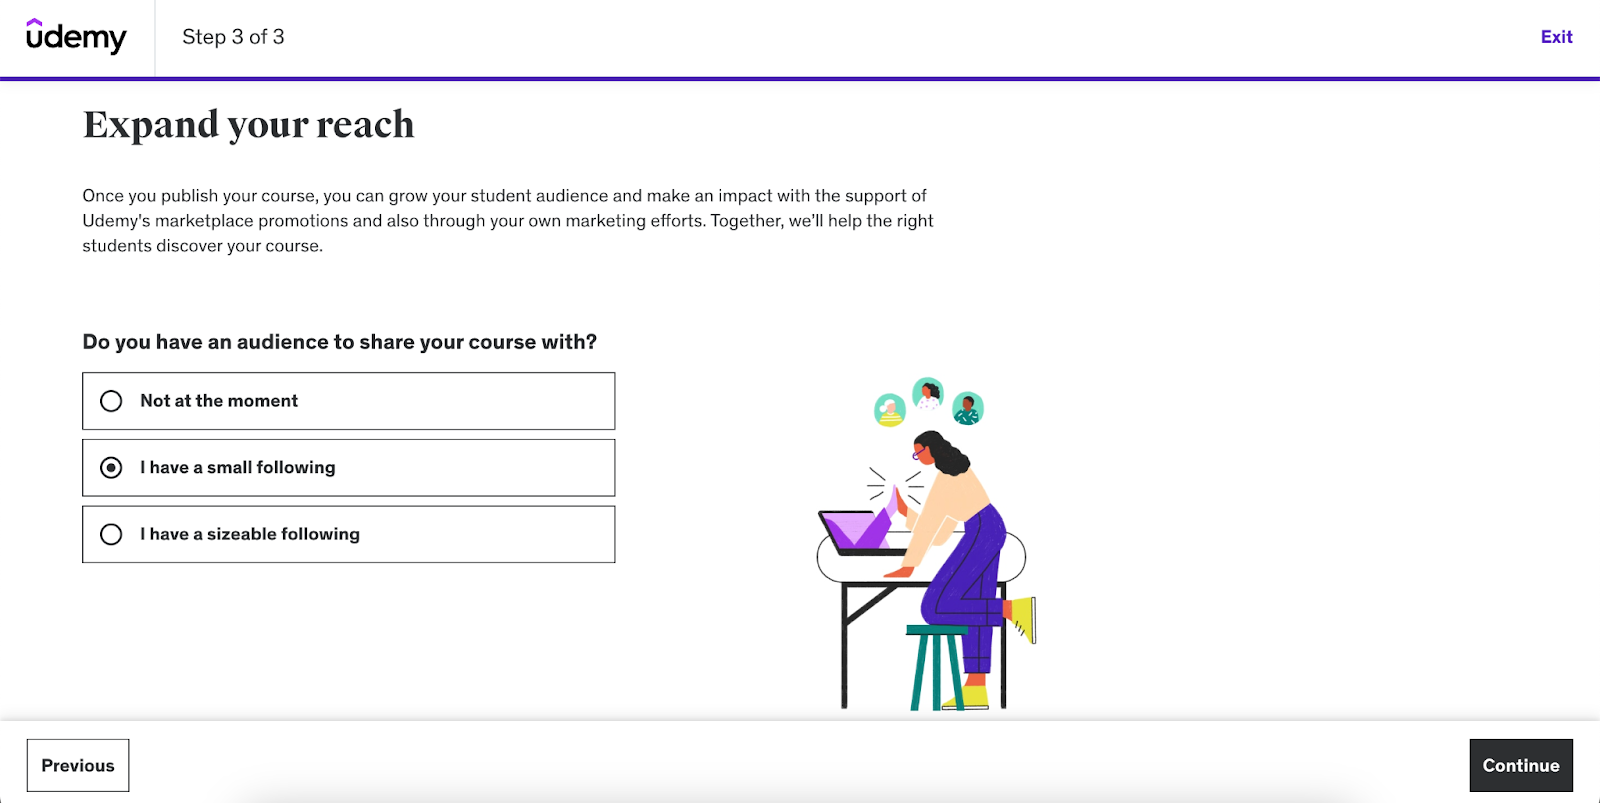
Finally, you’ll have to pick if you have an audience for your course already. We’ve picked “I have a small following”. Once you have selected that, you’re then set to sell courses on Udemy.
If you’re looking to be a premium instructor, you have to add a few more steps after creating your course.
Upload your content with Udemy's course builder
If you’re looking to sell courses on Udemy, you need to have a course to begin with. The good thing about Udemy is that you can easily design your course within the site itself following the steps we’ve outlined below.
Create your course
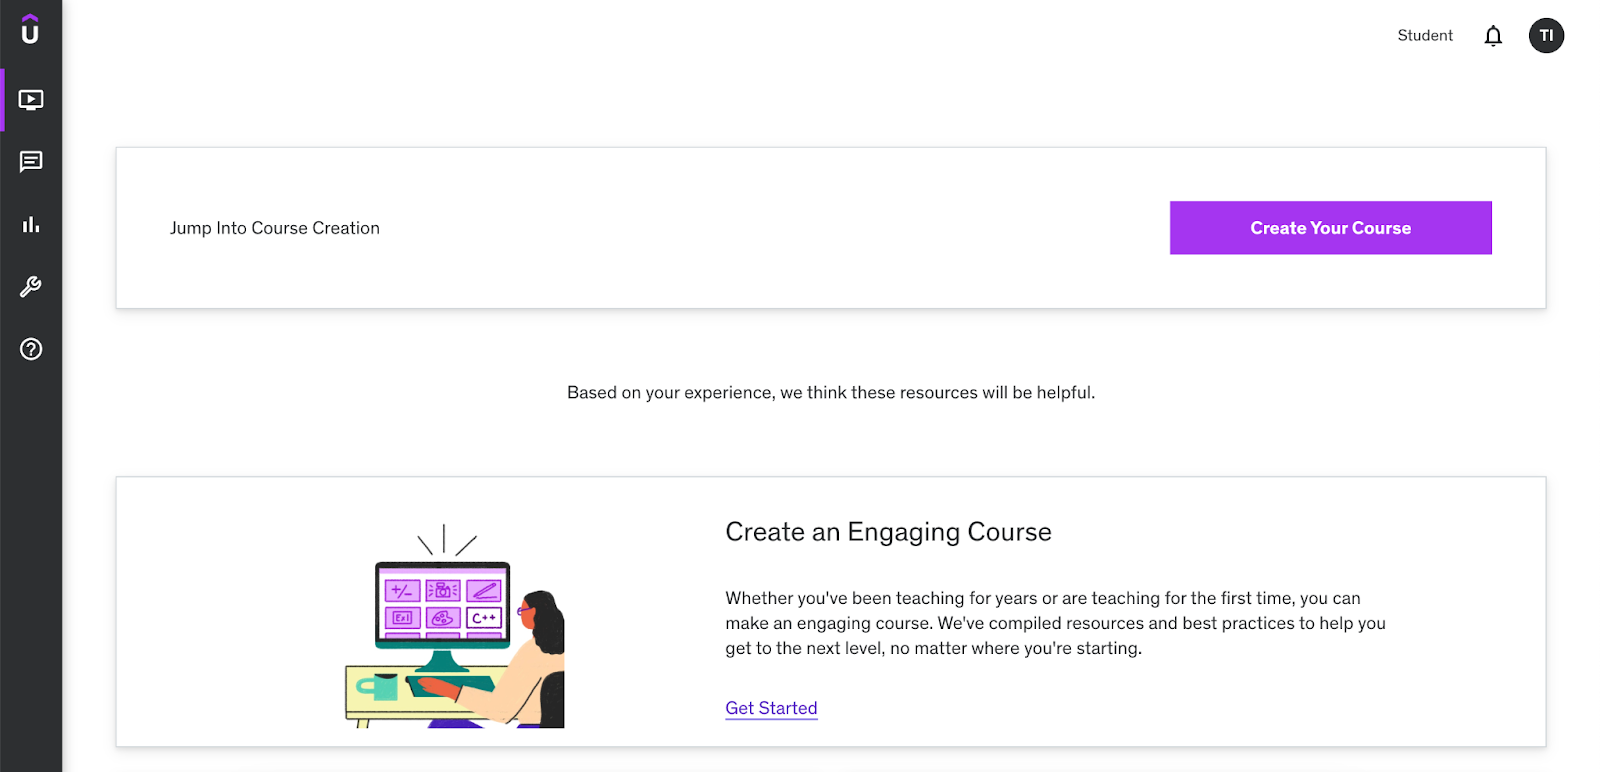
When you’re logged into the Udemy dashboard, you’ll see there’s an option to start creating your course as shown below.
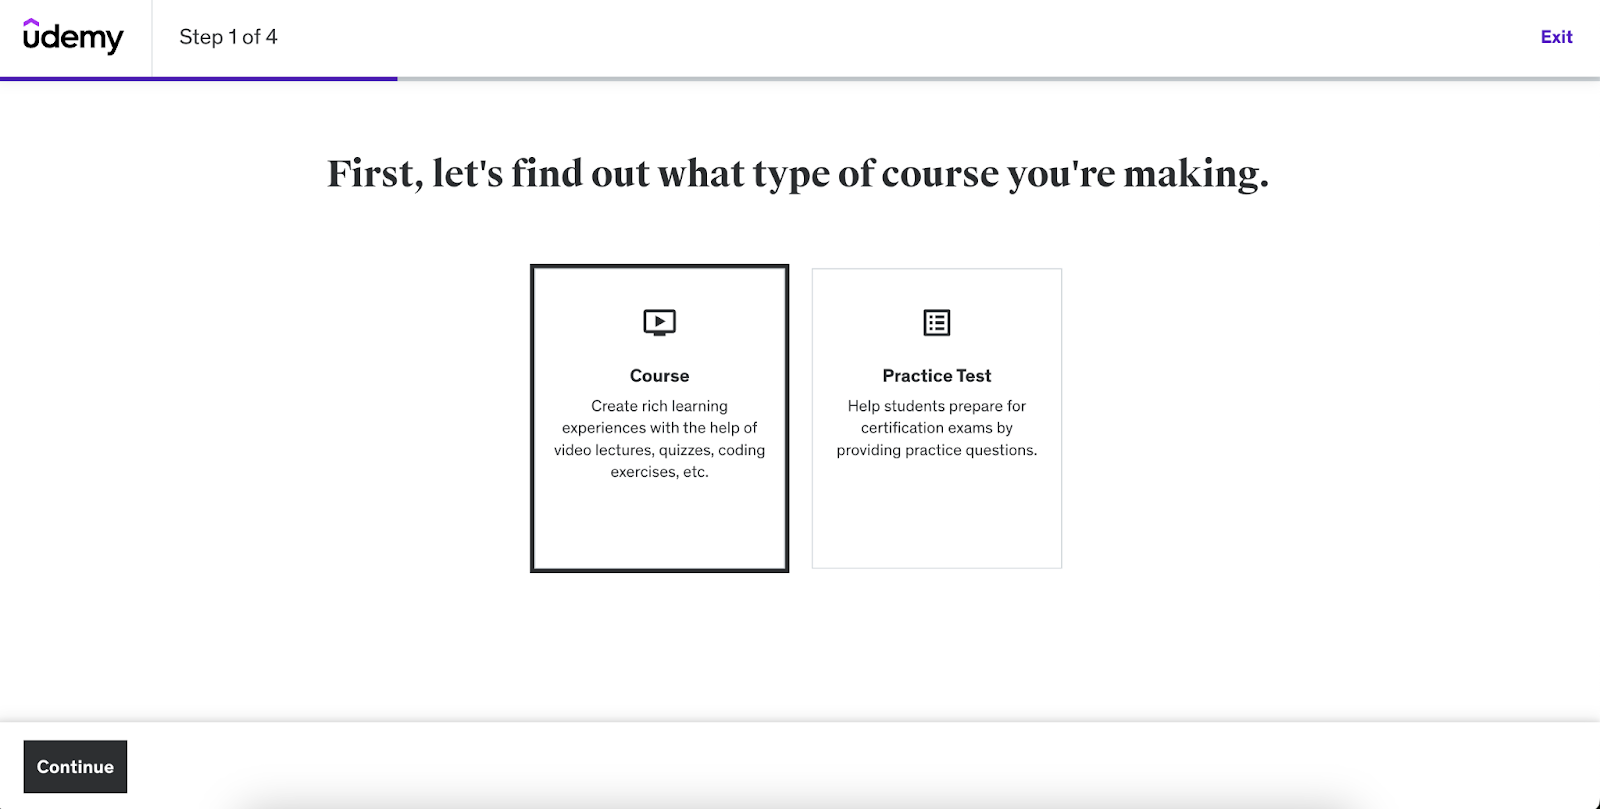
Once you click that, you need to fill out another questionnaire to help you design your course. We picked the option “course” since we’re looking to create an educational guide.
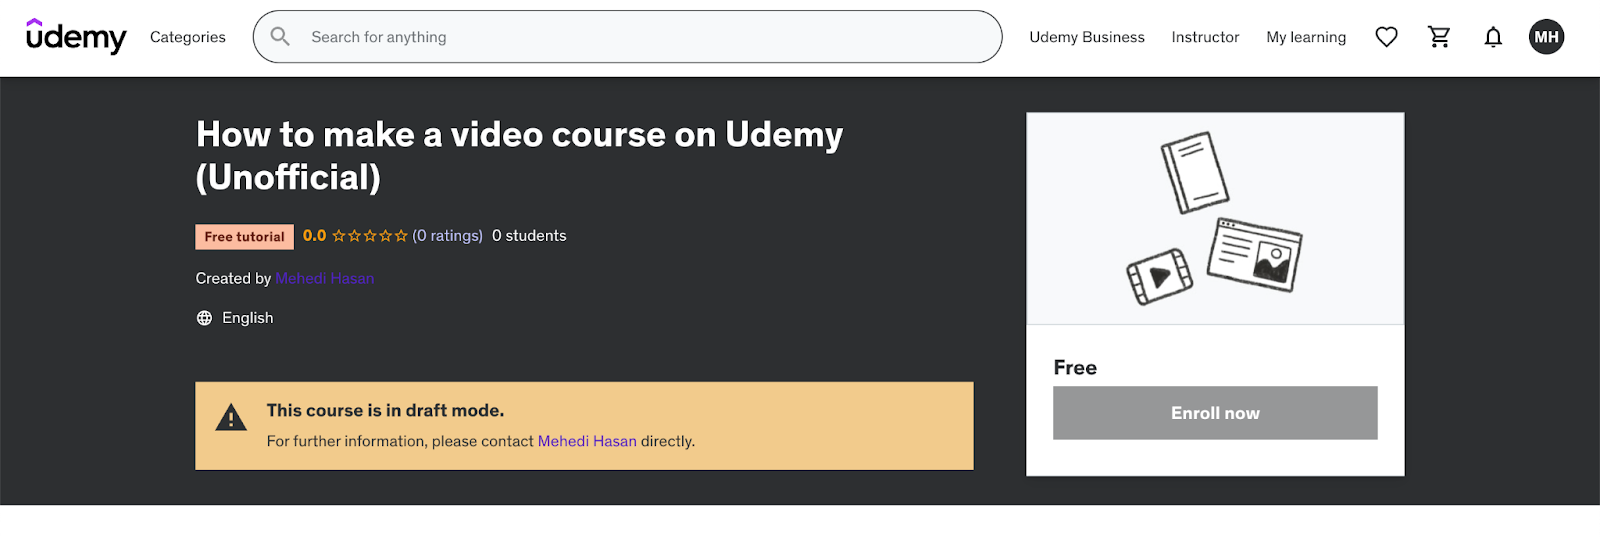
Next, you have to pick a title for your course, and for this example, we’ve named the course “How to make a video course on Udemy (Unofficial)”. You might be wondering why 'unofficial' is in the title - that’s because if you have the word “Udemy” in the title, you can’t create the course unless you’ve added in “Unofficial”.
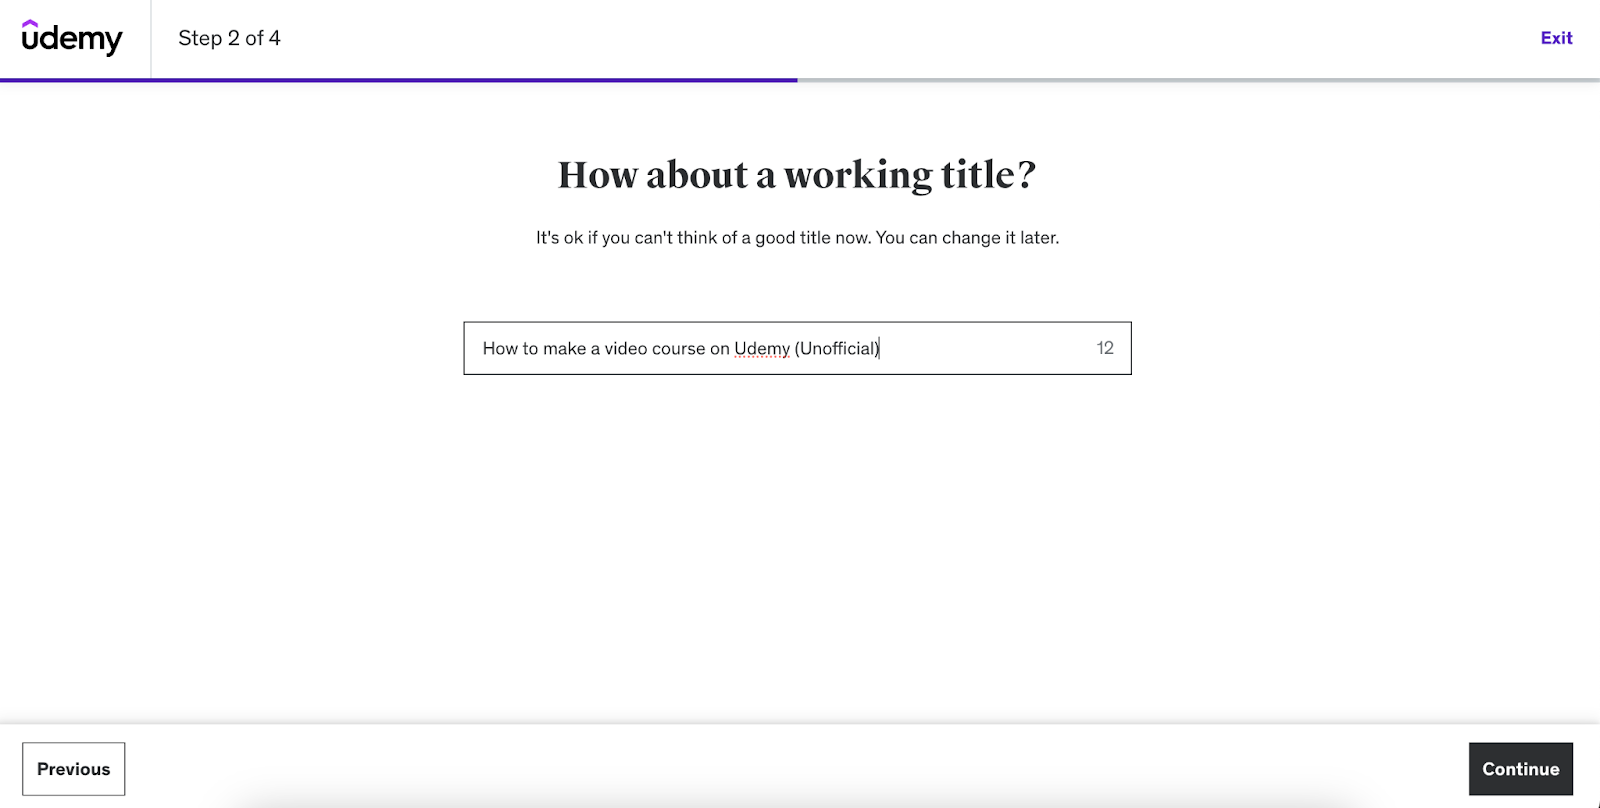
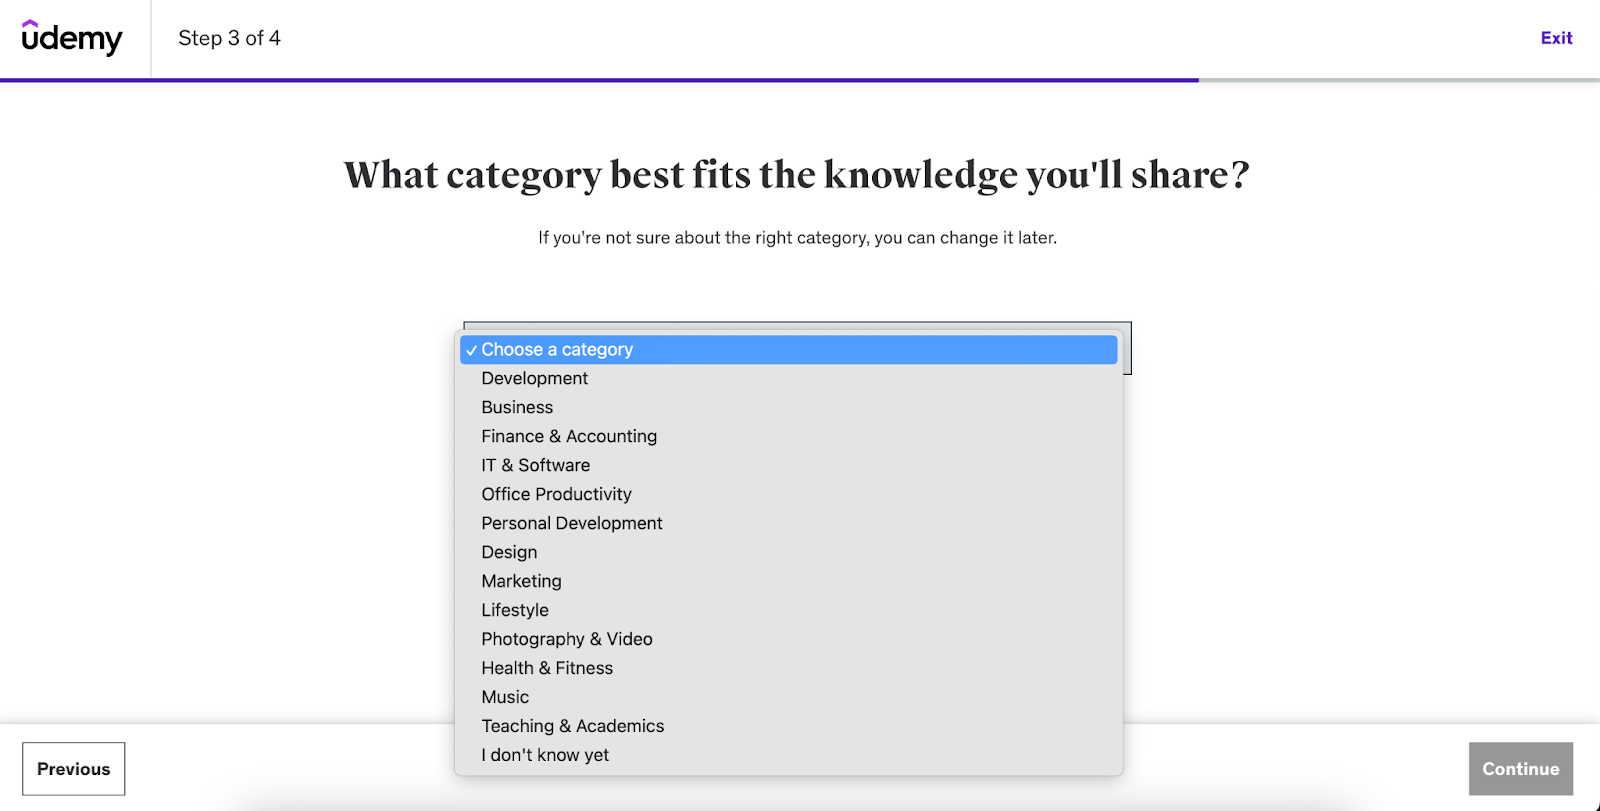
Once you've named your course, it's time to pick which category it falls under. Since we’re making a video course on Udemy, we went ahead and picked “Marketing” as the category.
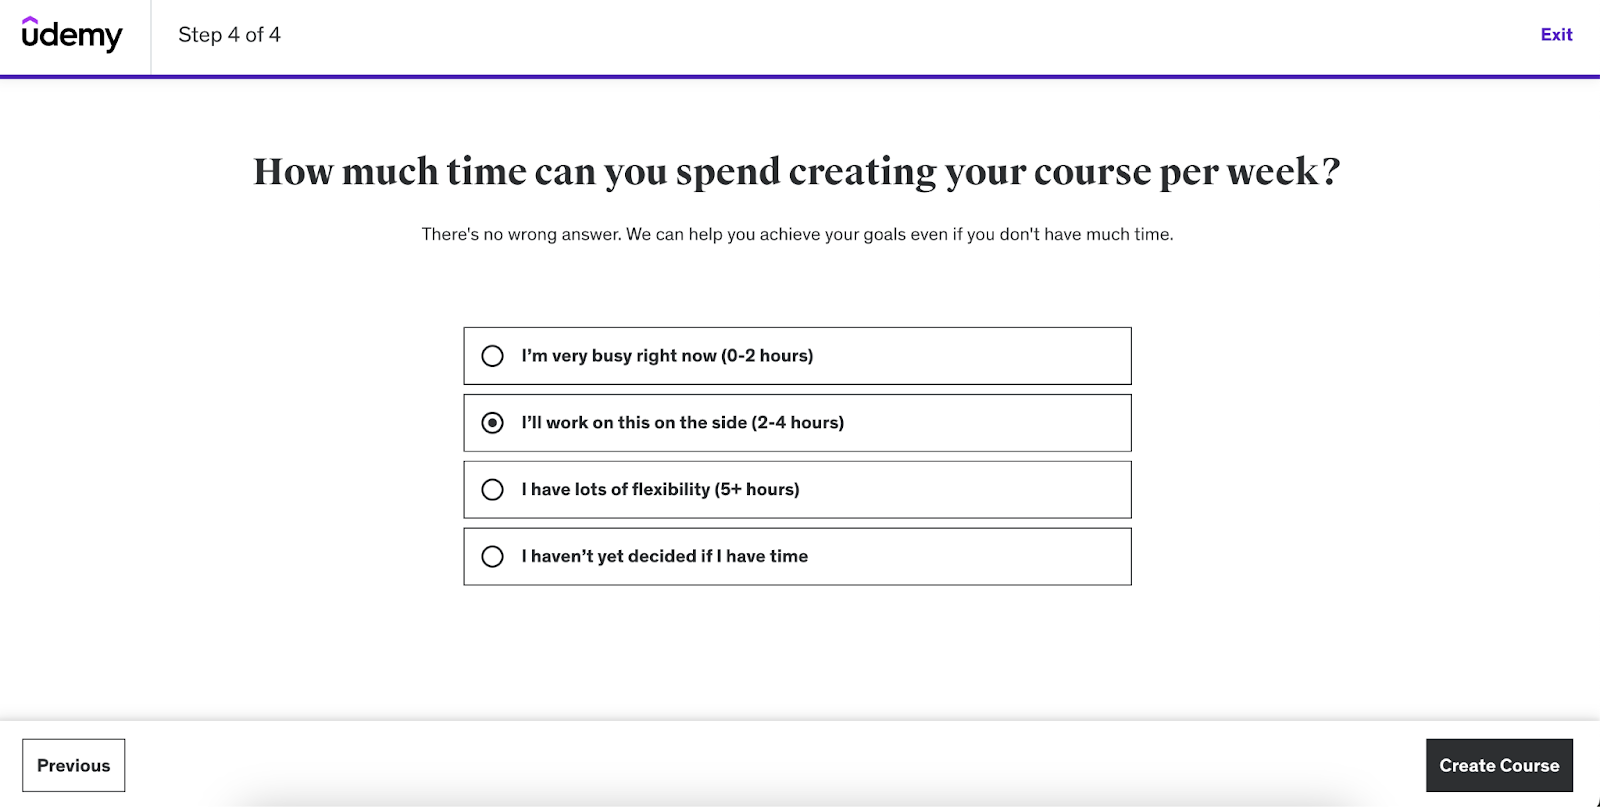
In the last step, you’ll have to pick how much time you can spend on creating this course. Of course, if you aren’t sure, you can go ahead with the last option. But we chose that we’d work on this on the side for 2-4 hours.
Voila, you’ve completed the first part of creating your course!
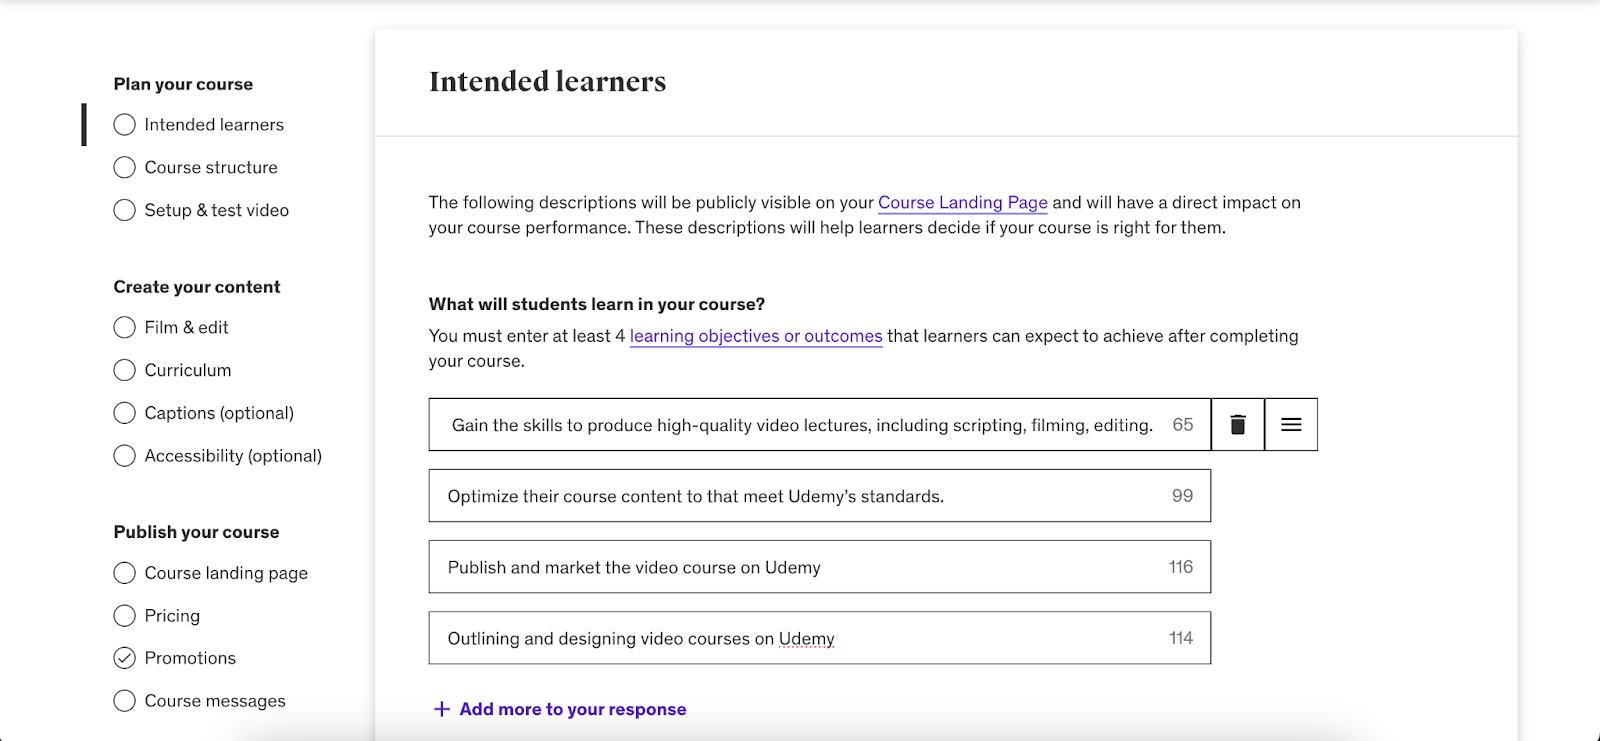
Choose your learning objectives
The first step to starting off your course is to write down what you expect your students to learn from you. As you can see, we’ve already put in what we think our learners should get out of “How to make a video course on Udemy (Unofficial)”.
You’ll also have to choose if there are any requirements for students who want to enroll in this course like the example below.

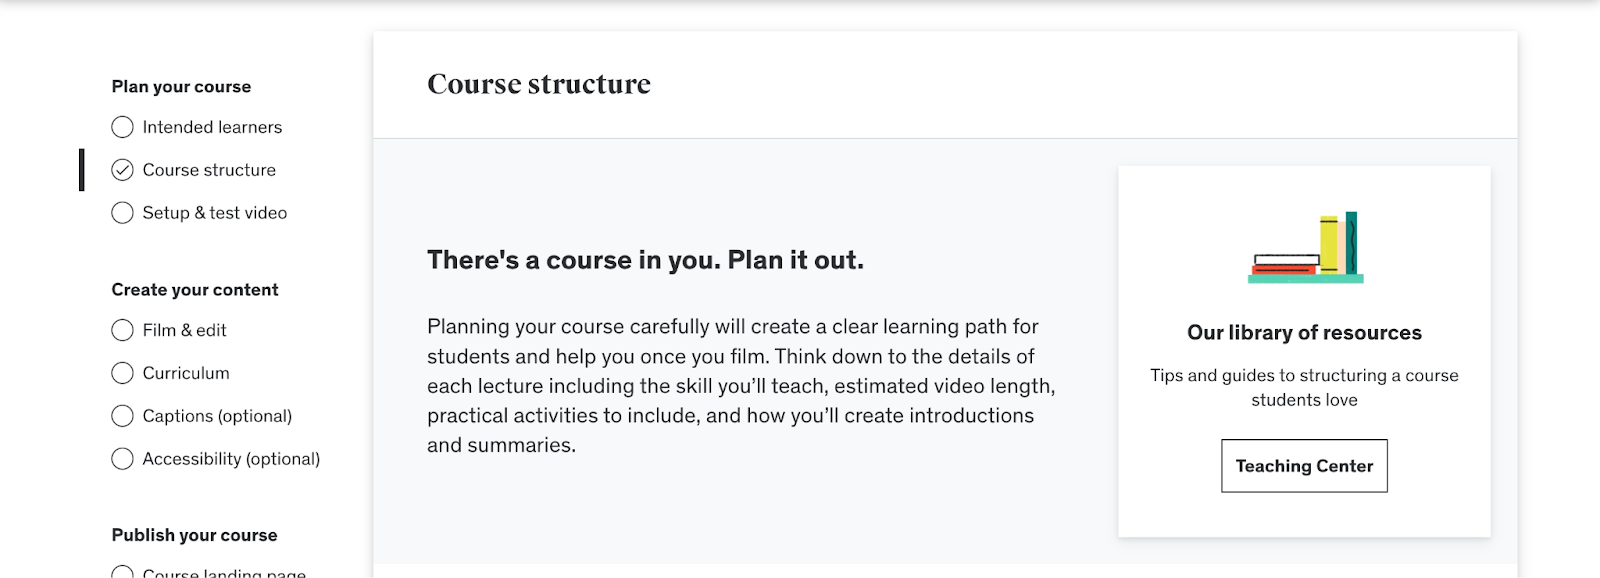
Structure your Udemy course
Once you’ve set up the basic details, you can start planning out how to structure your course. Pick how long your video will be, what each video will cover, and a summary of each lecture.
Make sure you’ve outlined what you’ll cover, how you’ll engage your students visually, and how you’ll be breaking down each topic.
You can find more resources on Udemy that can help guide you in setting up your course. Just make sure you follow the requirements given so that it passes Udemy’s quality review.
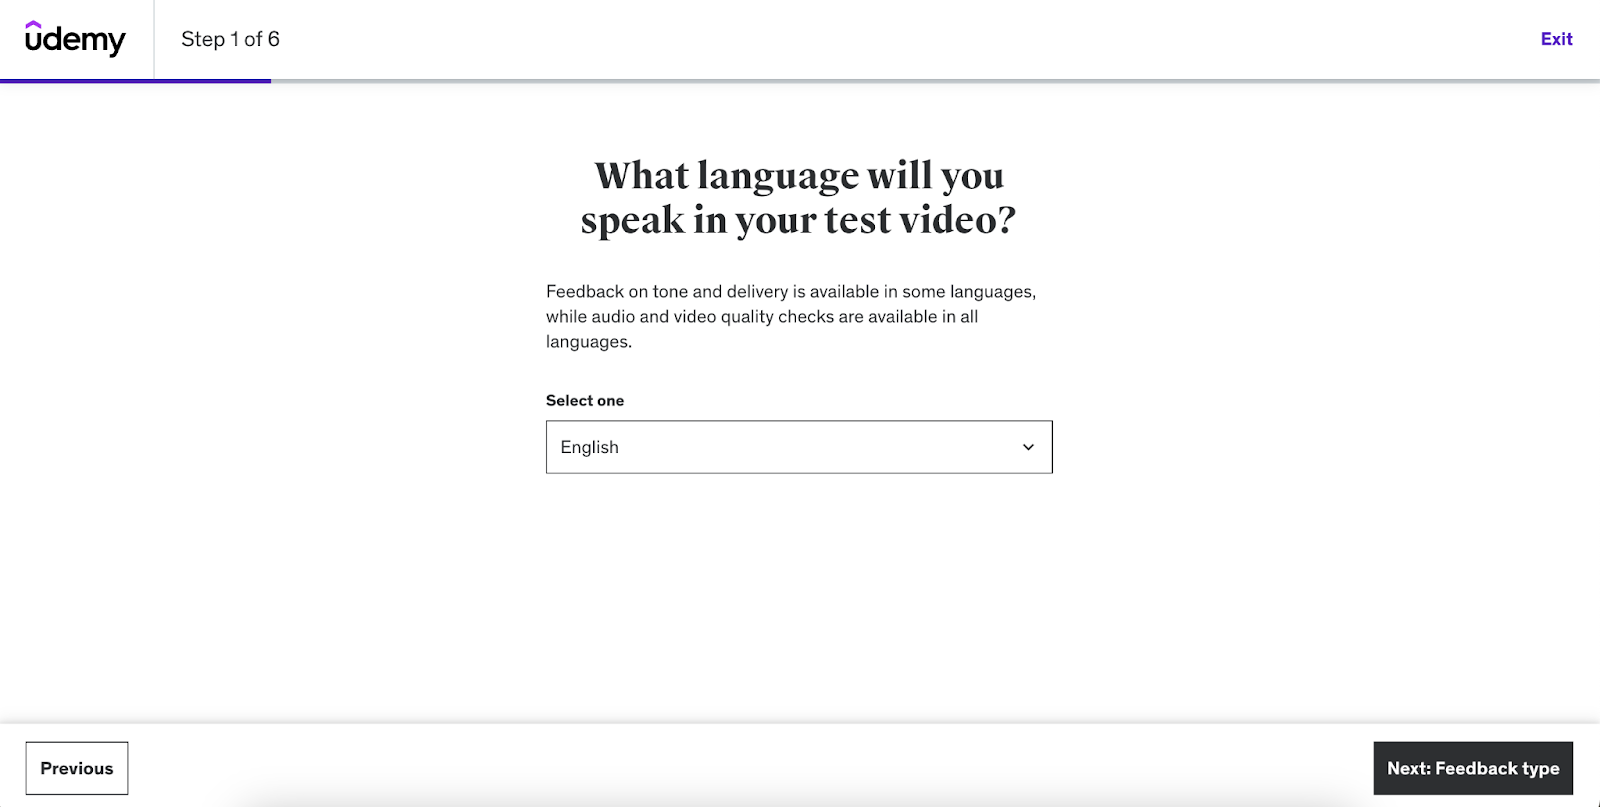
Test your recordings
If you’ve already created a video on your device, you need to check whether it works on Udemy’s platform. You’ll have to pick which language your video is in - we’ve picked English for our example.
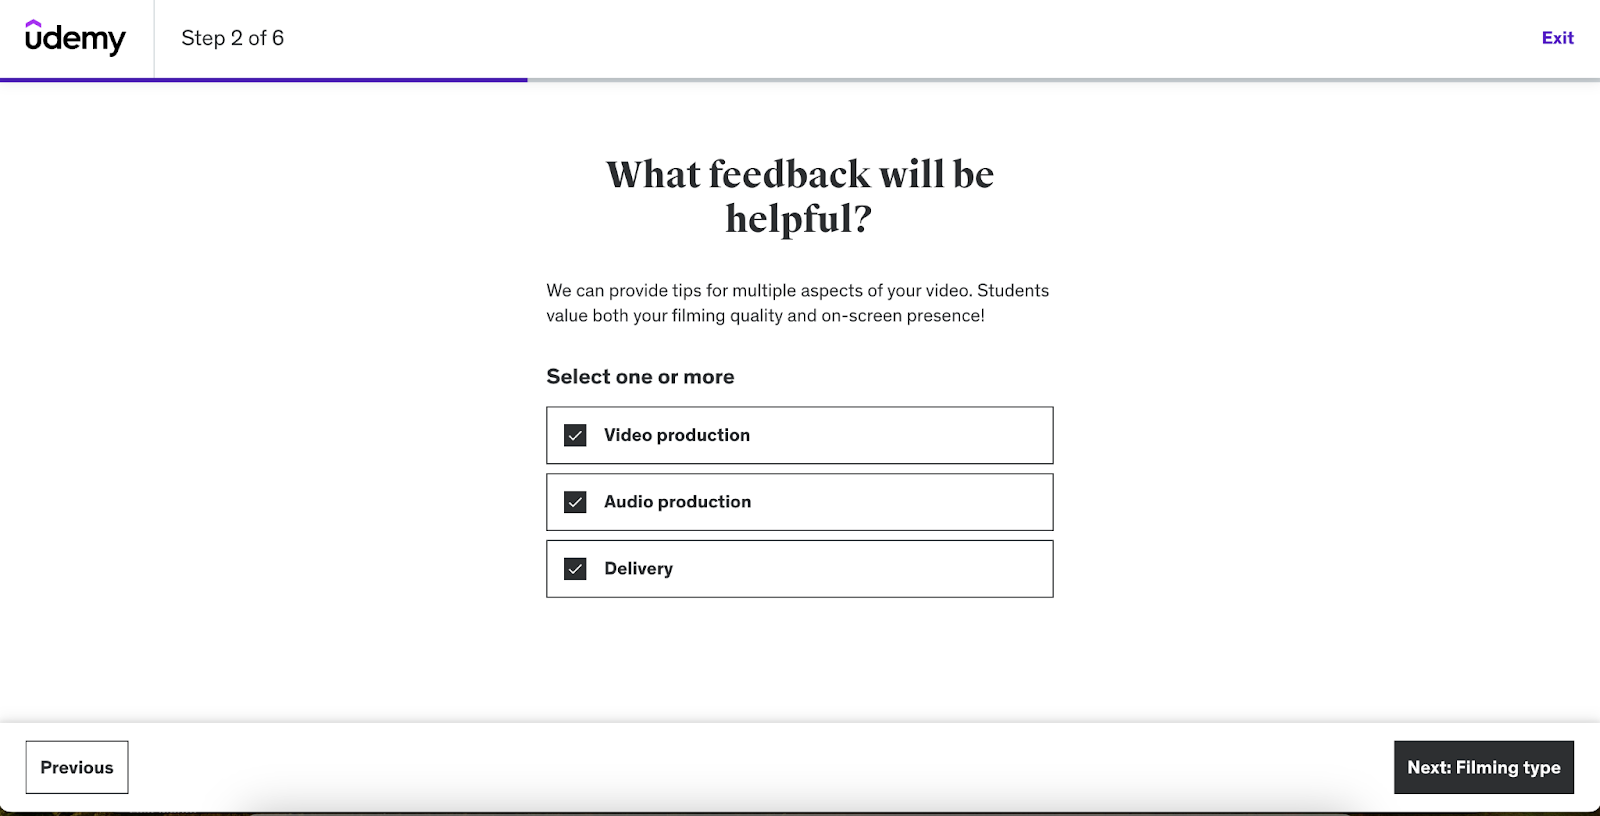
Depending on what kind of feedback you want on your video, you can pick either one or all of the options presented below (like we did).
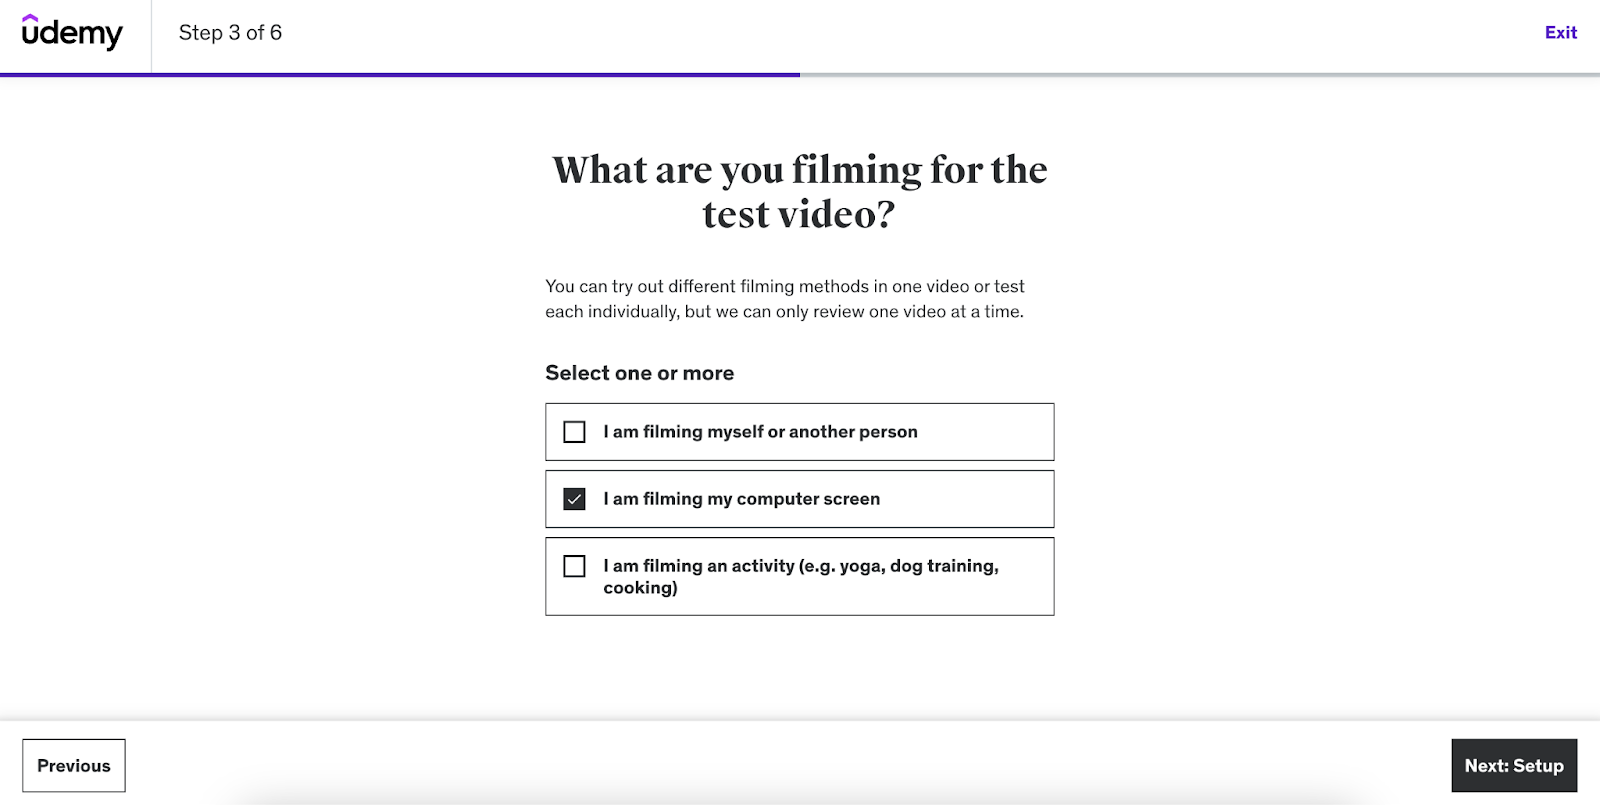
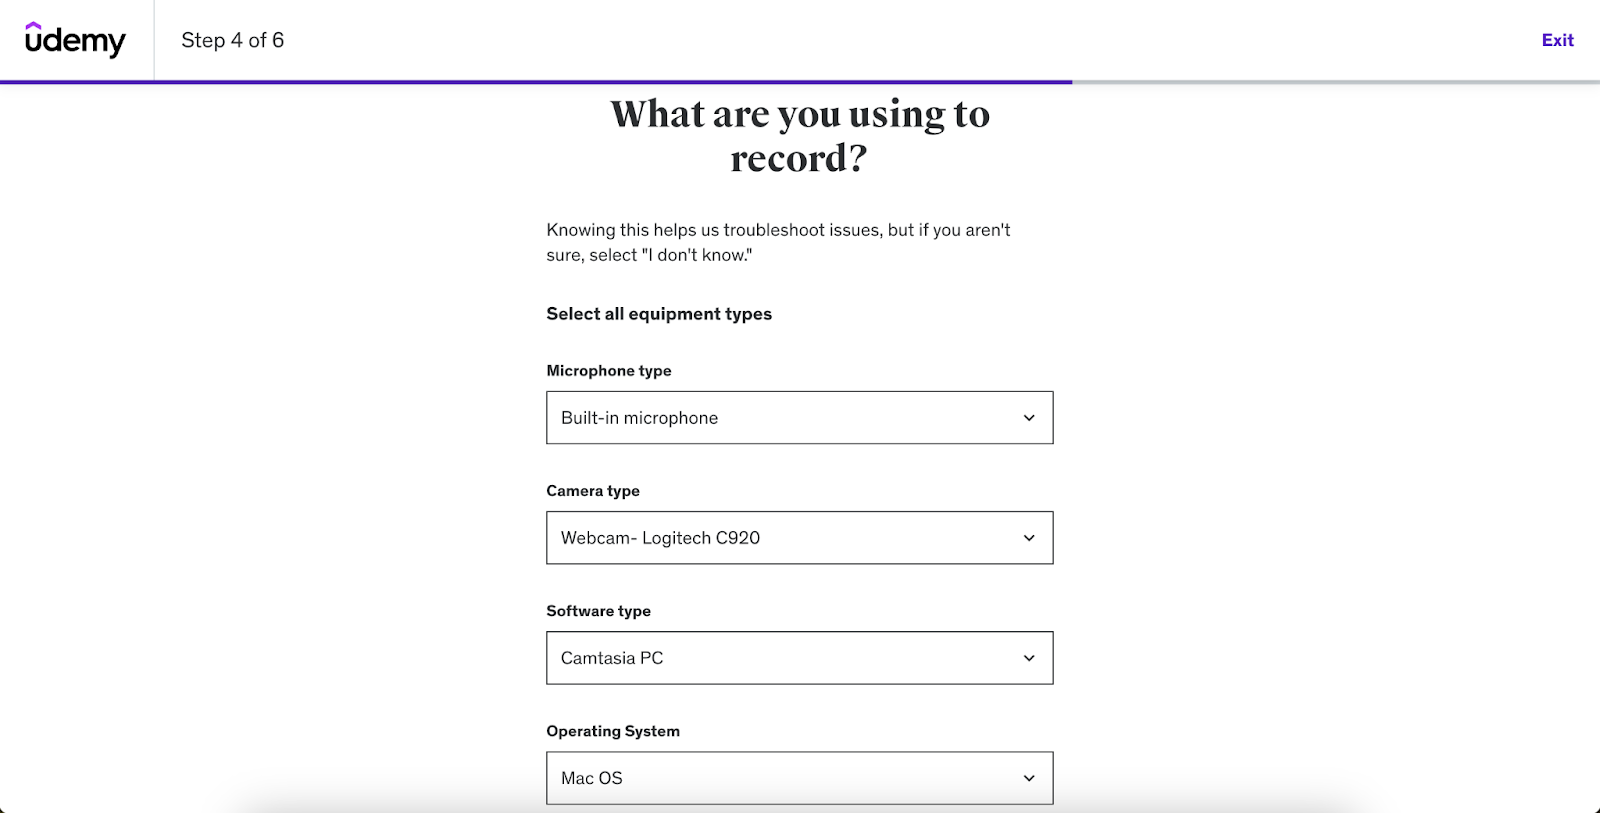
You’ll also have to specify what kind of filming method you’ll be using. So, we’ll be going ahead with the “I am filming my computer screen option”.
Don’t forget, you’ll also have to put in the details about what equipment you’ve used to record your video as we’ve done.
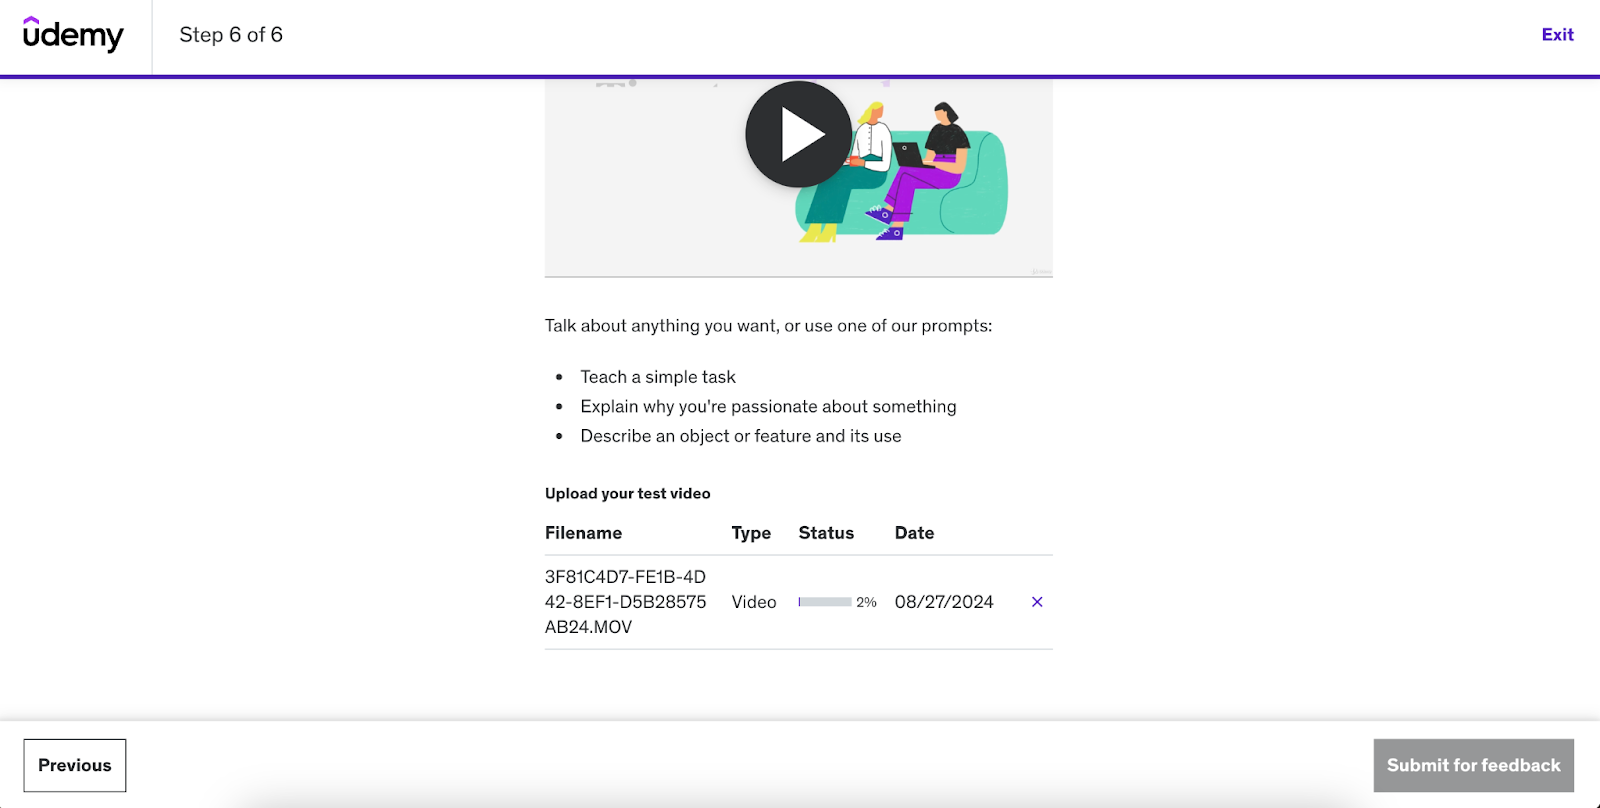
You’ll then be directed to the page where you can find video content on filming. If you have enough experience, you can skip this step but for beginners, this can be a good resource.

All you have to do next is upload your video to the platform and wait 24 hours for the feedback. Once you see that your test video has been approved, you can move on to the next step. If it hasn’t been approved, you’ll have to make some changes so that it's up to the mark.
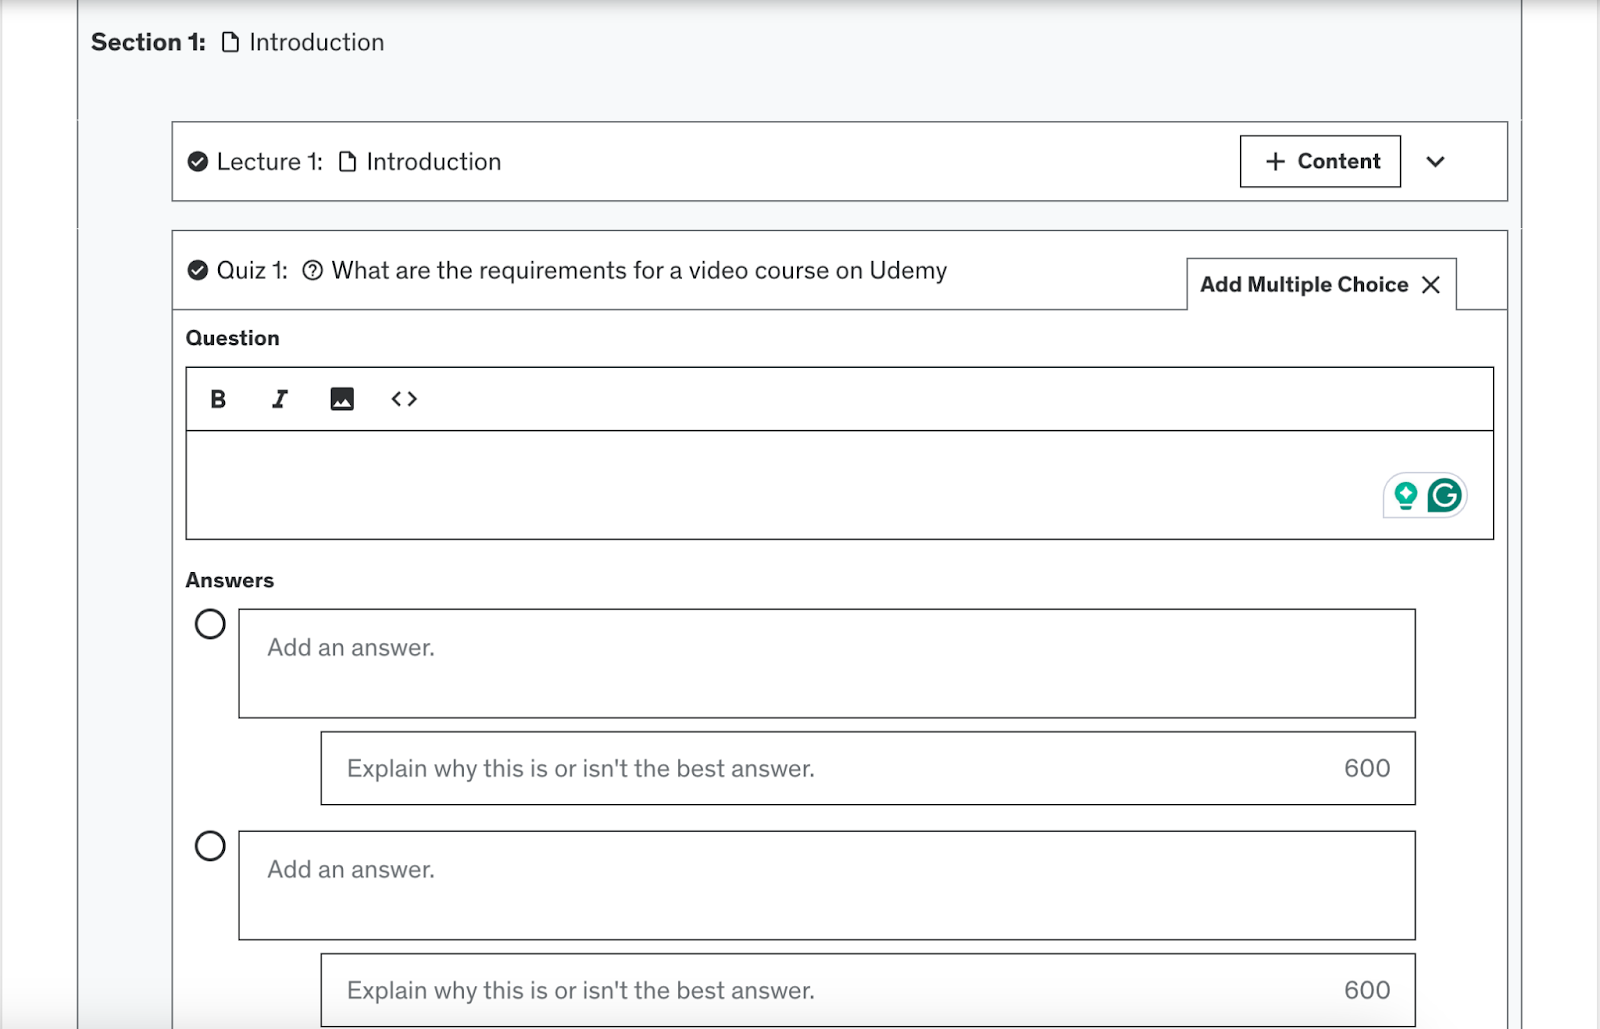
Design your quizzes and assessments
On your dashboard, you can pick the curriculum option to add in quizzes, assignments, or even a coding exercise if you’d like. For our example, we added a quiz to the first lecture which will test students on whether they know what videos Udemy accepts.
Similarly, you can add your questions and answers to them, with explanations as to why one or the other is the right answer.
Refine and edit your course content
Once you’ve created everything you need to start your course, you’ll have to check and see if your content is up to the standard.
Go over each of the sections/lectures you’ve set up, review your videos, and check if everything is audible. Think about adding a proper thumbnail with your photo for the videos. You can also look at whether everything follows the sequence you’ve built and wrap up your course.
There’s also an option to preview your course so you can see whether you’ve missed out on anything.
Once you’re happy with what your course looks like, you can go ahead and make a landing page!
Create your Udemy course landing page
Now it’s time to persuade prospective students to join your course by using the landing page. On the dashboard, you can see that we’ve put in the title and subtitles. Make sure they accurately represent the course content and include all the keywords.
On top of that, we’ve also added in a course description that serves as a synopsis of the topics covered in the course. You should write it so the students know what they may expect to learn from your course and why they should take it.
You’ll also have to add in some basic information such as the language of instruction, your student’s experience level, category, and sub-category.
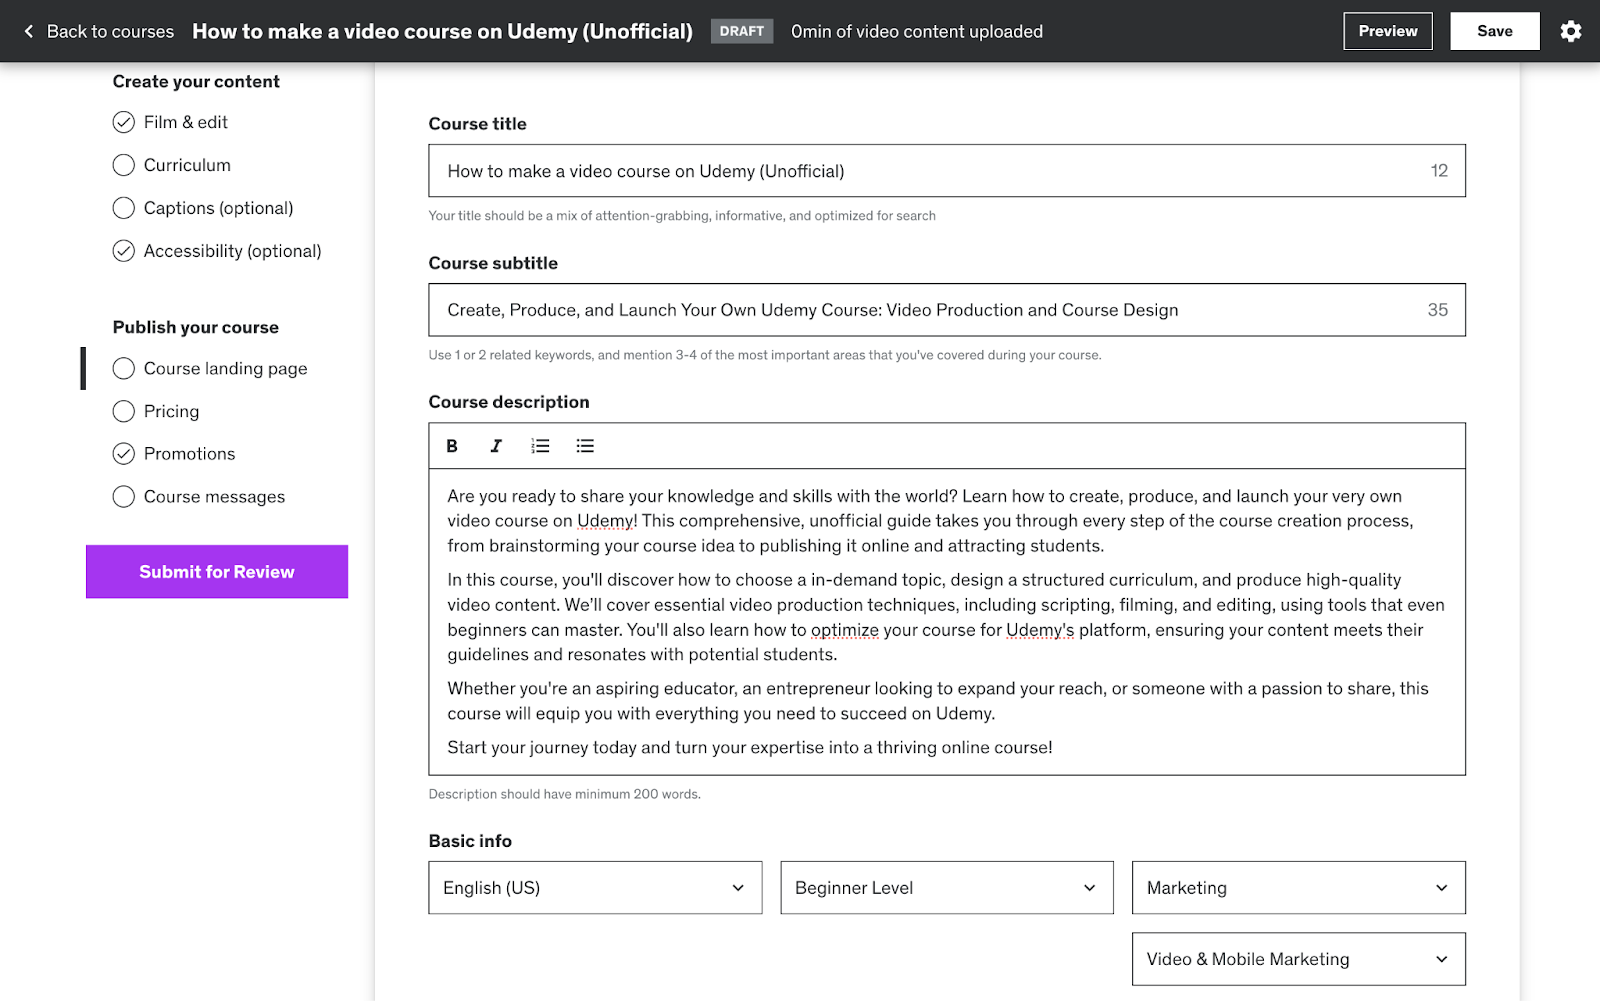
If you scroll below, you’ll see an option to choose the topic and image for your course. Make sure the image you choose is eye-catching and different from the others, as it will be featured on the website, in advertisements, and in emails.
You can also add a promo video on your landing page, which we’ll go through in the next section.

Make a trailer for your Udemy course
If you want to market Udemy courses, you have to learn how to promote your course yourself as well.
With a course trailer, you’ll be able to showcase why any student or learner should choose your course. Start by introducing your brand with the course image and then talk about yourself. Be sure to highlight how the course will benefit students and the learning objectives you’ll be covering.
Don’t forget to spend some time talking about who you’re making the course for, what challenges they can overcome, and the outcome of the course. In the end, add in your CTA to join your course, and that’s it!
Once you’ve uploaded the course trailer/promotional video, you can submit the entire course for review. That said, it might take around 24 hours or more before you get approval or feedback from the Udemy quality review team.
Bonus tip: Do your best to keep your promo video under 2 minutes since you want to keep your future learners engaged.
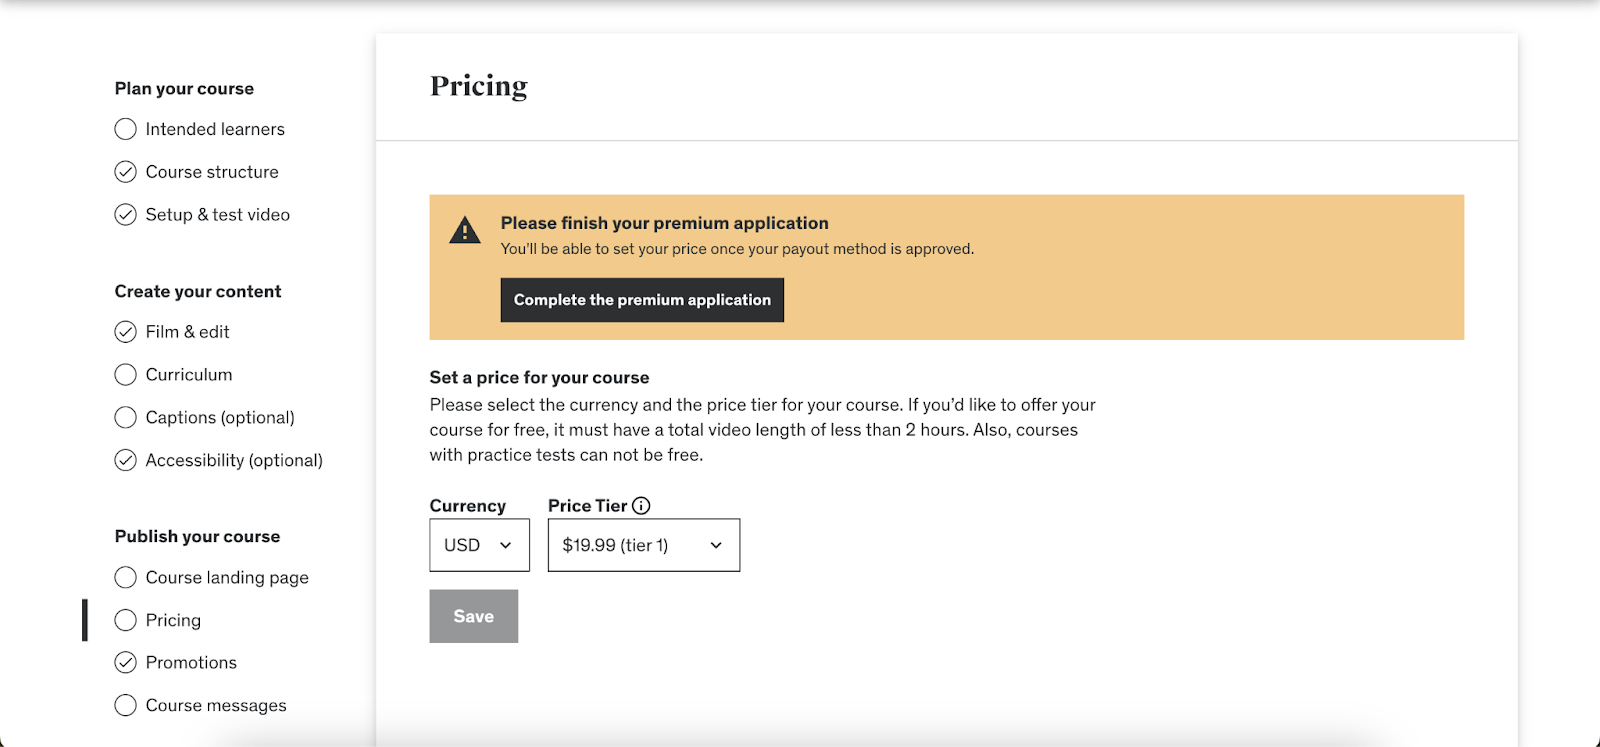
Pricing your Udemy course
On the course management page, you’ll see the option for pricing where you can select which currency or tier you want your price at.
Unfortunately, you can’t set up prices unless you’ve finished your premium application where you’ll have to add in your biography and image to validate your identity. You’ll also have to go through Udemy’s terms and conditions, where it opts you into their Deals program and Business program.
Once you’ve accepted that you’ll have to fill in your tax and payout details so you can receive your payments properly. After the application is complete, you’ll have to wait for the Udemy team to get back to you with the approval.
Now that you know how to sell online courses on Udemy, you might be considering signing up as an instructor. But is it the best choice for you? Let’s find out!
Is selling courses with Udemy worth it?
There’s no doubt that Udemy is one of the biggest online learning platforms in the world. It brings together millions of learners and students, so it provides more than thousands of courses at reasonable prices.
But is it the right choice for you?
| Pros of Selling Courses on Udemy | Cons of Selling Courses on Udemy |
|---|---|
| You can sign up for free, whether you're a regular or premium instructor. Plus, there are no extra costs for setting up your course, hosting it, or even maintaining it. | Unfortunately, Udemy does charge a high commission fee, which leaves instructors with 37% revenue if the referral code isn't used, even less if you use Udemy for Business. |
| Udemy makes it very simple for you to sell courses by providing lots and lots of helpful support materials that guide you through creating and promoting your first online course. You also gain access to their instructor community, where you can interact with others and ask questions. | There are a number of requirements you have to fulfill to get your course approved by the Udemy team. Whether it is video, audio, or image, you need to follow each rule carefully so that your course doesn't need multiple reviews. |
| The platform markets and promotes your courses for free, so more learners can take a look at what you offer. | You get charged a 3% commission fee if you use the Udemy referral link or code, but you also have to pay 30% processing fees in case you've used Google or Apple services. |
| You can choose to add quizzes, assignments, and other interactive elements to your course. | However, Udemy doesn't offer you the flexibility to just create a course with text, e-books, or PDFs. It's also a must to include a video in your course. |
| You don't have to worry about setting up and managing your platform because Udemy takes care of hosting courses, payment processing, and technical support. | Udemy frequently changes its pricing policies which can affect your future revenue projections. Plus they offer substantial discounts on courses, which makes it cheaper for students but limits your earning potential. |
Even though you can earn some money in terms of passive income, you can already guess that selling courses on Udemy may not always benefit you financially. So if you want to keep your revenue high, why don’t you look at some other options?
Where else can you sell online courses?
By 2029, the revenue for the online education market is set to grow to USD $279.30 billion. Want to earn a part of those billions? Let’s check out which platform can help you sell courses.
1. 🏆Whop
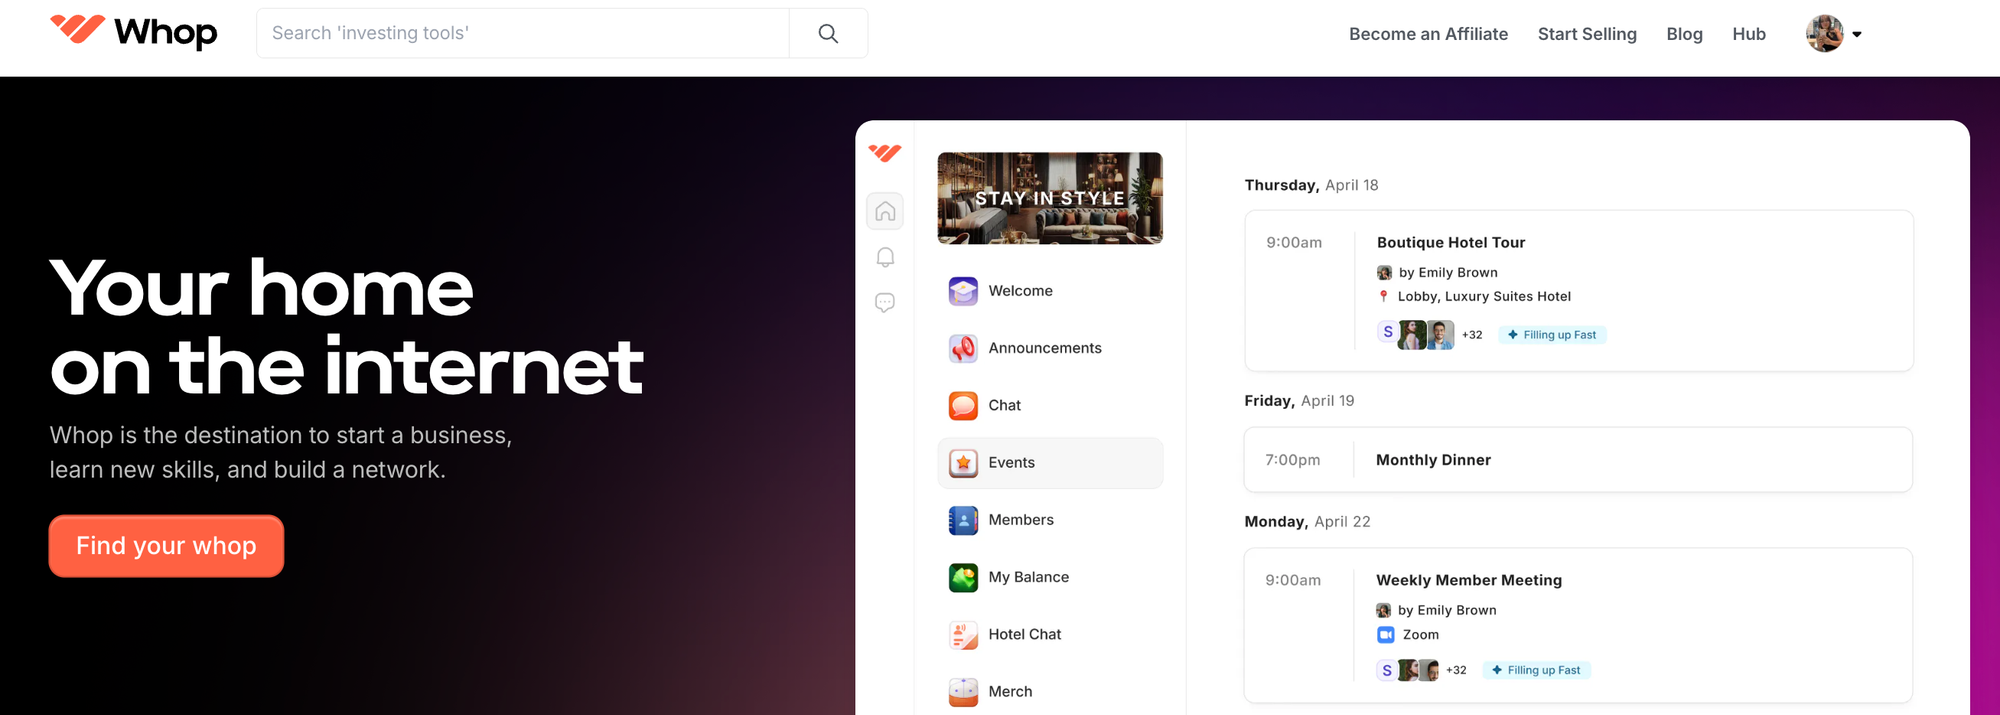
If you're searching for a streamlined and scalable solution to sell online courses, Whop is the perfect choice. You can set up your pricing as a simple one-time purchase or as part of a subscription plan. What’s more, there isn’t any need to adhere to specific tier plans, as it all depends on how you want to sell.
Plus, you aren’t just limited to selling courses on Whop. You can even sell memberships to a private community inside of your own whop, so your students won't have to switch to a platform they don't already use. There are also options to sell additional materials such as ebooks, downloadable PDFs, masterminds, and more. Whop is an excellent option for a low-fee, highly-scalable course platform.
Fees: Whop only keeps an industry-leading 3% of your sales revenue.
2. Kajabi

One of the most expensive platforms, Kajabi does have the ability to create, market, and sell courses. However, in terms of cost, the Kickstart plan charges $55/ month and their pro plan is billed at $319/month on an annual basis. There are no hidden costs or transaction fees associated with it.
If you’re looking to build automation, Kajabi provides a variety of if-then situations such as sending a student an email, registering them for an event, filling out a form, or more.
Fees: $55-319 a month when paid annually
3. Thinkific

Looking for a simple template to build your course? Thinkific can help you do that in a few minutes.
One of the best parts is that the website-based platform is interactive and offers many options for customization. However, you can only build and put out one course on their free plan. With their paid plans, you have the option to scale your courses however the Basic plan starts at around $36 per month, and its Grow plan costs $149 per month.
There are also additional transaction fees you’ll have to consider depending on your payment gateway.
Fees: $36-$149 per month when paid annually, plus transaction fees
If you want the best deal when it comes to selling courses, Whop comes out on top with its flexible features, great scalability, and low commission fees.
Sell courses with Whop and keep more of your hard-earned income
There’s no doubt that Whop is the #1 platform for selling courses. With a quick and simple sign-up process, you can start building your course in minutes. If you’re new to course creation, you’ll have access to extensive resources and 24/7 support for anything related to courses and other digital products.
Doesn’t matter whether you’re teaching sports or painting lessons, you can create a course on everything in between. Start selling your courses with Whop to monetize your content today.