With Whop, you can add a collection on different apps to your whop to build your own online hub. One of these apps is the Chat app. This guide outlines what the Chat app is and how you can use it.
Key takeaways
- The Chat app gives you full control over live community messaging, including access, moderation, and security settings.
- Admins can moderate effectively by muting or banning users, blocking URLs, setting cooldowns, and filtering banned words.
- Webhooks let you automate external messages into your chat, enabling integrations like daily updates from other services.
On Whop, you can build your own internet hub — called a whop. Think of it as a customizable space powered by apps. The apps you add shape the kind of online space you’re creating and define the experience your customers get.
There are many different types of Whop apps - from Courses, to Content Rewards, Content, Forums, and Chat.
In this article, we take a look at the Chat app and how you can use it.
What are Whop apps?
Whop apps are building blocks that let you create exactly what you need. Unlike other platforms, Whop gives you the freedom to mix and match features — so you can launch communities, courses, reselling hubs, or something entirely your own.
There are a lot of apps you can add to your whop, and new ones are being developed every day by both Whop and independent developers - you can even develop your own and list it on the Whop App Store.
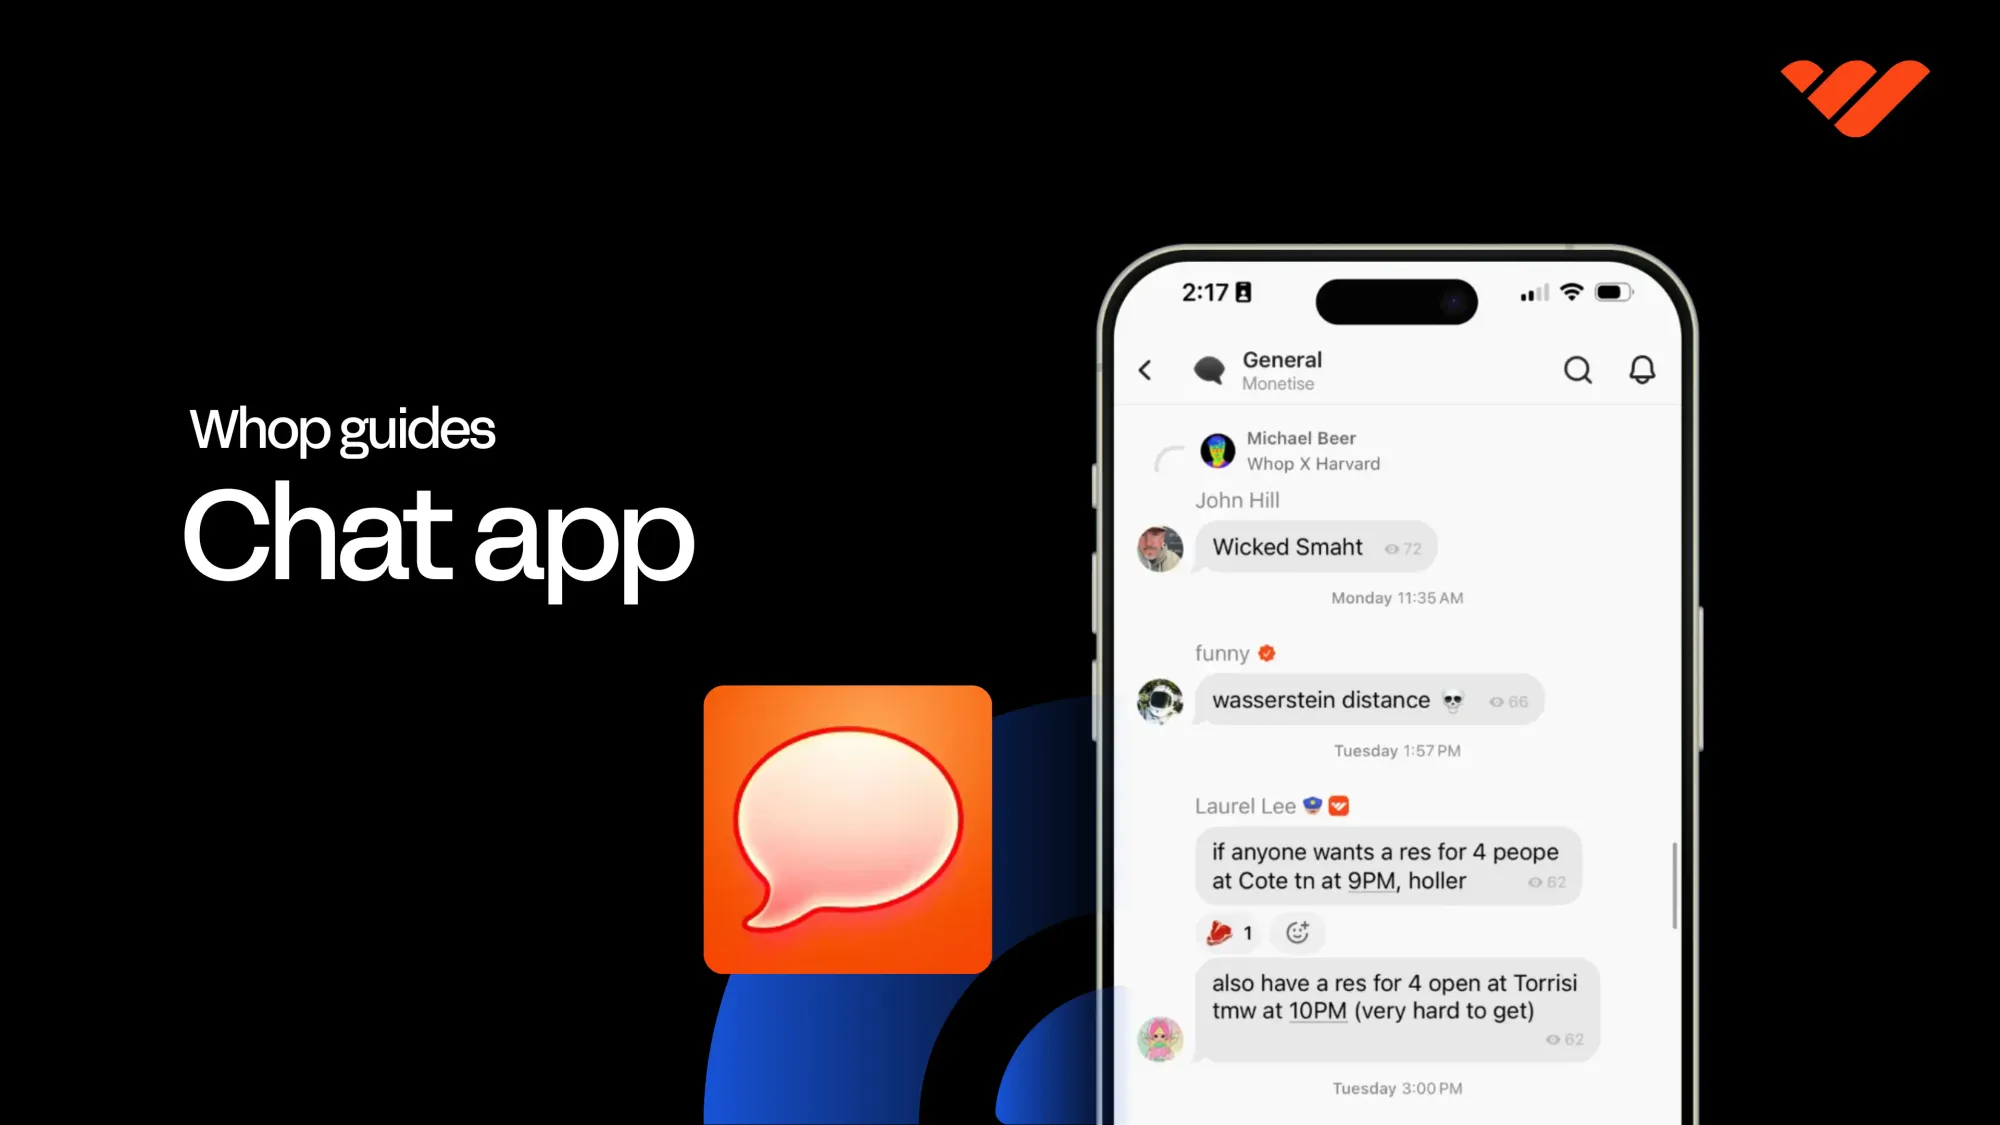
One of the most popular apps you can add to your whop is the Chat app, a live chat room that allows people to communicate with each other.
What is the Chat app on Whop?
The Chat app is a live chat room where your members can talk to each other and the best part is you have control over it.
You decide who can access it, who can send messages, whether links are allowed or not, you can even connect a webhook to send messages to it.
How to add the Chat app to your whop
You can add the Chat app to your whop just like any other app, and it’s really easy to do.
But first, you have to have a whop. If you don’t already, check out our guide on creating your first whop.
If you got your whop ready to go, let's take a look at the steps of adding the Chat app to your it:
- Click the App store button under the Admin area of your whop. This is going to take you to the Whop App Store.
- In the App Store, find the Chat app and click on its Add button
That's it — once you've completed these steps, you'll be directed to the Chat app and asked to select which products can access it.
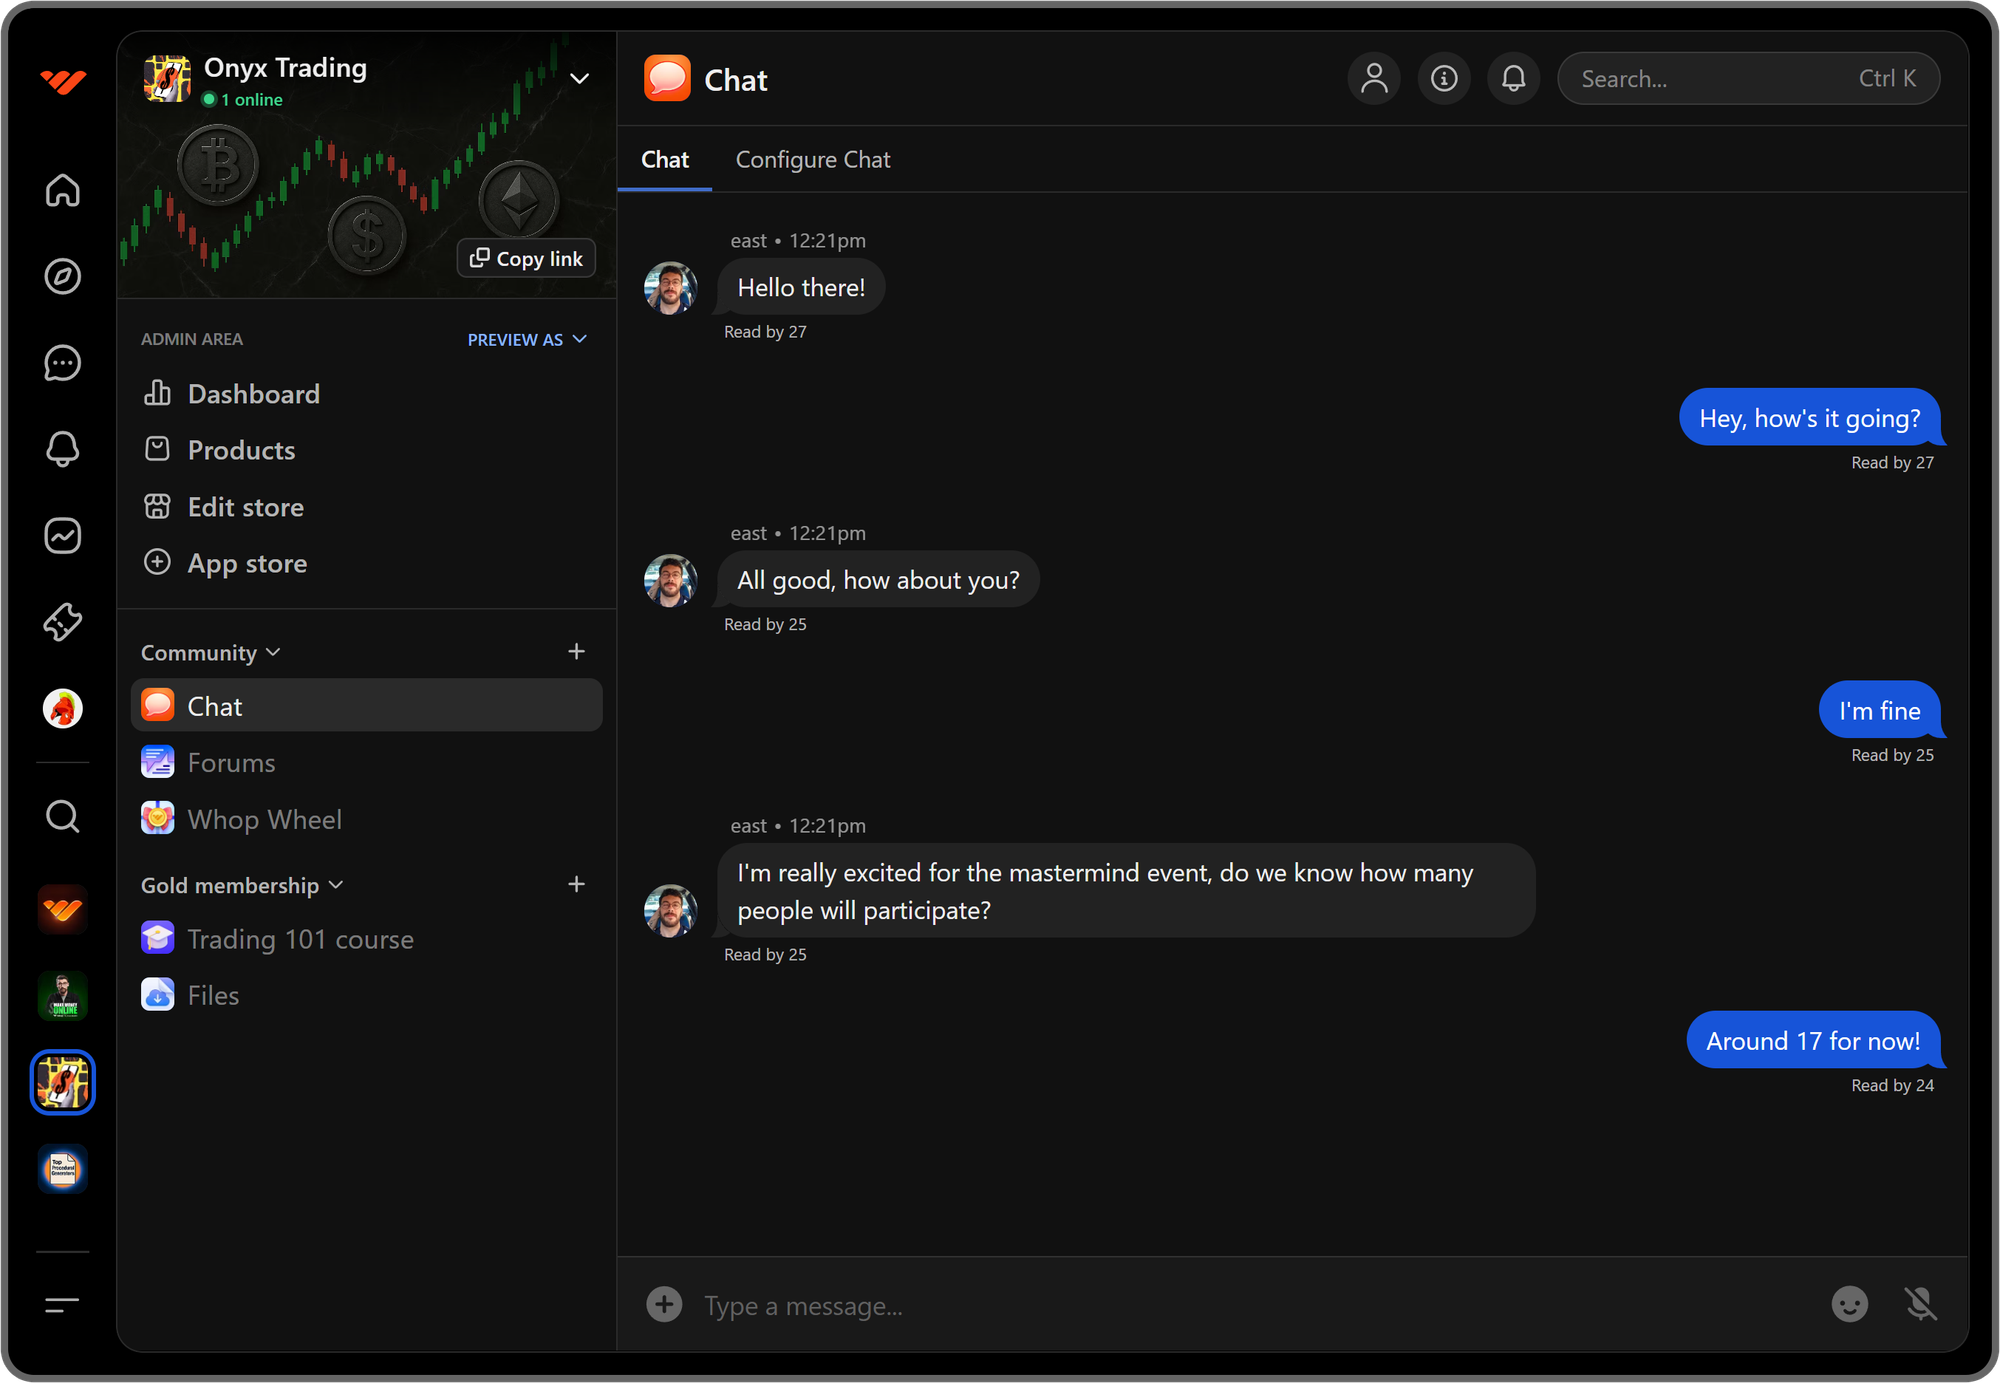
Using and managing the Chat app
After adding the Chat app to your whop, you can see it in the app list of your whop, under the Admin area.
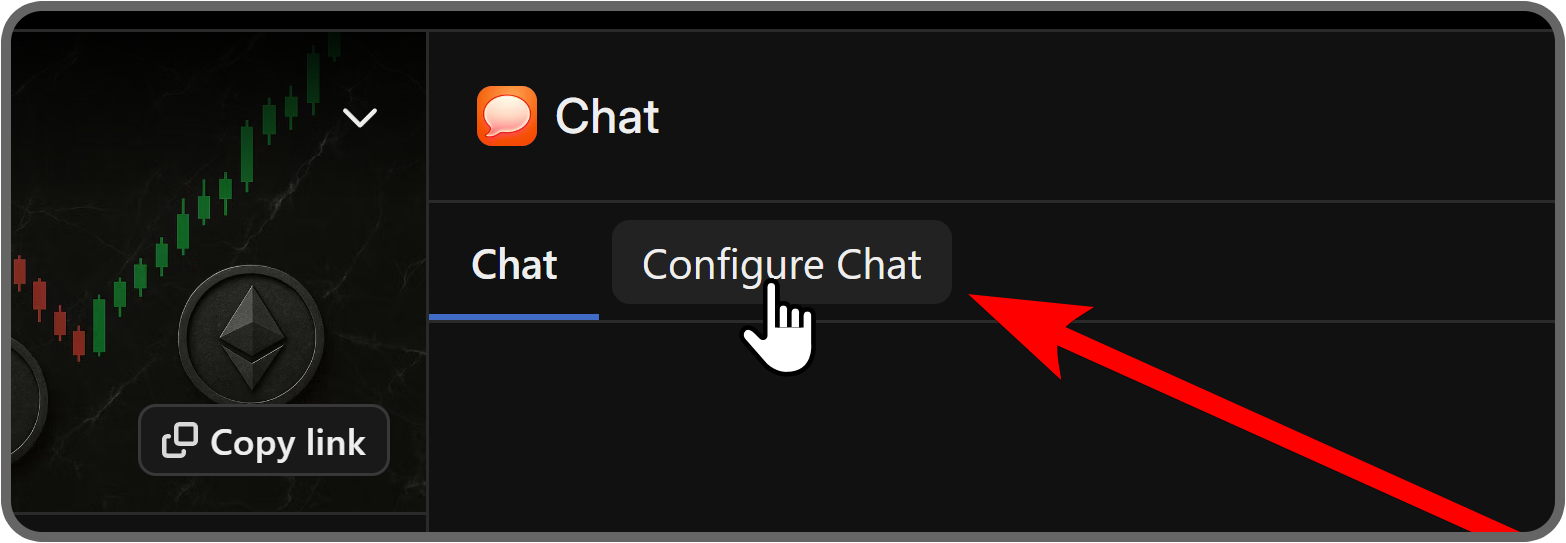
Clicking on it will take you to the app and you will see two tabs of the app at the top of your screen: Chat and Configure Chat.
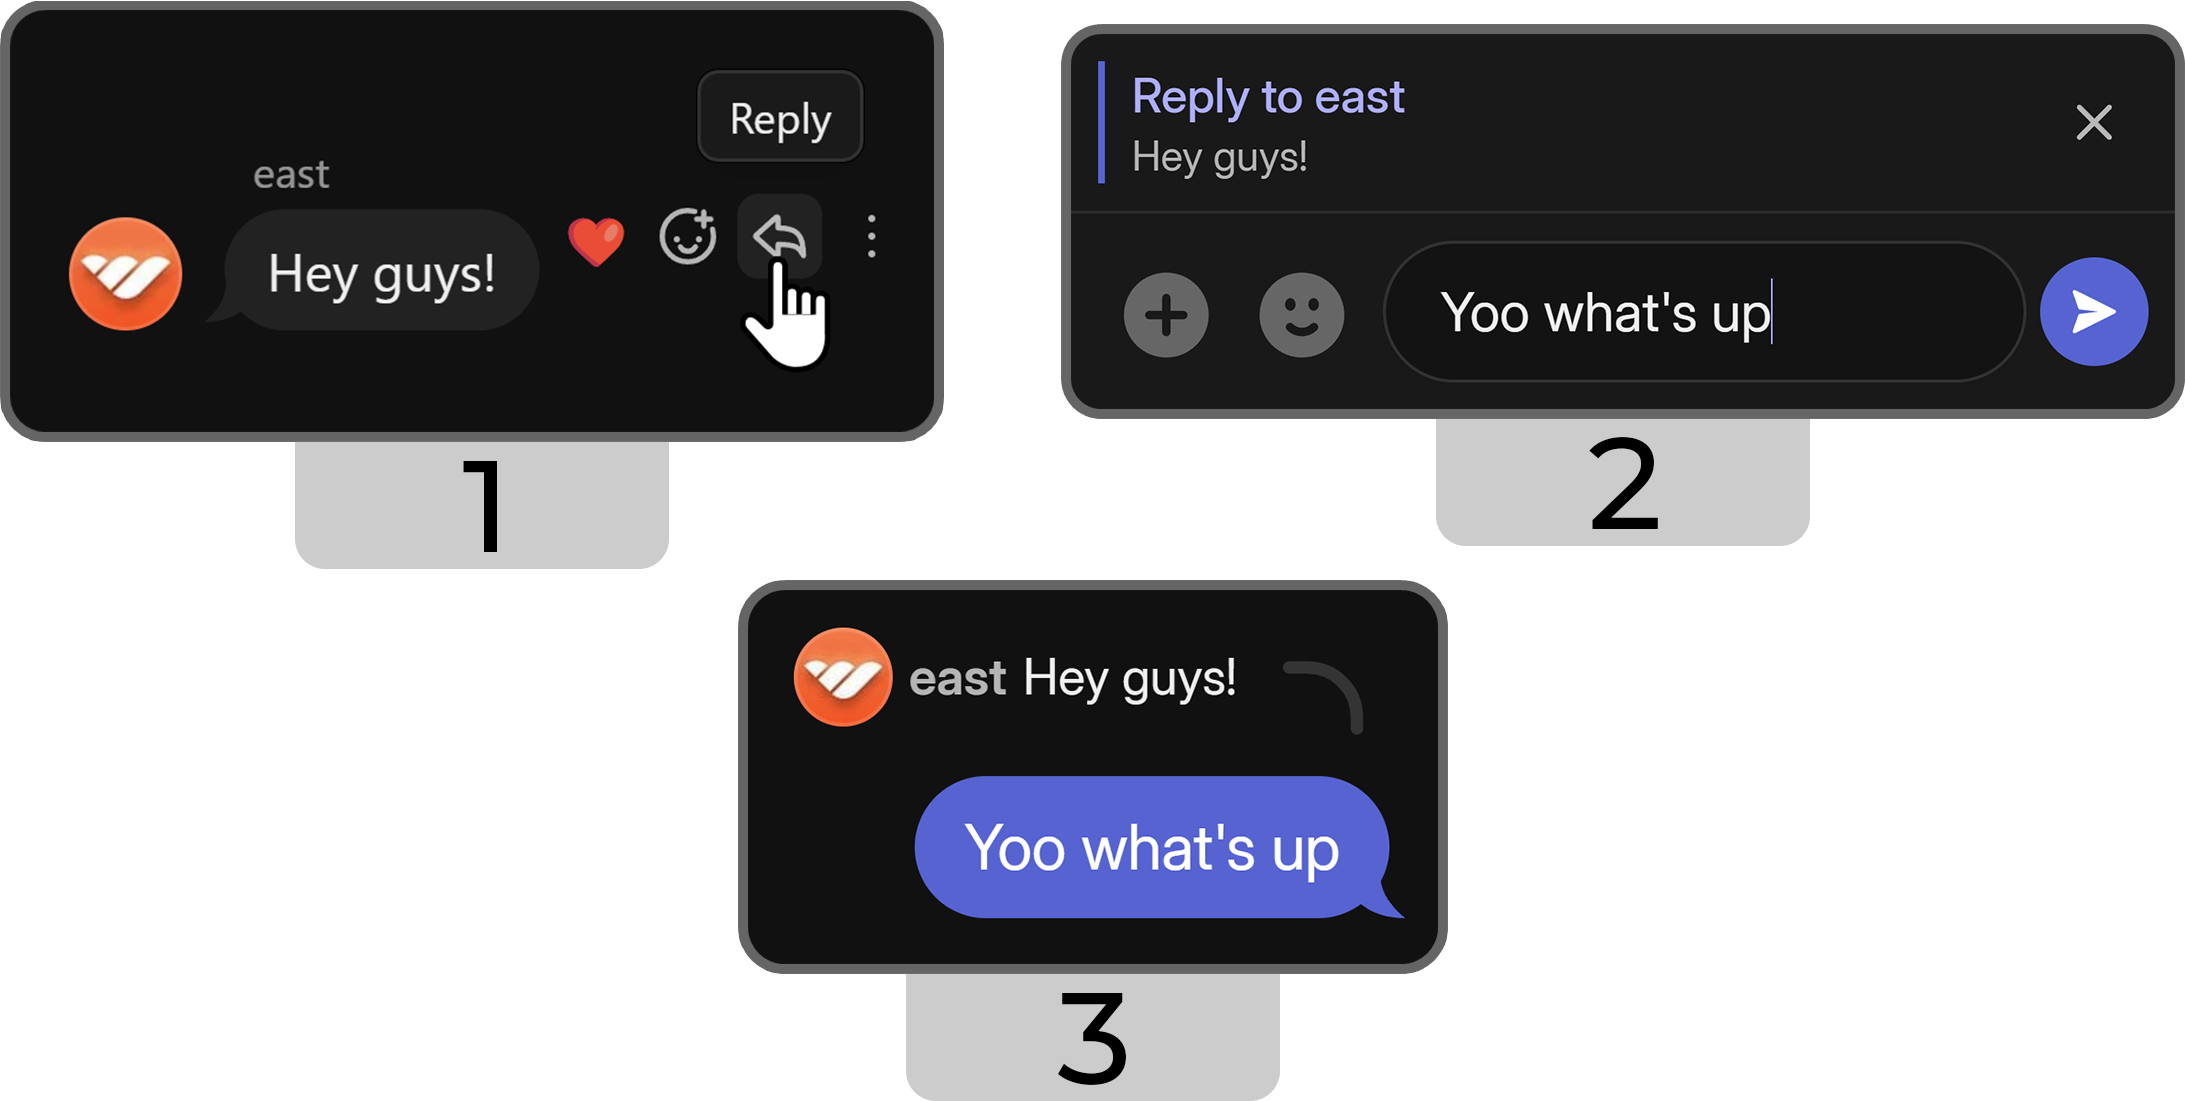
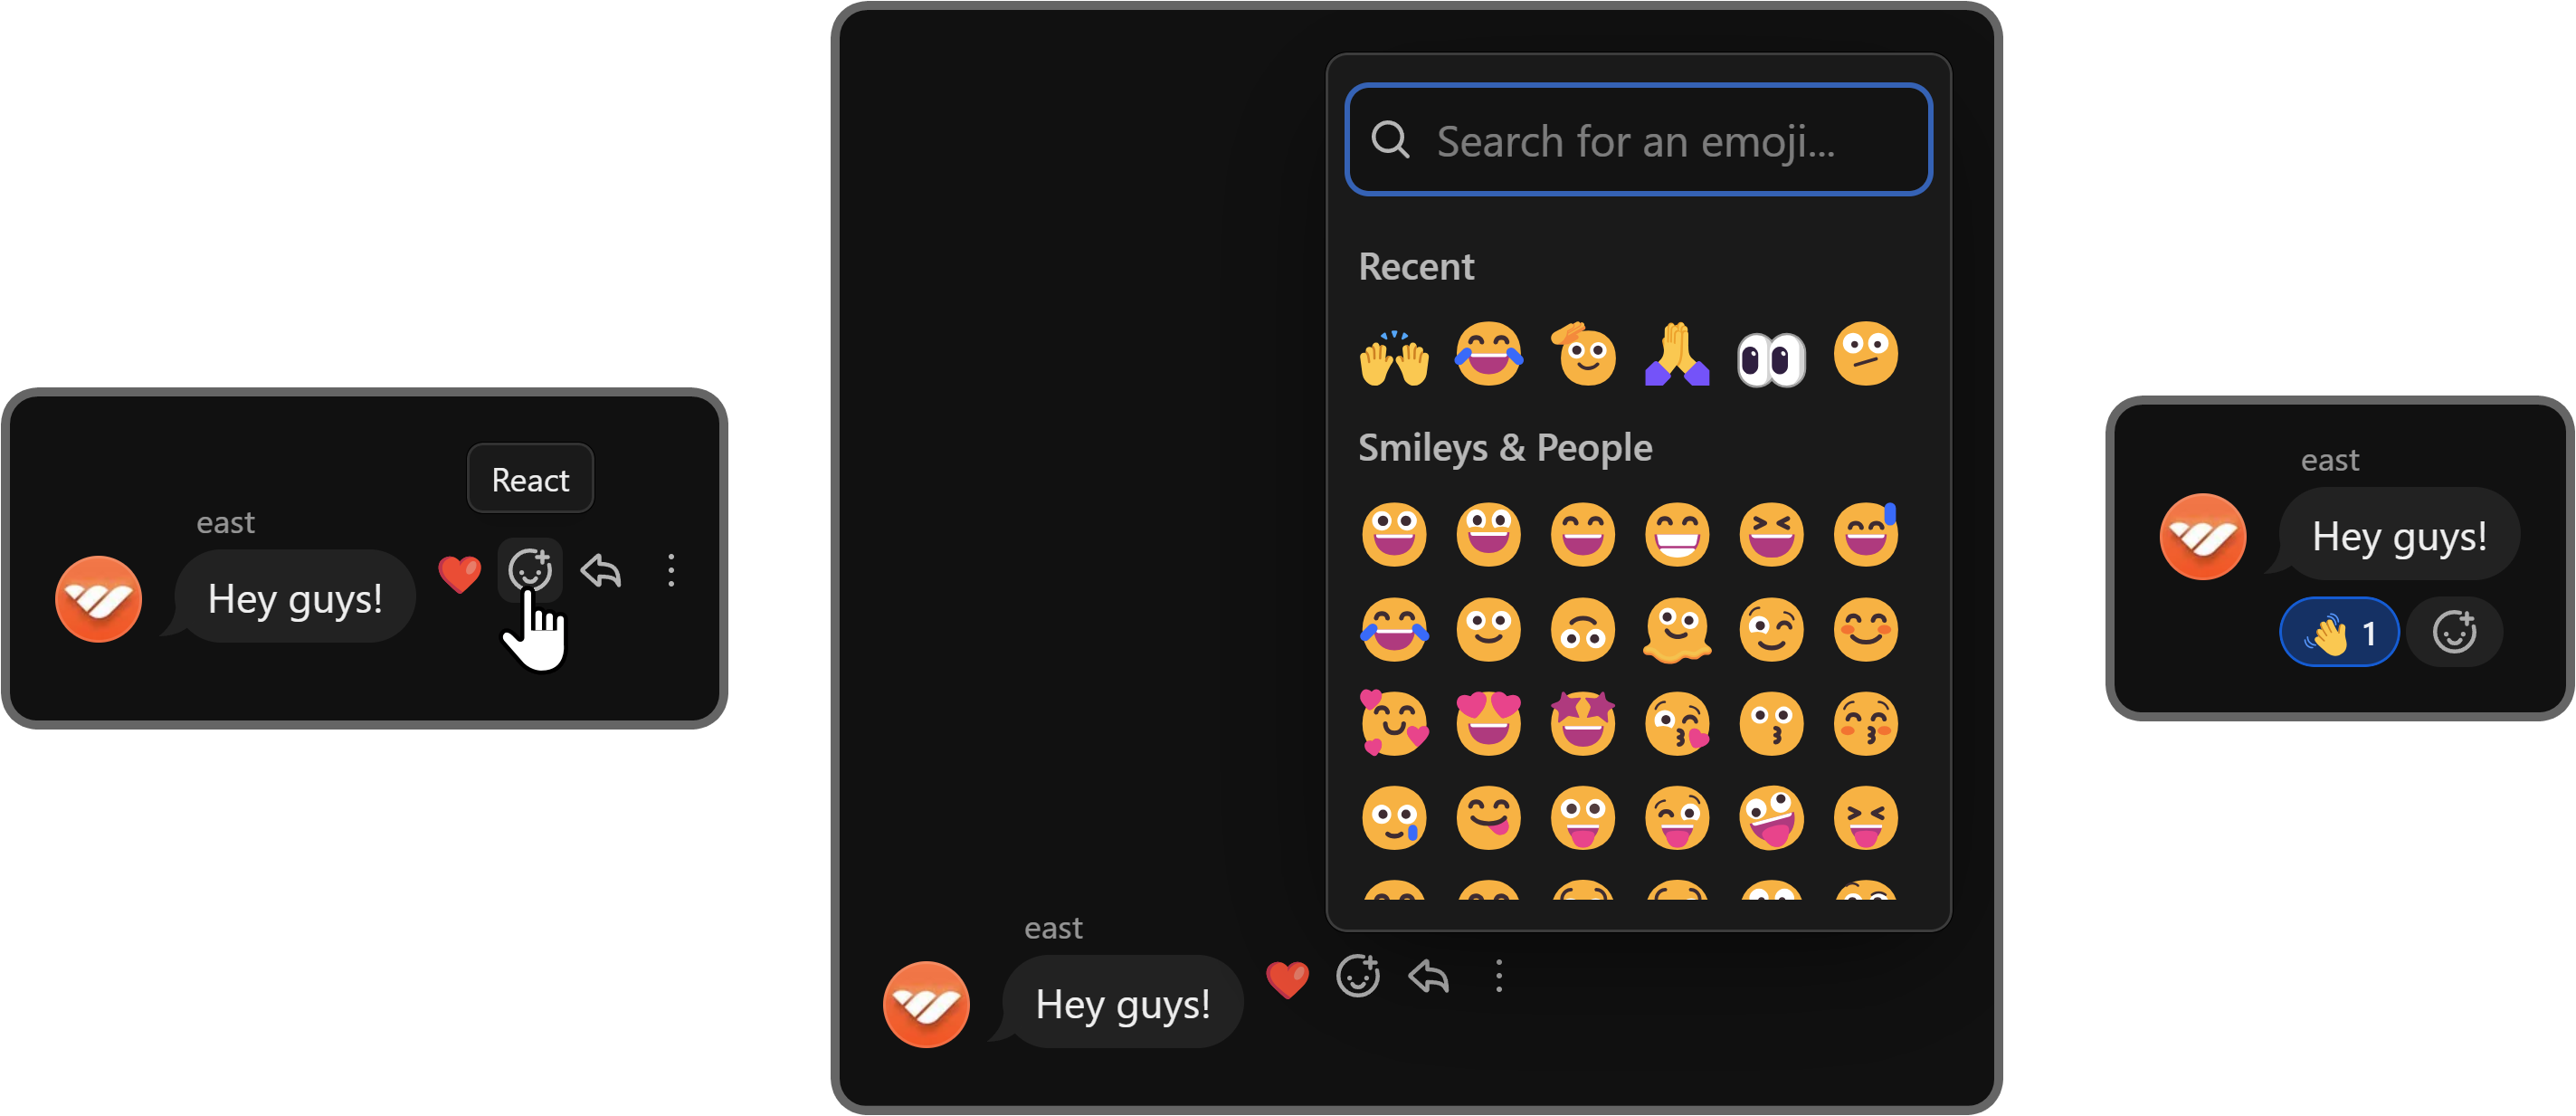
How to reply and add reactions to messages on the Chat app
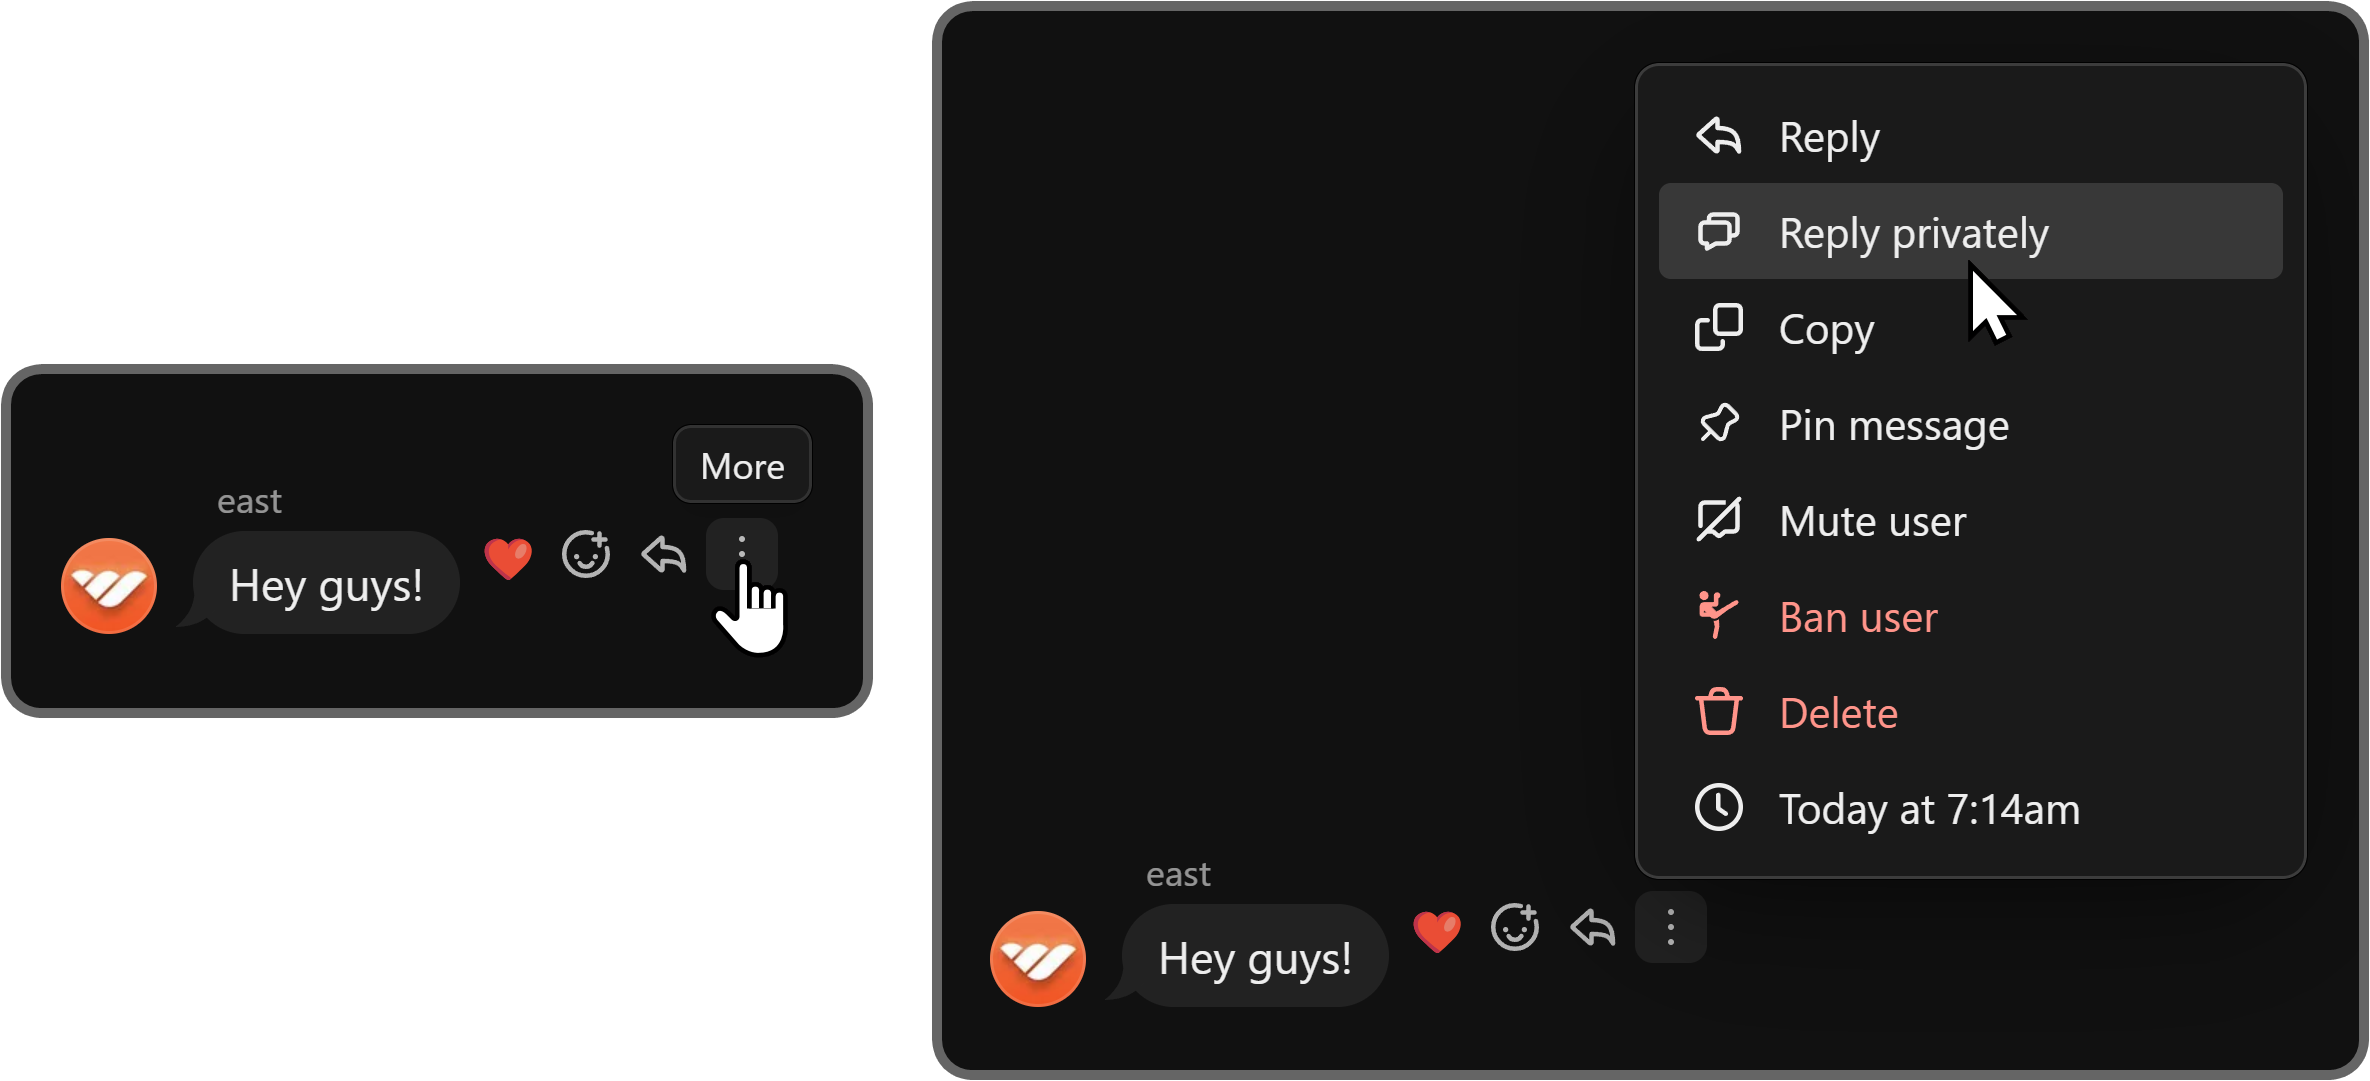
When you hover over a message on the Chat app, you'll see three buttons: Reply, React, and More. If you click the Reply button, you'll see a preview of the message above your input field, and when you send a message, it will be formatted as a reply.
Depending on the user's notification settings, they're going to get a notification about your reply.
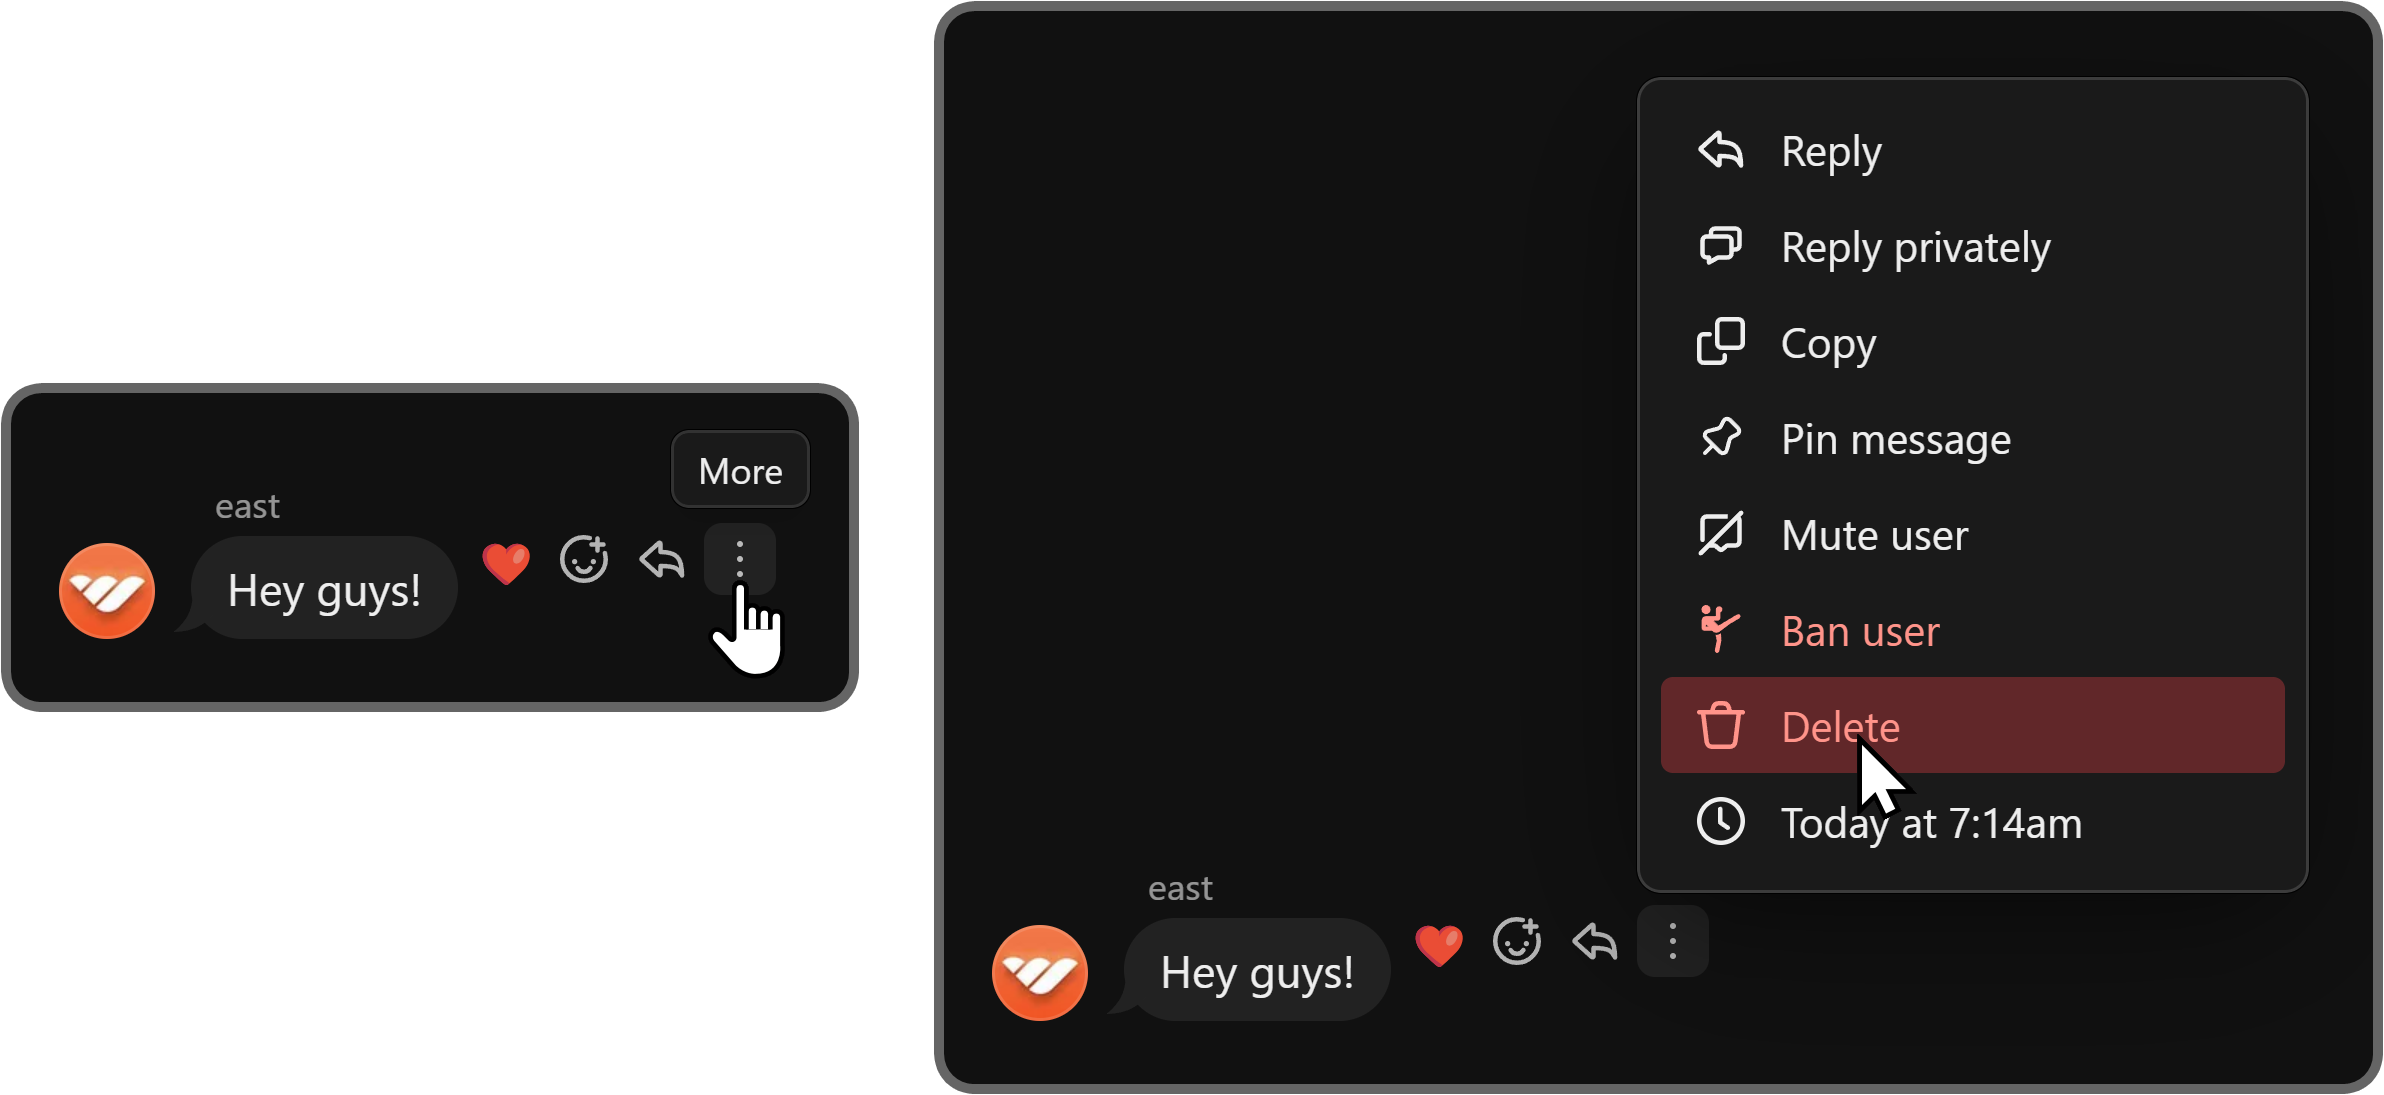
You can also click on the More button to see the context menu where you'll see the Reply privately button to directly navigate to the private DMs of the user.
If you click on the React button of a message, you'll see the emoji list. There, selecting an emoji is going to leave a reaction to the message. You can then click on the reaction to remove it if needed.
How to delete messages on the Chat app
When you click on the More button of a message, you're going to see its context menu. There, you can use the red Delete button to instantly delete a message.
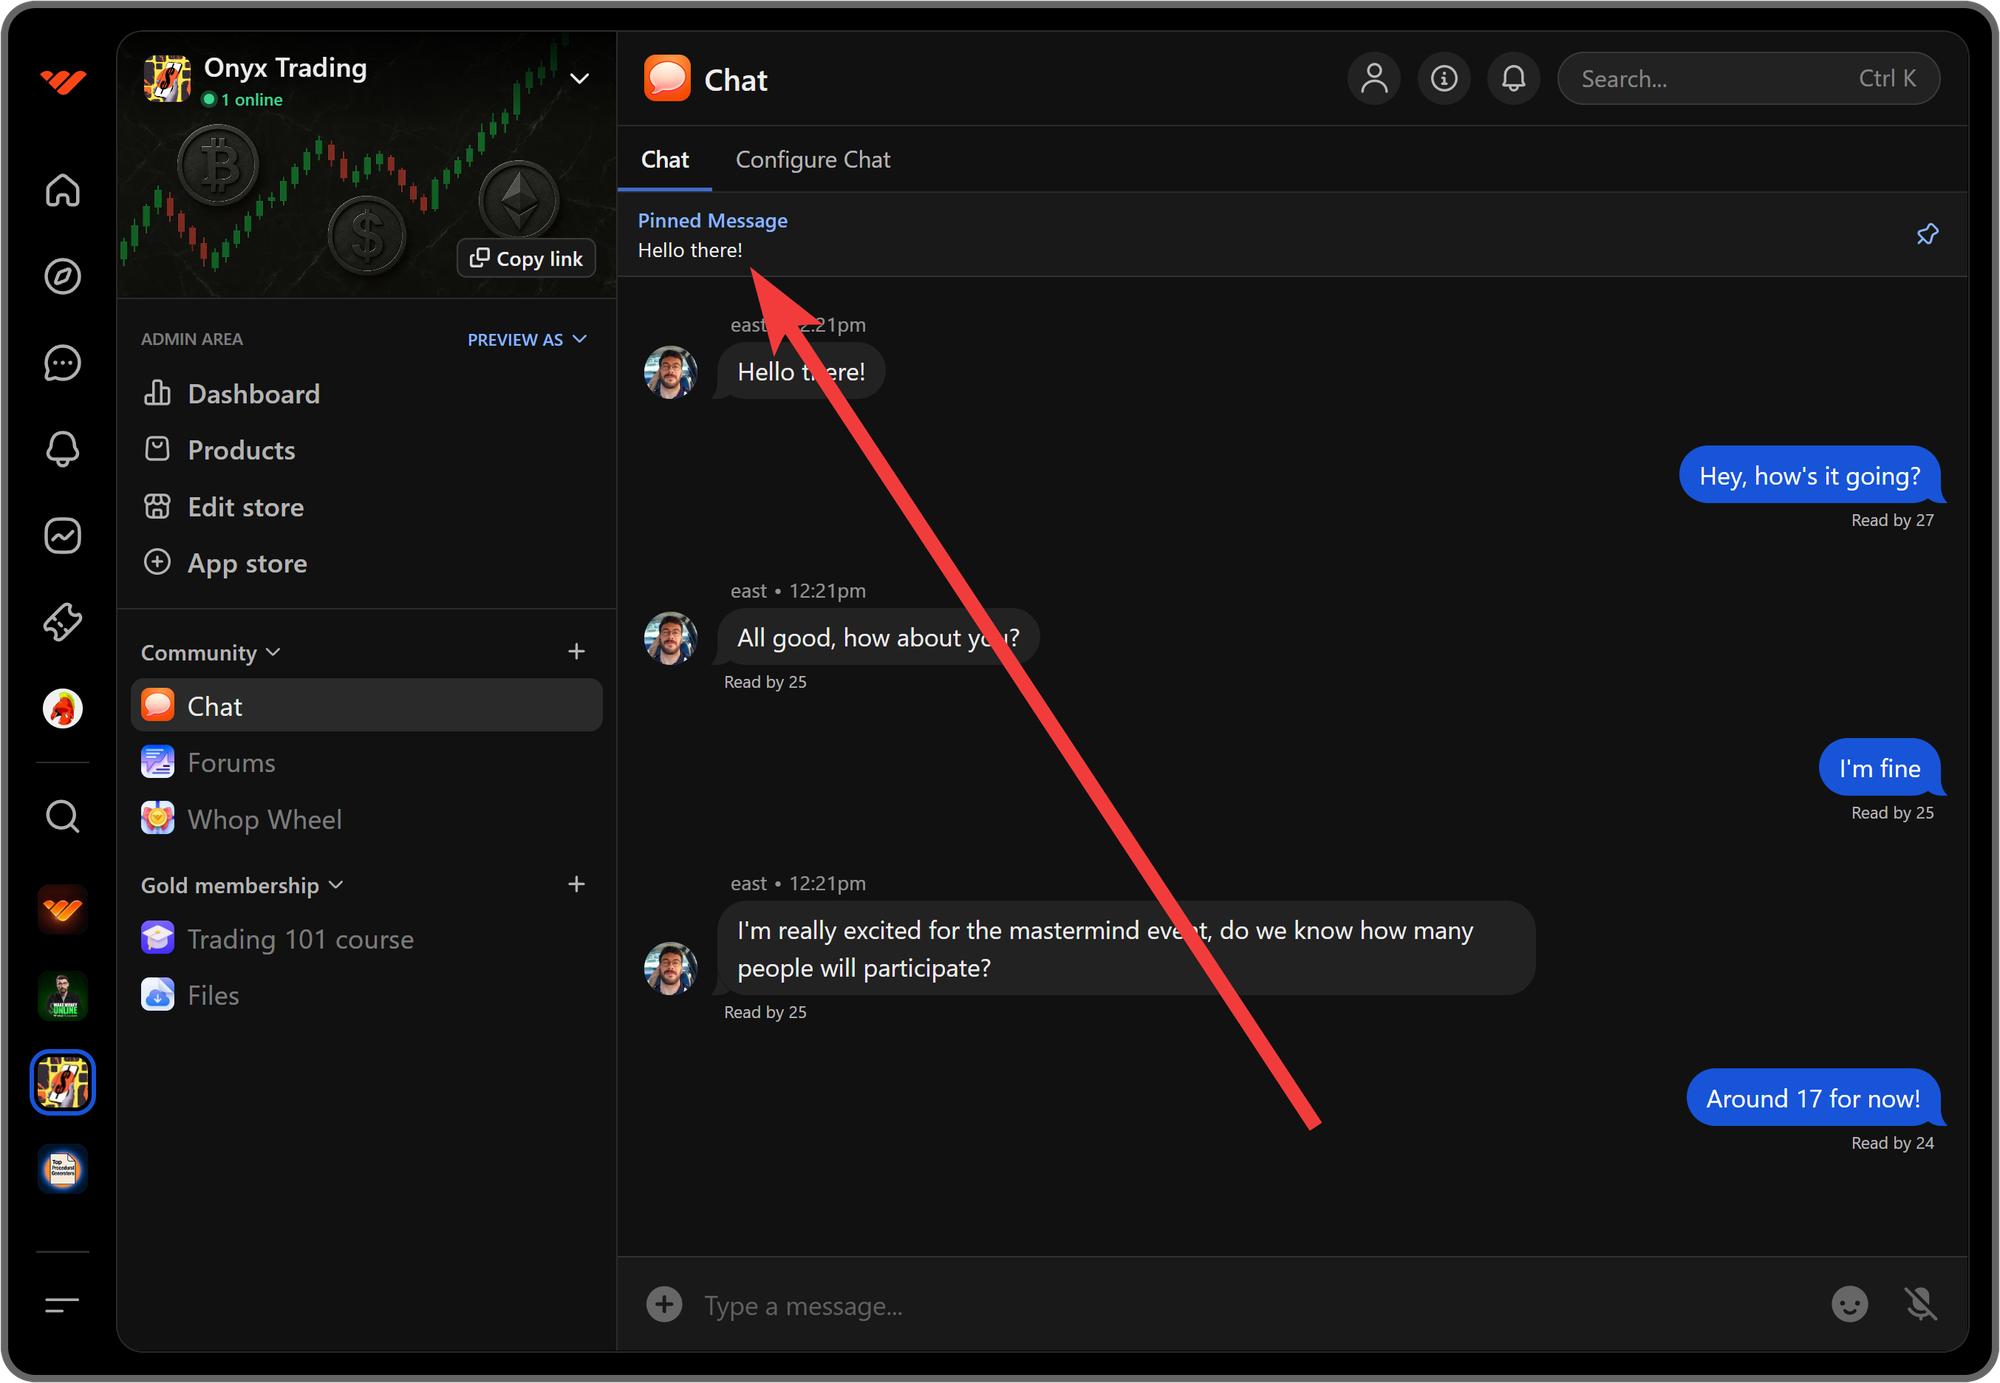
How to pin messages on the Chat app
When you click the More button of a message, you're going to see the Pin message button in its context menu. Clicking on it will pin the message at the top of the app for all members of your whop to see.
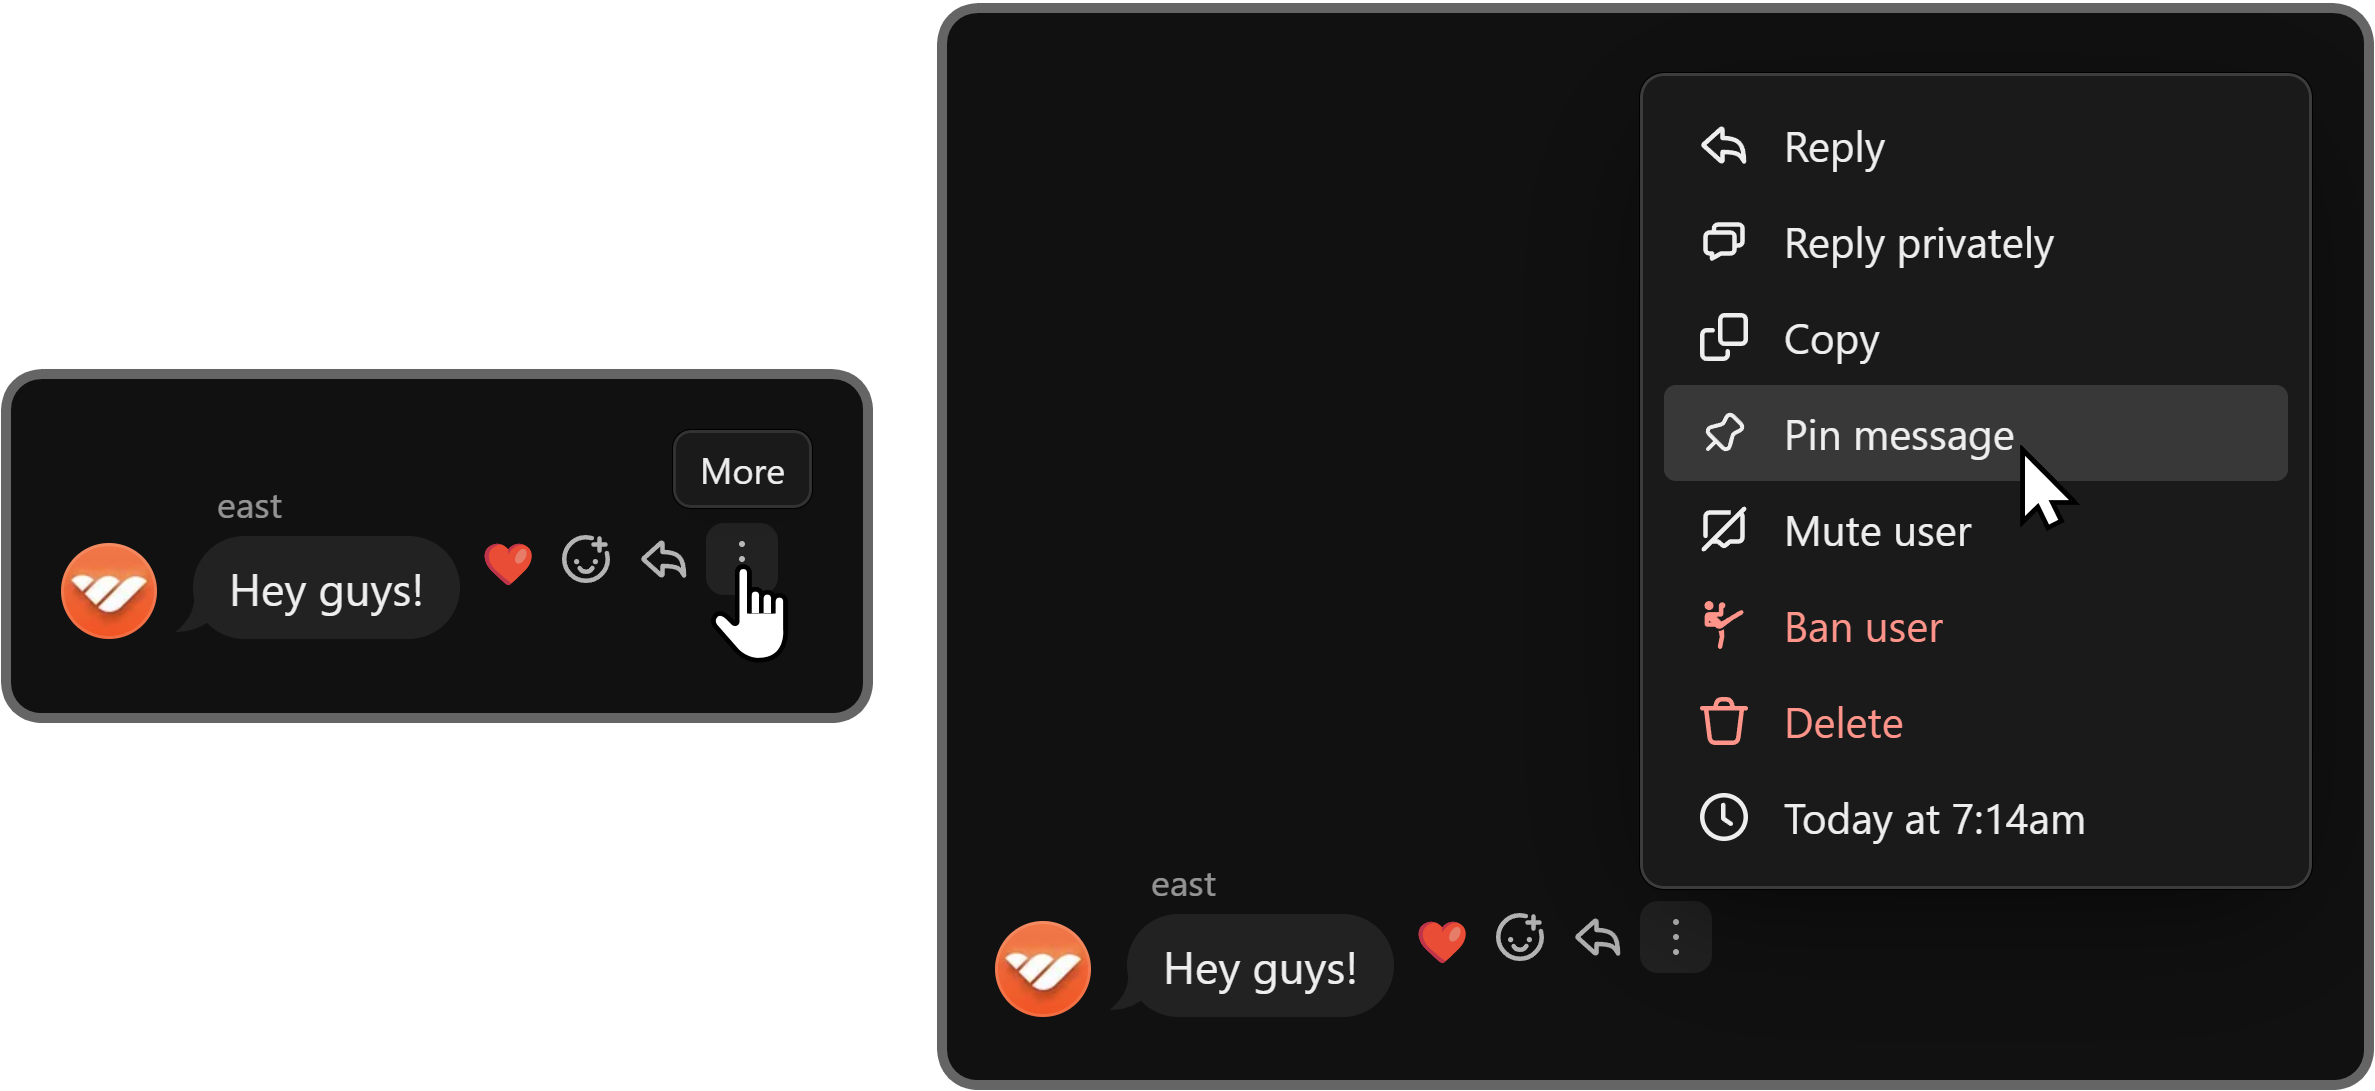
Pinned messages are great for highlighting certain messages, announcements, or things that people should know. Clicking on the pinned message at the top of the app will immediately scroll up to that message.
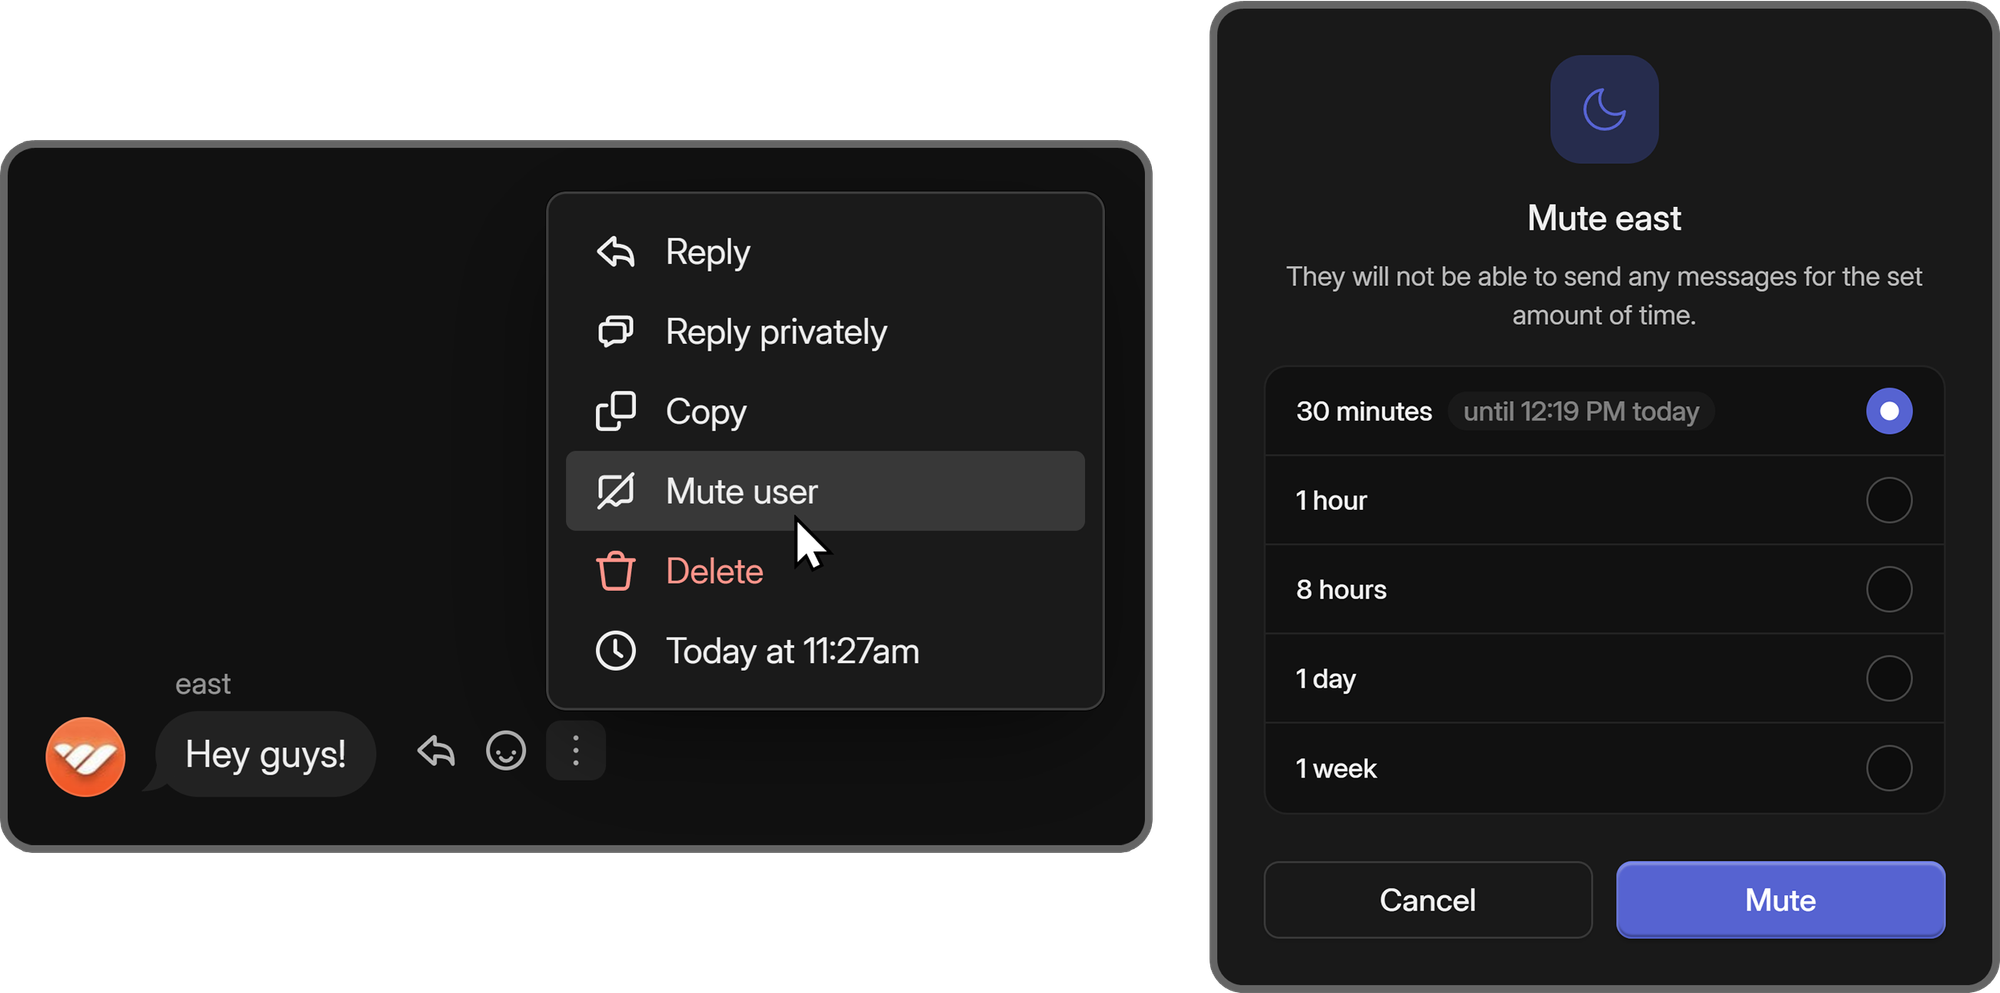
How to mute users on the Chat app
You can also see the Mute user button in the context menu of messages. Clicking on it is going to display a popup window with five time settings that you can select and then click the Mute button to prevent the user from sending messages.
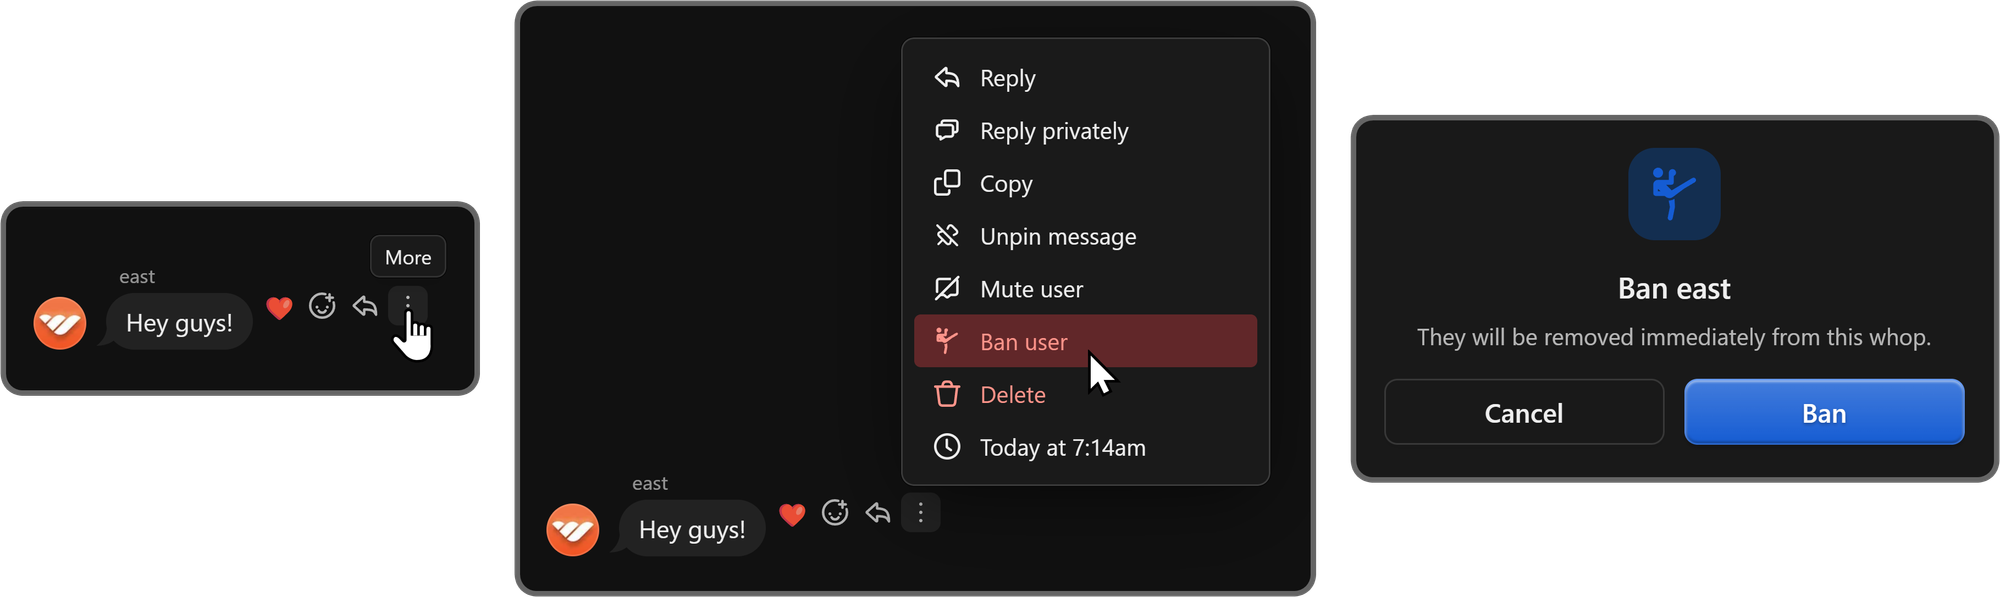
How to ban users on the Chat app
One of the other options you're going to see in the context menu of messages is the Ban user. As its name suggests, clicking the button will display a confirmation message about banning the user and confirming it by clicking on the Ban button will ban the user from your whop.
Configuring the Chat app
To access the settings of the Chat app, all you have to do is click on the Configure Chat button at the top left of the app. This is going to take you to the admin view of the app.
Choosing who can react and post in your whop chat
In the app settings, the first setting you're going to see is Who can react?, which has two options: Everyone, which is the default option, and No one.

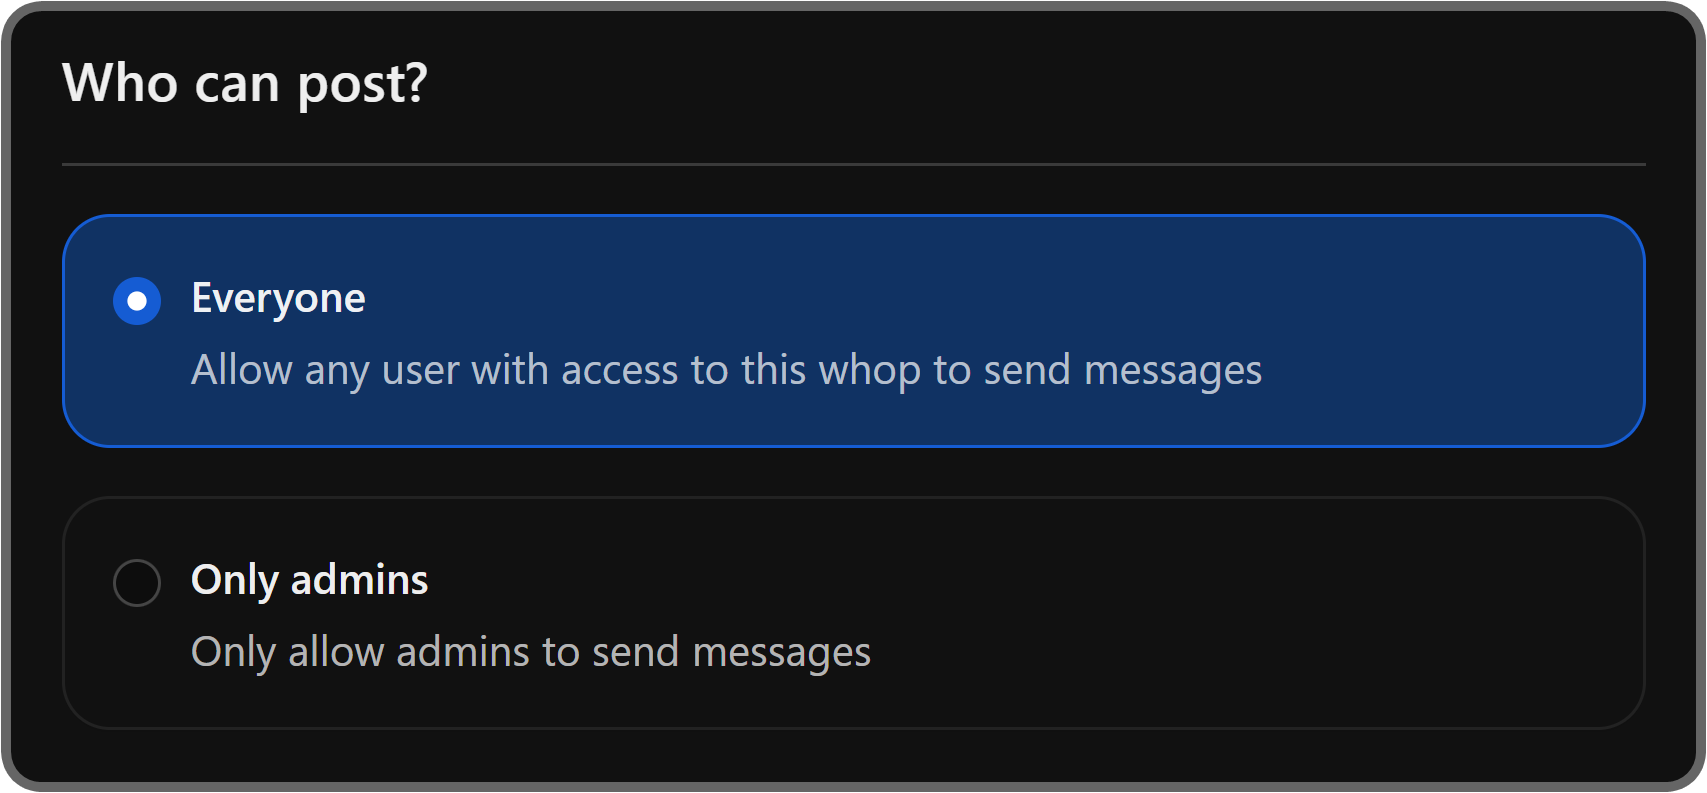
The next setting is Who can post? As its name suggests, the Who can post? option allows you to determine who can send messages into the app. The Everyone option is the default one.
If you select the Everyone option, all of your whop's members will be able to send messages on the app - if you select the Only admins option, however, only your whop's team members will be able to send messages.
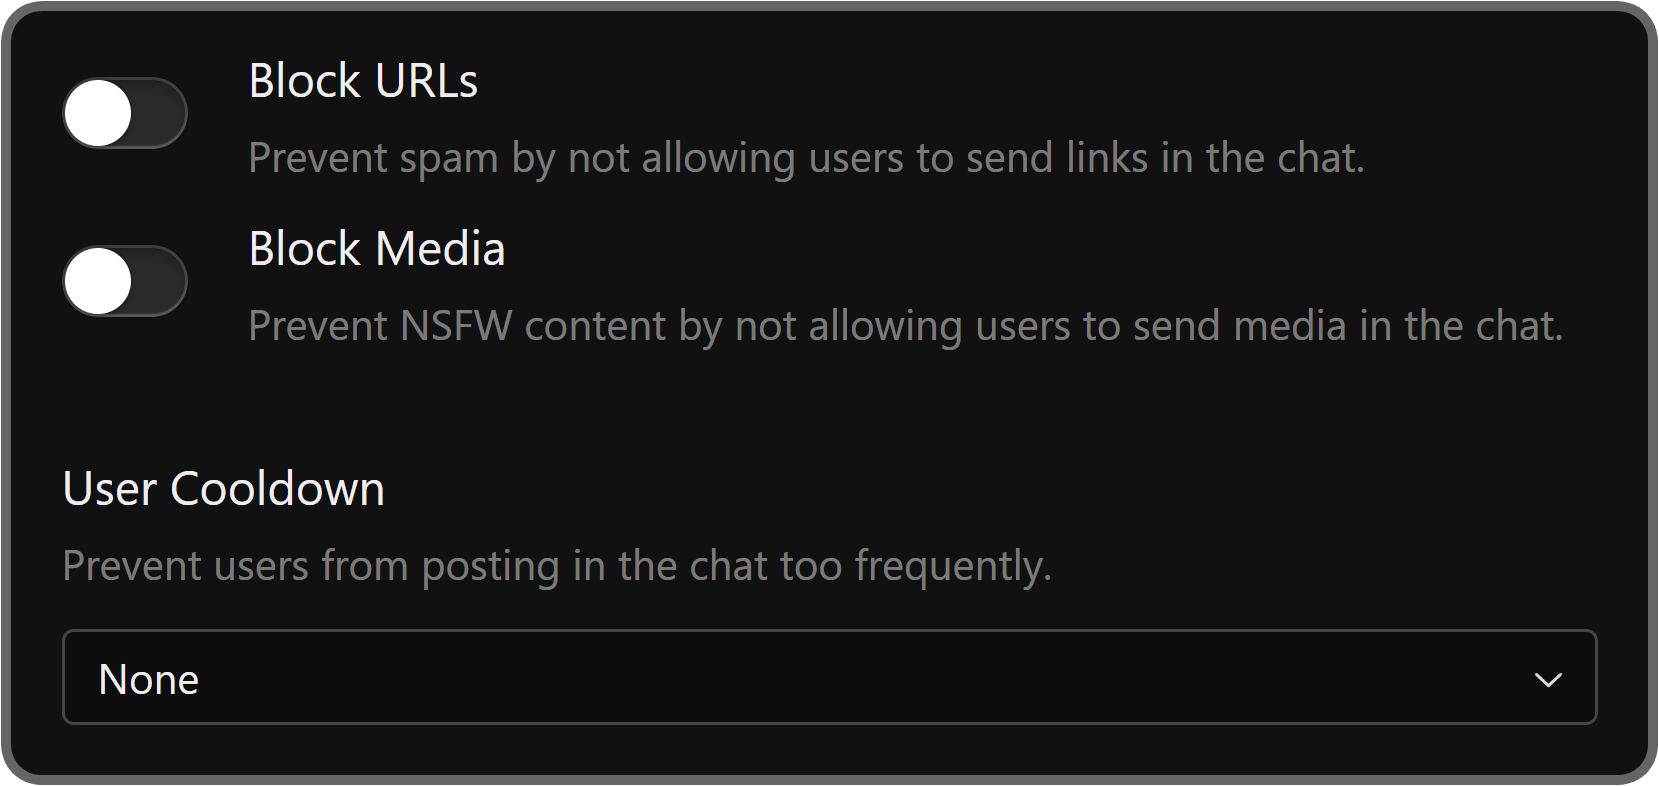
The next three settings are Block URLs, Block Media, and User Cooldown. The Block URLs toggle setting allows you to determine if members can send links to the chat or not.
Updating the 'block' and 'cooldown' settings of your whop chat
This is ideal if your Chat app has a lot of engagement and you want to keep it as secure as possible. Similar to the Block URLs setting, Block Media toggle will prevent users from sending media in the chat when enabled.
The User Cooldown setting is set to None by default - you can click on the dropdown menu to select from a range of timeframes that will act as cooldowns between messages for members.
This is great if your chat is super active and it's hard to keep up.
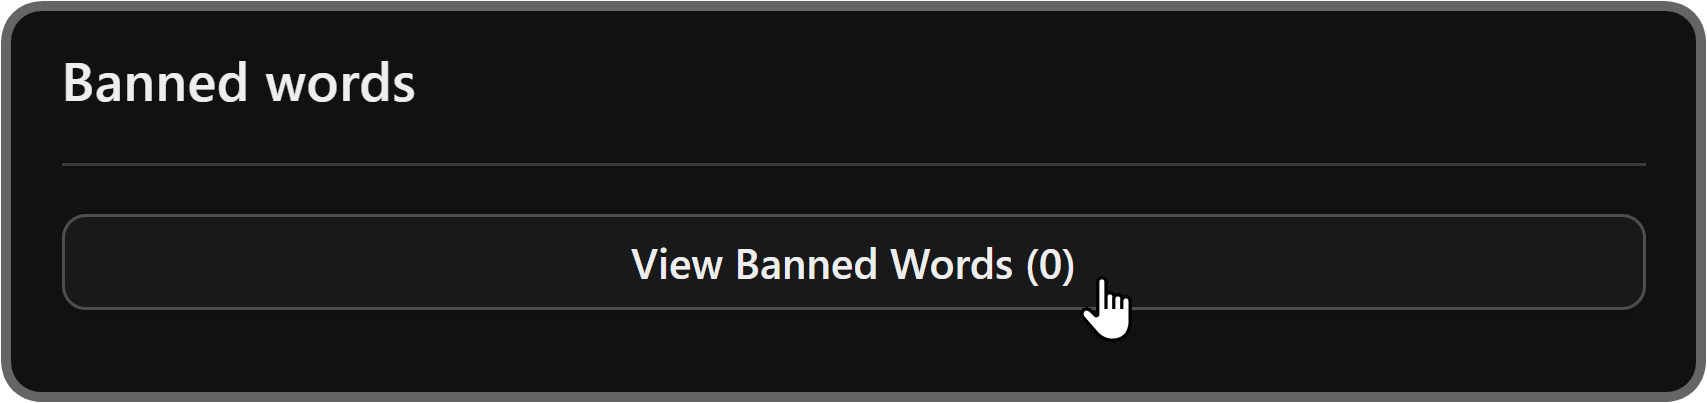
Banning words from your whop chat
One of the most powerful settings you're going to see in the admin view is Banned words. To be able to see the contents of the banned words setting, click the View Banned Words button first.
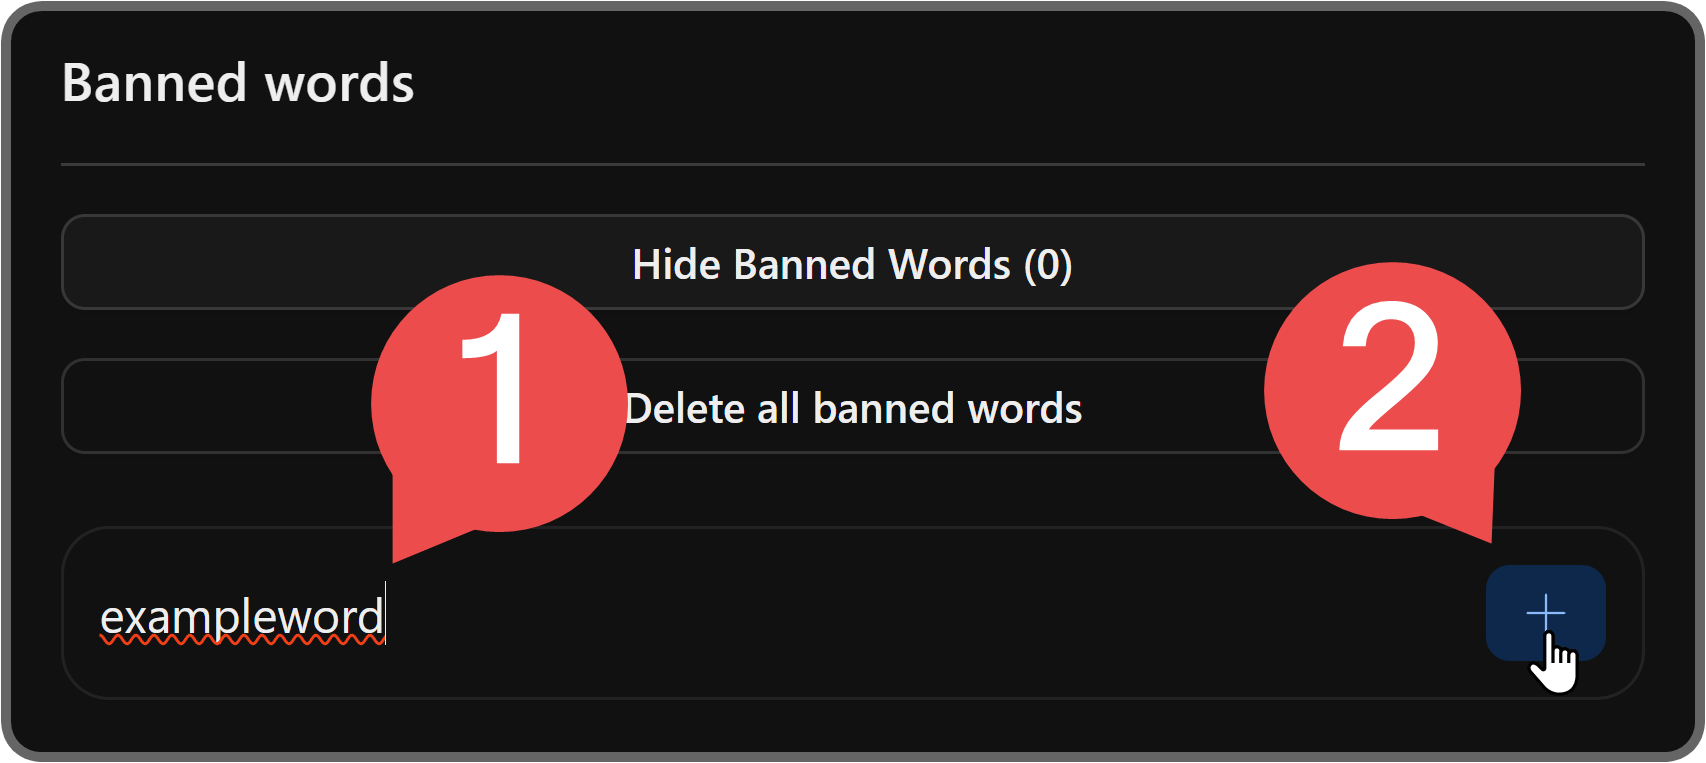
Once you click the View Banned Words button, you'll see the Delete all banned words button and an input field below it.
There, you can enter which words you want to ban and click the add button (plus icon) to save them.
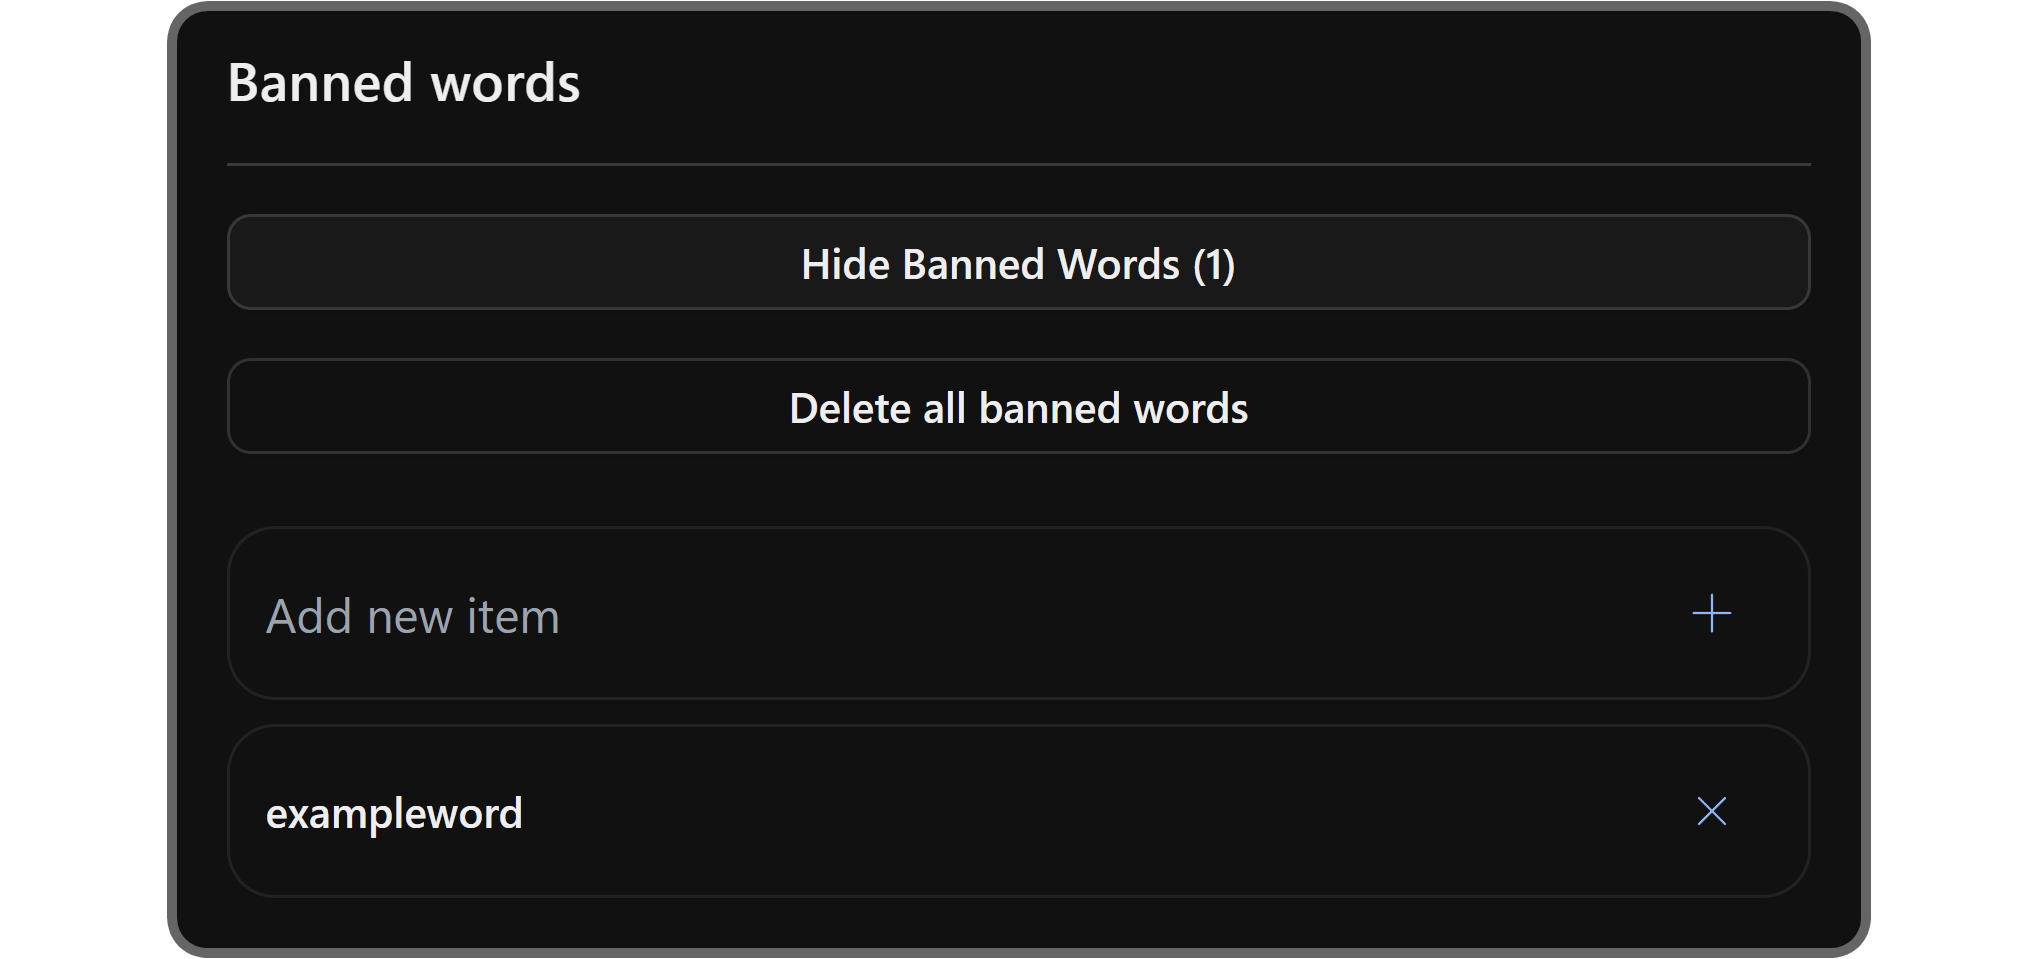
After you add a banned word, you can click the remove button (X icon) to remove it or use the Add new item input field to add more.
Webhooks and whop chat
The last section you're going to see is Webhooks. You can think of webhooks as bridges between a service that sends messages and the place those messages are displayed on, which in this case, is your chat app.
For example, if you want daily weather updates, you can use a service that creates daily POST requests to webhook URLs with weather details.
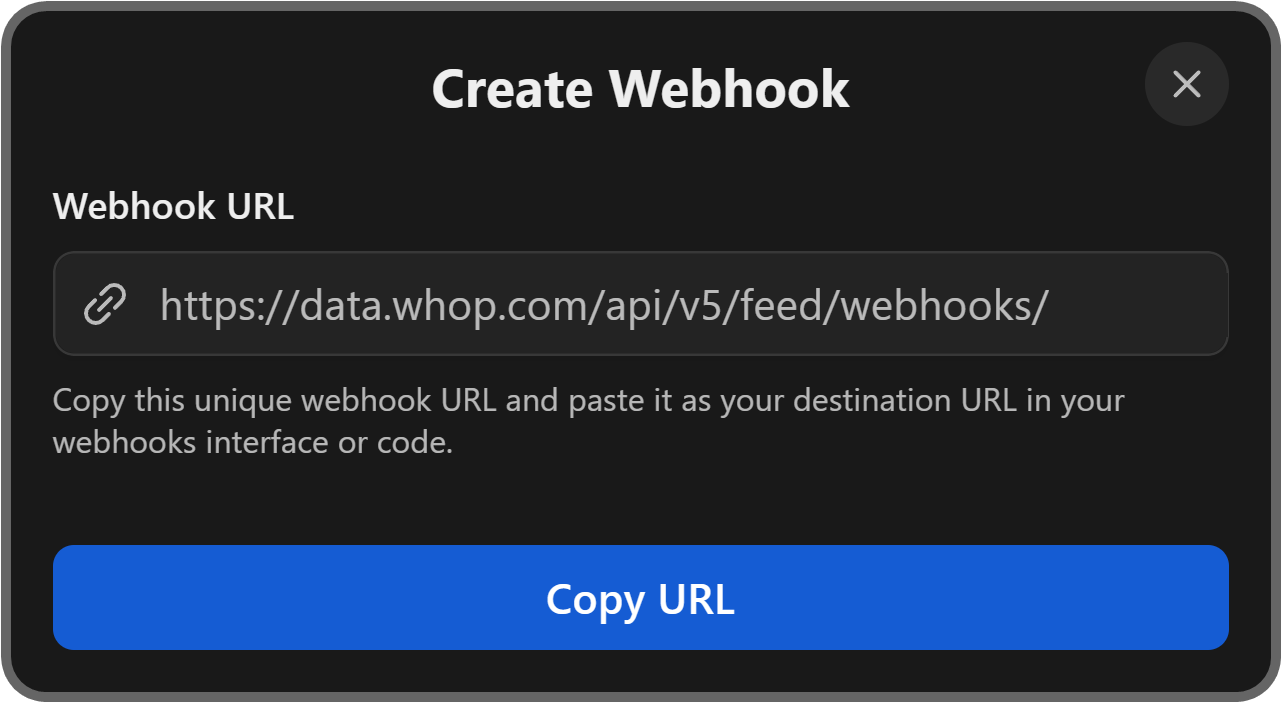
Let's click the Create Webhook button to see the webhook creation popup.

In the popup, you'll be prompted to give your webhook a name for internal usage only. Naming it after the service that will send messages to your webhook is a good idea.
Once you've entered a name for the webhook, click the Create button at the bottom of the popup.

Once you click Create, you'll see the URL of your webhook, which you can provide to the service you want to use as a source for your messages.
Remember, you should never share your webhook URL with people or services you don't trust.
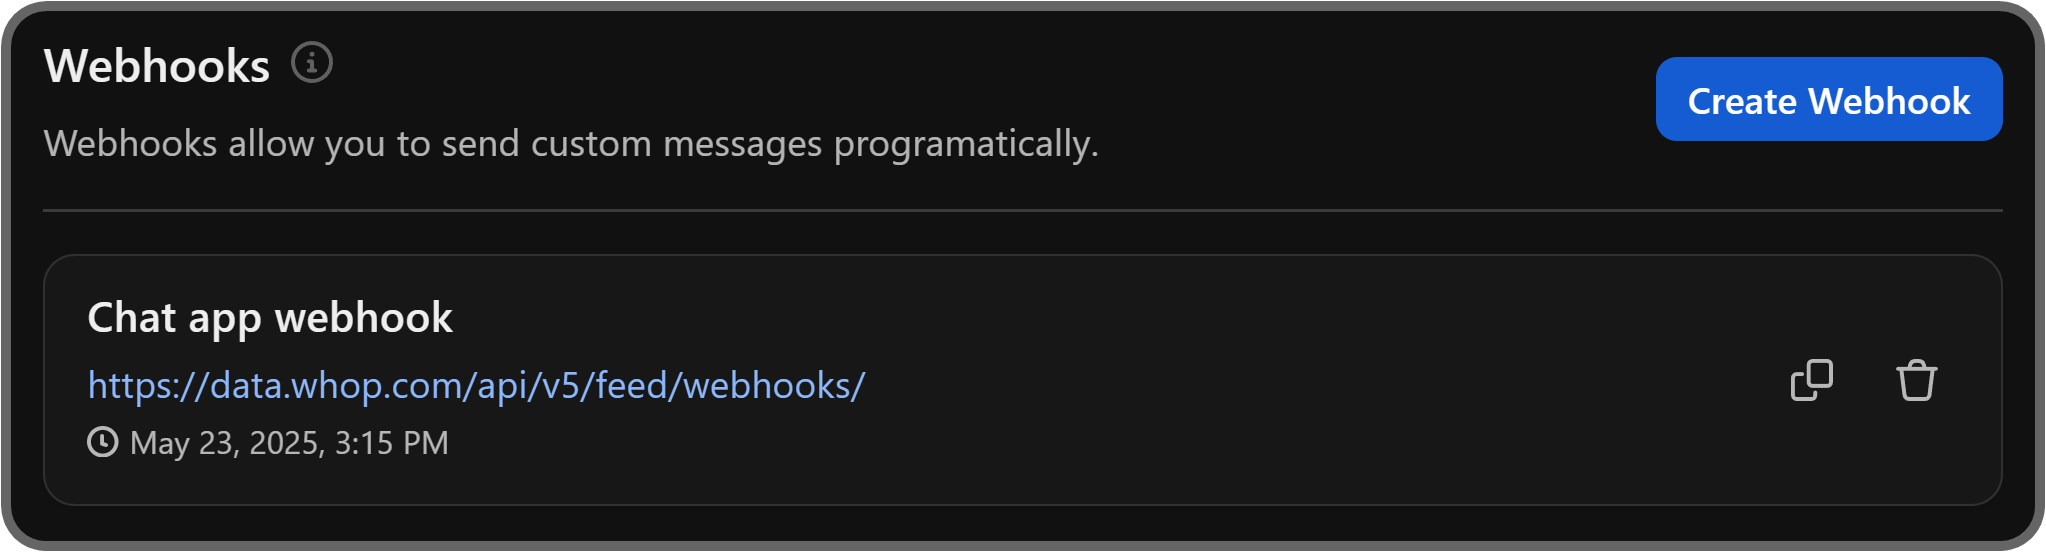
After the webhook is created, you can see it listed under the Webhooks section of your app settings. If you ever want to remove a webhook, you can simply use the trash button to its right.
Adjusting the settings of the Chat app
When you hover over an app on Whop, you're going to see its context menu button appearing. If you click on it, you're going to see a bunch of options and one of them is App settings.
If you click the App settings button, you're going to see the App settings popup appearing on your screen, which includes settings like the app icon, name, description, and which products can access it.
Create a whop and sell access to your online community
Now you know how to use the Chat app. The next step is to start making money online with your whop.
Create your whop and add the apps you need for your online business. Whether you're creating a learning hub, a sports picks community, an artistic group or simply a place to play games, you can do it all with a whop.


