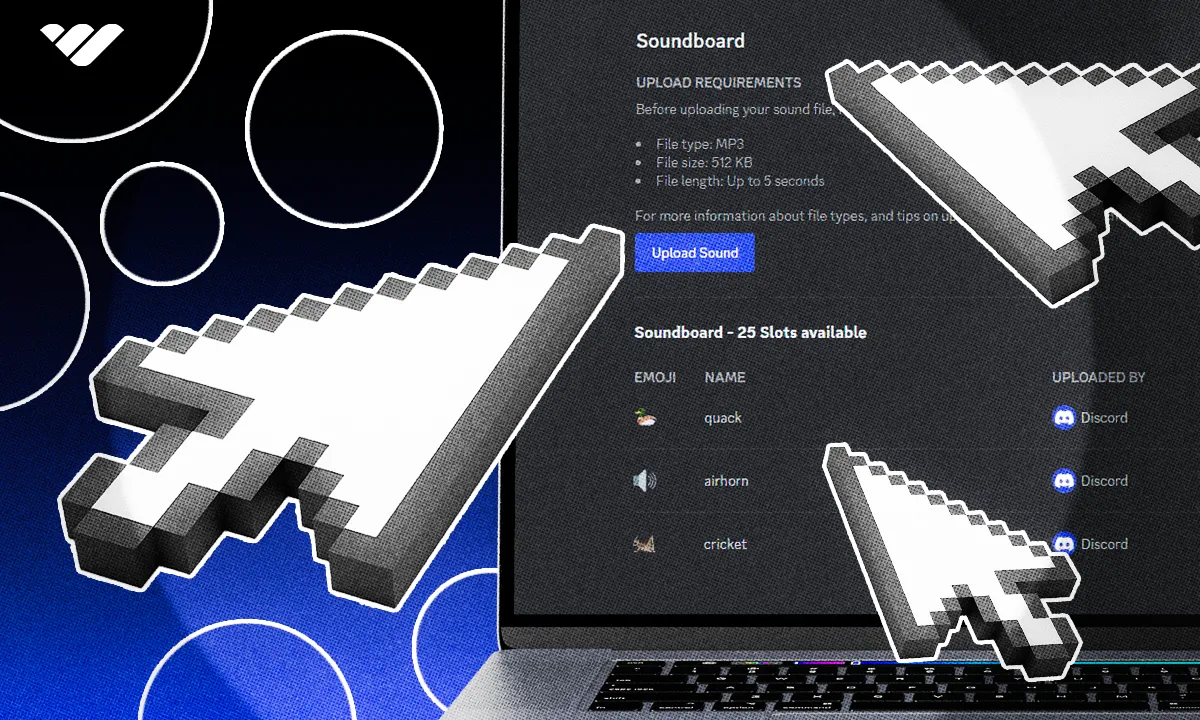
Discord Soundboard lets you play short sounds in your server - but how do you set it up? Read this article to find out.
Key takeaways
- Discord soundboard lets you upload custom sounds under 5 seconds to play in voice channels without external software.
- You need the Create Expressions permission and must use desktop Discord to upload sounds to your server.
- Server boost levels unlock more sound slots, ranging from 8 default slots up to 48 at Level 3.
Soundboard is an amazing Discord feature that was introduced more than a year ago. As its name suggests, Discord soundboard allows users to utilize a built-in soundboard on Discord. We have covered how you can use the Discord soundboard on desktop and on mobile before. In this guide, we’re going to take a look at how you can actually add sounds to your server so that you can use them.
What is Discord Soundboard?
Introduced in April 2023, Discord soundboard is a way to play custom (or built-in) sounds in voice channels. You might be familiar with the concept of soundboards from radio or sitcom shows - they utilize soundboards a lot. In fact, most radio shows actually have physical soundboards that have sound effects like laughing, clapping, etc., bound to their keys.
Using soundboards in digital communication has been a thing for a very long time - hence, you can find soundboard software online, although they’re not the best practice. Whether you want to troll your friends with Call of Duty announcer clips or be the person who plays ba dum tss after every joke, you can do it using a soundboard.
This is why Discord came up with the soundboard idea - to let people use soundboards without having to download external software. The best part about the Discord soundboard is that you can upload custom sounds to a server and use them. So, let’s see how you can do it.
How to Add Sounds to Discord Soundboard
Adding sounds to your server’s soundboard is really easy. But first, you need a server to begin with. If you don’t already have a Discord server of your own, you can check out our step-by-step guide on making a Discord server.
If you have your server ready to go, let’s take a look at the prerequisites for uploading sounds to your server. Other than your server, there are two things you should prepare before starting to upload sounds to your server:
- A sound: To upload a sound to your Discord server, you have to have a sound ready. Discord only supports sounds up to 5 seconds so you have to make sure your sound fits this limit. You can upload the following file types as sounds to your Discord soundboard: .MP3, .WAV, .OGG, .X-WAV, and .MP4.
- Enough sound slots: Just like other expressions on Discord such as emojis and stickers, sounds also have a slot limit. This limit can be upgraded by boosting the server and making it reach new levels. Servers with no boost have 8 sound slots, while Level 1 has 24, Level 2 has 36, and Level 3 with a whopping 48.
- Create Expressions permission: There are two permissions on Discord that directly control how users can add or modify expressions (emojis, stickers, and sounds.) To be able to add sounds to a server, you need to have the Create Expressions permission. If you want to go back and modify sounds (like changing their name or emoji), you’d need the Manage Expressions permission. If you’re the server owner, though, you don’t have to worry about these permissions since you automatically have all permissions by default.
Adding Sounds
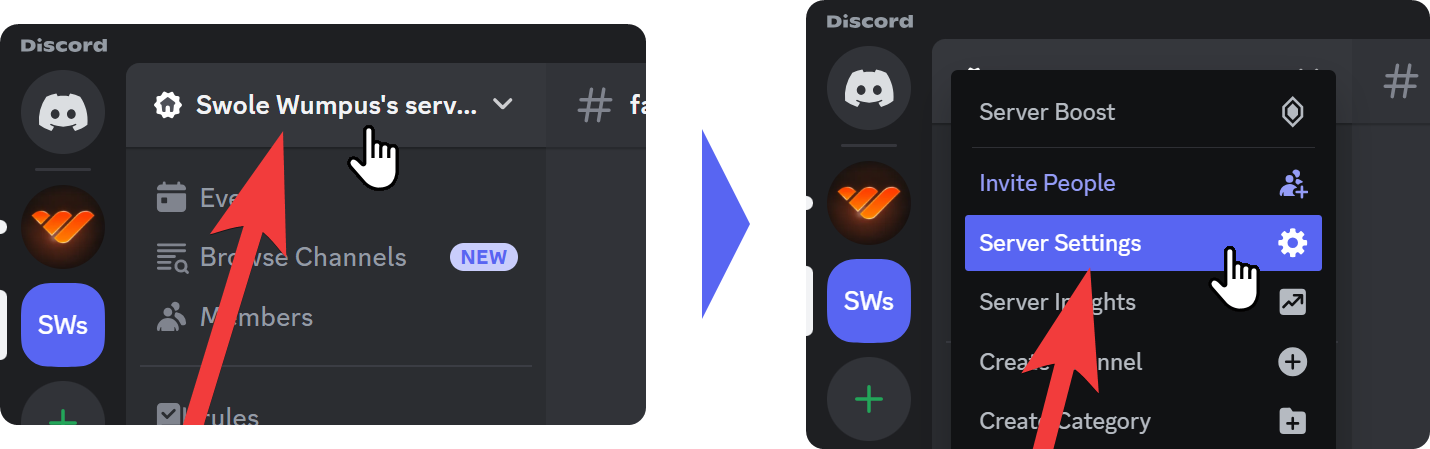
Adding sounds to a server is super easy. As of August 2024, uploading sounds to a server’s soundboard isn’t possible on mobile versions of Discord, so you need to use a computer. Let’s start with the first step by clicking on the server name at the top of your channel list to open the server context menu. Then, select the Server Settings option.
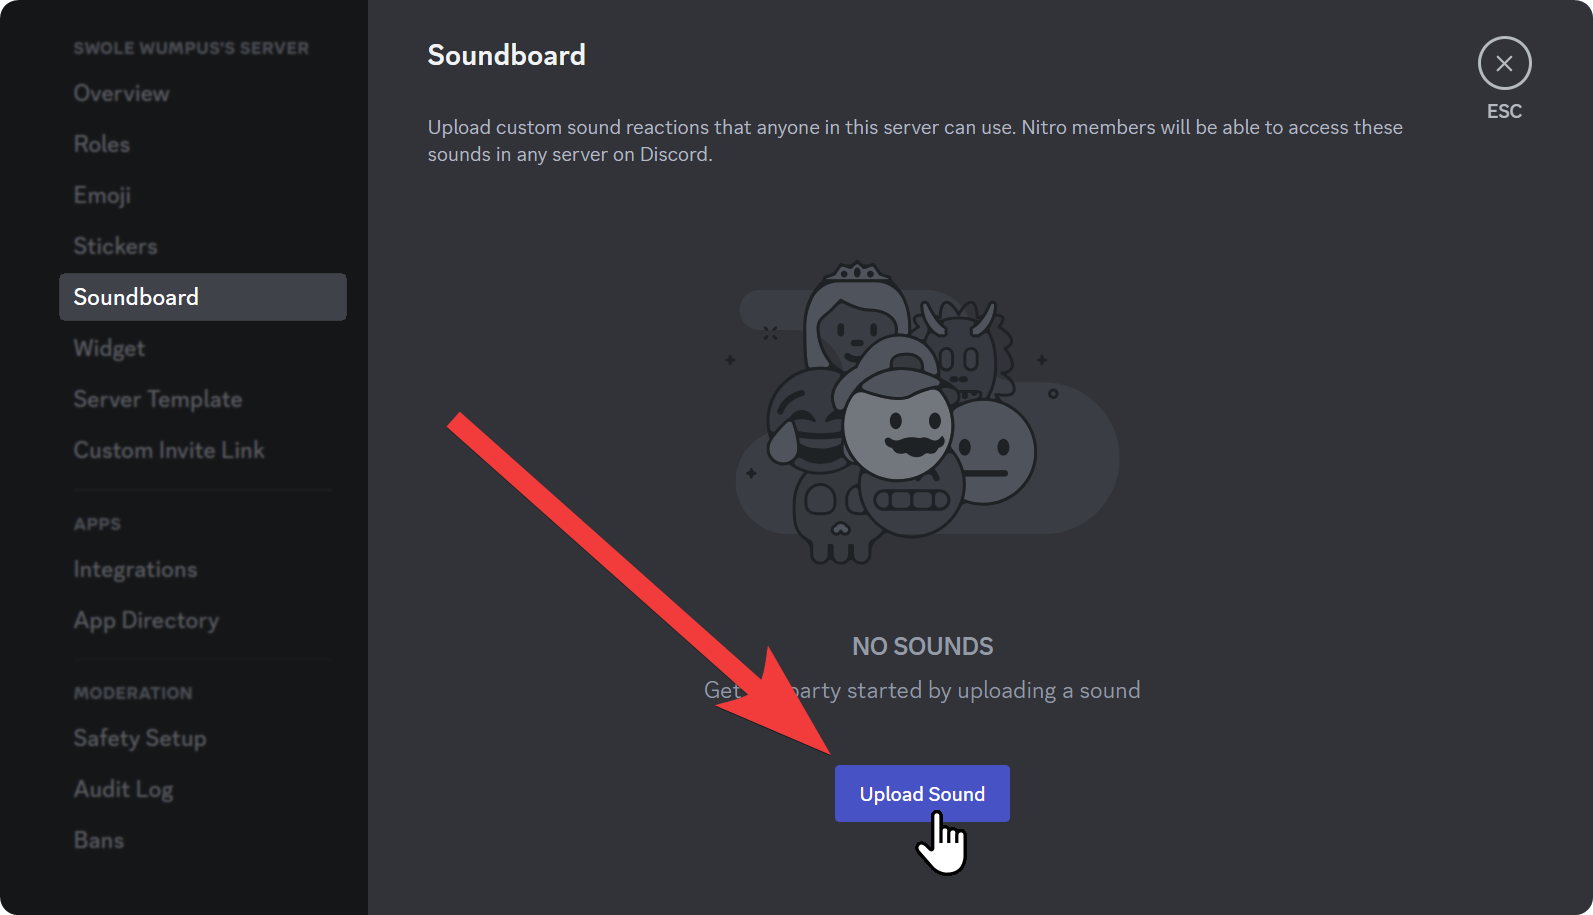
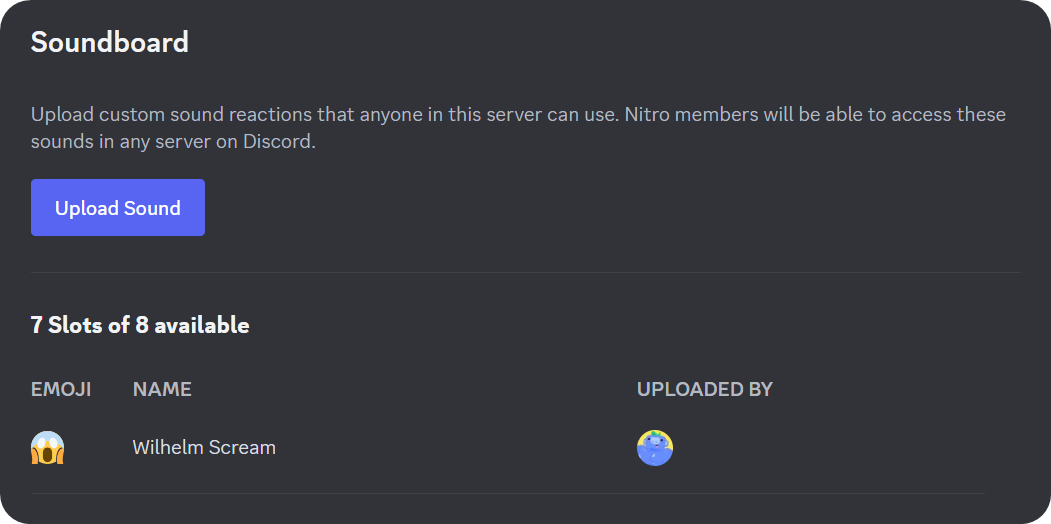
Once you click the Server Settings button, you’ll be directed to your server’s settings page. If you take a look at the left side, you’ll be able to see a bunch of setting categories, but our concern is with the Soundboard section for now. Let’s click on it to open the server soundboard. If you or anybody else who has the correct permissions has uploaded sounds to the server before, you’ll see them listed there. If not, you’ll see a “No sounds” message. Let’s click on the Upload Sound button to start the process.
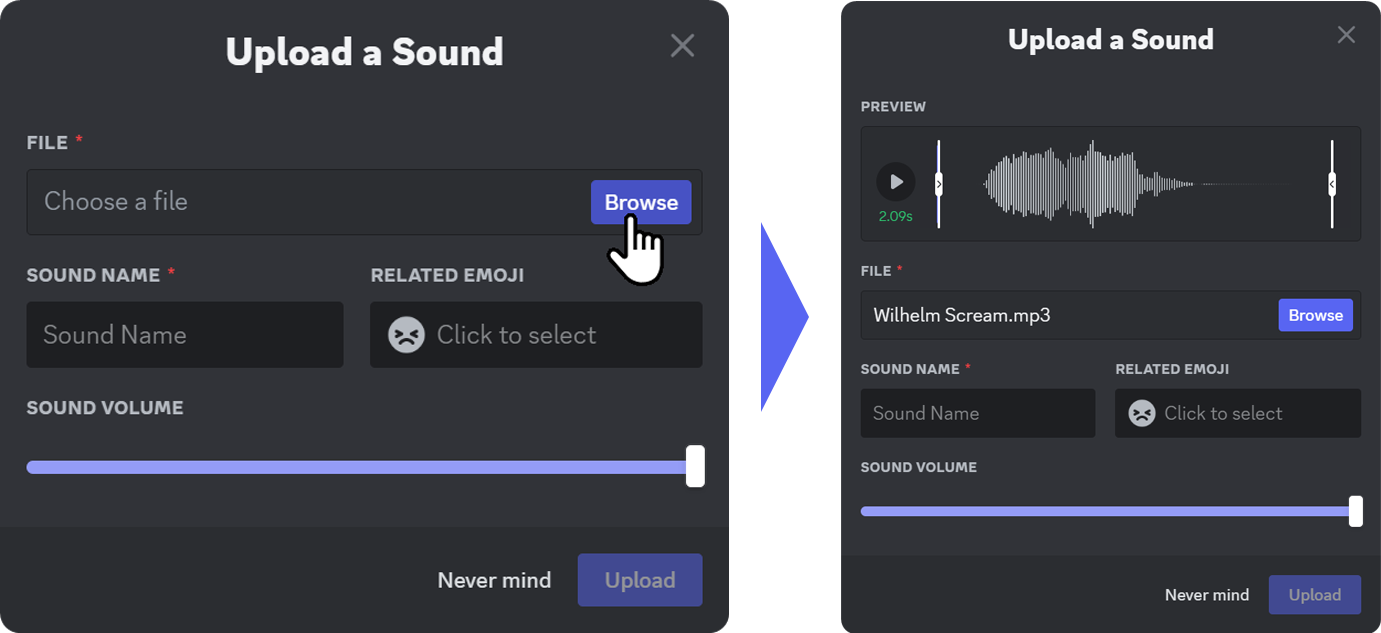
Once you click on the Upload Sound button in the Soundboard section of your server settings, you’ll see a popup window titled “Upload a Sound.” There, you have four sections to set up:
- File: In this section, you should click on the Browse button to open a file selection modal and select which file you want to upload as a sound. As we mentioned, Discord soundboard only supports file types .MP3, .WAV, .OGG, .X-WAV, and .MP4.
- Preview: Once you select a file, you’ll see that the File section will transform into the Preview section. Here, you can preview your sound and cut it if necessary. Since sounds can be up to 5 seconds long, you might have to cut it. You can see the selected length of the sound under the play button. If the length is above 5 seconds, the indicator will turn orange - if it’s under or equal to 5, it will be green.
- Sound Name: In this section, you should input a name for the sound. The name of your sound should be short so that people can understand what it is quickly - there’s a 32-character cap on sound names.
- Related Emoji: If you take a look at your soundboard, you’ll see that all sounds have a related emoji. These emojis can be either default emojis or custom emojis of your server.
- Sound Volume: It’s possible that some sounds you want to upload might be too loud - since you wouldn’t want anybody to be disturbed by the sounds you play, you can adjust the volume of the sound here.
Once you’re done with all the settings, click on the Upload button at the bottom right of your screen to finalize the process.
After clicking the Upload button and finalizing the process, you’ll see that the sound will be listed in the Soundboard section of your server settings. Now, you can repeat this process until you hit the soundboard limit of your server.
Previewing, Modifying, and Removing Sounds
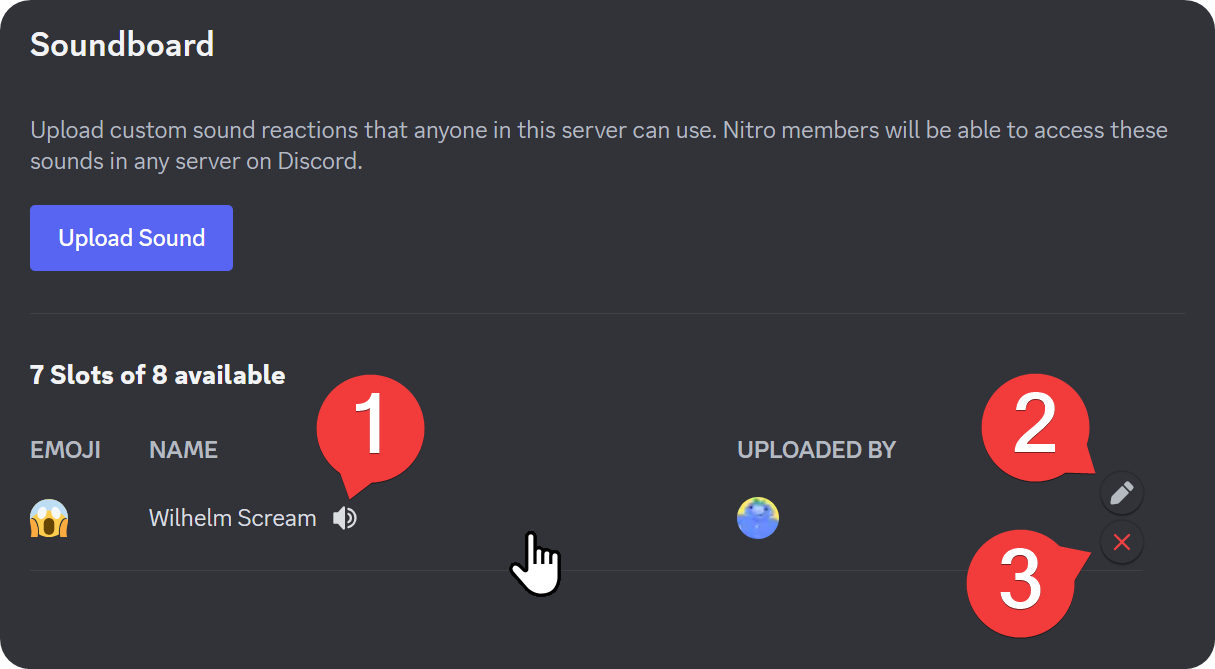
Now you know how you can add sounds to your Discord server, but what if you want to remove them? Doing that is as easy as adding sounds. All you have to do is to navigate into the Soundboard section of your server settings (just like you did when adding a sound) and hover over a sound.
When you hover over a sound, you’ll see three options appearing on the sound. By clicking on the:
- Preview button, you can listen to your sound and see if it’s cut correctly, whether its volume is fine or not, etc.
- Modify button, you can change the name, emoji, and volume of the sound.
- Remove button, you can remove the sound. When clicked, this button will display a confirmation message asking if you’re sure.
Monetize Your Community with Whop
Now you know you can make your Discord server a better and fun place for your members. It’s time to take the next step and transform your server into a premium one with the help of Whop.
Whop has been helping thousands of Discord server owners with monetizing their Discord servers - you can be one of those. Whop offers features like 7/24 support, advanced analytics, and an easy-to-use platform. Sign up today.
Alternatively, you should consider hosting your platform on Whop - unlike other platforms, you can create your dream internet hub with Whop. Platforms like Skool, Coursera, Discord, and Telegram might not have the features you want, or require that you use the features they do have. However, when you create your own whop, you’ll be able to select what features it has, thus realizing your dream platform. Check out Whop today and create your whop for free.


