The Help Desk app allows you to give great customer services to the members of your whop. Read this article to understand how to use it and how to set it up in your whop.
Key takeaways
- The Help Desk app enables private ticket-based communication between members and staff for customer support.
- Customize your help desk with automatic ticket creation for new users and custom form questions before submission.
- Control access by setting the app as free for public use or paid/private for monetized or restricted communities.
Every single platform you can think of offers customer service where people can open tickets or directly get in contact with representatives. If you're running your own business, you need a dedicated channel for customers to contact your team. This is why Whop has implemented the Help Desk app - an app that you can add to your whop that allows its users to create tickets to talk with your whop’s staff privately.
There are countless reasons why someone could want to get in contact with the staff of the platform they’re using. By adding the Help Desk app, you can make this possible for your platform as well.
In this guide, we’re going to recap what Whop apps are, how you can add the Help Desk app to your whop, and how you can use it.
What are Whop Apps?
To understand apps on Whop, let’s think of them as features of the platform. Let’s take Discord, for example. Discord has many features, but perhaps the primary feature is text channels. Similarly, Coursera focuses on online courses. So if you were to create a course where you educate people on how to maintain aquariums but also want to host conversations, you’d have to use those two platforms externally - creating a hassle of access. On Whop, however, you can include features that serve those purposes into a single platform.
Using the Chat app, you can create a place for your members to communicate with each other, and the Courses app to provide them with comprehensive online courses. This is the power of Whop apps - they allow you to equip your platform with the features that you need. By doing this, you’ll be able to create the perfect platform that’s made to measure.
One of the strengths of Whop apps is that you can add multiple instances of the same app to your whop. Let’s say you want to create forums for saltwater and freshwater fishkeeping since they’re completely different things - you don’t want the conversations to get mixed. So, you add two Forums apps. One for your members to create individual threads and communicate with each other about saltwater fishkeeping and one for freshwater.
What is the Help Desk App on Whop?
As its name suggests, the Help Desk app on Whop is a section where members can create tickets and chat with the admins.
For example, let’s say your whop has a couple of apps, but a member doesn’t understand how to use them - they could open up a ticket so that they could ask for a walkthrough of your platform. This is especially useful in cases where members don’t want to ask questions about your whop in public channels like the Chat or the Forums app.
How to Add the Help Desk App to Your whop
Adding the Help Desk app is pretty simple, but before walking you through the process, we need to make sure you actually have a whop to begin with. If you don’t already have a whop, you should check out our How to Create Your Own whop guide to learn everything about creating your whop. It’s a simple process, and it won’t take longer than 5 minutes.
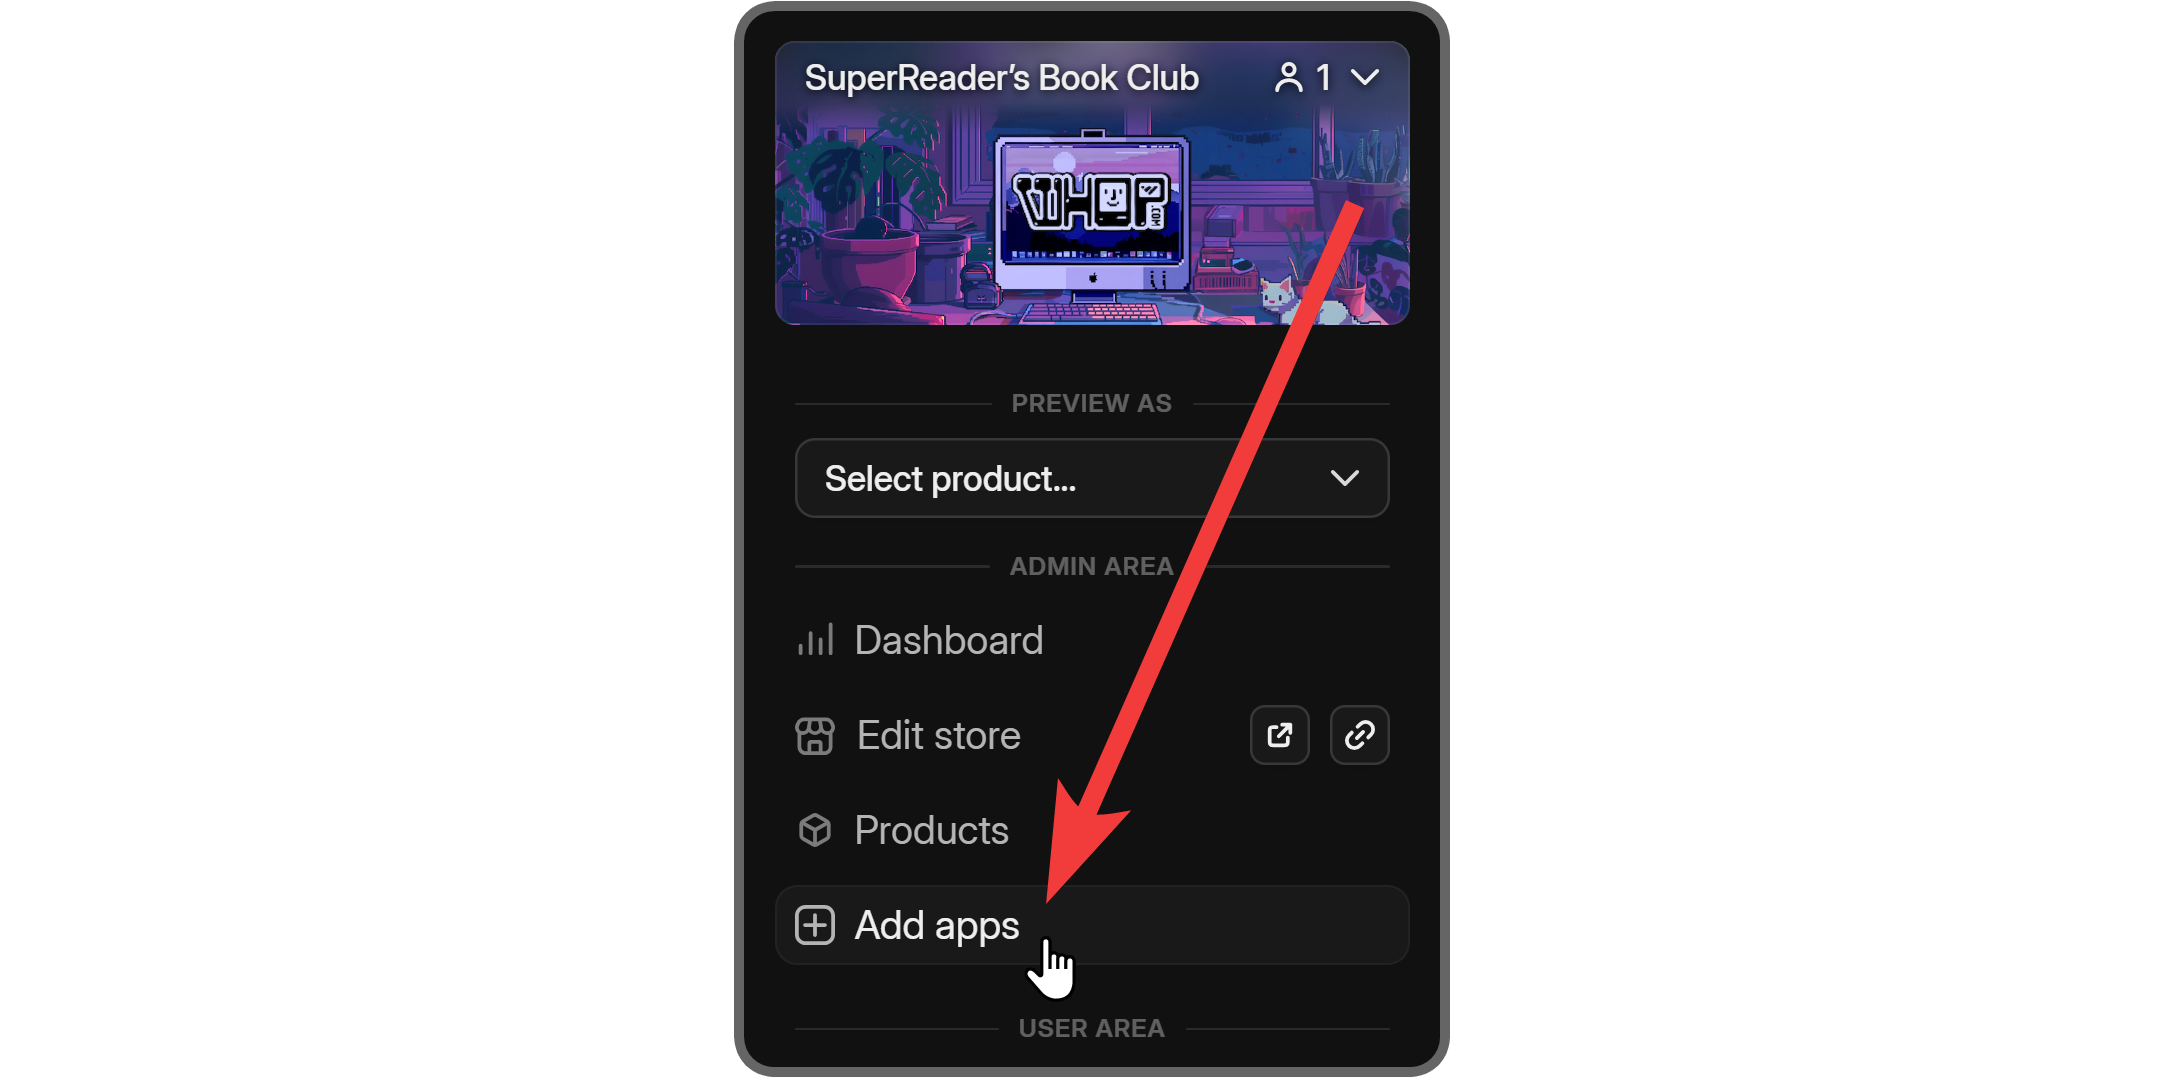
If you got your whop ready to go, let’s see how you can add the Help Desk app to it. First, let’s click on the Add apps button under the Admin Area to see the list of all available apps.
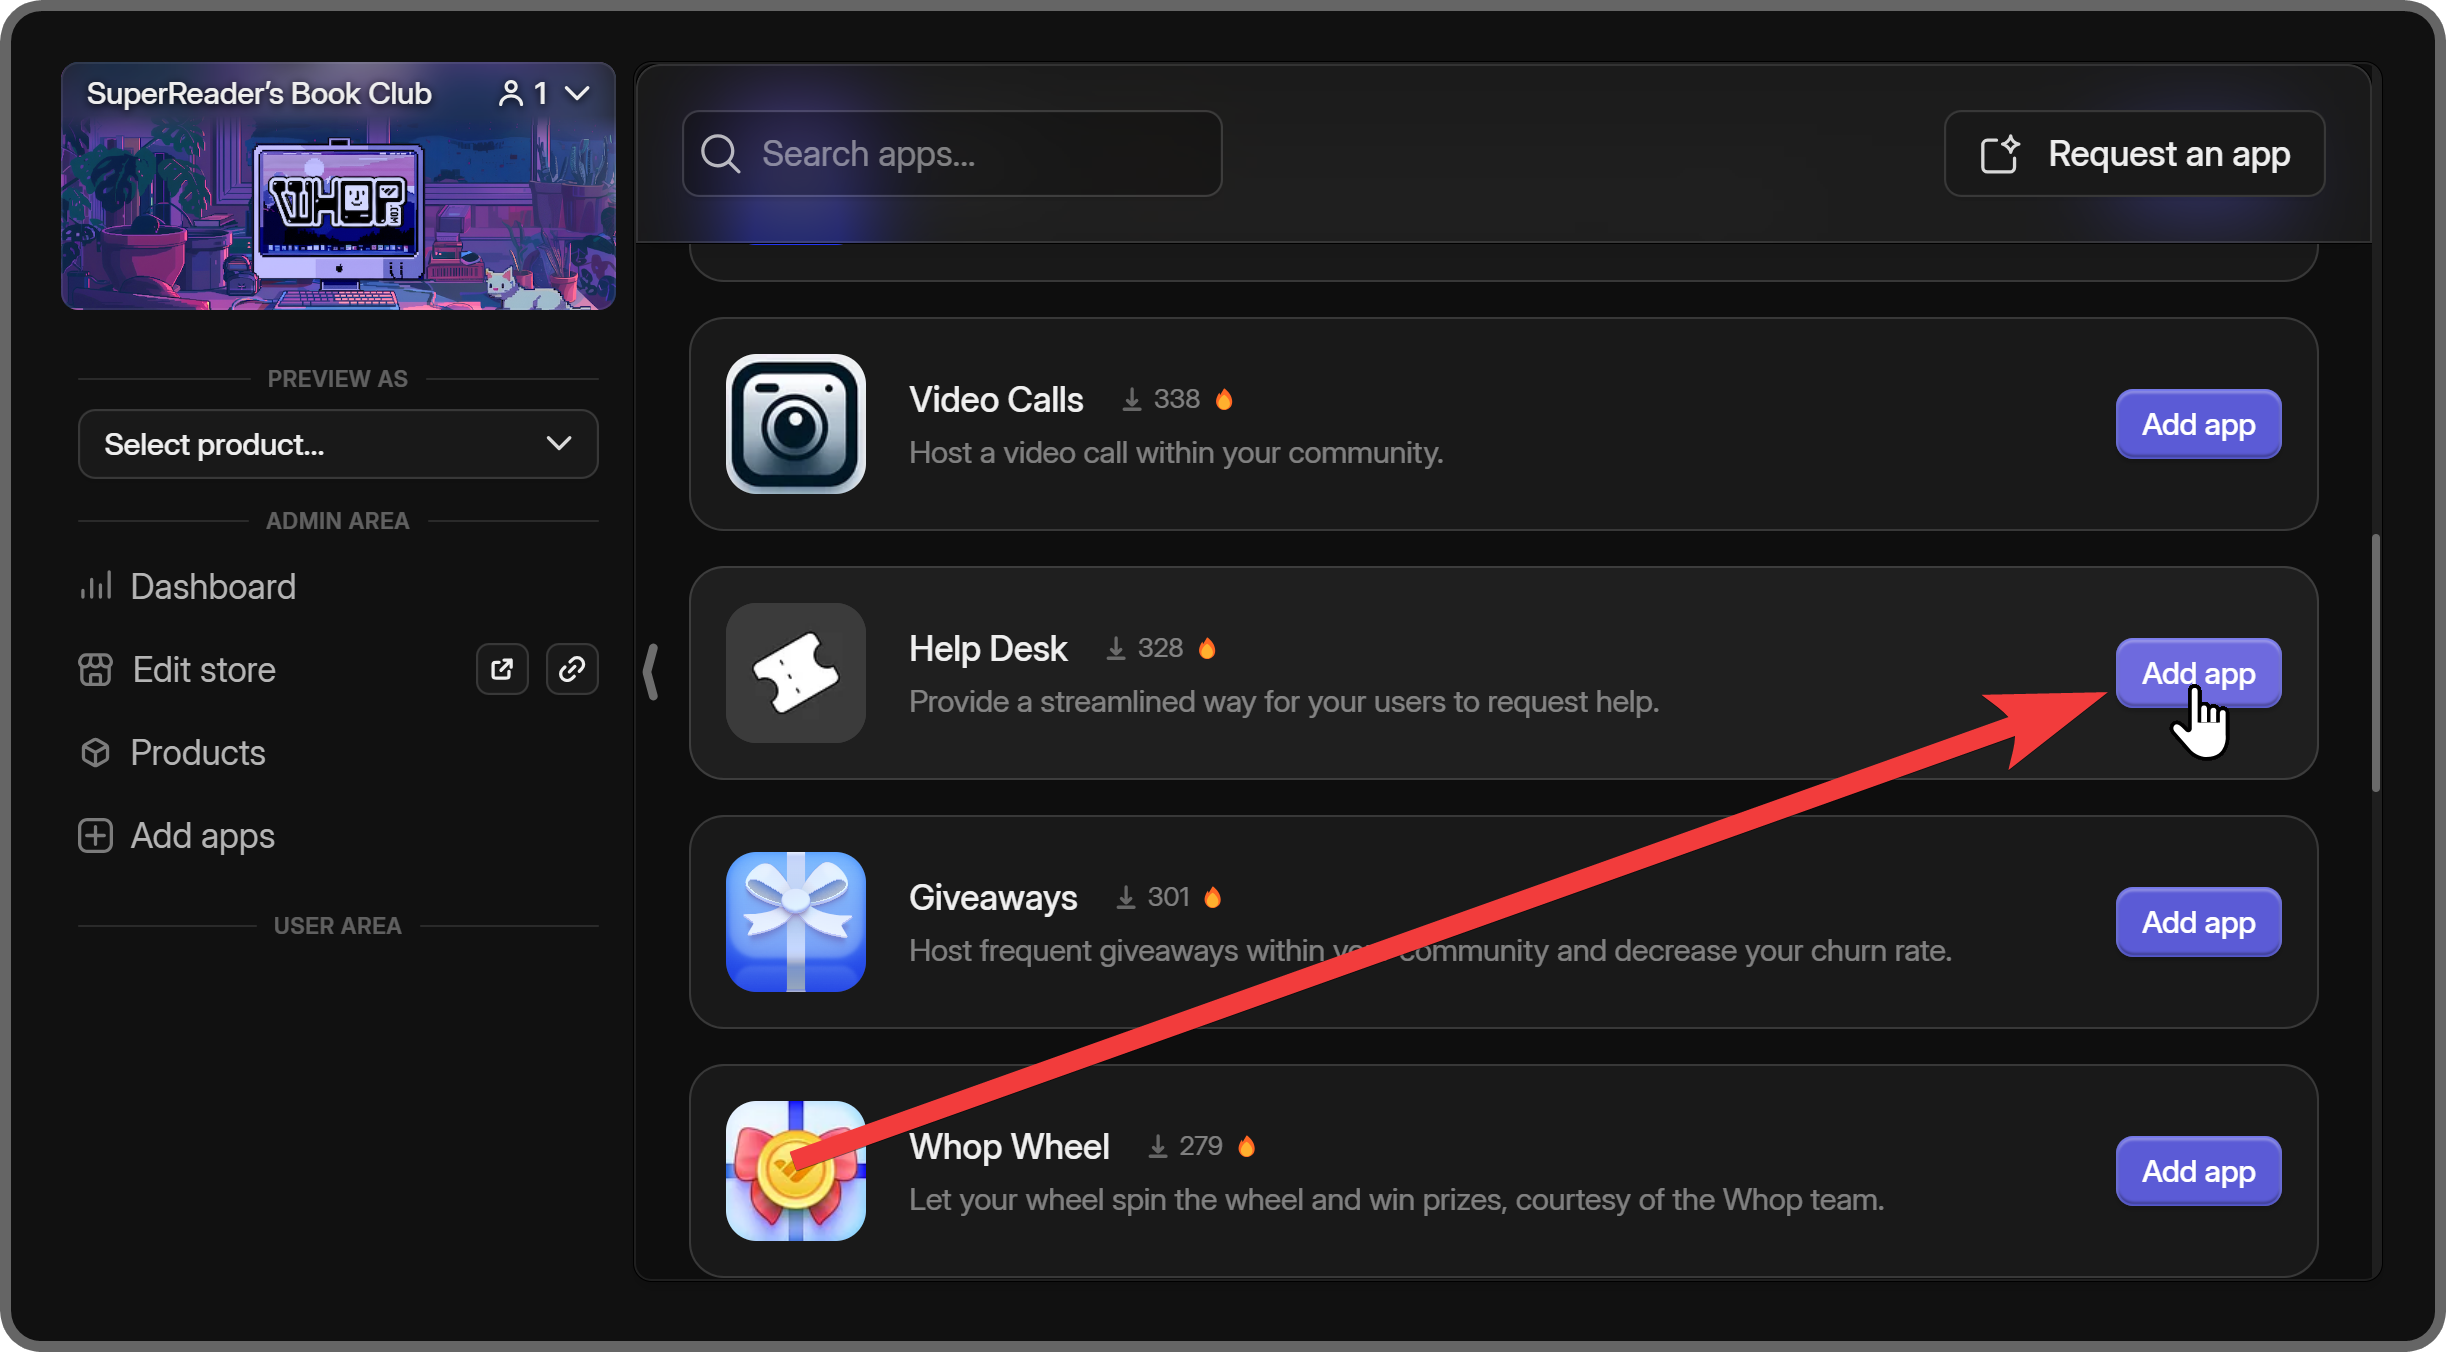
Once you’re viewing the app list, you can scroll down a bit until you find the Help Desk app. Then, click on its Add app button to add it to your whop. When you click on the Add app button, you’ll be directed to the app’s Set up section.
Using the Whop Help Desk App
Almost all apps on Whop have three sections. They allow you to adjust its settings, preview it as a regular user, and determine how people can access the app. You can navigate between these apps by using the navigation bar at the top of your screen.

1: Set up
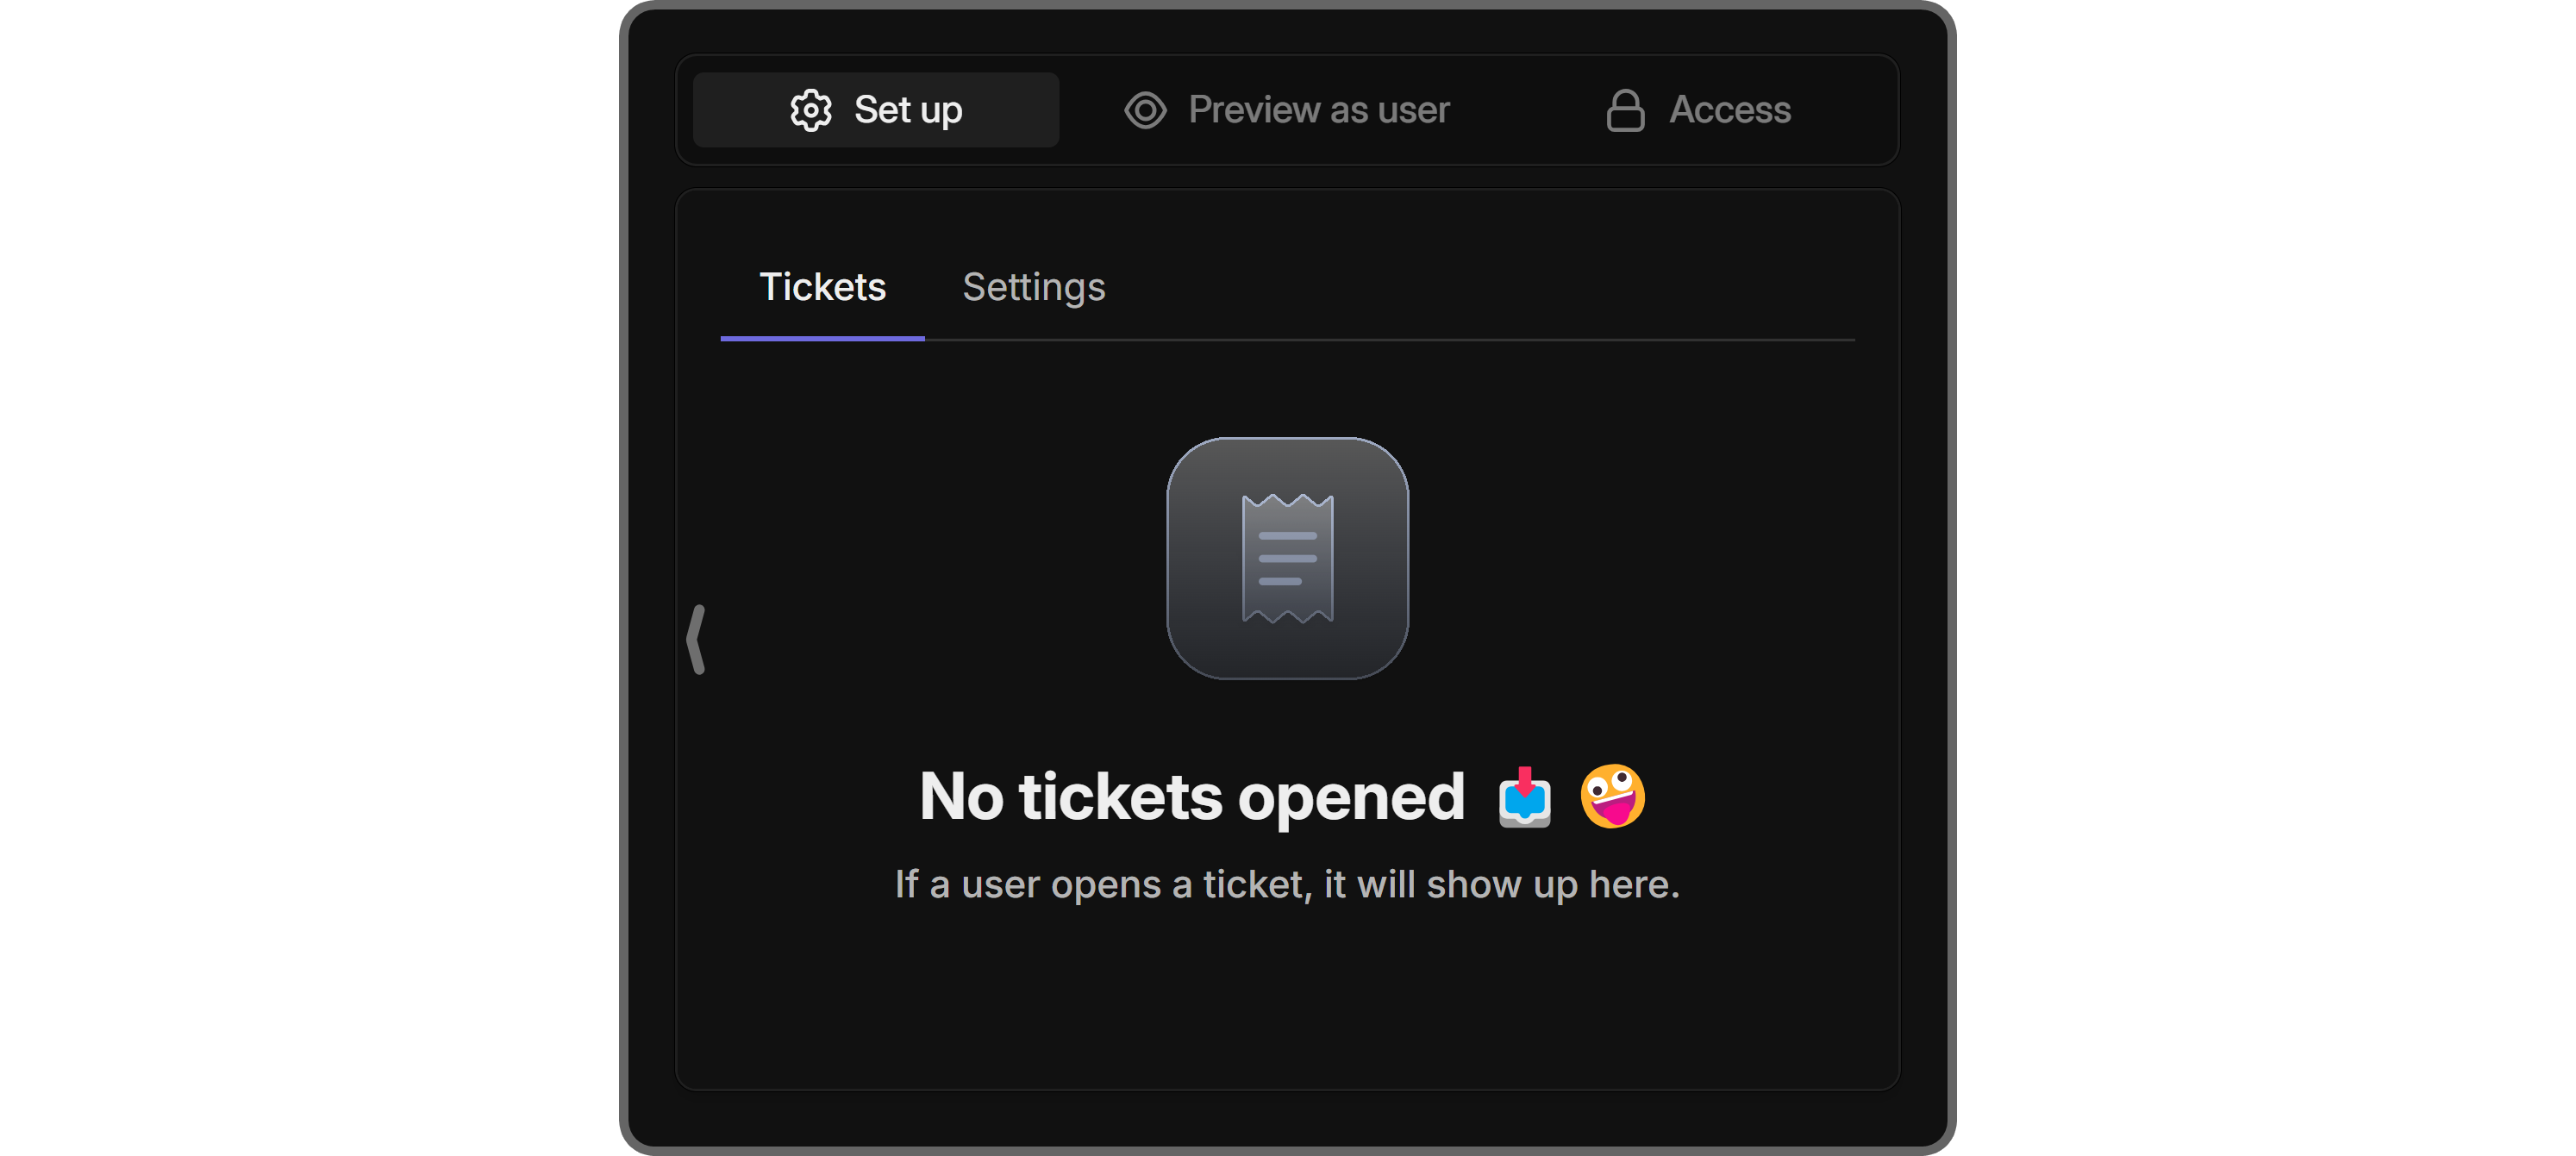
The Set up section of the Help Desk app is where you can see all of the tickets created by users and adjust the app’s settings. As you might’ve noticed, the Set up section has two tabs: Tickets and Settings. Let’s examine the Tickets tab first.
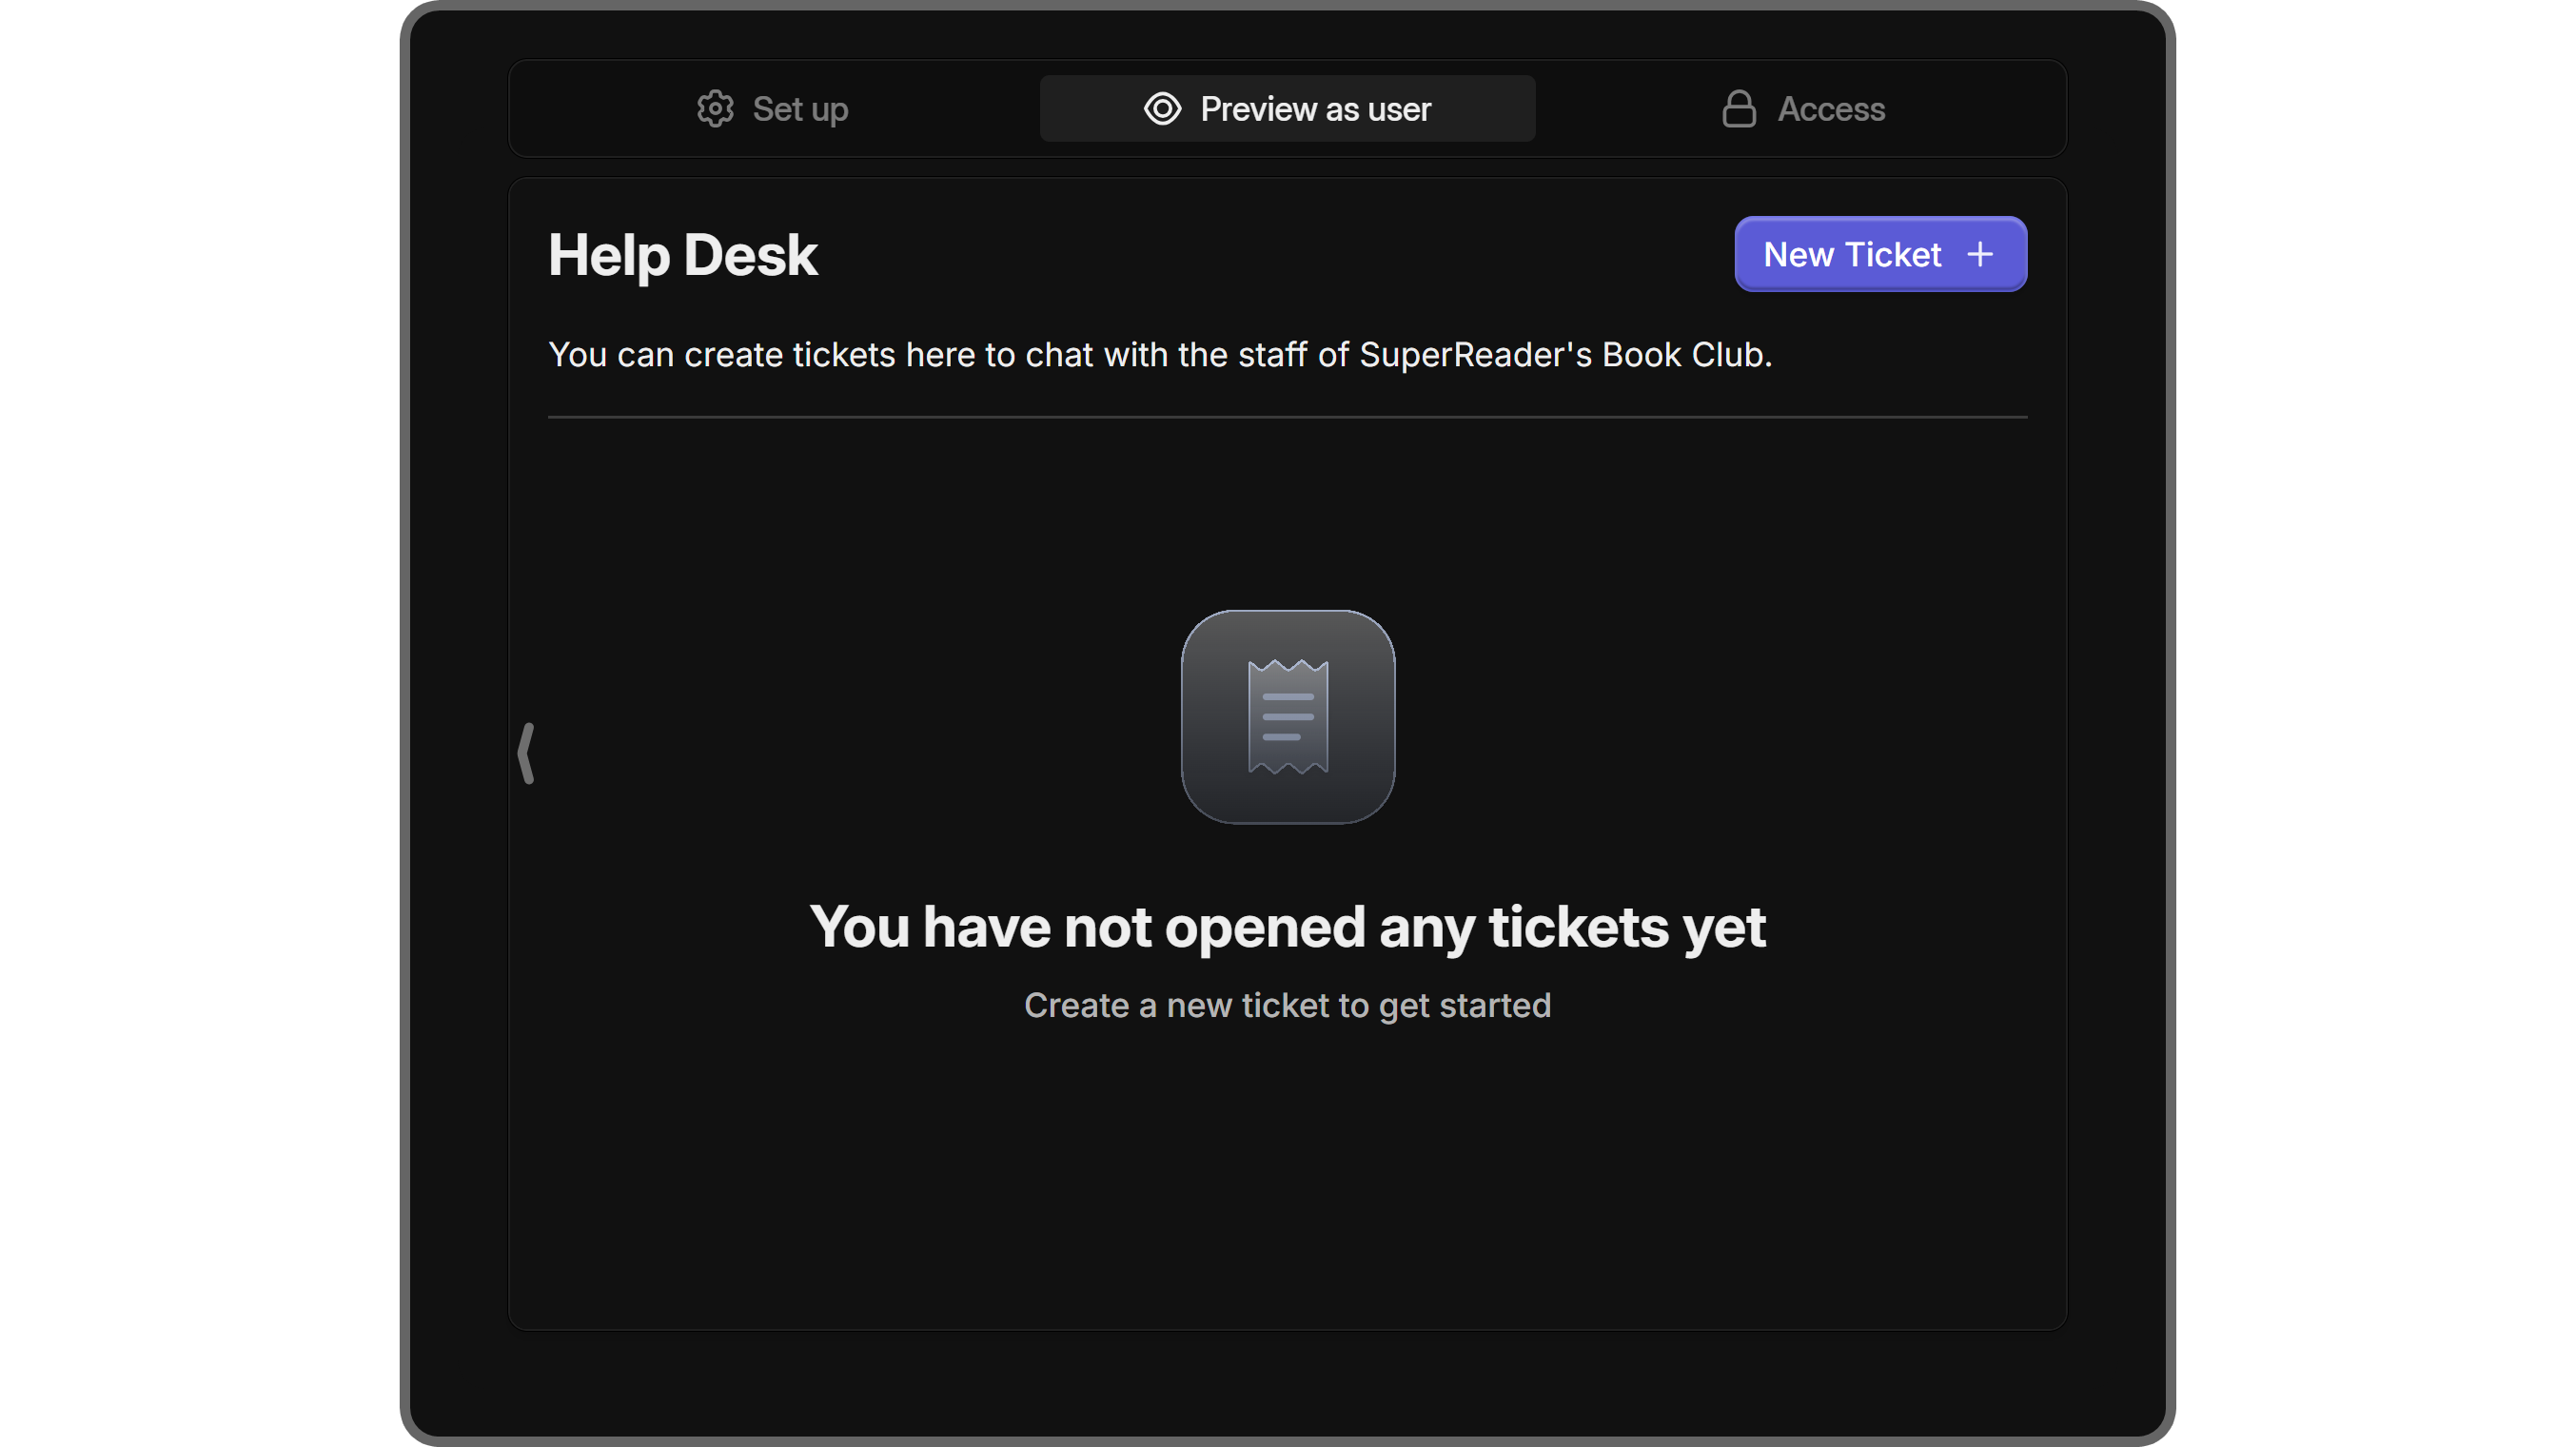
When you first add the app to your whop, there won’t be any tickets, and you’ll see the “No tickets opened” message.
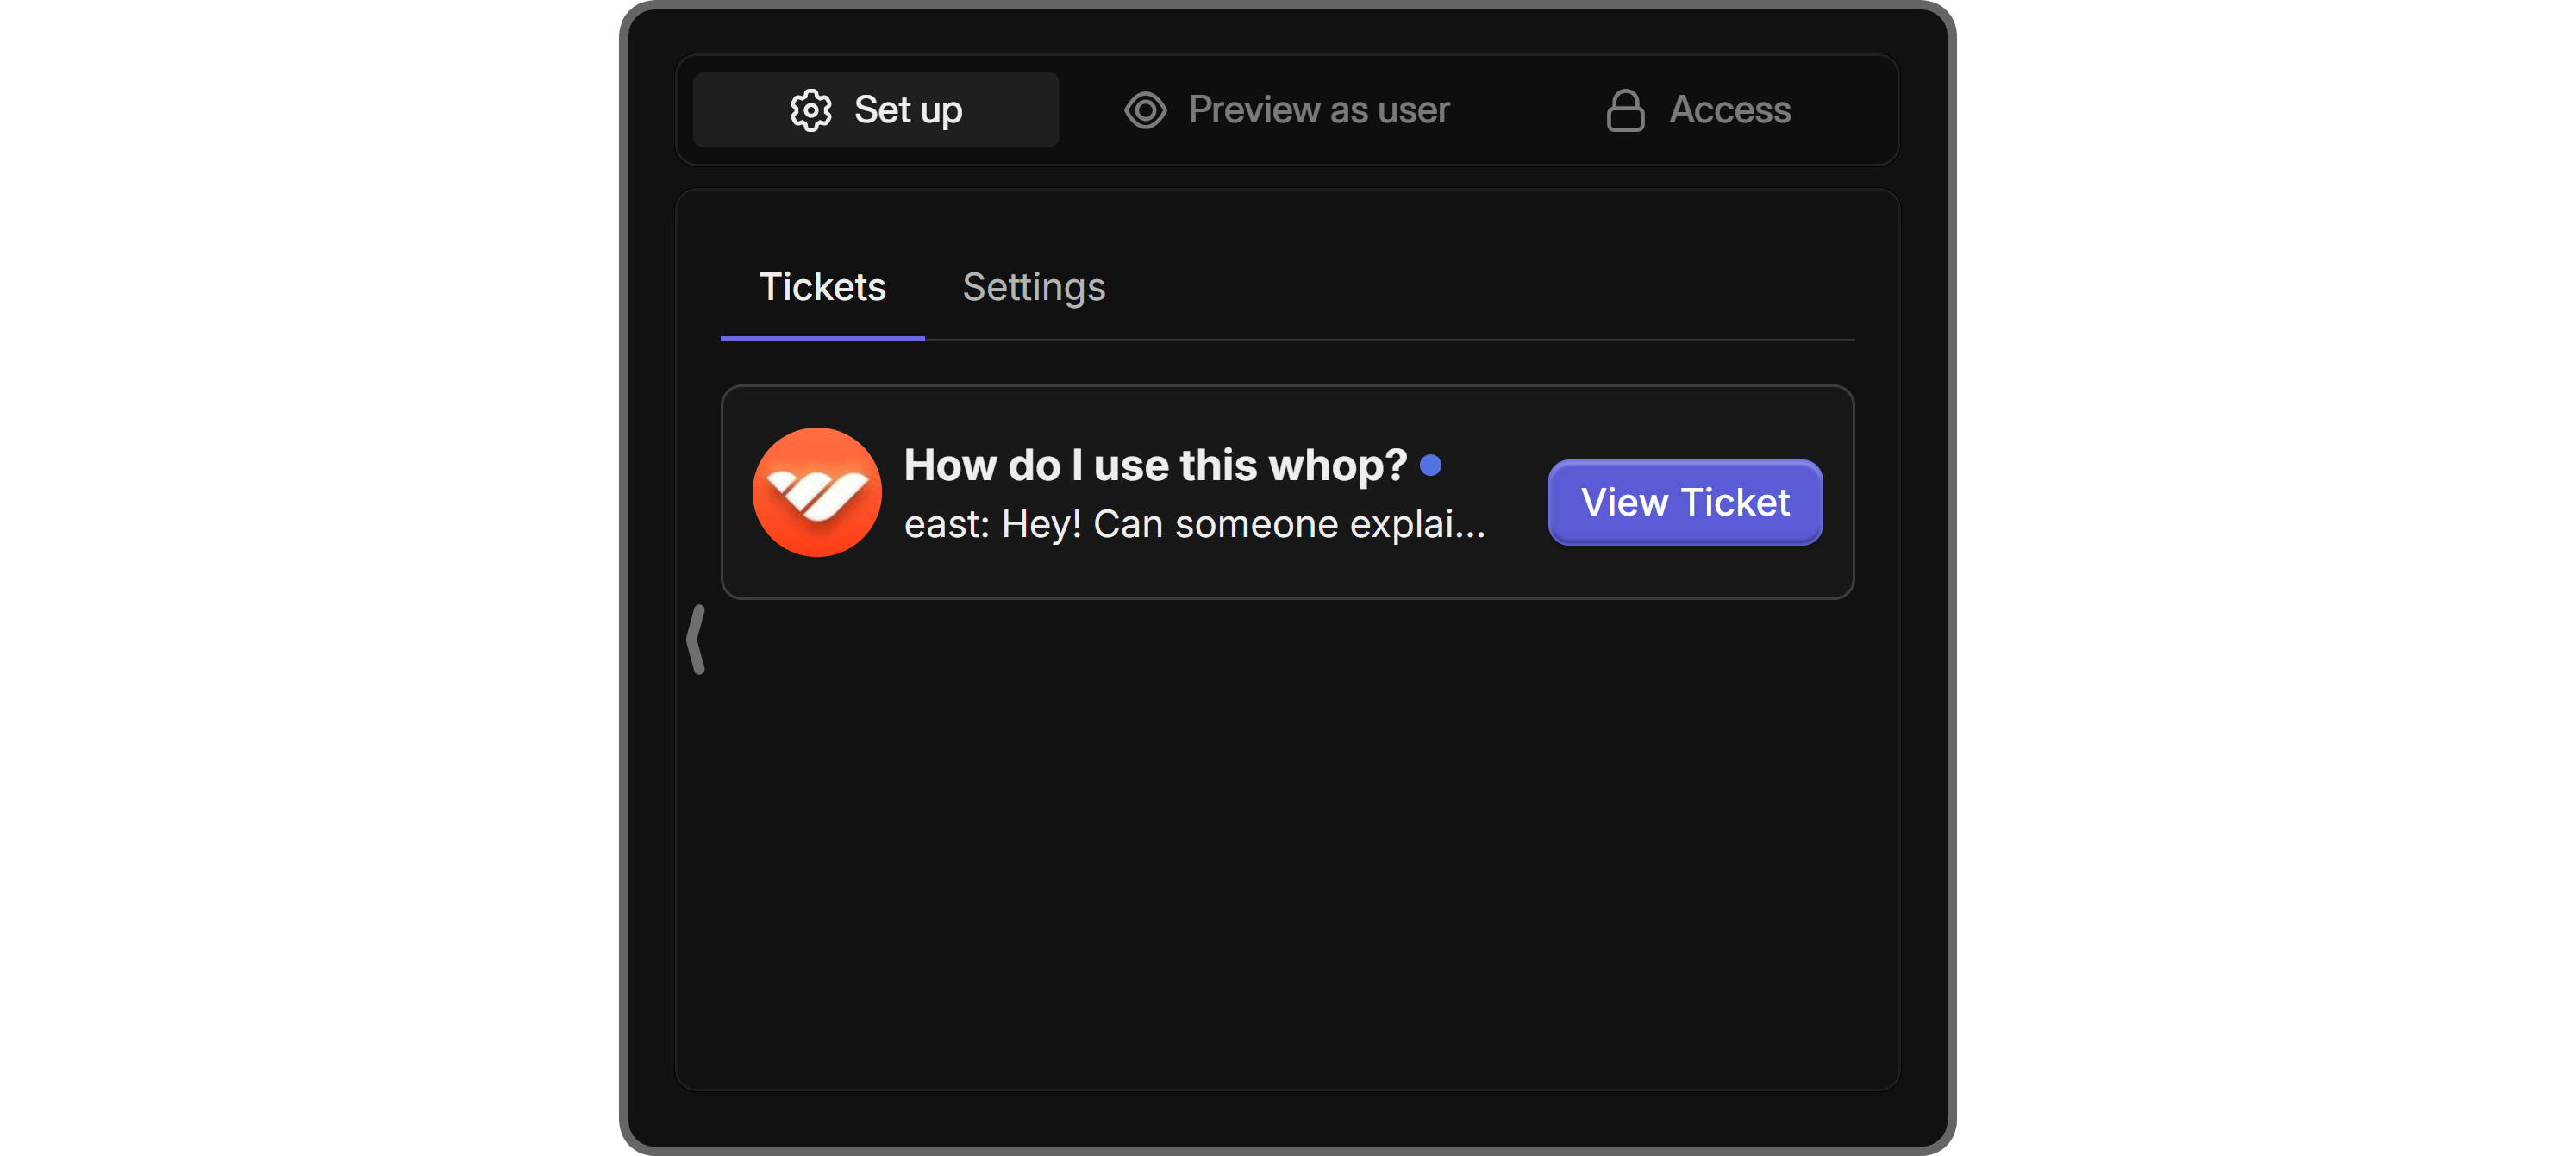
When a user creates a ticket, however, you’ll see that it will be listed here. You can think of tickets as regular chat rooms - the only members who can see the ticket are the individual who opened the ticket and the whop’s admins. In this screen, you can see the title of the ticket, the creator of it, and the recent message that was sent. You can click on the View Ticket button of tickets to go into the chat, where you can talk with the person who created the ticket.
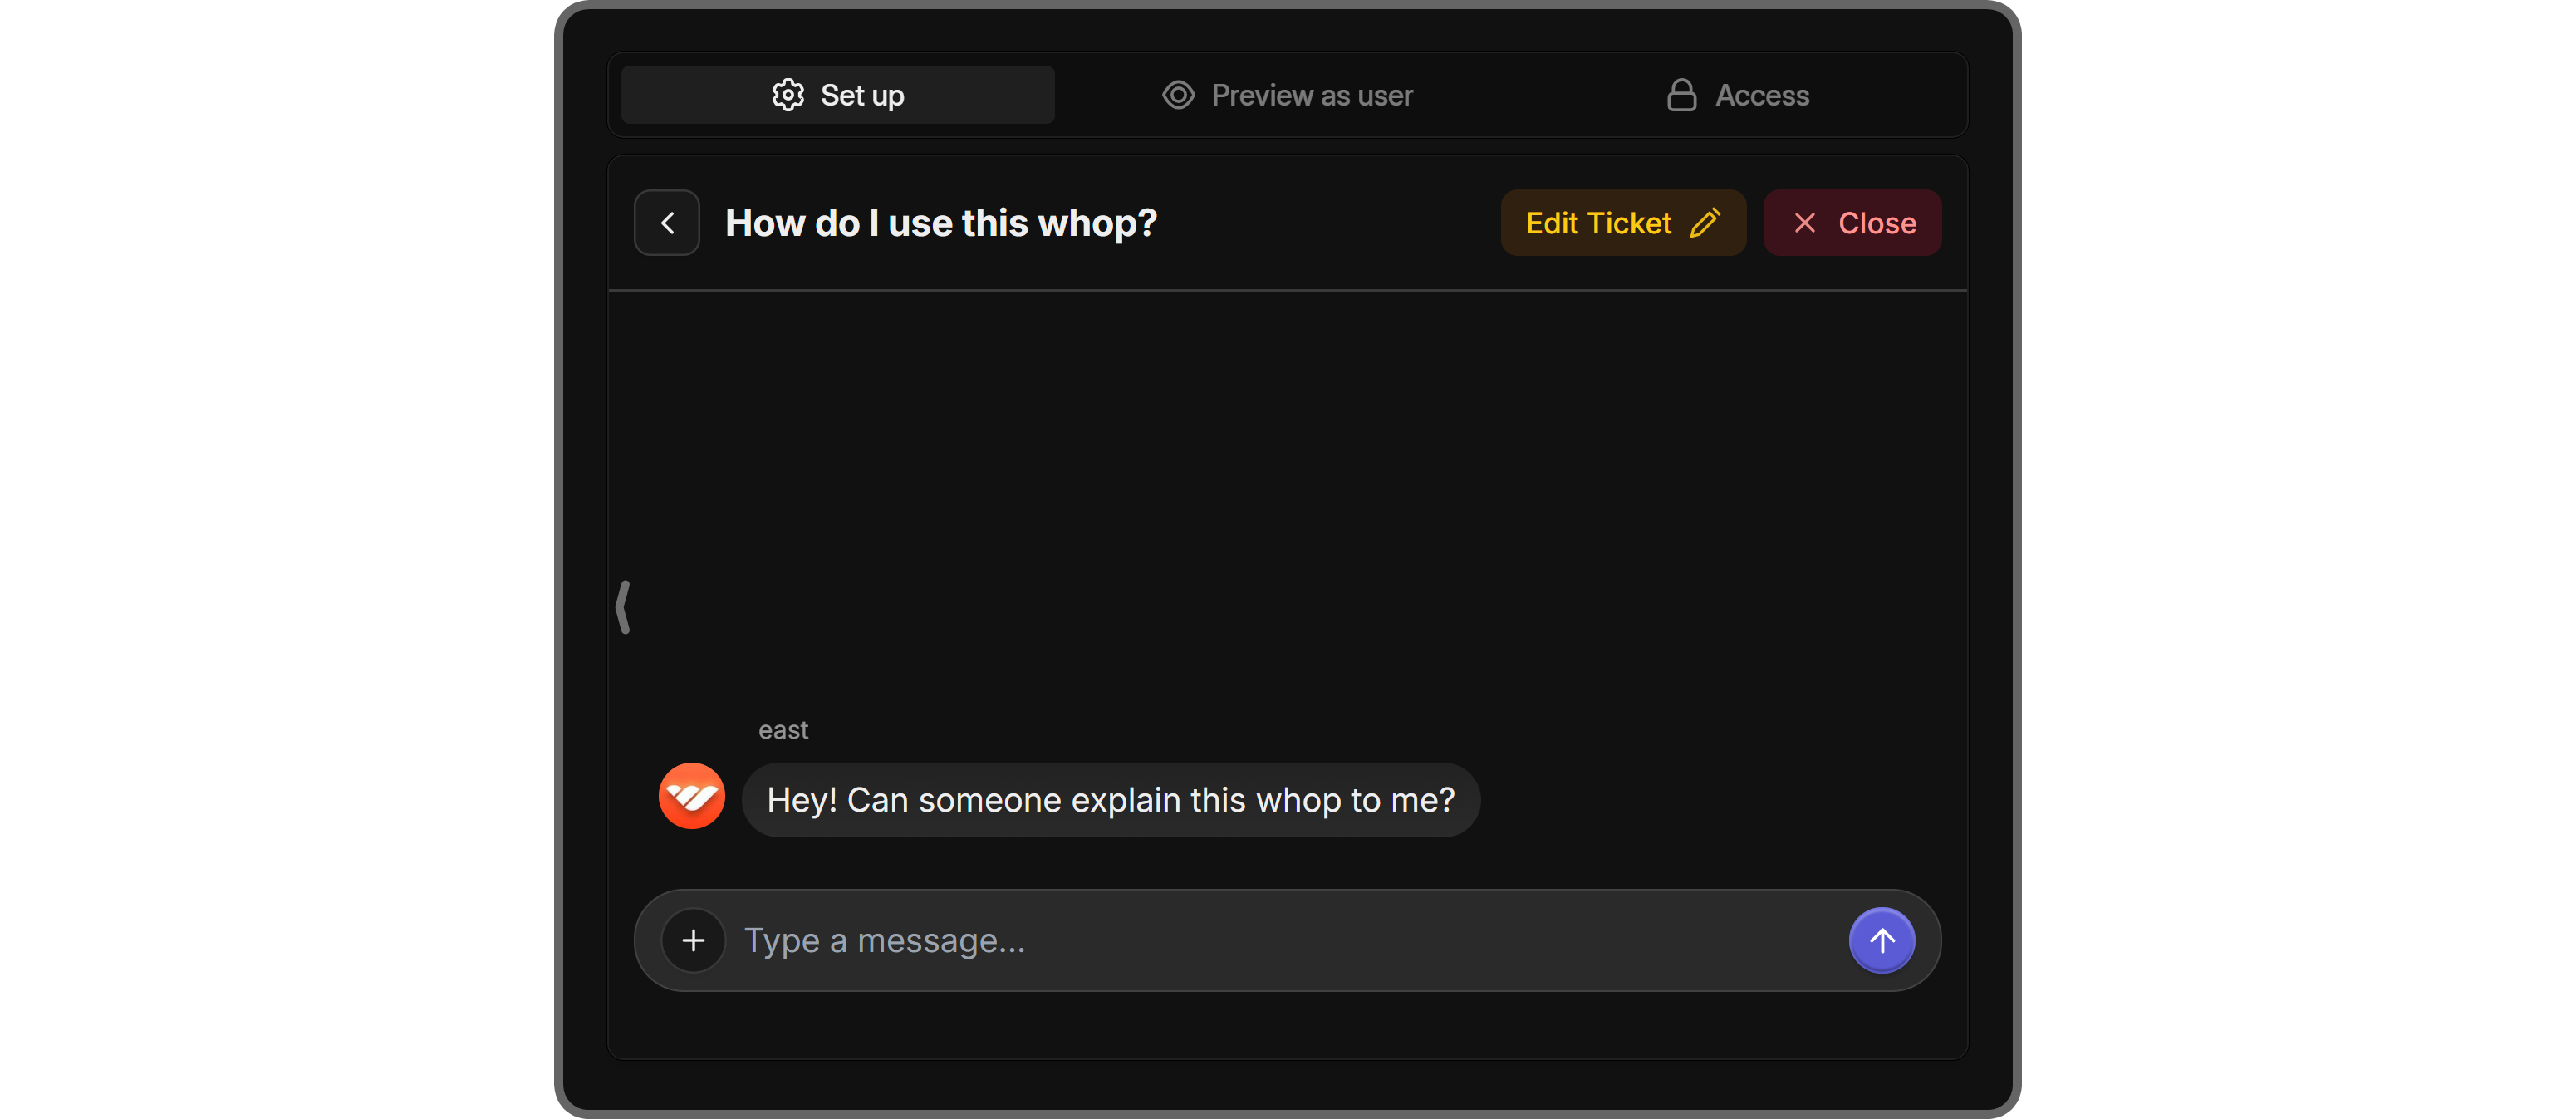
Once you click the View Ticket button of a ticket, you’ll be directed to its chat. There, you can talk with the user who created the ticket. You can attach images to your messages as well. There are also two buttons at the top right of the chat view: Edit Ticket and Close. As their name suggests, the Edit Ticket button allows you to change the name of the ticket, and the Close button will mark the ticket as closed - no one will be able to send messages, and the ticket will be archived.
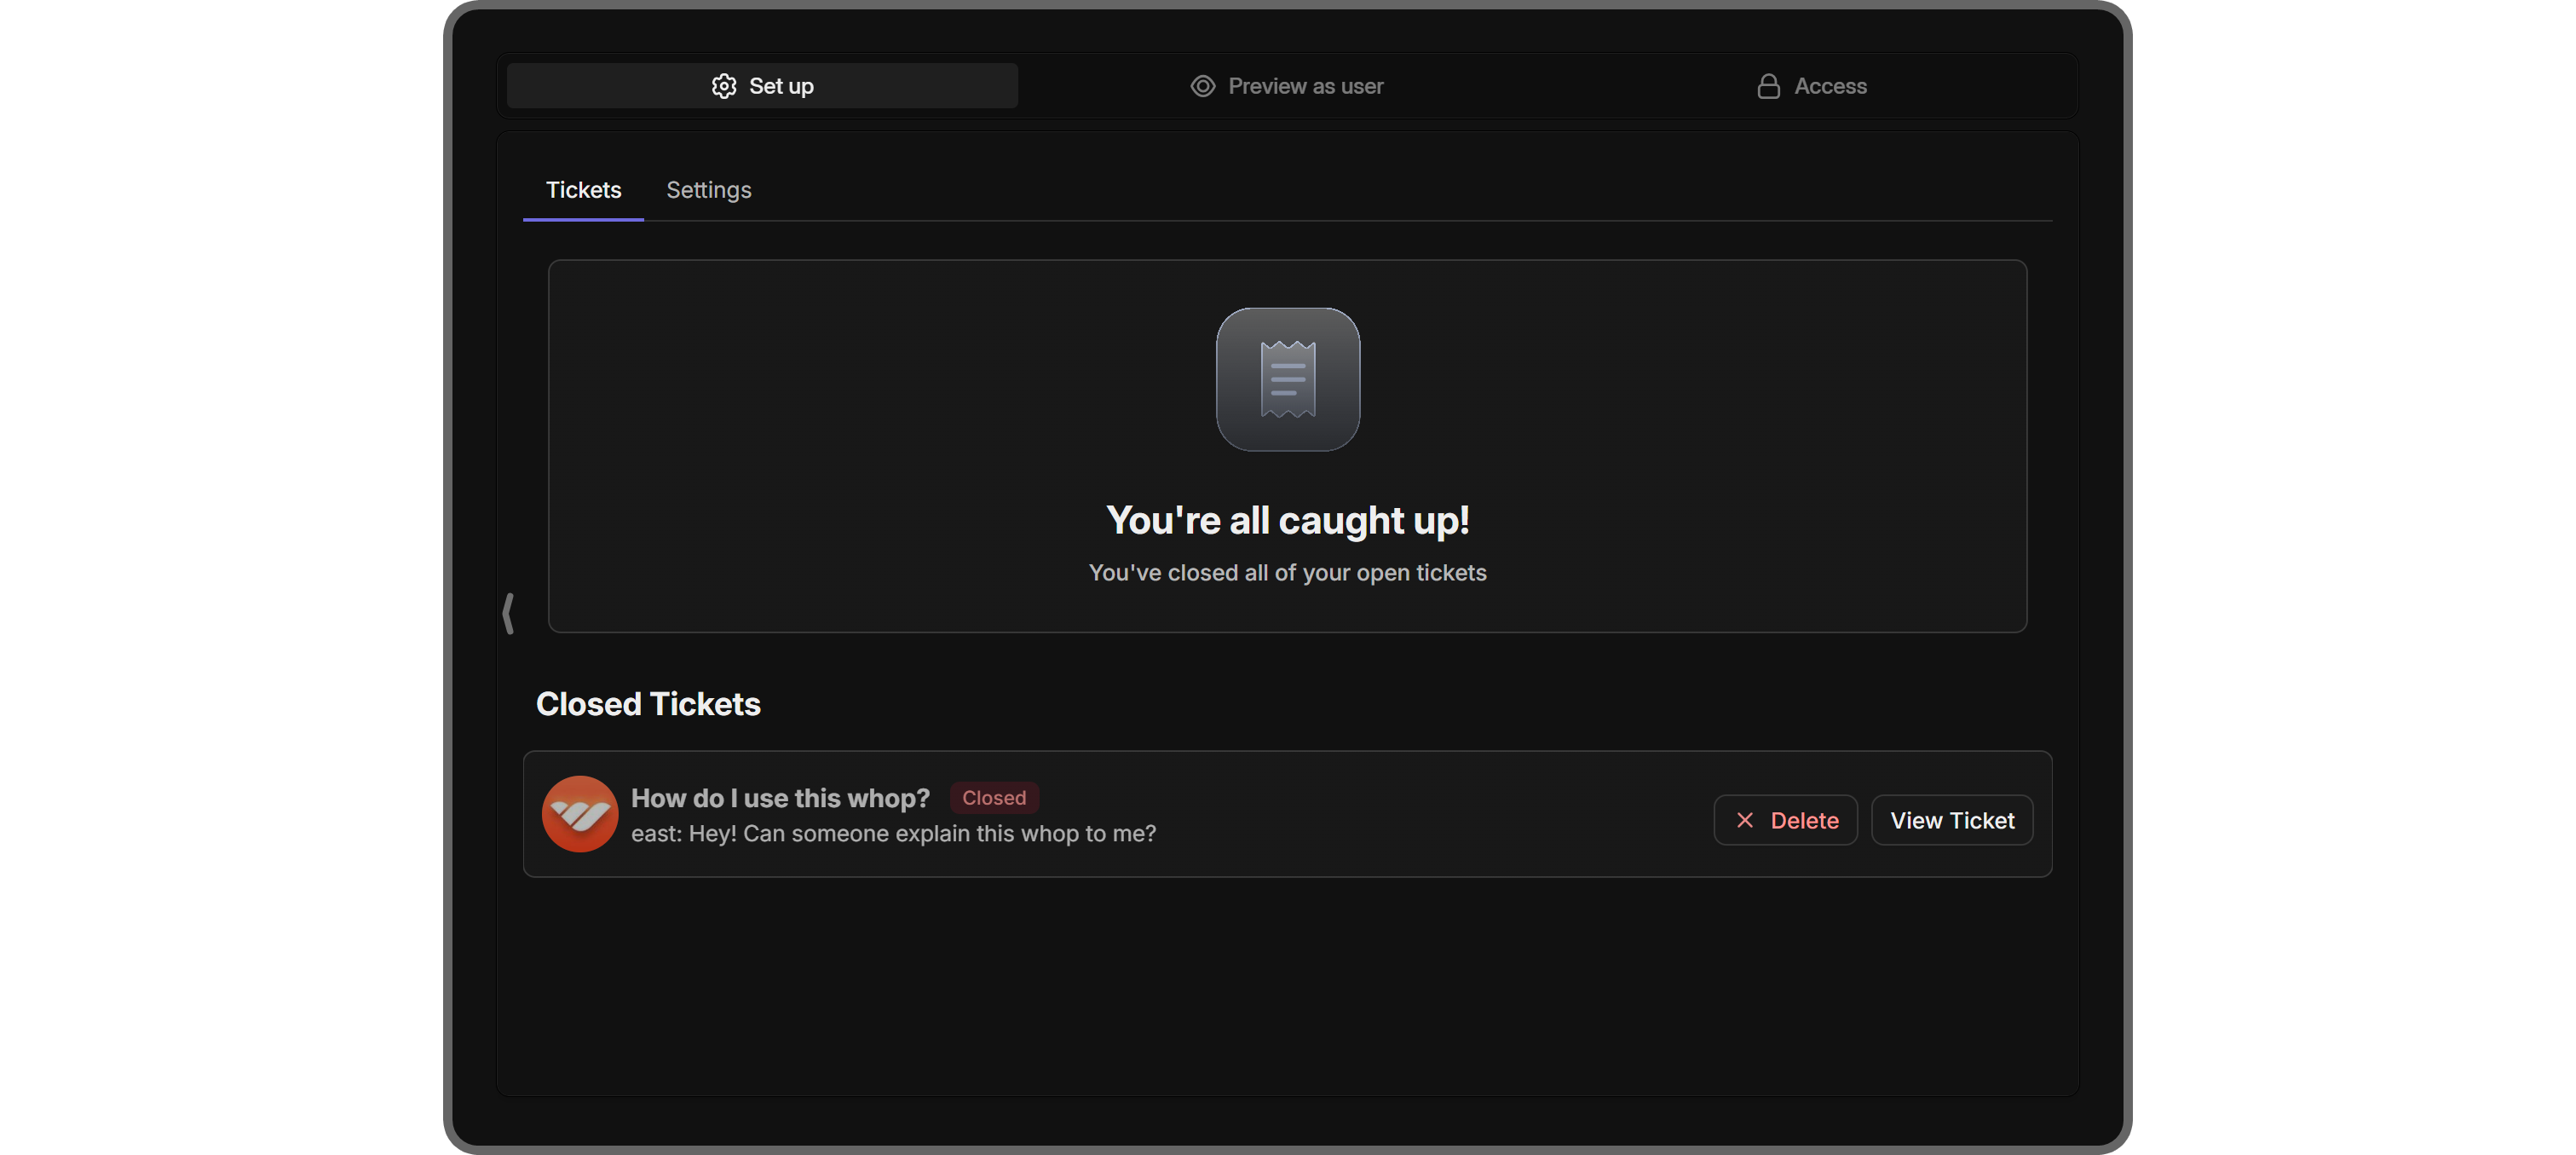
When you close a ticket and go back to the Set up section, you’ll see that the ticket will be moved to the Closed Tickets section. You have two options for closed tickets - you can delete them by clicking on their Delete button, or you can re-visit the ticket by clicking on the View Ticket button. Once a ticket is closed, there’s no way to re-open it.
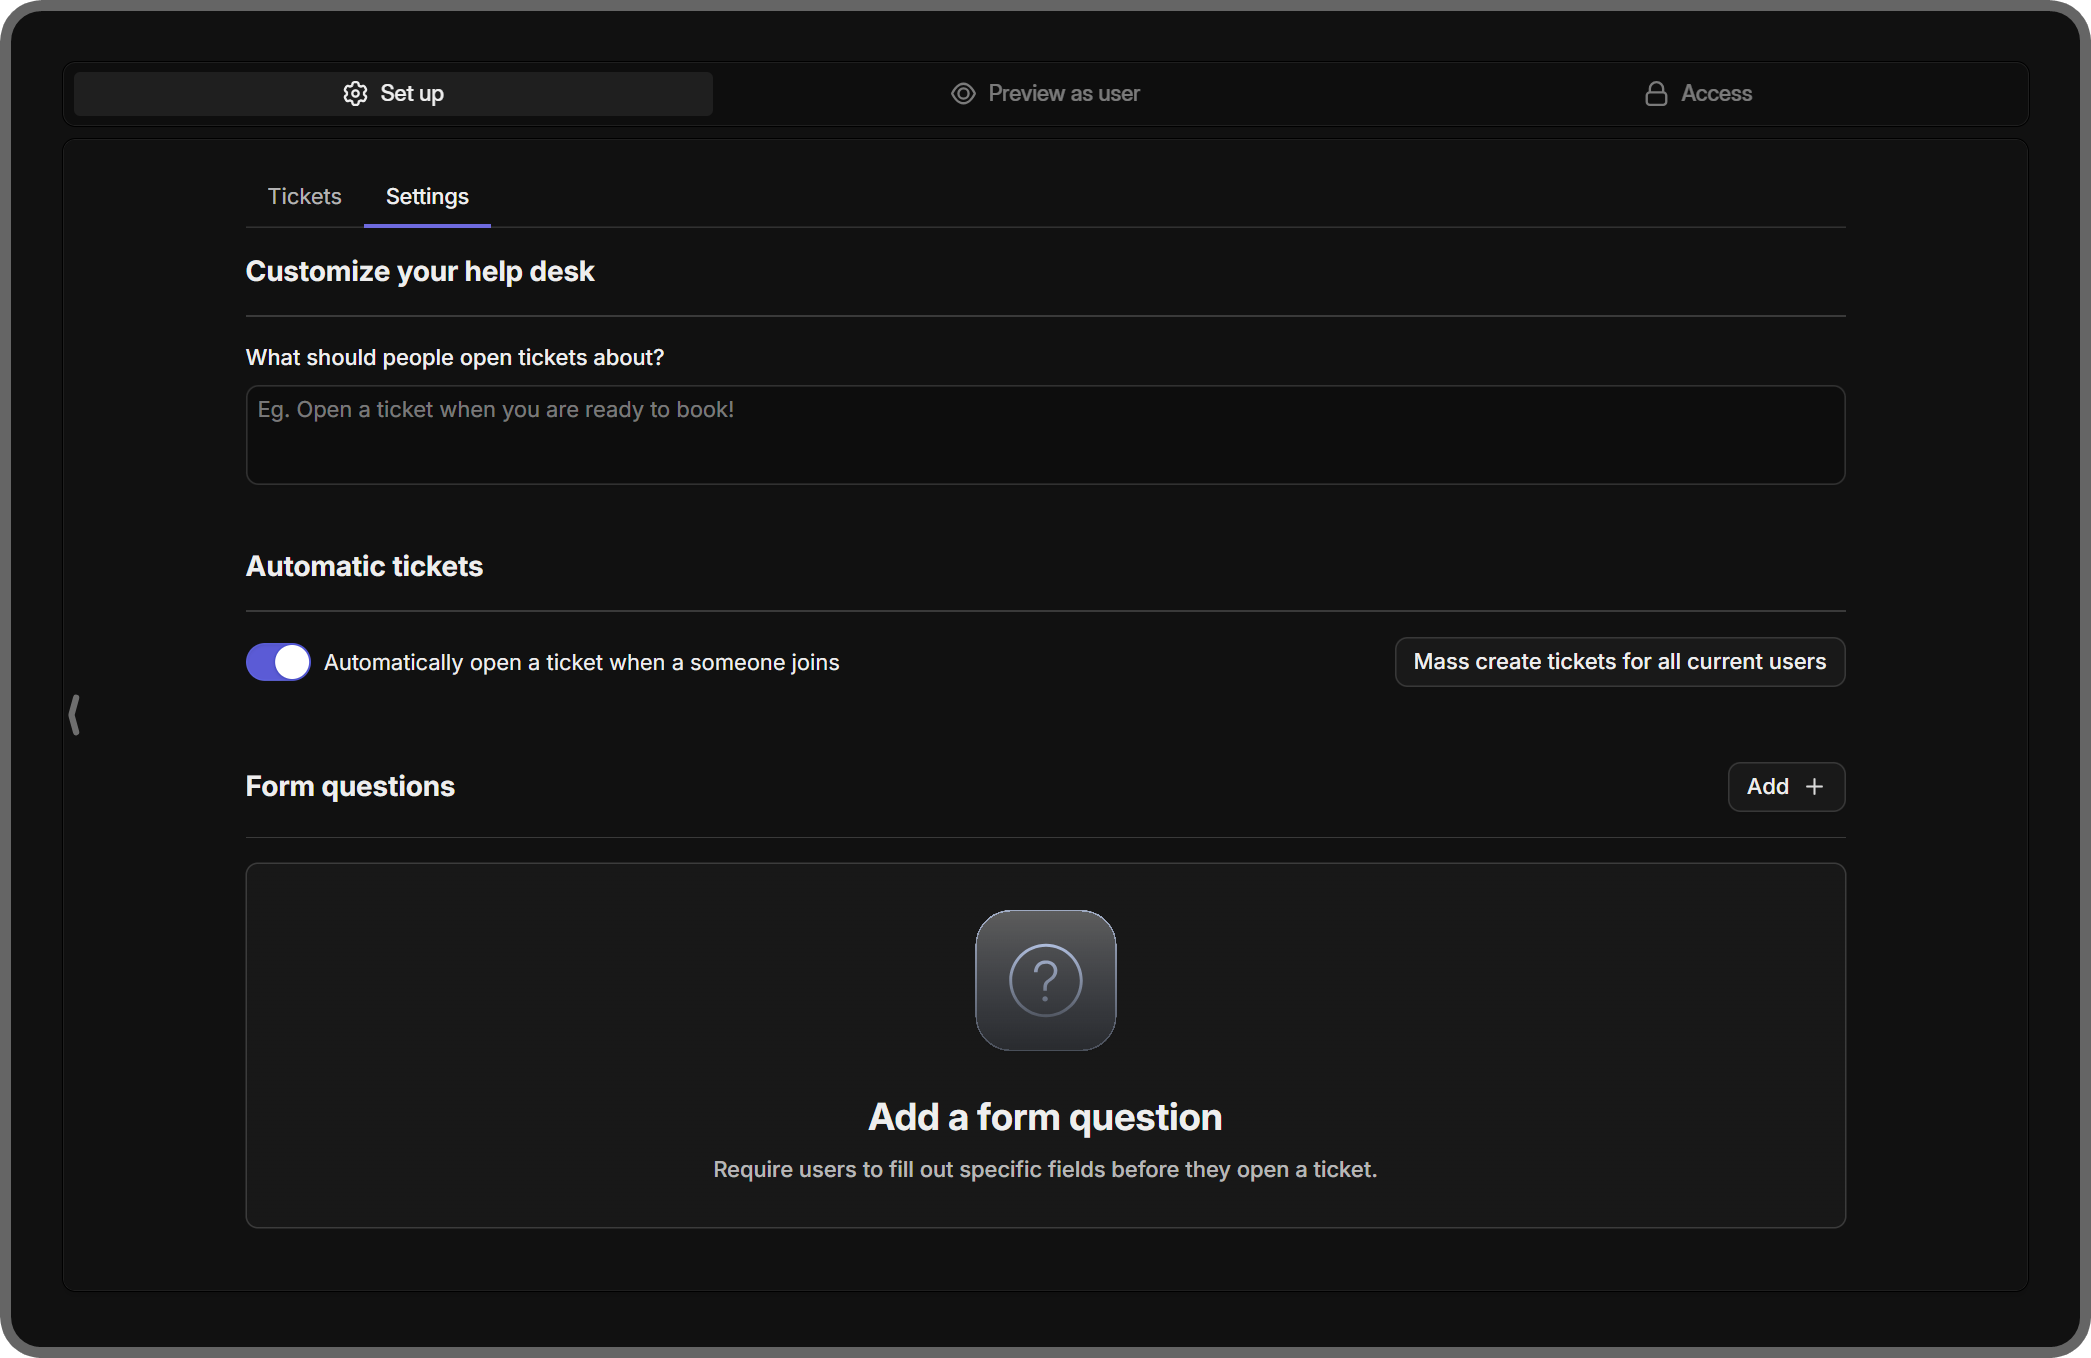
Now, let’s take a look at the Settings tab of the Set up section. You can navigate to this tab by using the navigation bar with two options: Tickets and Settings. In this tab, you have three settings, let’s examine each:
- Customize your help desk: In this section, you can write down a description for the Help Desk app which should explain what kind of tickets the users should open. This text will be displayed right under the Help Desk title of the app.
- Automatic tickets: This toggle option has a very self-explanatory name. It determines whether the app should automatically create a ticket for all new users upon their joining. If you already have members on your whop and you want to create a ticket for each one, you can use the Mass create tickets for all current users button to the right of the toggle option to force the app to create tickets for everyone.
- Form questions: You can use the Add + button to the right of this section header to add questions for members to answer before creating a ticket. Their answers will be displayed on the chat of the ticket. You can add up to 10 questions.
2: Preview as user
The Preview as user section of the Help Desk app allows you to see the app from the perspective of a regular user. After adjusting the app’s settings under the Settings tab of the Set up section, you can test out how users will interact with the app here.
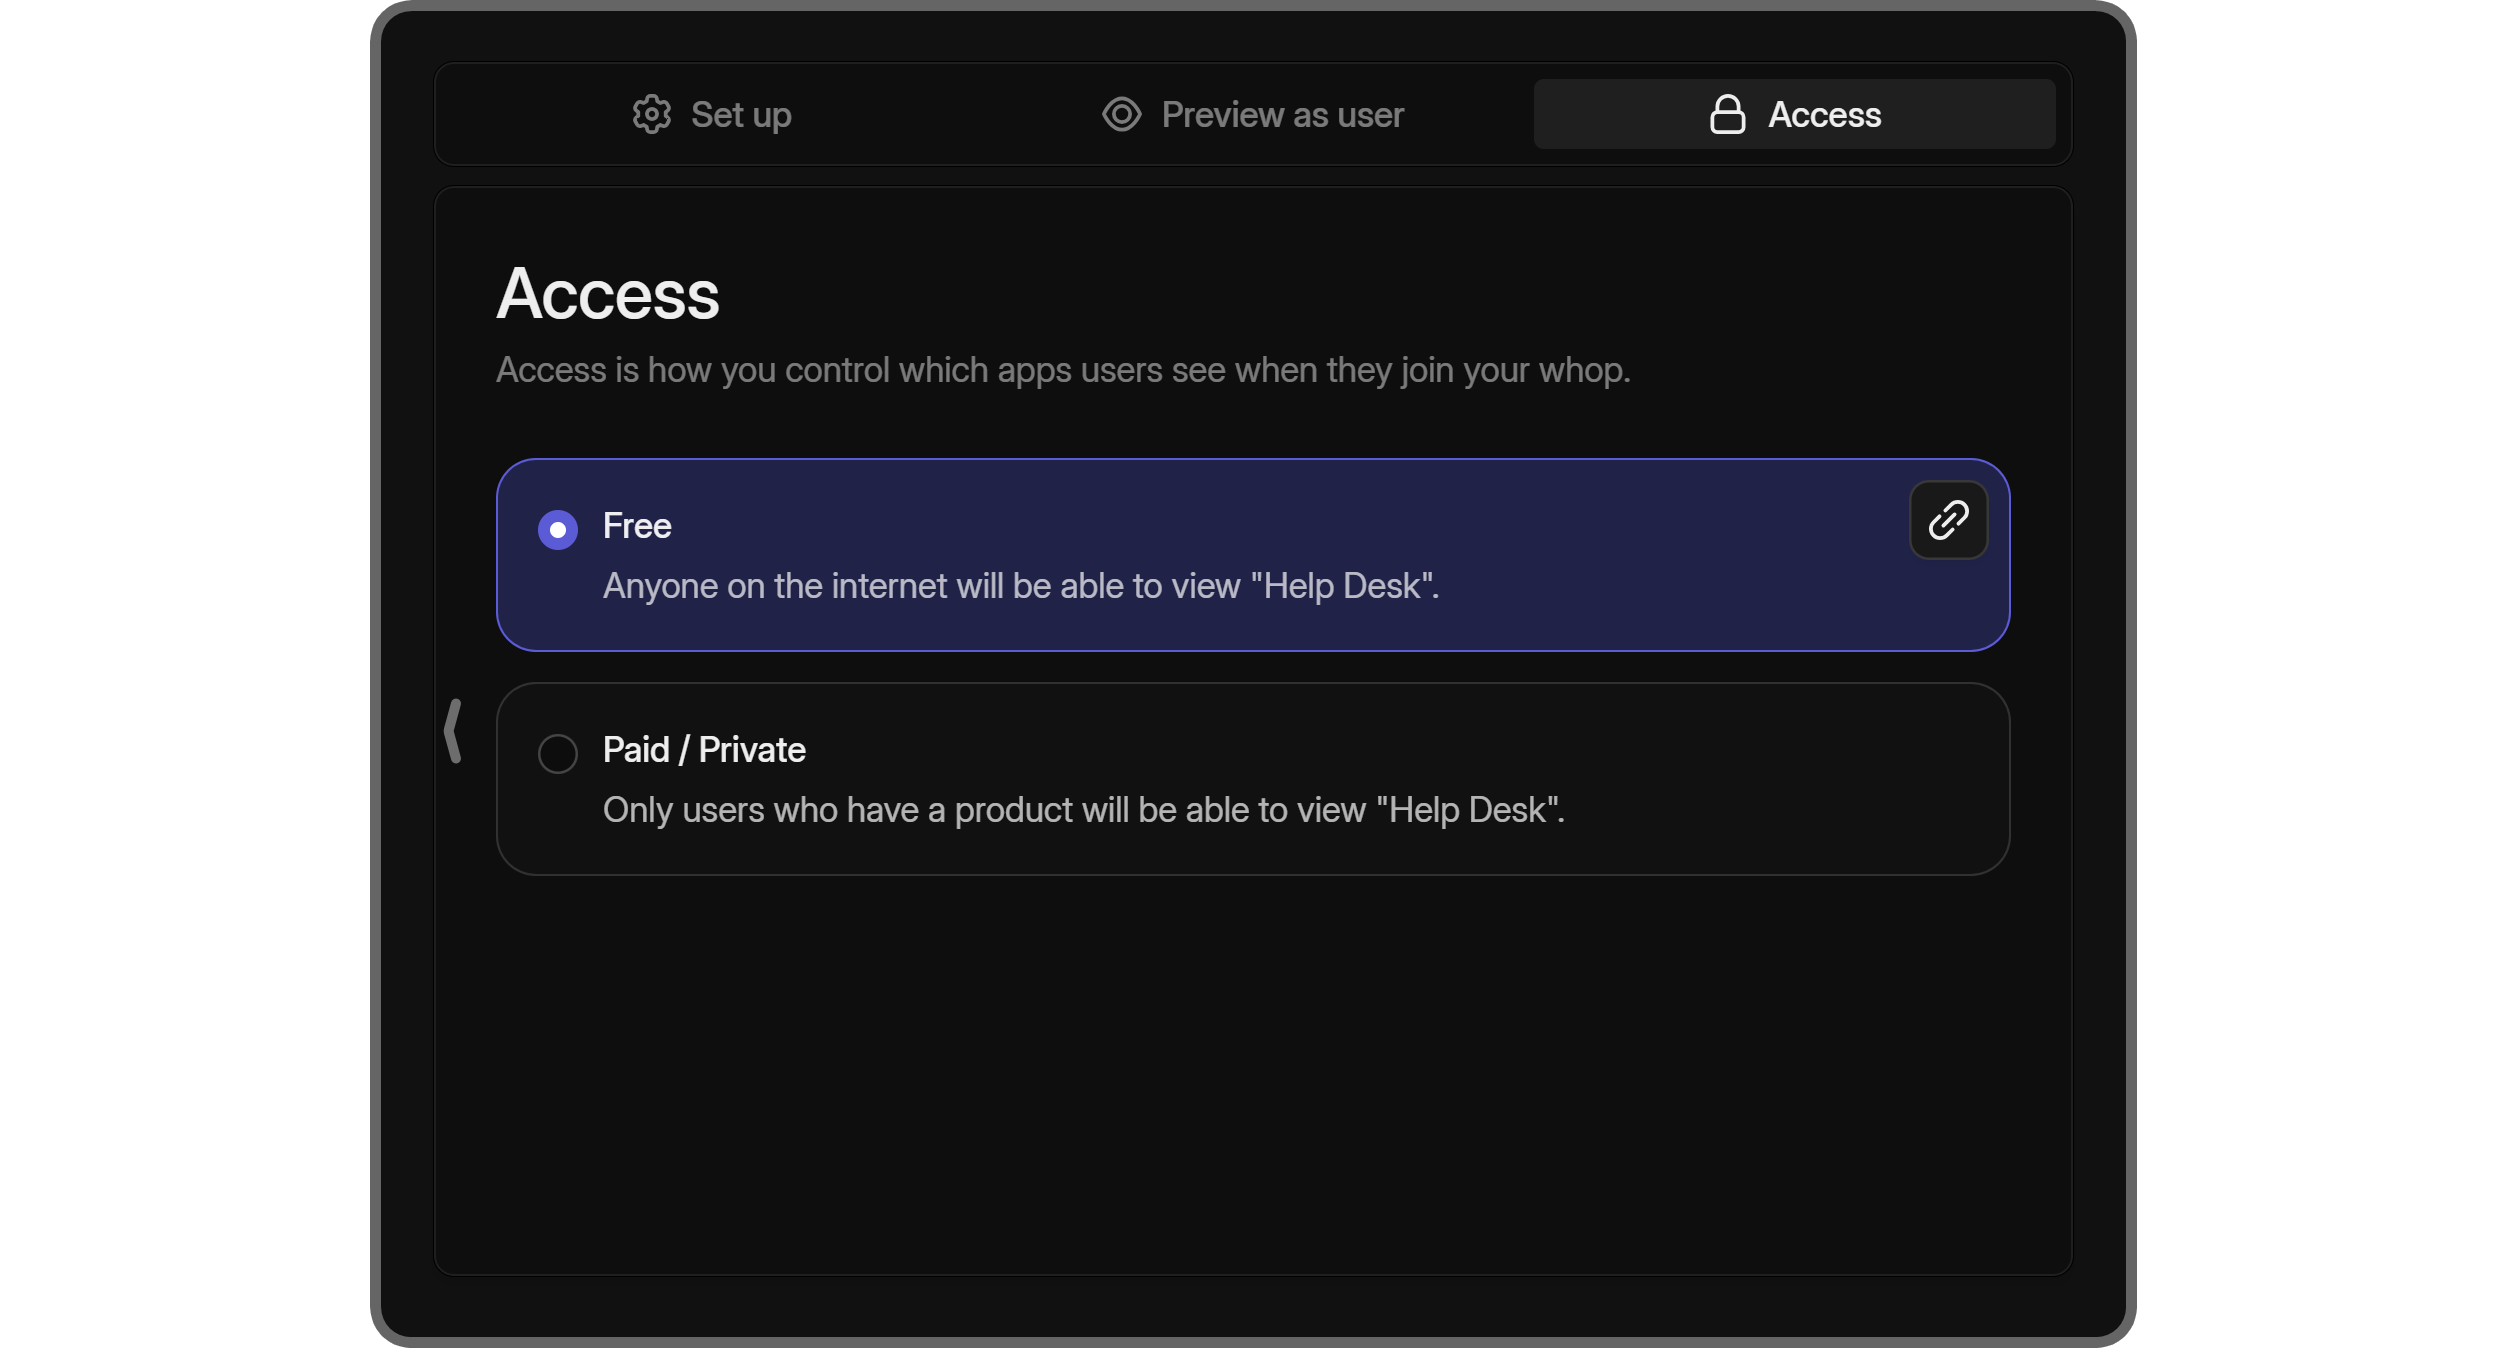
3: Access
You can see two options in the Access section of the app: Free and Paid/Private. They determine how people on the internet can access your whop and its apps. Selecting the Free option here means that anyone who has the link to your whop will be able to use this app. If you’re planning to create a public platform, you should select this option.
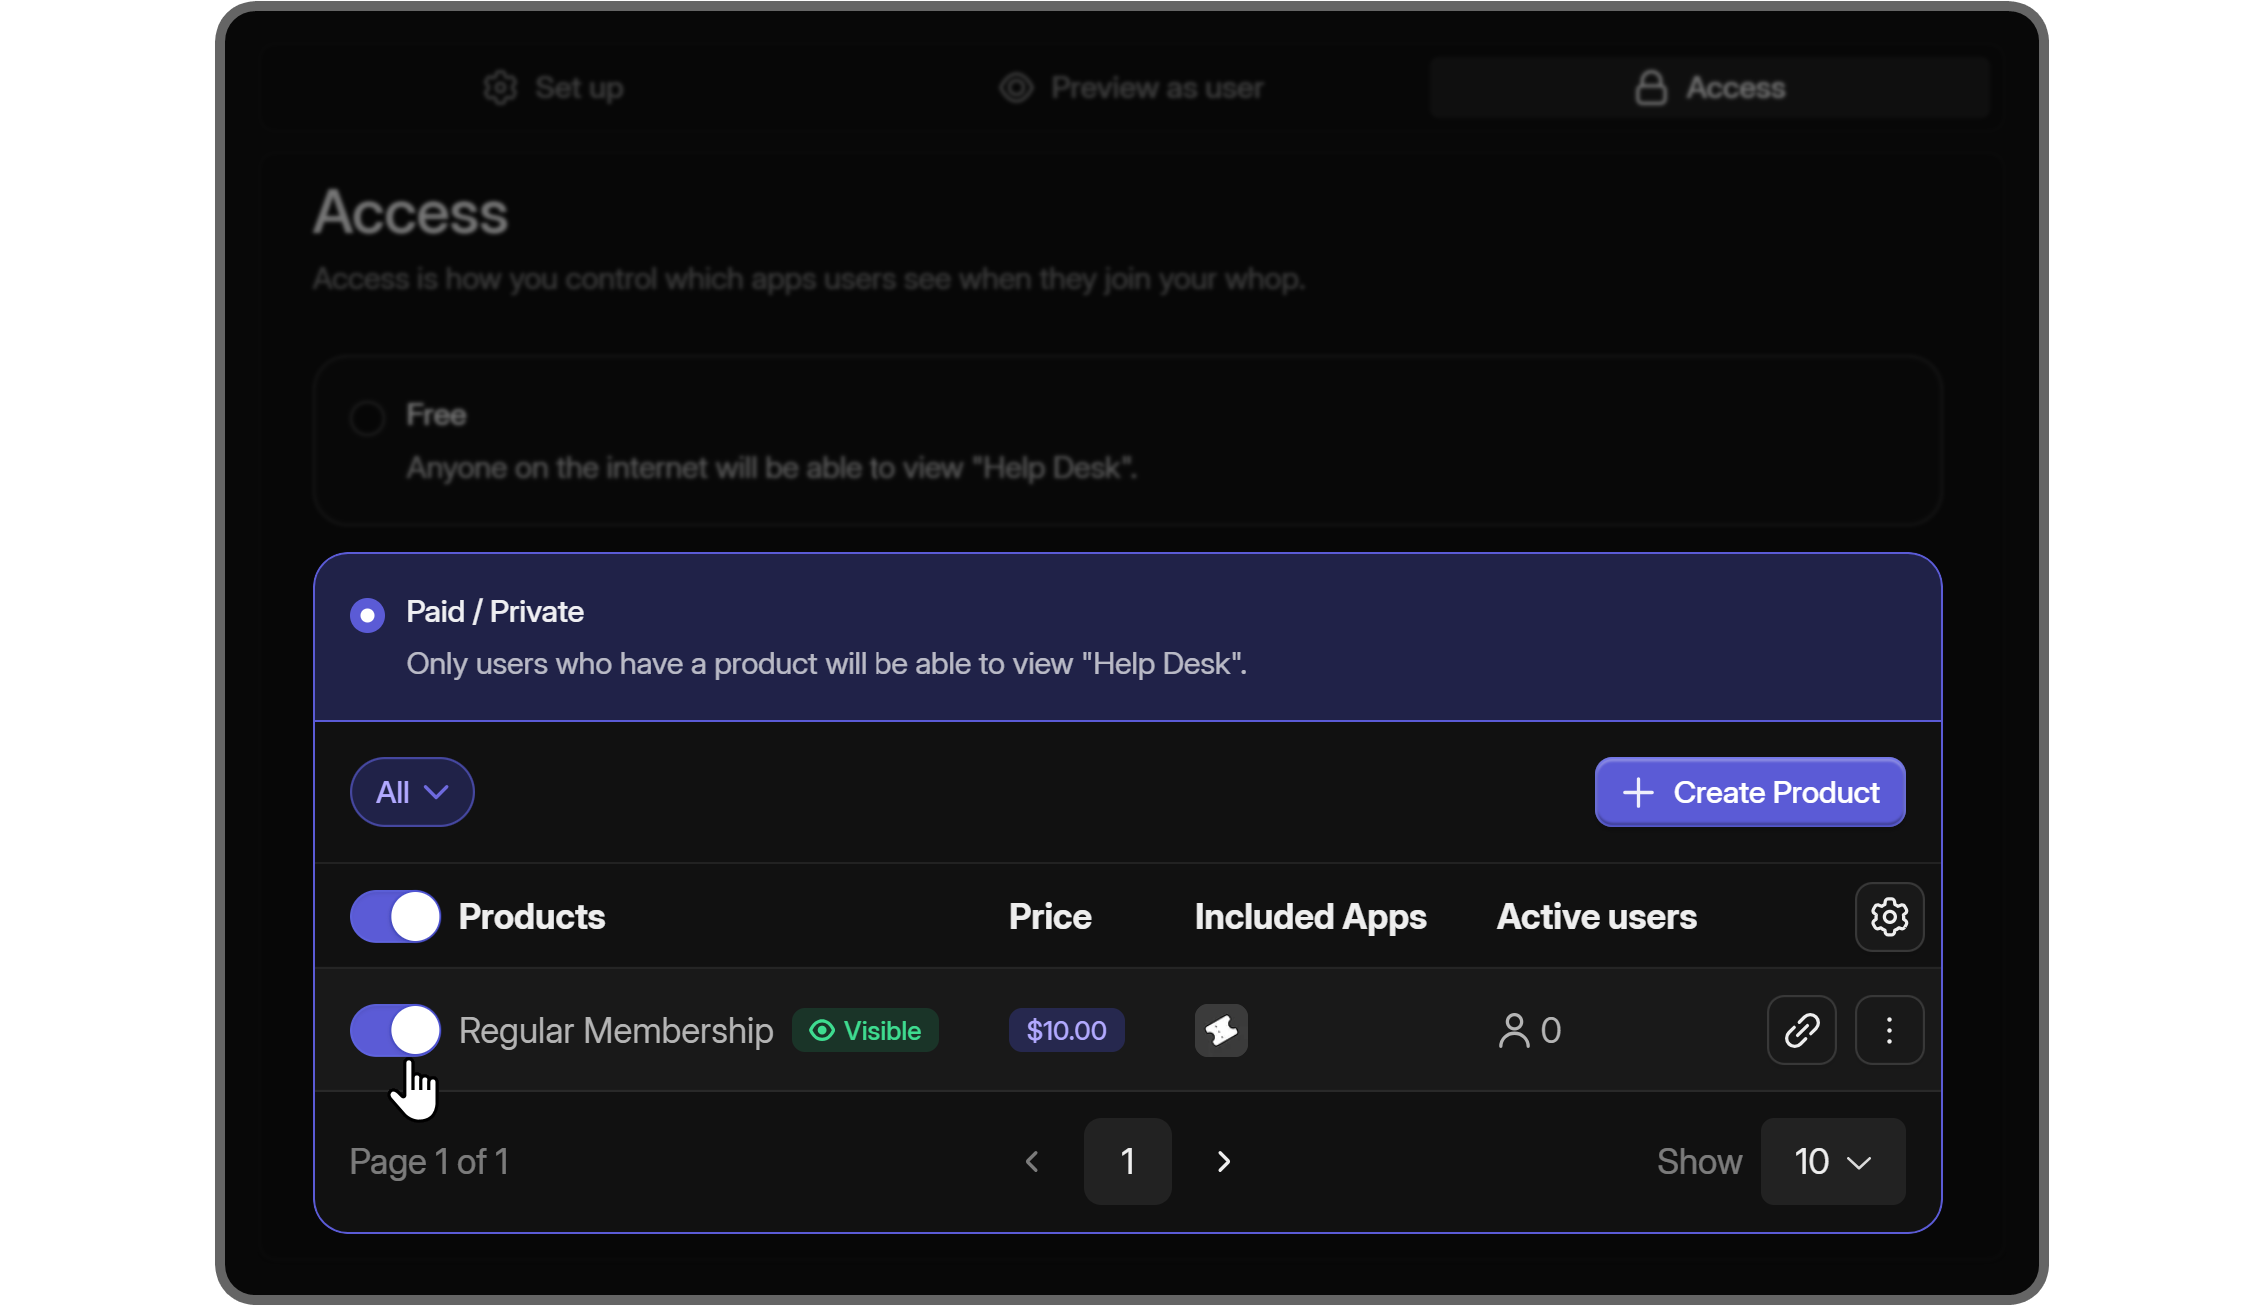
On the other hand, if you want to implement a waitlist or monetize access to the app, you should select the Paid/Private option. This will display a list of all products on your whop. Since products can be free, waitlisted, or monetized, you’ll have control over who accesses the app and how.
If you don’t have any products, you can create one by clicking on the Create Product on the top right of the Paid/Private option.
Create the Perfect Internet Hub with Whop
Whop allows you to create the platform of your dreams where you can control every single part. On top of that, creators on Whop have access to features like 7/24 support, advanced analytics, and more. Thousands of people have been creating their platform and monetizing it with Whop - you can be one of them.
Signing up to Whop and starting to sell access to your platform takes less than 10 minutes - sign up today.


