
Your whop is the home of your online business, and you likely need staff to help you run it! Read this article to understand how you can use the Job Board app to find candidates for your roles.
Key takeaways
- Whop's free Job Board app lets creators build customizable recruitment systems with application forms and tracking dashboards.
- Creators can tailor job postings with flexible pay formats, location options, and custom application questions for any role type.
- The streamlined interface makes posting jobs and managing applicants simpler than traditional cluttered job platforms.
There’s a really high chance you’ve browsed a couple of “find a job” websites before - most of them are full of clutter, expensive for business owners to publish advertisements on, and hard to use. Unlike other platforms, Whop’s Job Board app is a super easy app to use for both creators (you) and regular members.
The Job Board app is a place where business owners can publish recruitment postings for the members of your whop to apply. The app has a simple and effective application and categorization system that makes the process straightforward for both parties.
In this guide, we’re going to remember what Whop apps are, how you can add the Job Board app to your whop, and how you can use it.
What is a Whop app?
To understand what a Whop app is, let’s first think of a whop as a platform where you control its features. Let’s take Zoom, for example - it has features like video calls, chat rooms, screen sharing, and more. But if you don’t want Zoom to have a chat room, you can’t remove the feature. What if you want it to have a giveaway feature? Again, not possible, as you can't add features to Zoom.
On a whop, however, you can add, remove, or swap features - or “apps,” as we call it. If you want people to be able to chat in your whop, you can do that by adding the Chat app. Or maybe you want to create online courses - the Courses app is here to help you. There are a lot of apps on Whop that allow you to add any feature you want to your platform, and with all the feature clutter today’s apps have, this is refreshing.
Adding apps to a whop is free, and you can add as many instances as you want. This can help you create layers within your whop or different content based on the same app. Now that you know what a Whop app is, let’s take a look at what the Job Board app is.
What is the Job Board app on whop?
As its name suggests, the Job Board app on whop is a page where you can post job openings for your platform, company, community, etc.
Sharing job postings on the Job Board app is super easy. You can customize the posts with all the necessary details you want to share with your members, and you have an advanced dashboard to keep track of responses, contact rates, and more.
While the app’s main purpose is to list job postings and recruit people, you can use it to find people for project collaborations, volunteers, and more. Think of the Job Board app as a place where you can recruit people - even if the recruitment isn’t for a full-on paid job.
The Job Board app is great, but how do you exactly add it to your whop? Let’s see.
How to add the Job Board app to your whop
Before walking you through adding the Job Board app to your whop, we want to make sure you have a whop to begin with. If you do, you can skip this paragraph. If you don’t, check out our How to create your own whop guide to see how you can create one in under 5 minutes.
If you do have a whop and you’re ready to go, let’s see how you can add the app to your whop:
- Click the Manage apps button in the Your apps section at the top left of your whop to see the Edit apps popup
- In the Edit apps popup, click the New app button to see the app list
- In the app list, search for the Job Board app and click on it to see its visibility setting
- In the visibility setting, select Visible (since the app don't require a long setup) and click Add to add the app to your whop
Adding the Job Board app to your whop is that easy. In the next section, we're going to take a look at how you can actually create job postings.
Using the Job Board app
When you first add the app to your whop, you'll see its regular view mode. This is what your members will see when they open the app. To be able to publish job postings, you have to go to the app's admin view first.
You can do this by clicking on the Configure Job Board button at the top left of the app.

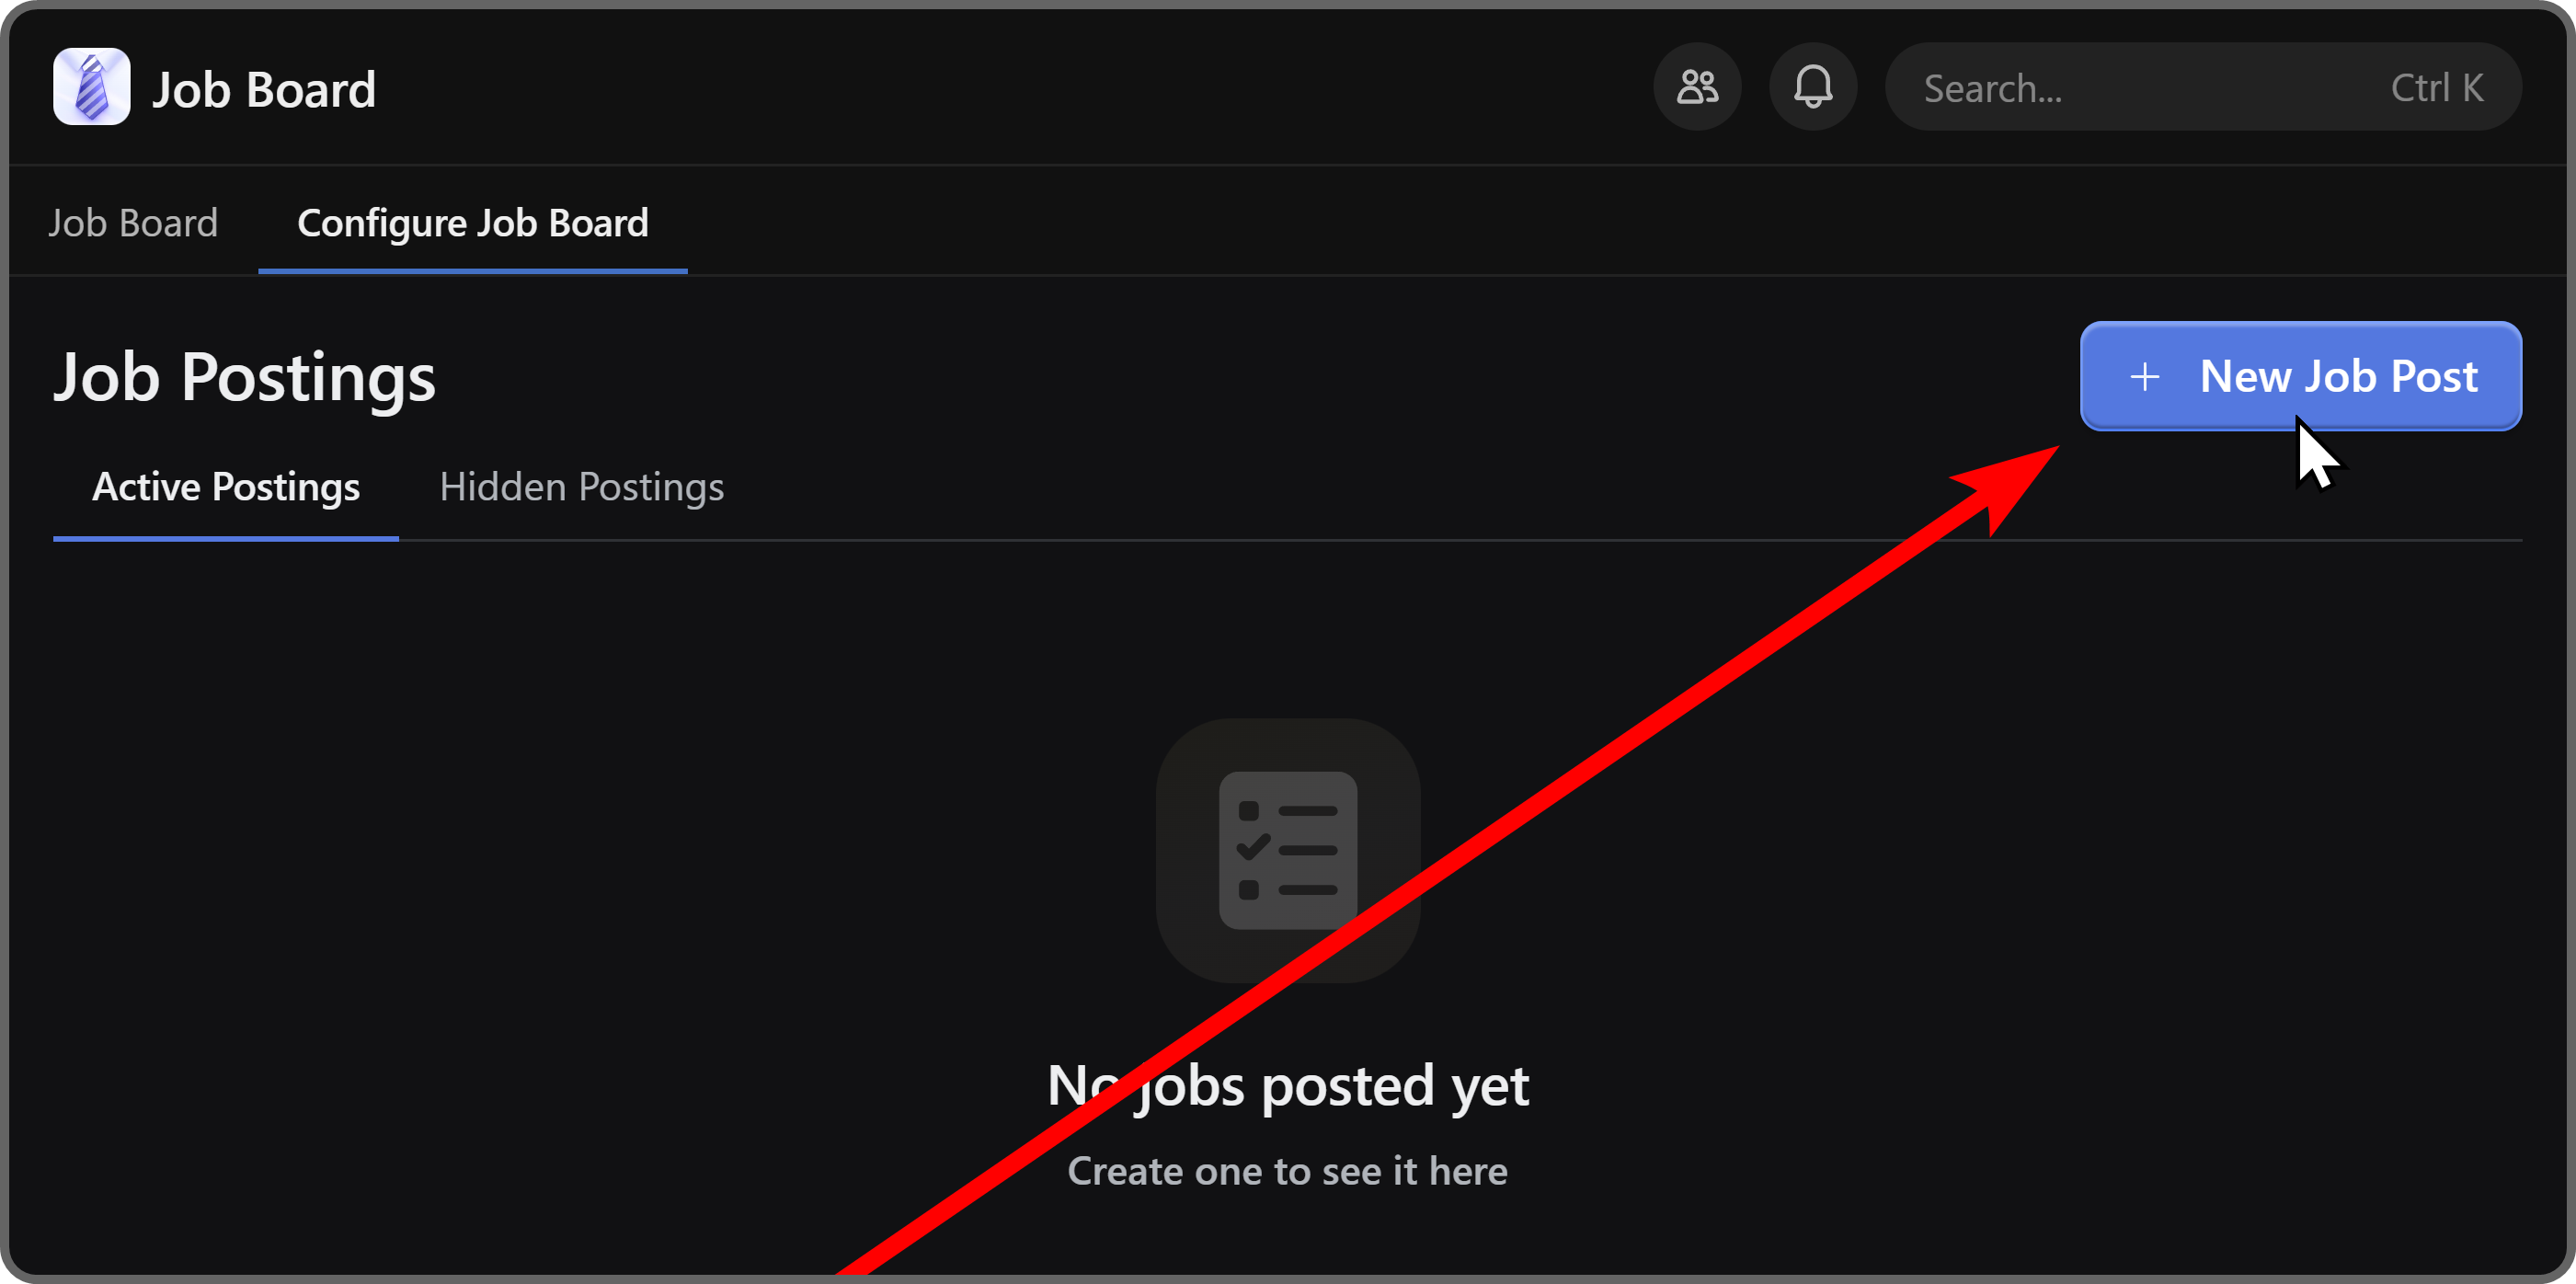
Once you're in the admin view of the app, you'll see three things:
- New Job Post button to create job postings
- Active Postings tab to see the active job postings you've published so far
- Hidden Postings tab to see the job postings you've archived
Let's click on the New Job Post button to see the "Create your job post" popup.
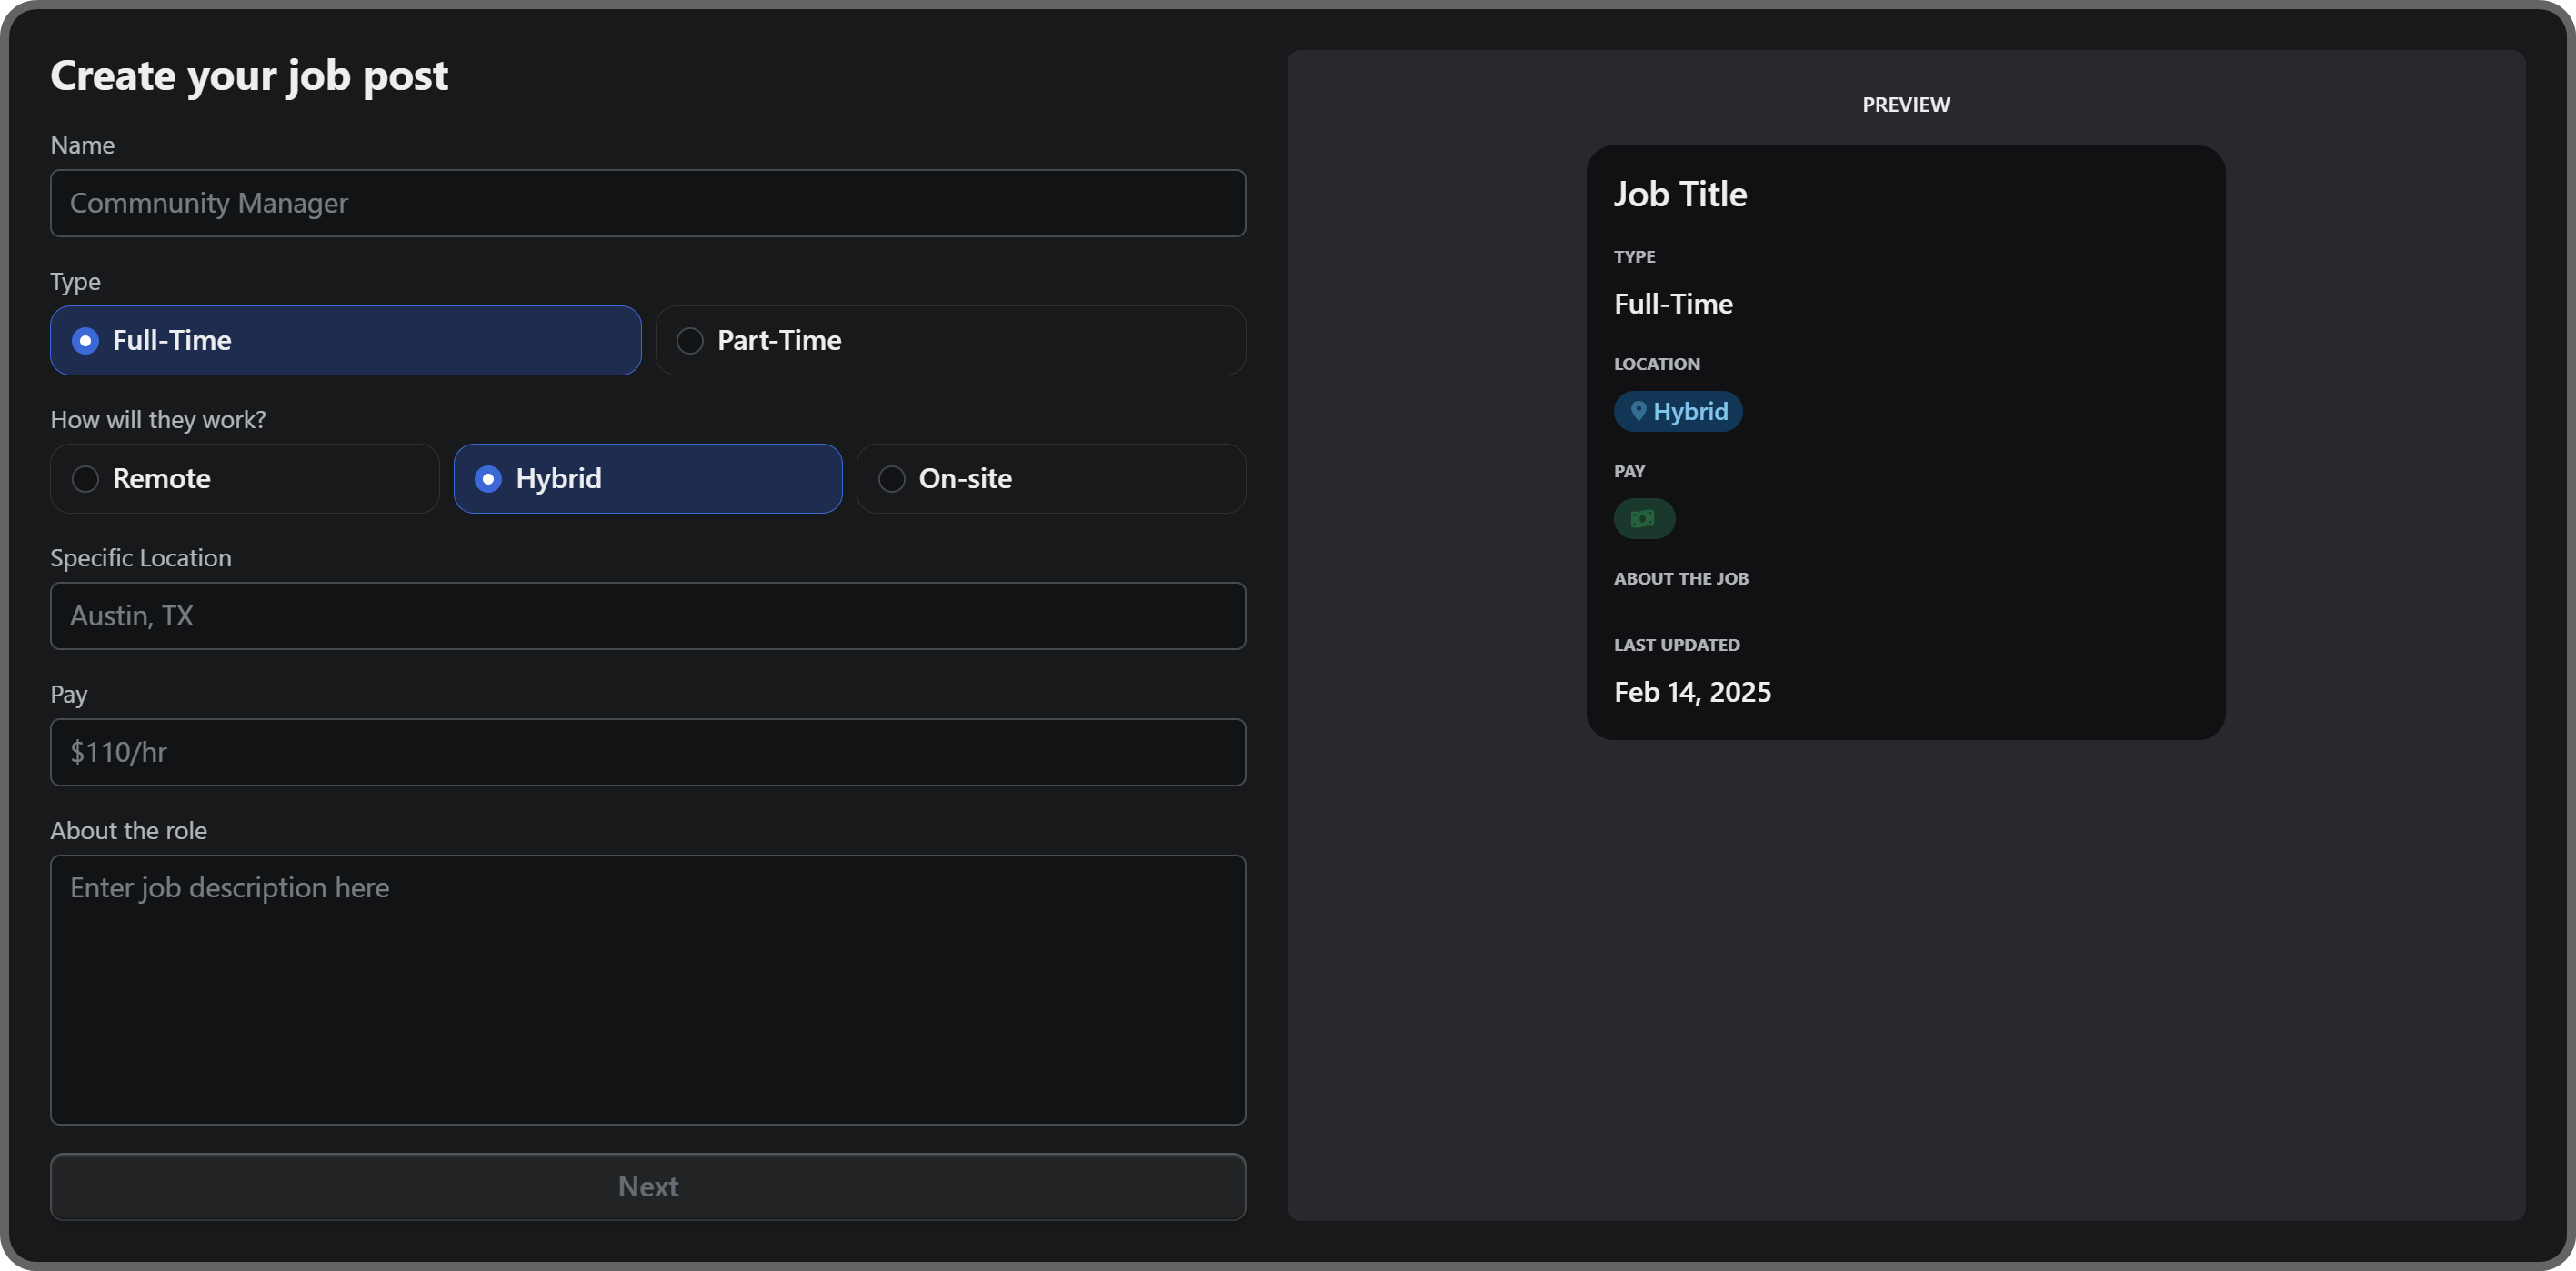
In the "Create your job post" popup, you'll see six sections on the left with a preview of the job posting on the right. Let's break down the sections:
- Name: Enter the name of the role in this field
- Type: Select either the Full-time or Part-time option
- How will they work?: Select if the role is Remote, Hybrid, or On-site. If you select the Hybrid or the On-site option, you'll see the Specific location field appearing below this section.
- Specific location: Enter the specific location of the role in this field
- Pay: Enter the pay of the role in this field. Since this is a free-form field, you can input any pay format you want, like $20/hr, £5 per video, €500 per app, etc.
- About the role: Enter a descriptive text detailing the role, its prerequisites, your expectations, etc.
Once you're done filling out all the fields, click the Next button at the bottom left of the popup to proceed.
The next step is configuring the questions of the application form. If the default Name and Email questions are enough for you, you can click the Save and Publish button to publish the job posting or Save as Draft to save it as an editable draft to post later.
If you want to add some questions to the application form, however, click the Add Question button above the Save and Publish button.
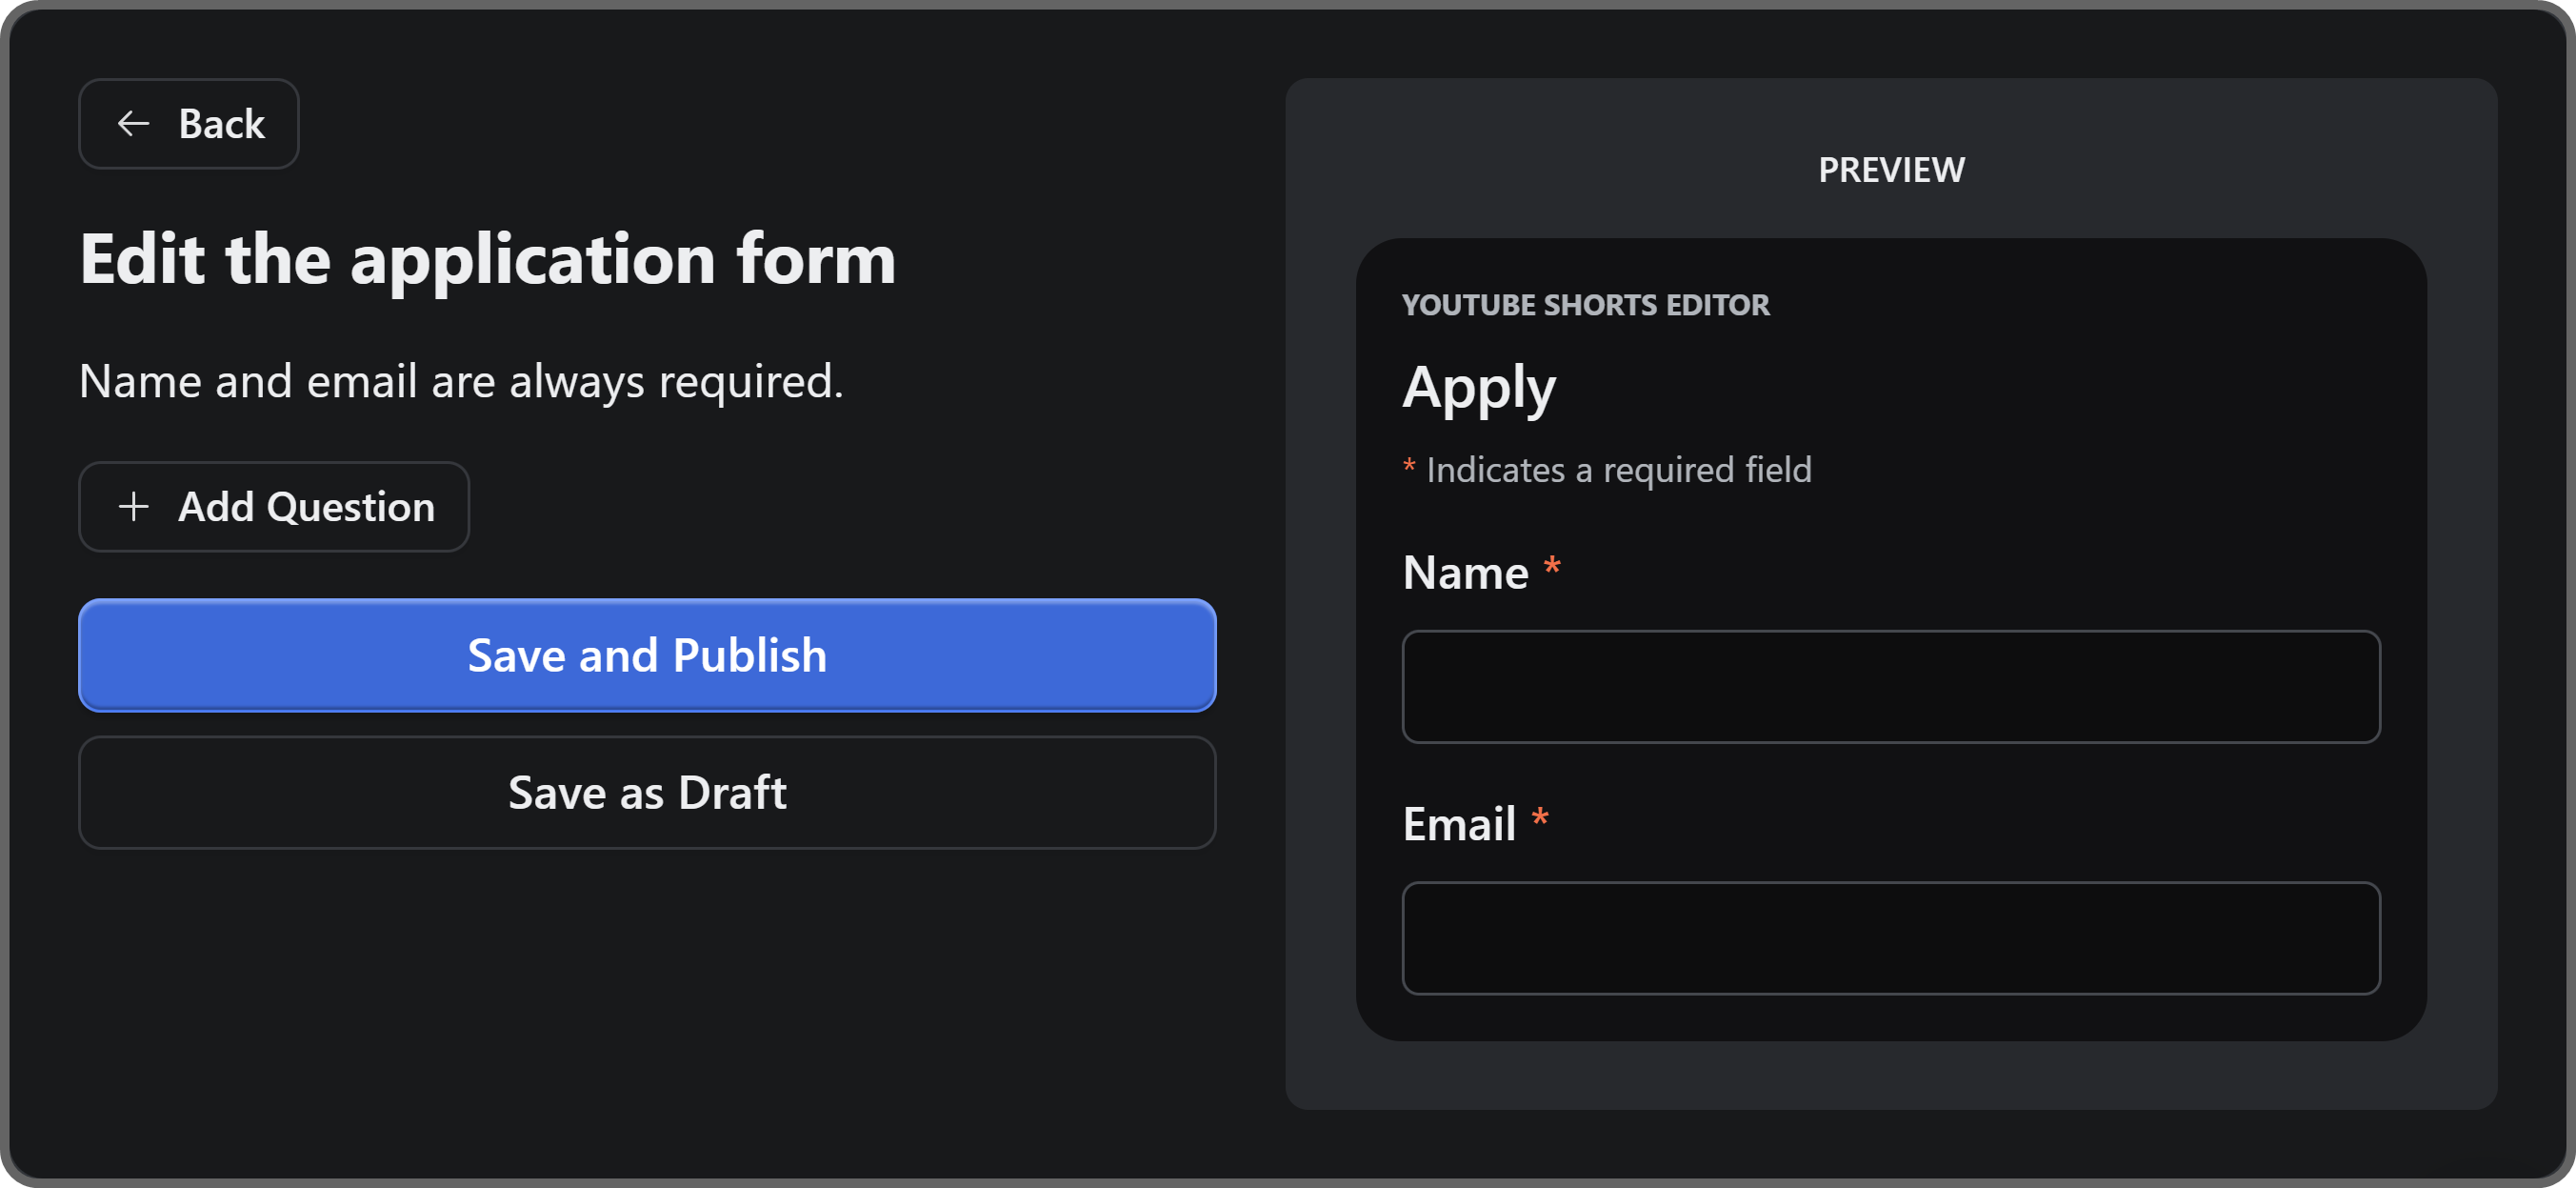
After clicking the Add Question button, a Short answer question (by default) will be added to the form. You can change the question type by clicking on its dropdown menu and selecting Short answer, Long answer, Select dropdown, or File upload.
For each question type, you should input a label for it, and toggle whether the question is required or not by using the toggle button at the bottom right of it.
You can change the order of the questions using the up and down arrow buttons or delete them using the trash can icon. Once you're done with the questions, click the Save and Publish button at the bottom left of the popup to publish the job posting.
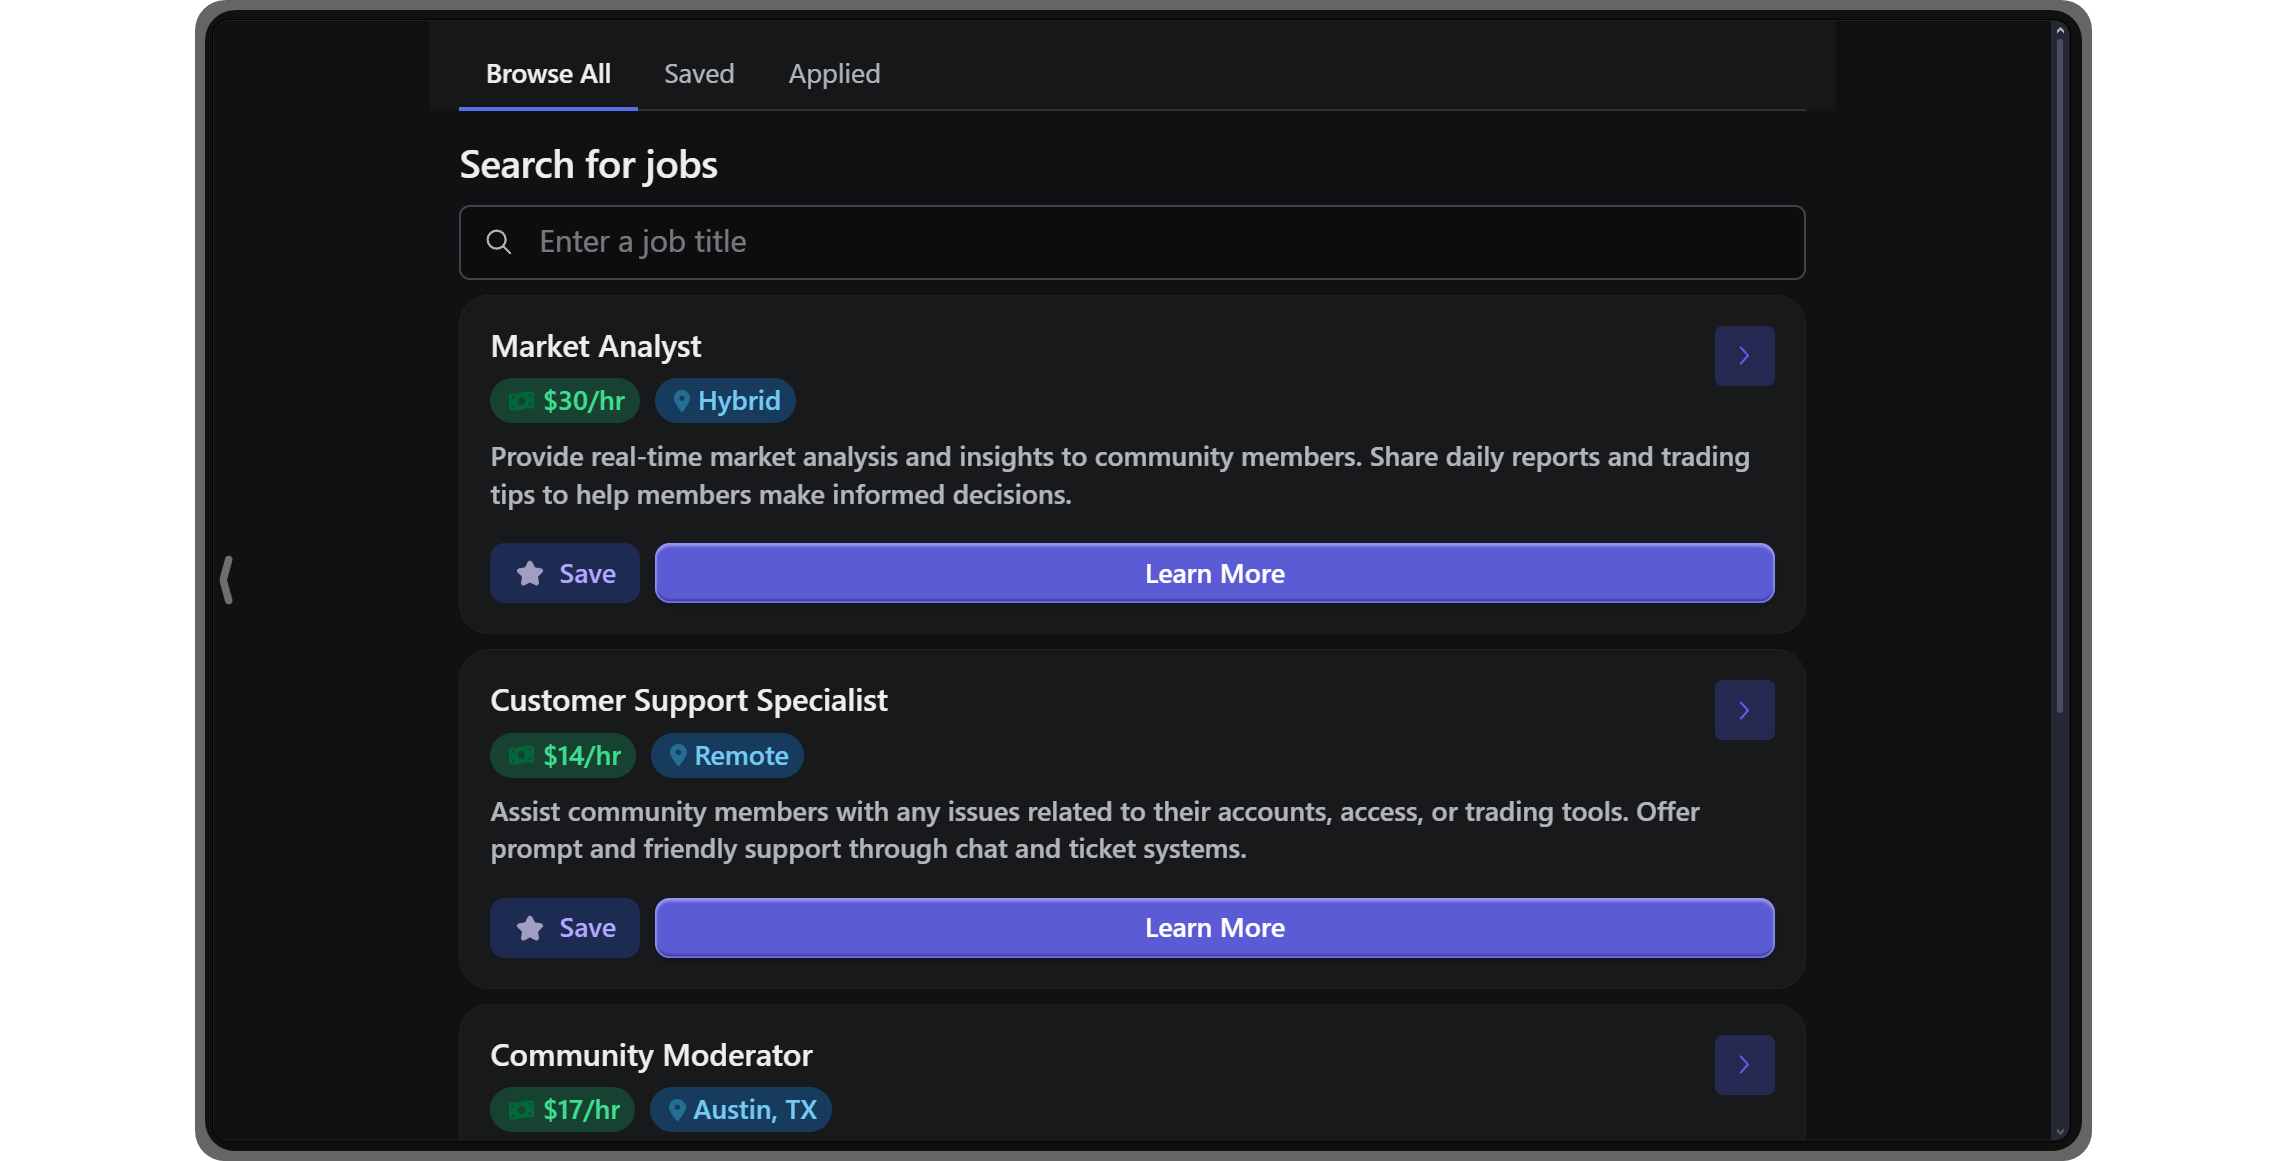
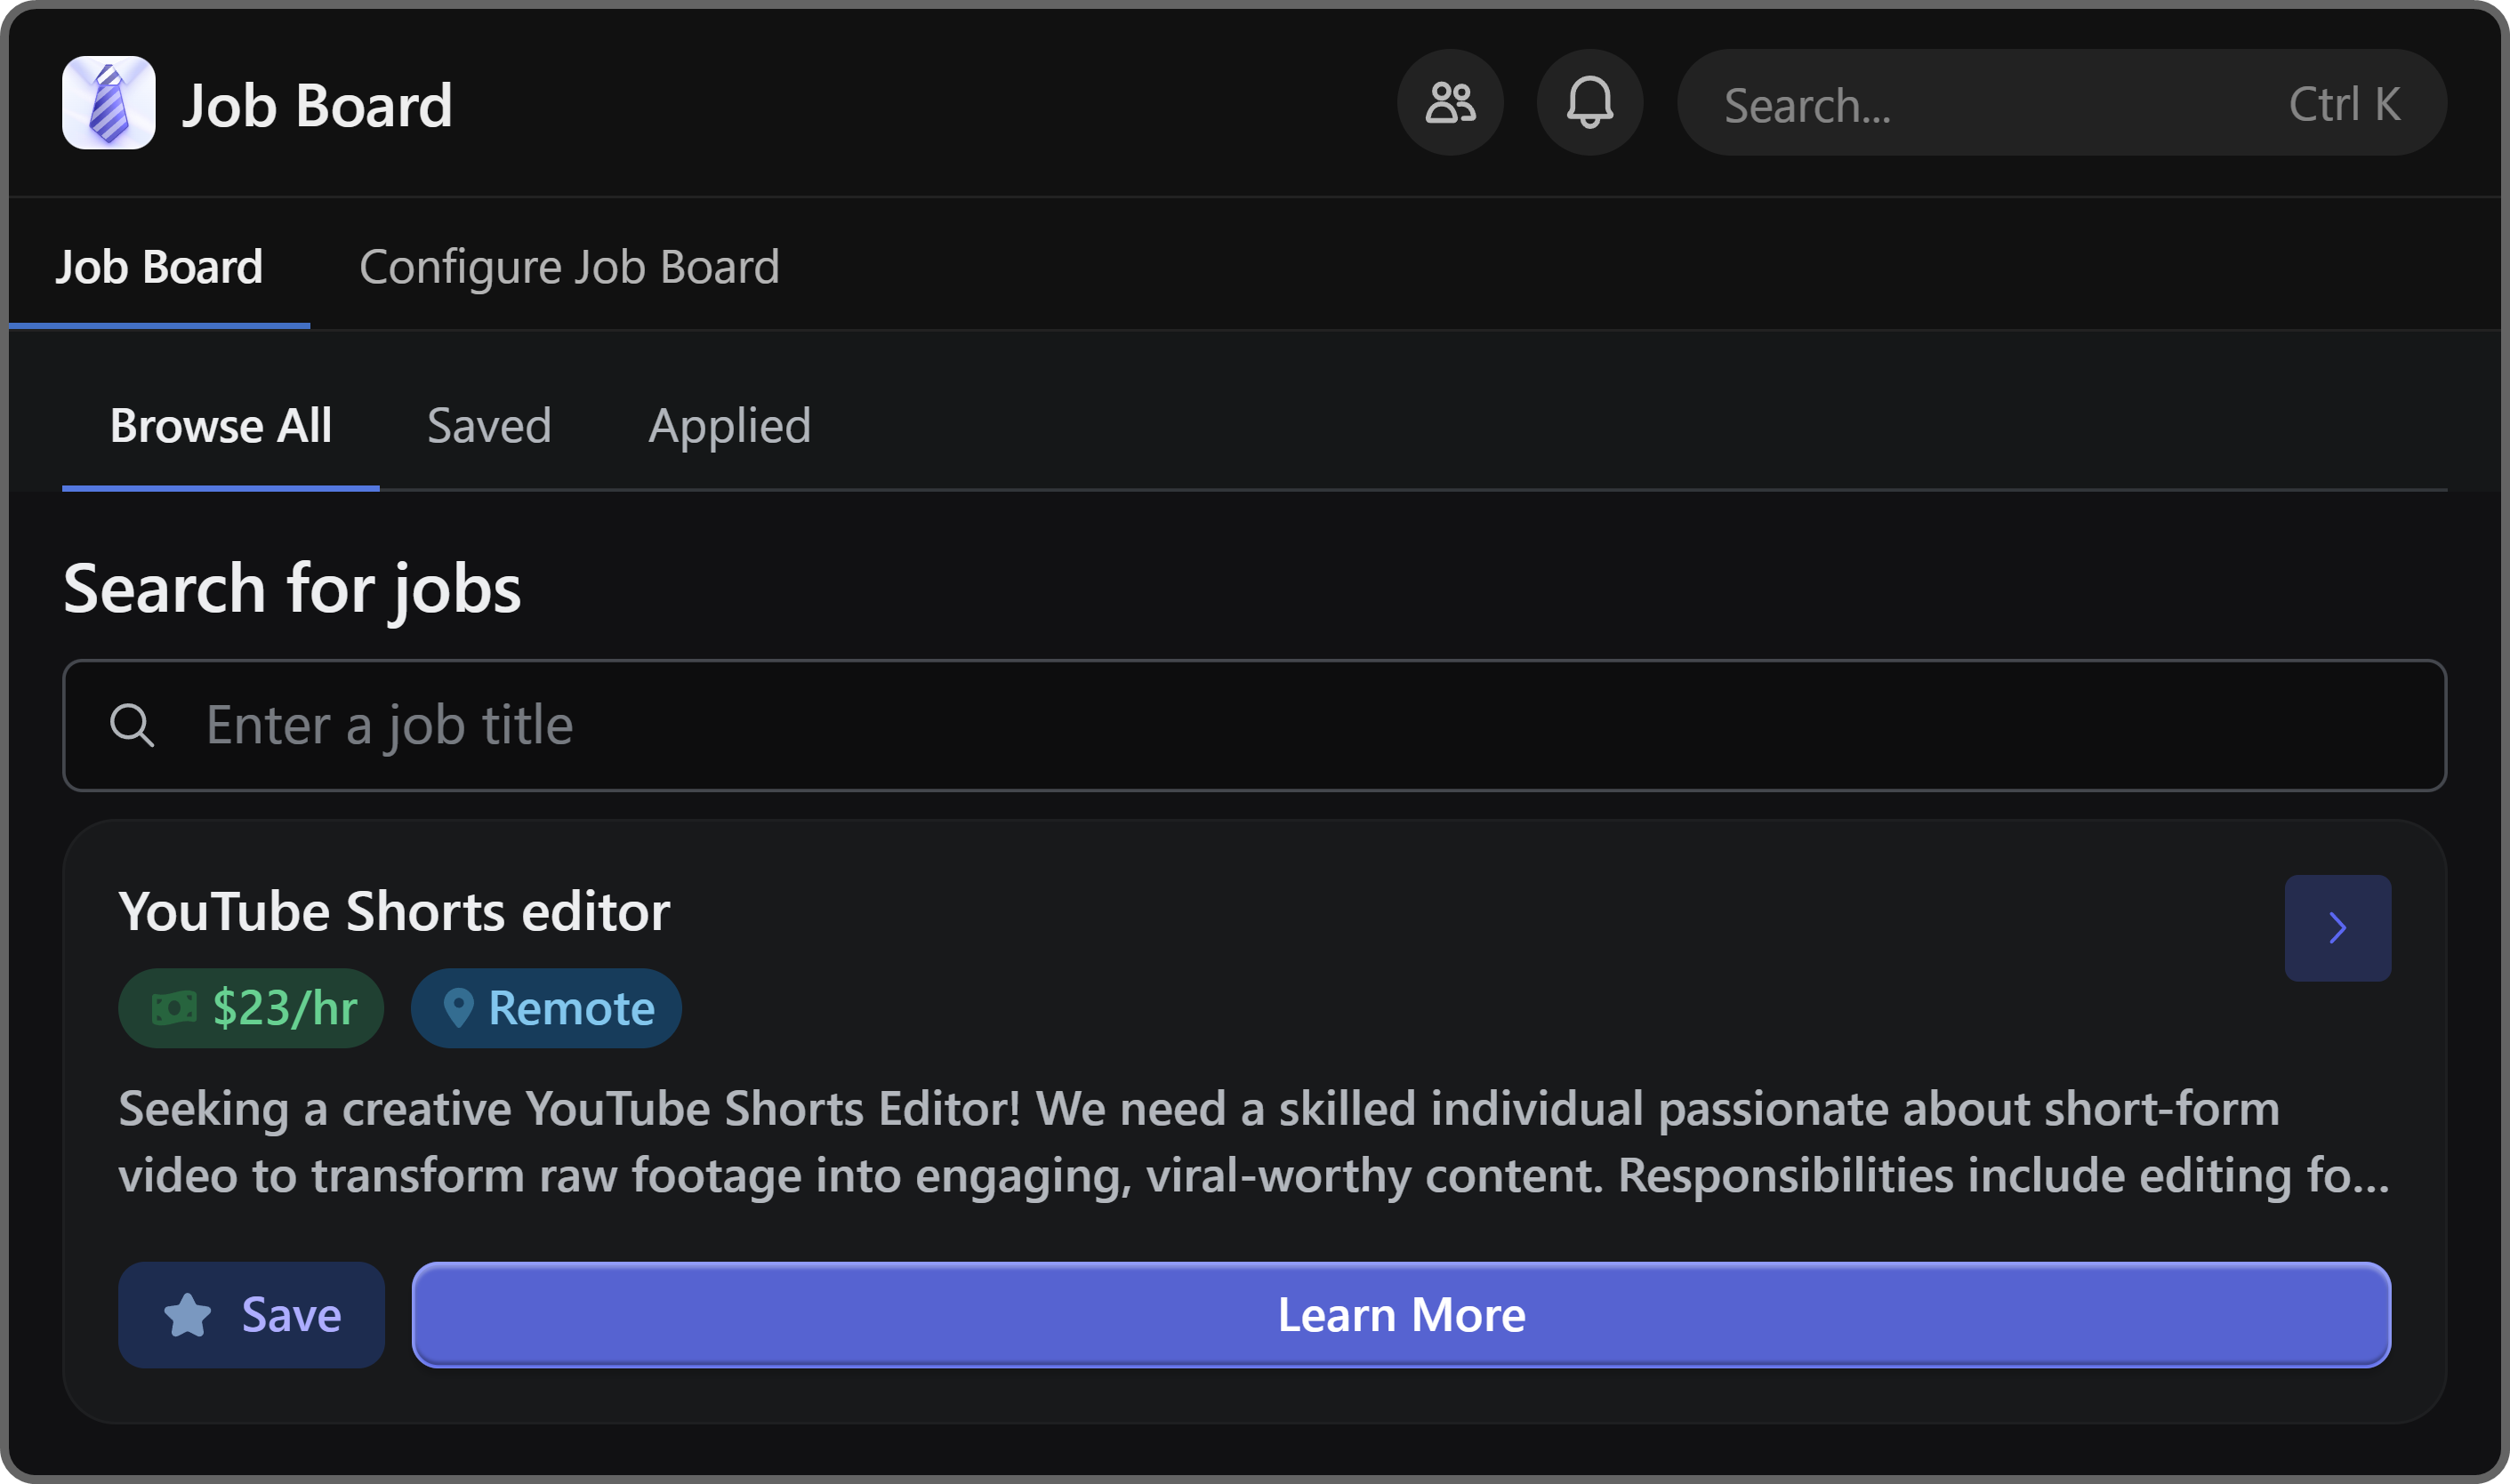
Now that you've published a job posting, let's see how your regular members will see it. Click the Job Board button at the top left of the app to go to its regular preview mode.

There, you'll see that the job posting you just published is listed. Users can click the Save button at the bottom left of the job posting cards to save them to their Saved tab (at the top of the list) or Learn More to see the posting's details and apply.
Start selling access to your whop
Thousands of people have been using Whop to create their dream digital platforms, and many of them monetize them using paid products. Features like 7/24 support, advanced analytics, an easy-to-use dashboard, and unlimited customization options help you create the perfect digital platform in a very short time.
Singing up to Whop, creating your own hub (whop), and starting to sell access to it takes less than 10 minutes. Don’t wait any longer, sign up today.


