In this blog, we will breakdown how to add discord roles to your server, set up your moderation roles and start premium discord roles
Key takeaways
- Role hierarchy determines permission priority, so position roles carefully to ensure proper access control.
- Premium Discord roles can be monetized through Whop to create paid membership tiers and exclusive content access.
- Temporary roles create urgency and exclusivity for events or trial periods, potentially converting users to paid subscribers.
Want to learn how to create roles on Discord? You've come to the right place - as our comprehensive guide to adding roles in Discord will help you navigate this process from start to finish. When you have the best bot for Discord servers, this task is as easy as a few clicks, and voila - you're done!
As the owner or administrator of a Discord server, you have a lot of responsibility. Not only do you have to manage the server and keep it running smoothly, but you also have to ensure that all of the members of your community feel welcome and included.
One of the ways you can do this is by properly utilizing Discord roles. These are a great way to give members of your server different levels of access and responsibility. For example, you might want to give certain members the ability to moderate the chat or manage other members. Other members may not be qualified for that responsibility.
The hard part is coming up with a system of choosing/upgrading roles. but that's where we come in. In this article, we’ll show you how to add roles to a Discord server so that you can take advantage of all that they have to offer! First, here's a brief introduction to this topic...
What are Discord roles?
Before we can teach you how to create roles on Discord, we want to explain what this is - and why you should be interested in undertaking this task in the first place.
Discord roles are a great way to give your users different permissions on your server. For example, you can give one role ‘Chat’ access to your server’s chat and another role ‘Voice’ access to your server’s voice chat. This way, you can easily control who can do what on your server.
Roles also give you the ability to give your users different colors in chat. For example, you can give your ‘member’ role a green color and your ‘moderator’ role a red color. This way, users will know at a glance who is a member and who is a moderator.
If you are looking for a way to give your users different permissions on your server, then roles are the way to go! But how do you add roles on Discord? Find out below as we walk you step by step through the process of how to create roles on Discord.
How to create roles on Discord: Step-by-step guide to adding Discord roles
You can see why the best online community is one in which the membership is broken up among different roles. This creates a sense of hierarchy in your community, and you and your members alike will appreciate the organization and structure that come with it.
Plus, adding roles on Discord allows you to pass off the moderation to your members - so you have more time to create content for the group or grow your Discord server in other ways. Other benefits included enhanced user recognition and status for your most loyal members, better communication throughout the server, and customization for your unique community.
Now the question becomes - how do you add roles on Discord? Don't sweat it - we're going to teach you how to create roles on Discord below. It's actually a lot easier than you may initially assume. If you’re interested in adding more roles to your server, these two steps will demonstrate how to add roles in Discord.
Step 1: Go to roles page
Click on your server name to open the drop-down menu, then click on Server Settings. Once the settings page opens, click on the Roles tab. For this example, we have created a test server. Then it shows you all the roles you created with also a list to show how many users have that role.

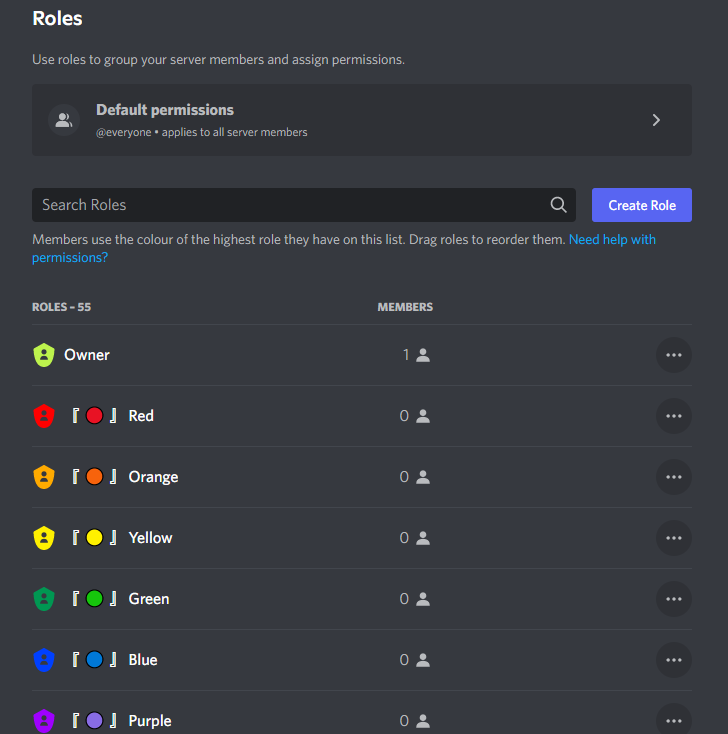
You can create a new role by clicking the button "Create Role".
Step 2: Customizing the role
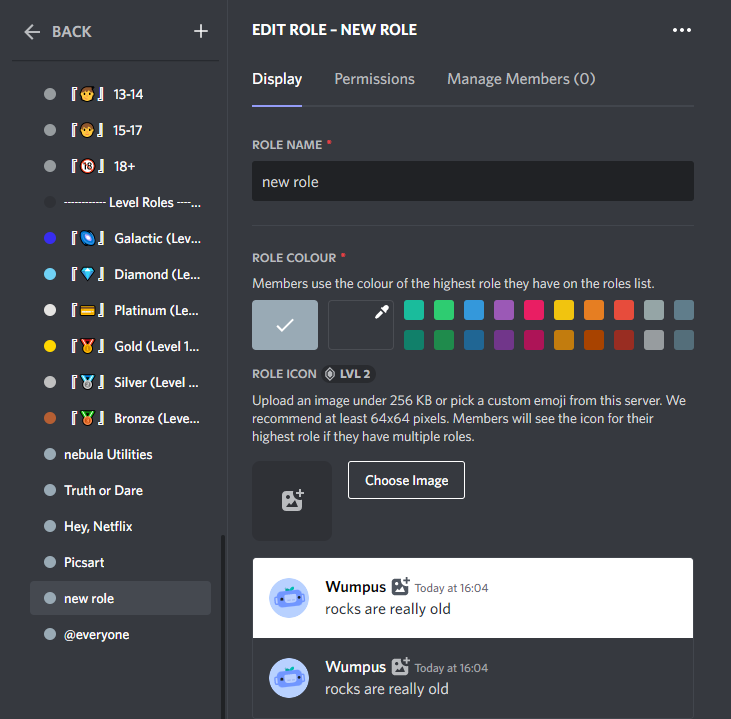
After clicking on the button, you will be redirected here. From here you will find three tabs: Display, Permissions, and Manage Members.
Display: The display tab allows you to customize how your role looks and the name and the color with separate visibility from users. You can also add role icons, which is pretty great stuff in itself but your server will need a Level 2 Boost.
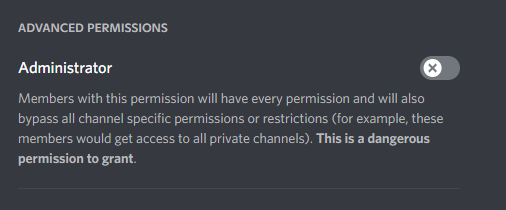
Permission: The permission tab allows you to set permission for a certain role. These include seeing the channel, sending messages, sending media, and managing the server. You have to be careful with that as Administrator Access to any role can grant your users control of the server.
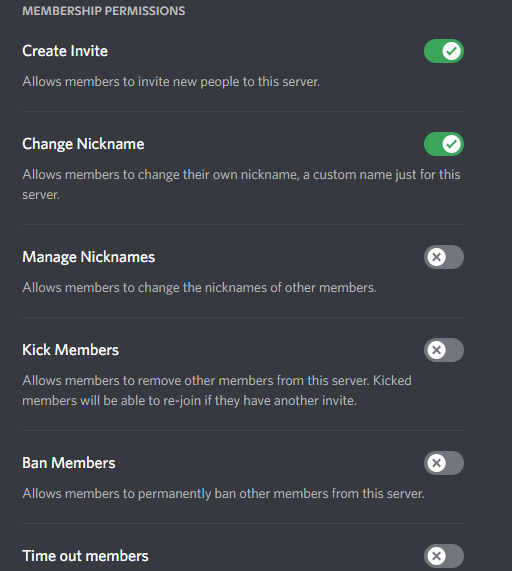

Currently, these are the permission available during the customization of a role.
Create Invite; Change Nickname; View Channels; Send Messages; Embed Links; Attach Files; Read Message History; Mention @everyone,@here, and All Roles; Use External Emojis; Add Reactions; Use Slash Commands; Connect; Speak; Video; Use Voice Activity
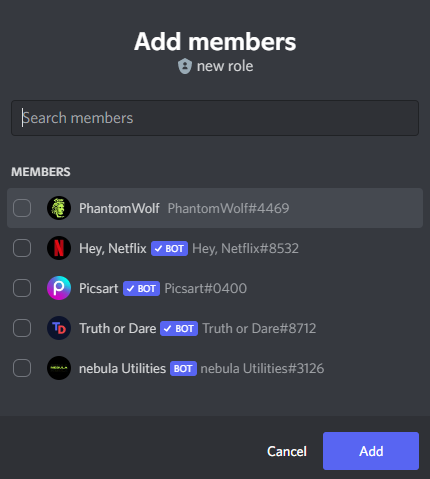
Manage members: From this tab you can assign users role. You can select specific users from this menu.
- View channels— This permission controls a user’s ability to see content in a server. If this permission is disabled, a user cannot read any text because they will not be able to see the text channels. The same goes for using voice channels, a user might have permission to connect to voice channels, but they will not see any voice channels to connect to for as long as this permission is disabled for them.
- Send messages — Mostly self-explanatory, it controls if a user can send messages in a text channel. If this permission is later disabled for a user, the user will no longer be able to edit any of their previously sent messages in that channel.
You can control your server in many ways with permissions, such as giving people the ability to manage messages and channels. Managing a server requires permissions. Let's look at some of them.
- Manage messages — This permission grants the ability to delete other users’ messages or pin messages in a channel. They also can manage reactions to a message, which means they can delete other users’ reactions.
- Manage channels — Anyone who has this permission can create, delete, rename, and reorder any channels or categories that they can see. It also allows someone to edit a channel’s topic along with other channel-specific settings.
Permissions have a powerful impact on the success or failure of any Discord server. For now, let’s take a closer look at Role Hierarchy.
Once you've created Discord server roles, configure your role tierarchy
The Role Hierarchy you use may alter how users interact with your service. The sequence in which roles are listed on the Roles page is referred to as the "role hierarchy." When determining permissions, a role that is higher than another role will be given priority and will appear higher on the sidebar.
I'll utilize my Owner role and another role to put my user account above the Administrator account in order to observe how Role Hierarchy directly impacts users. With the exception of name and color, I created a Second Role and positioned it above my Owner Role. Simply click and drag roles up or down on the Roles page, and click Save Changes
The access and control privileges granted can vary based on the order of roles. As an example, the Manage Roles permission restricts a user's access to managing roles to those beneath their highest position. In this situation, you would need to ensure that the role with that particular permission is listed before the roles it needs to control.
Furthermore, when it comes to controlling channel access, Role Hierarchy and permissions are tightly associated. You can grant and revoke access to a channel in accordance with your channel permissions, but if your responsibilities are in the wrong sequence, this action could not have the intended outcome.
Now that you know how to add roles to a Discord server, here are some tips for making the most of this tactic...
Now that you understand what Discord roles are and how to add roles to a Discord server, here are a few ways you can use them to make the most of your Whop subscription.
Make a moderator role
In addition to users and channels, Discord roles are one of the fundamental parts that make up the permission system. Roles in Discord offer a simple way to control member behavior on both your server and in certain conversations. In fact, this is among the most common reasons creators come to us wondering how to add roles to a Discord server.
It would be simple for someone with a moderator role to prohibit or mute a user who breaches your server's terms of service, for instance. Alternatively, you may alter their Discord role to one that has fewer rights and permissions, perhaps one that prevents them from sending messages.
Add a premium Discord role(s)
With Discord roles, it's simple to allow all users on your server to watch and interact in a public channel while limiting access to certain channels to those who have a specific role (for example, premium).
They will have to pay a charge in order to have this role and access to this content. Give users a role that will enable them to do so and then silence them if you want them to ask a question. Everyone else can play a role that limits their abilities to listening.
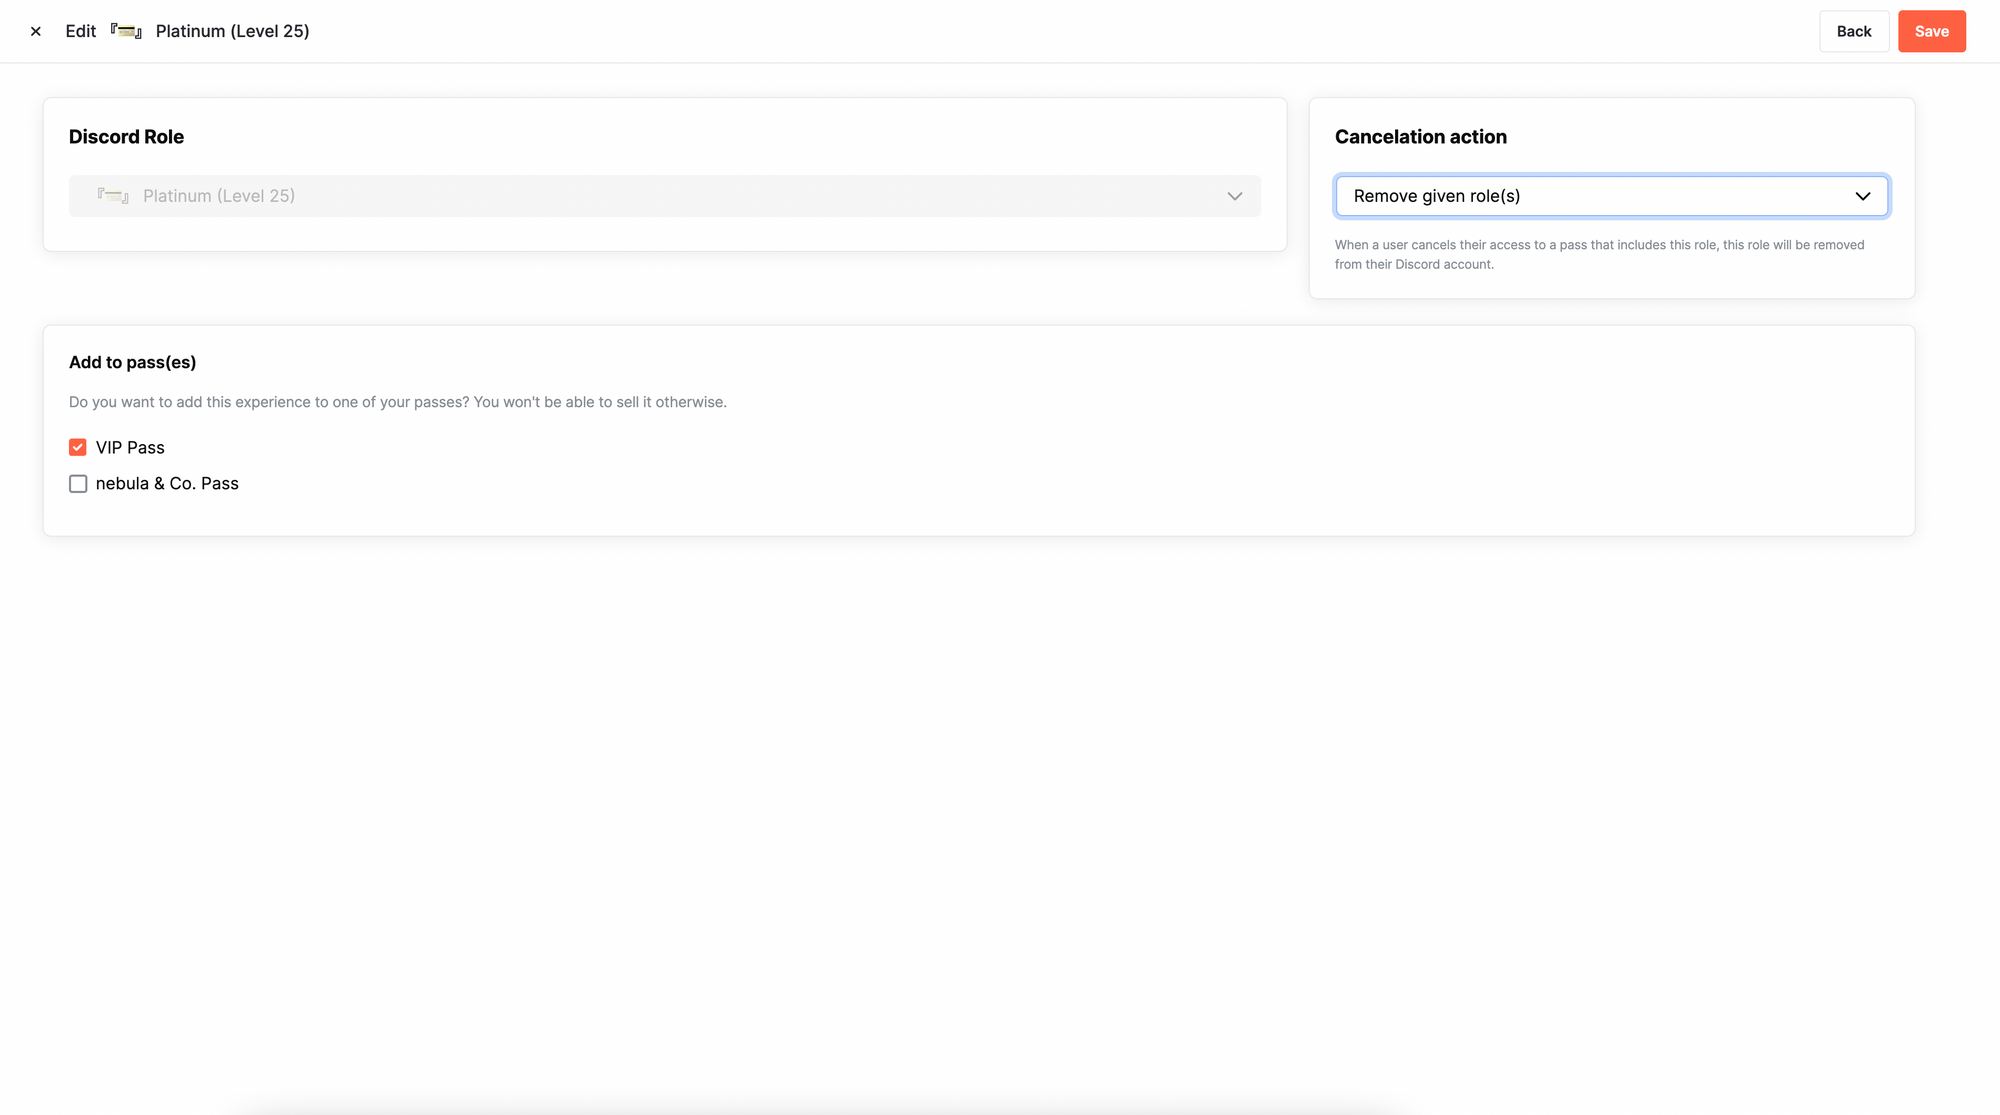
You can add a Premium Role by going and adding your Community in Whop's Website. From there on the Dashboard, you can choose Add Pass and name your Pass anything you like.
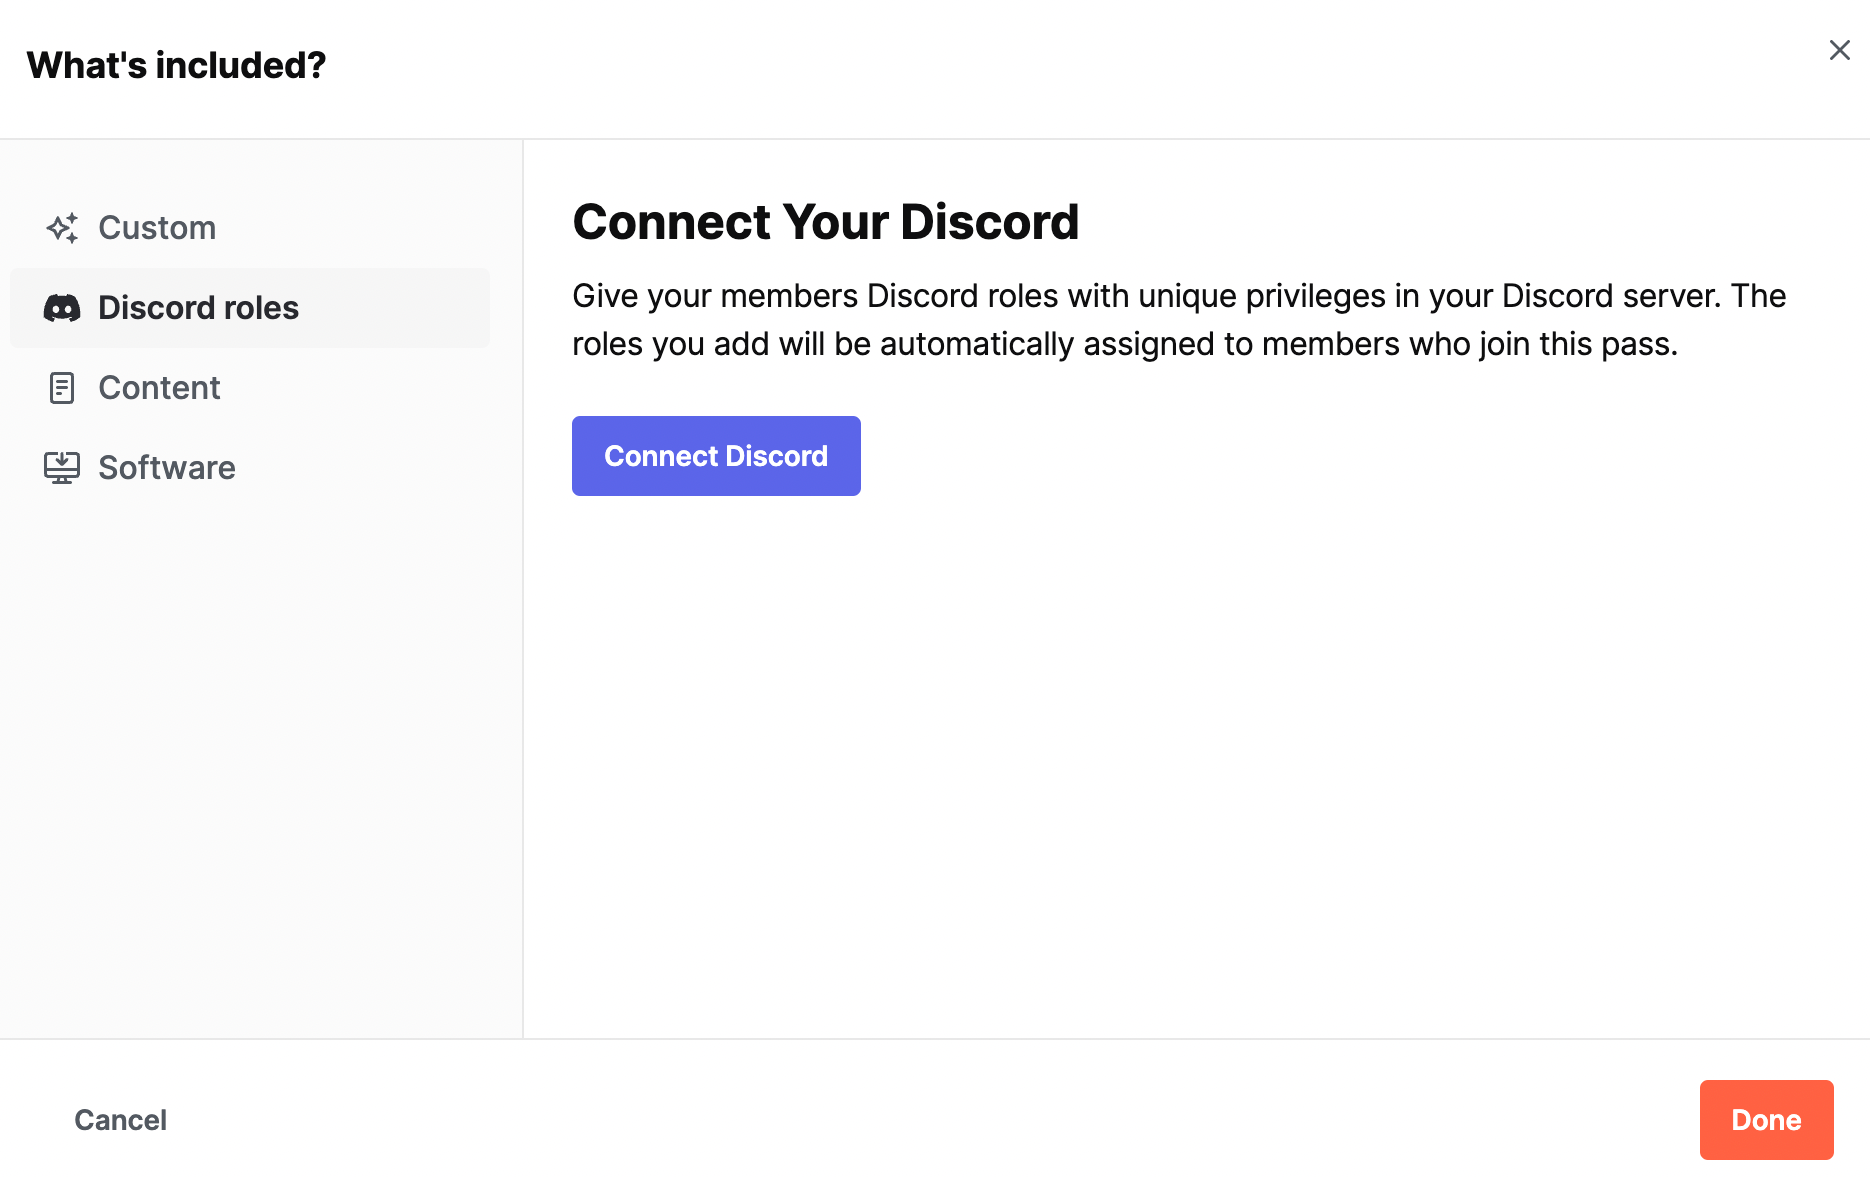
After that select Discord Roles and then a pop-up opens which shows you to Connect your Discord. From there you have to add Whop's Official Bot and then do the few steps shown and then you're good to go!
In this example, I have made a VIP Pass for Platinum Role. But, this is just one example of how you can go about it. Get creative and do what makes the most sense for your unique community!
Create a temporary role
Creating a temporary role can be a strategic way to enhance engagement and manage access during special events, promotions, or trial periods. Here's a brief guide on how to create roles on Discord for temporary use:
- Create the role: Navigate to your server settings, select the "Roles" tab, and click "Create Role". Customize the role's name, color, and permissions to suit the event or promotion.
- Assign the role: Manually assign the temporary role to relevant users or use a bot to automate the process based on specific criteria, such as event sign-ups.
- Set a time limit: Discord doesn't natively support time-limited roles, so use a bot or a reminder to track when the role should be removed. Schedule the role's removal at the end of the event or trial period.
- Remove the role: After the time limit, remove the temporary role from users, either manually or using a bot.
Temporary roles can create a sense of urgency and exclusivity, encouraging users to participate in events or activities while keeping your server organized. Offering trial access to premium content through temporary roles can also give users a taste of the benefits, potentially leading to paid subscriptions or higher-tier role upgrades. By implementing temporary roles, you can effectively manage access to content and boost user engagement during special occasions.
Make adding roles on Discord easy with Whop
Whop is the best Discord bot because it can help you automate the process of creating roles - and it can even serve as a Discord membership bot!
You can effortlessly create, monetize, and manage your community using Whop - saving valuable time to worry about more important tasks. Learn more in our article on how to charge access to Discord.
Parting thoughts on how to create roles on Discord servers
There you have it - how to create roles on Discord servers step by step. In the end, Discord roles give you a world of limitless options for personalizing your server and addressing your unique demands. By customizing your Discord roles, you can make the most of your new paid Discord server and guarantee that every one of your members has a unique experience.
We're dedicated to helping you make the most of your discord communities. Check out some of our articles like how to build an online community in the first place (including specific tips for Discord server creation), Guilded vs Discord, the best Discord rules, how to boost a Discord server, reselling Discord servers, and more.
But for now, it's time to get to work adding roles on Discord. Now that you know how to add roles to a Discord server, what are you waiting for?
👉 Want to find out how to monetize your Discord server with Whop? Click here to get get started.