
Your whop is your new home on the internet, where you can sell digital products, create communities, and monetize your skills and knowledge. Learn how to set up your own whop in this guide.
Key takeaways
- Whops are free, customizable hubs that combine community, commerce, and apps for any business model.
- Flexible pricing options let you offer free access, one-time purchases, or recurring subscriptions.
- Advanced features like waitlists, custom questions, and auto-expiring access help control member onboarding.
Here on Whop you can now create your very own whops - but you may be wondering what they are and how you can use them. That's exactly what we will explain in this guide.
You can think of a whop as a space for community, connection, and commerce. Whether you are hosting a gaming group, ecommerce community, coaching calls, or even a book club, you can host it on your whop.
Plus, unlike other social platforms, your whop can be adapted to your needs using apps.
What's the difference between a Whop and whop?
Well, 'Whop' is us, the social commerce platform for selling online.
A 'whop' is your own online hub, the space for your business and community
Let’s look at a couple of use cases.
- First, say you have a community that shares sports picks - you can add a Chat app for your users to communicate with each other, the Sports app to share NBA picks, NFL picks, MLB picks (or any other sports picks), the Guess The Score app for members to enter competitions, and the Courses app to sell a betting-focused course.
- Now, let's imagine a totally different scenario. You're simply a creator who wants to sell access to your SaaS, without managing a community. With your whop, you use the Web app or Software app, the Suggestions app to gather valuable feedback, and the Forum app for community Q&A.
Now, you have a place where your users can subscribe to become a member, ask questions, and give feedback - all in one space.
As you can see, you can customize your whop to your business model. Setting up the perfect whop for your business can be easily done by investing a little time.
But first, you need to actually create one - let’s see how you can do that.
How to create a whop
Everyone can create a whop, and it's completely free to do so.
On the onboarding screen, you’re going to see the intro to Whop - watch it to see what your future holds.
Then, let's click the Create your whop button to start your journey. This is going to display our onboarding page.

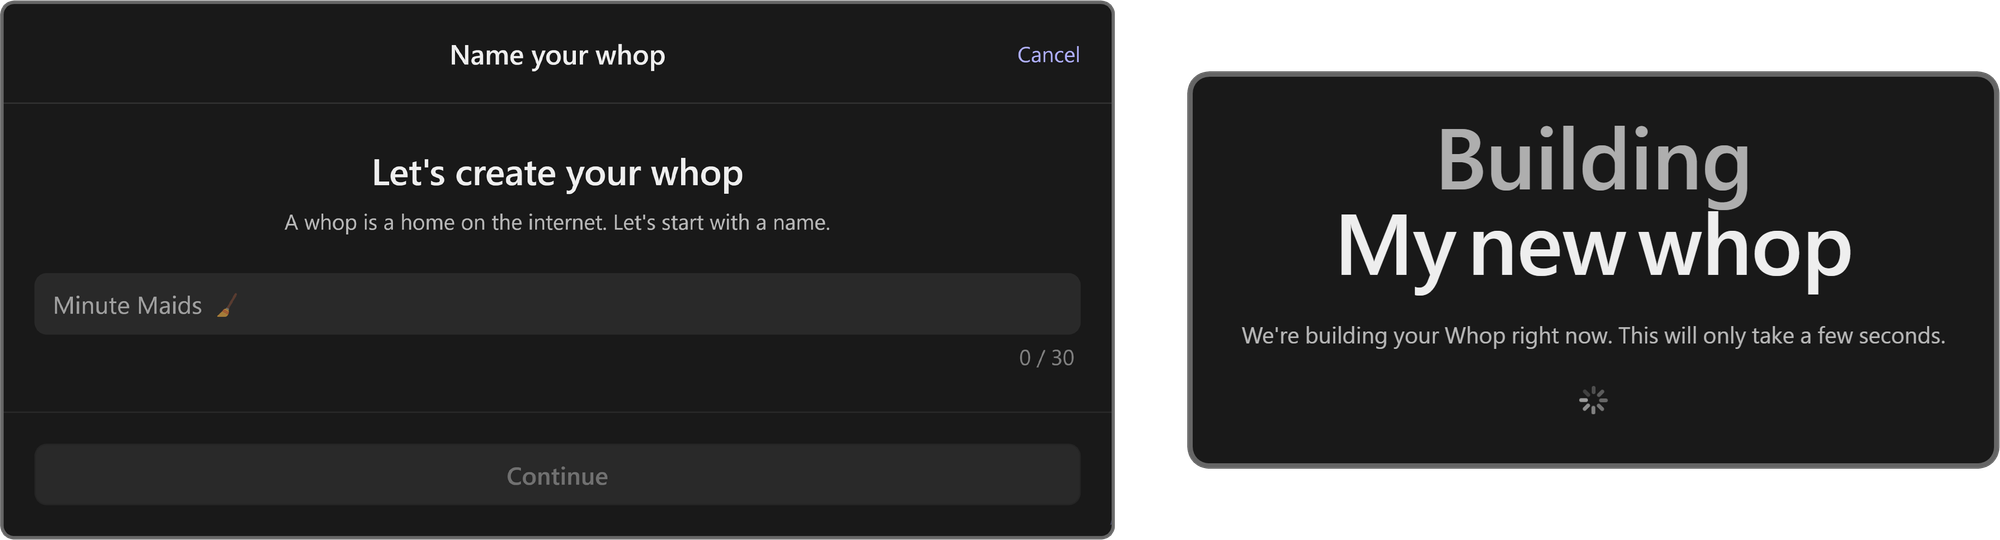
In the onboarding page, you're going to see an input field prompting you to name your whop. After giving your whop a name, you'll be prompted to select its URL as well.
Keep in mind that whop names have a character cap of 30. After inputting your whop's name, click the Continue button at the bottom of the popup to proceed.
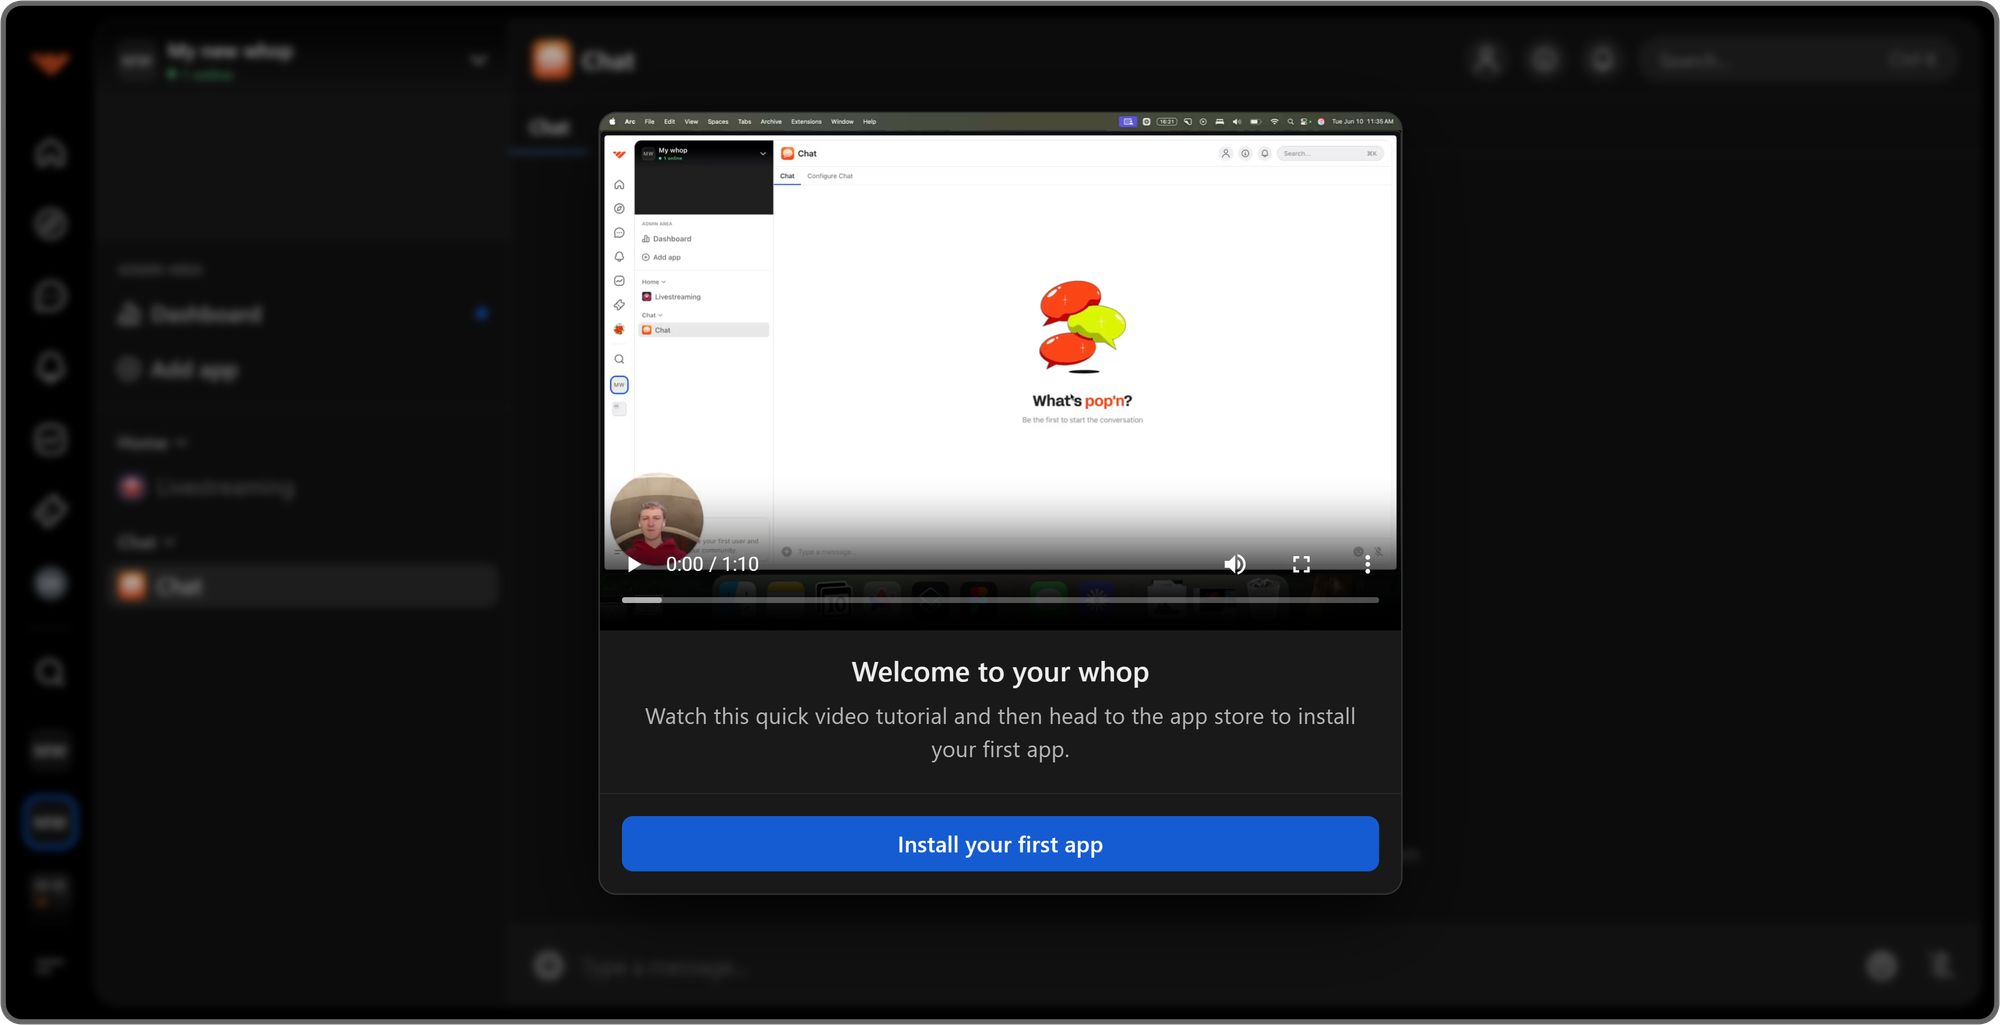
After your whop is created, you'll be taken to it and welcomed with a popup video prompting you to install your first app to your whop. Click Install your first app to open the App Store, where you'll find apps from Whop and independent developers.
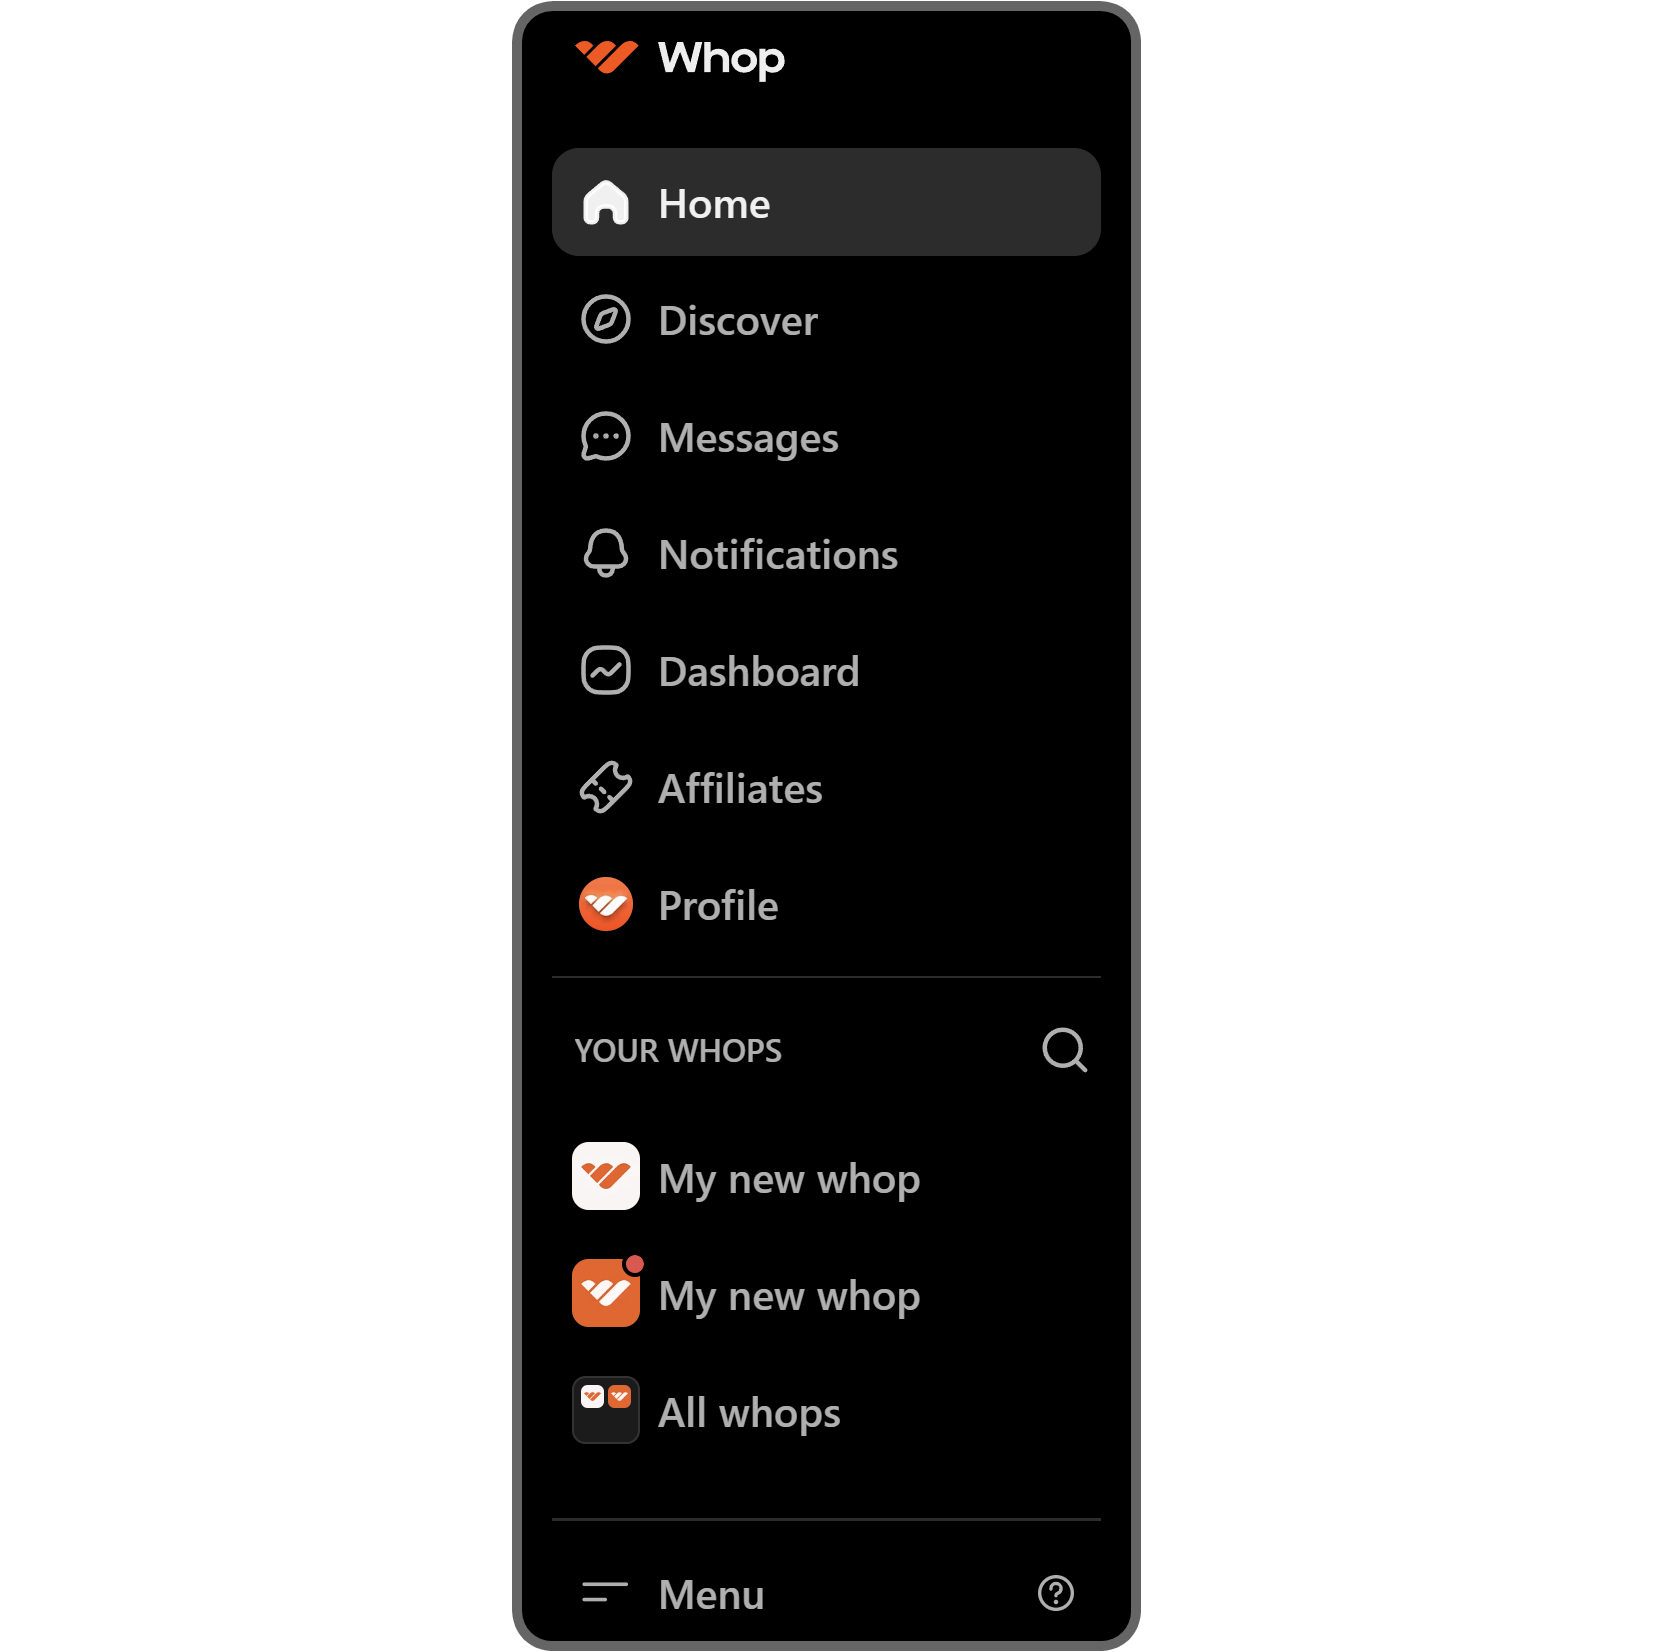
Let's also examine the navigation bar on the left side of your screen so that you know how to navigate Whop:
- Home: This will direct you to your Whop 4.0 feed, where you can see all your Whop activity.
- Discover: This will direct you to the Discover section, where you can find other whops and apps.
- Messages: This will direct you to your private DMs and group chats.
- Notifications: This will direct you to your notifications page, where you can find all activity notifications from the whops you're a member of, or specifically your mentions.
- Dashboard: This will direct you to your Whop Dashboard, where you can find all sorts of analytics about your whops and access advanced settings like promo codes, affiliates, resolution center, and more.
- Affiliates: This will direct you to your affiliates page, where you can find all the details about your affiliate links and their analytics.
- Profile: This will direct you to your profile page, where you can find your general profile settings, connected accounts, payment methods, balance, and more.
- Your whops: This shows your pinned whops. Use the search button at the top right to find specific whops, or click All whops at the bottom to see every whop you've joined. You can pin or unpin whops from the full list.
Adding apps to your whop
Adding apps to your whop takes just two clicks, and the updated Whop App Store has more options than ever. In the App Store, you'll find apps from both Whop and independent developers, from community tools to AI betting analytics.
Let's take a look at the steps of adding apps to your whop:
- Click the Add app button at the top left of your whop. This is going to take you to the App Store.
- In the App Store, find the app you want and click its Add button. The app will be added instantly, and you'll be taken to it.
After you add an app to your whop, you'll see it listed in the apps list on the left.
Adding apps to your whop is that easy. Now, you can use the Edit app settings button of the apps you've added to change settings like app icon, name, description, visibility, screenshot protection, and more. You can also remove apps from your whop using its settings menu.
If you want to learn more about adding apps to your whop, adjusting their settings, and removing them if needed, check out our guide on adding apps to a whop.

Creating pricing options for your whop
Creating pricing options is just as easy. The first thing you're going to do is click on the context menu button (down arrow) of your whop. This is going to display a bunch of options like View dashboard, Design store page, and Manage pricing. There, select the Manage pricing option.
Doing this will display the Manage pricing popup on the right side of your screen. There, you can see all of your active and archived pricing options.
Since you probably don't have any, let's click on the Create pricing option to add one.
Once you click on the Create pricing option button, a popup will appear on the right with three pricing option types: Free, One-time, and Recurring.
If you choose the Free option here, everyone on the internet will be able to access your whop and its contents. If you select one of the paid options (One-time or Recurring), however, only paying people can become members of your whop.
Each pricing option type has its own unique settings, so let's break them down one-by-one.
Creating a free pricing option
After selecting the Free option, you can go ahead and click the Create button at the bottom of the popup to publish it, but that's not all. There are more settings you can customize.
Let's click the Advanced options dropdown button to see more settings:
- Stock: All pricing options on Whop have unlimited stock by default - inputting a number in the Stock input field will determine how many times the pricing option can be used by users
- Description: The description you add to your pricing option will be displayed to the users on the checkout page
- Show on store page: Selecting this option makes your pricing option public. If you disable it, only users with the private link can access it
- Add a waitlist: Enabling the waitlist option will make your users join a waitlist and wait for you to admit or reject them, which you can do so using your dashboard
Below the waitlist, you'll see the Ask questions before checkout option. Enable this to see four fields: the question, answer placeholder, an optional toggle, and an Add another question button. Users will have to answer the required questions before they can complete their purchase.
Continuing after the questions option, you're going to see three more:
- Auto-expire access: Selecting a timeframe from the dropdown menu of this setting will make your users lose access after the selected number of days
- Redirect after checkout: Adding a redirect URL to your pricing option will direct your users to the URL after they complete their purchase
- Add internal name: Giving your pricing option an internal name (which only your whop team can see) will make it easier for you to reference it in the future
Once you're done with all the settings, click the Create button to publish the pricing option.
Creating a one-time paid pricing option
If you select the One-time option as the pricing type, you're going to see the Price input field. While you can input a price and create the pricing option, you can also customize other settings, like the Free pricing type.
Below the Price field, you'll see two dropdowns: Advanced options and Payment methods. Let's click the Advanced options dropdown first and break down its contents.
The first setting you're going to see in the Advanced options section is the Stock. Pricing options have unlimited stock by default on Whop - inputting a number in the stock field will limit the number of uses the pricing option has.
Below that, you're going to see the Description field - it allows you to set a description for the pricing option, which will be displayed to the users at the checkout page.
If the Show on store page option is enabled, which it is by default, everyone on Whop will be able to use the pricing option. If you disable it, the option is hidden and can only be accessed via a private link.
Enabling the Add a waitlist option will make your members join a waitlist after their purchase is complete. You can then approve or reject them from your dashboard.
Next, you'll see the Ask questions before checkout setting, which shows four fields when enabled: the question, answer placeholder, optional toggle, and an Add another question button.
Users will have to answer the questions that you mark as required before they can complete their purchase.
The last three settings of the advanced options are:
- Auto-expire access: Selecting a timeframe or setting a custom one in this setting will automatically end the membership of the user after the period is done
- Redirect after checkout: This setting allows you to redirect your users to a custom URL once they complete their purchase
- Add internal name: This setting allows you to set a name that only your whop team will see for the pricing option, making it easier for you to differentiate pricing options
Lastly, under the Payment options dropdown, you're going to see the toggle options for the payment options like Card, ACH, PayPal, and Crypto. You can also click the Apply for financing button to go to the financing application form.
Once you're done with all the settings, click the Create button to publish the pricing option.
Creating a recurring paid (subscription) pricing option
When you select the Recurring option, you'll see three fields below the pricing type:
- Subscription price: This is the monthly recurring price of the pricing option
- Subscription period: This is how long a subscription is. You can either select a pre-defined time period or set a custom number of days
- Initial fee: This is how much you want your subscribers to pay during their initial subscription - you can leave it empty if you don't want to create an initial fee
Next, let's click the Advanced options dropdown to see other settings that allow you to customize your pricing option. The first setting you'll see is Stock. If you enter a number into the stock field, it will be the usage limit of the pricing option - once the option is used that many times, it will become unavailable.
Below that, you'll see the Free trial duration dropdown menu. You can either select a set time period or enter a custom number of days, which will let users access your whop for the time period before they get charged.
Enabling the Enable split pay (Installments) setting and inputting the number of allowed payments will let your users split the payment of their recurring payment into installments.
Next, you'll see the Offer a discount on cancellation setting, which lets you offer a percentage discount to users trying to cancel. You can also set how long the discount lasts: Forever, First payment, 3 months, 6 months, 1 year, or 2 years.
The Ask questions before checkout setting will display four fields when enabled: question, answer placeholder, an optional toggle, and a button to add another question. All users will be prompted to answer the required questions before they can join your whop after purchase.
The last two settings of the advanced options are:
- Redirect after checkout: This setting allows you to redirect your users to a custom URL once they complete their purchase
- Add internal name: Giving your pricing option an internal name, which only your whop team can see, will make it easier for you to differentiate pricing options
Below the Redirect URL setting, you're going to see the dropdown button for the Payment options section. Clicking on it will display the toggle buttons of the payment options and the Apply for financing button, which will take you to the financing application form.
Once you're done with all the settings, click the Create button to publish the pricing option.
What's next? Start earning with Whop
Now you know how to create a whop, you can create the foundation of your online business - and that’s a huge step. Applying the things you’ve learned in this guide will allow you to set up a whop that your future customers will want to be a member of - hence growing your whop and even making you generate an income.
Now, you should review each of the apps that can be added to whops, determine which ones you need, and set them up. After that, you should examine each section of your whop dashboard to adjust the settings of your whop - including the Finances - so you can start offering paid products and earning money.
If you want to learn more about Whop and whops from experienced members, make sure to join the Whop University.
Related articles


