
The Announcements app is one of the most popular apps on whop and the best way to communicate with your members. Read this guide to learn how to add, use, and configure the app on whop.
Key takeaways
- The Announcements app creates a dedicated space for publishing updates to members with customizable posting permissions.
- You can control who posts and comments, choosing between open access for everyone or admin-only restrictions.
- Email notifications and Discord webhook integration help ensure your announcements reach members across multiple channels.
Organizations of all kinds - no matter their purpose - require the ability to communicate with staff and members. Typically this is done with notifications, blog posts, announcement posts, and so on.
There are many ways to deliver announcements to your members in your whop, but the best way is to use the Announcements app, which is one of the most popular apps on the platform.
In this guide, we’re going to remember what Whop apps are, what the Announcements app is, how you can add it to your whop, and how you can use it.
What are Whop apps?
To easily understand what a Whop app is, think of them as the features of a platform. Think of a hypothetical platform that we’ll call “HypoChat.” It allows users to use chat rooms and voice channels to communicate with each other but doesn’t support video calls.
Another hypothetical platform, “HypoCall,” supports video calls but not chat rooms. On top of this, we were looking for a platform that could support online courses as well as chat rooms, voice calls, and video calls. Using these platforms, we have a single option: using three different platforms for our product/community.
This is where Whop comes in. By creating a whop and adding the Chat (chat rooms), Video Calls (voice and video calls), and the Courses (online courses) apps to it, you’ll end up with a platform that has all the features you look for and none that you don’t need.
Adding apps to a whop is free, and you can add as many apps as you want to your whop, including multiple instances of the same app - you can host tens of chat rooms, forums, video calls, courses, and Solana wallet trackers in a single whop.
What is the Announcements app on Whop?
One of the most powerful and popular apps on Whop is the Announcements app. As its name suggests, the goal of the Announcements app is to create a dedicated space for your whop team to publish announcements to the members of your whop.
The Announcements app is a mirror of the Forums app. Therefore, they’re almost identical - all settings apply to both. If you know how to use the Forums app, you can skip this guide and start using the Announcements app right away - if you don’t, you’ll learn how to with this guide.
How to add the Announcements app to your whop
Adding the Announcements app to your whop is super easy to do but before we walk you through how, you should have a whop to begin with. If you don’t, check out our guide on creating your first whop.
If you have a whop and you’re ready to go, let’s take a look at the steps of adding the Announcements app to your whop:
- Click the Manage apps button in the Your apps section to see the Edit apps popup
- Click the New app button in the Edit apps popup to see the available app list
- Find the Announcements app and click on it to see the app visibility popup
- Select the Visible option in the visibility popup and click Add to add the app to your whop
Adding the app to your whop was that easy. One thing you must keep in mind is that if you have two or more whops under the same organization, you’ll be able to see the Link existing app button below the New app button in the Edit apps popup. It allows you to create mirror instances of apps between whops - essentially making them share the same app.
How to use the Announcements app in your whop
After adding the Announcements app to your whop, you’ll see that the Preview as user mode is enabled. As its name suggests, it makes you see the app from the perspective of a regular user. This is where you’ll be able to publish announcements.
While the Preview as user mode is enabled, let’s publish an announcement together:
- Click the Title field to input a title for your announcement. Then, click the Write something… field to input the actual contents of your announcement.
- You have the option to attach files, GIFs, paywall the post, and add polls to it. Let’s test it out by clicking on the paywall button (dollar sign) and entering the cost of the post. You can also add a poll by clicking on the poll button (charts icon.)
- Click the Post button at the bottom right of the field to publish the post.
Congrats - you just published your first announcement. Of course, there’s more to the Announcements app than just doing this. As a team member of your whop, you have the option to configure the app’s settings. Let’s see how you can do that.
Configuring the settings of the Announcements app
To be able to see the settings of the Announcements app, you first have to click the Configure Announcements button at the top left of the app. This is going to display all of the app’s settings.

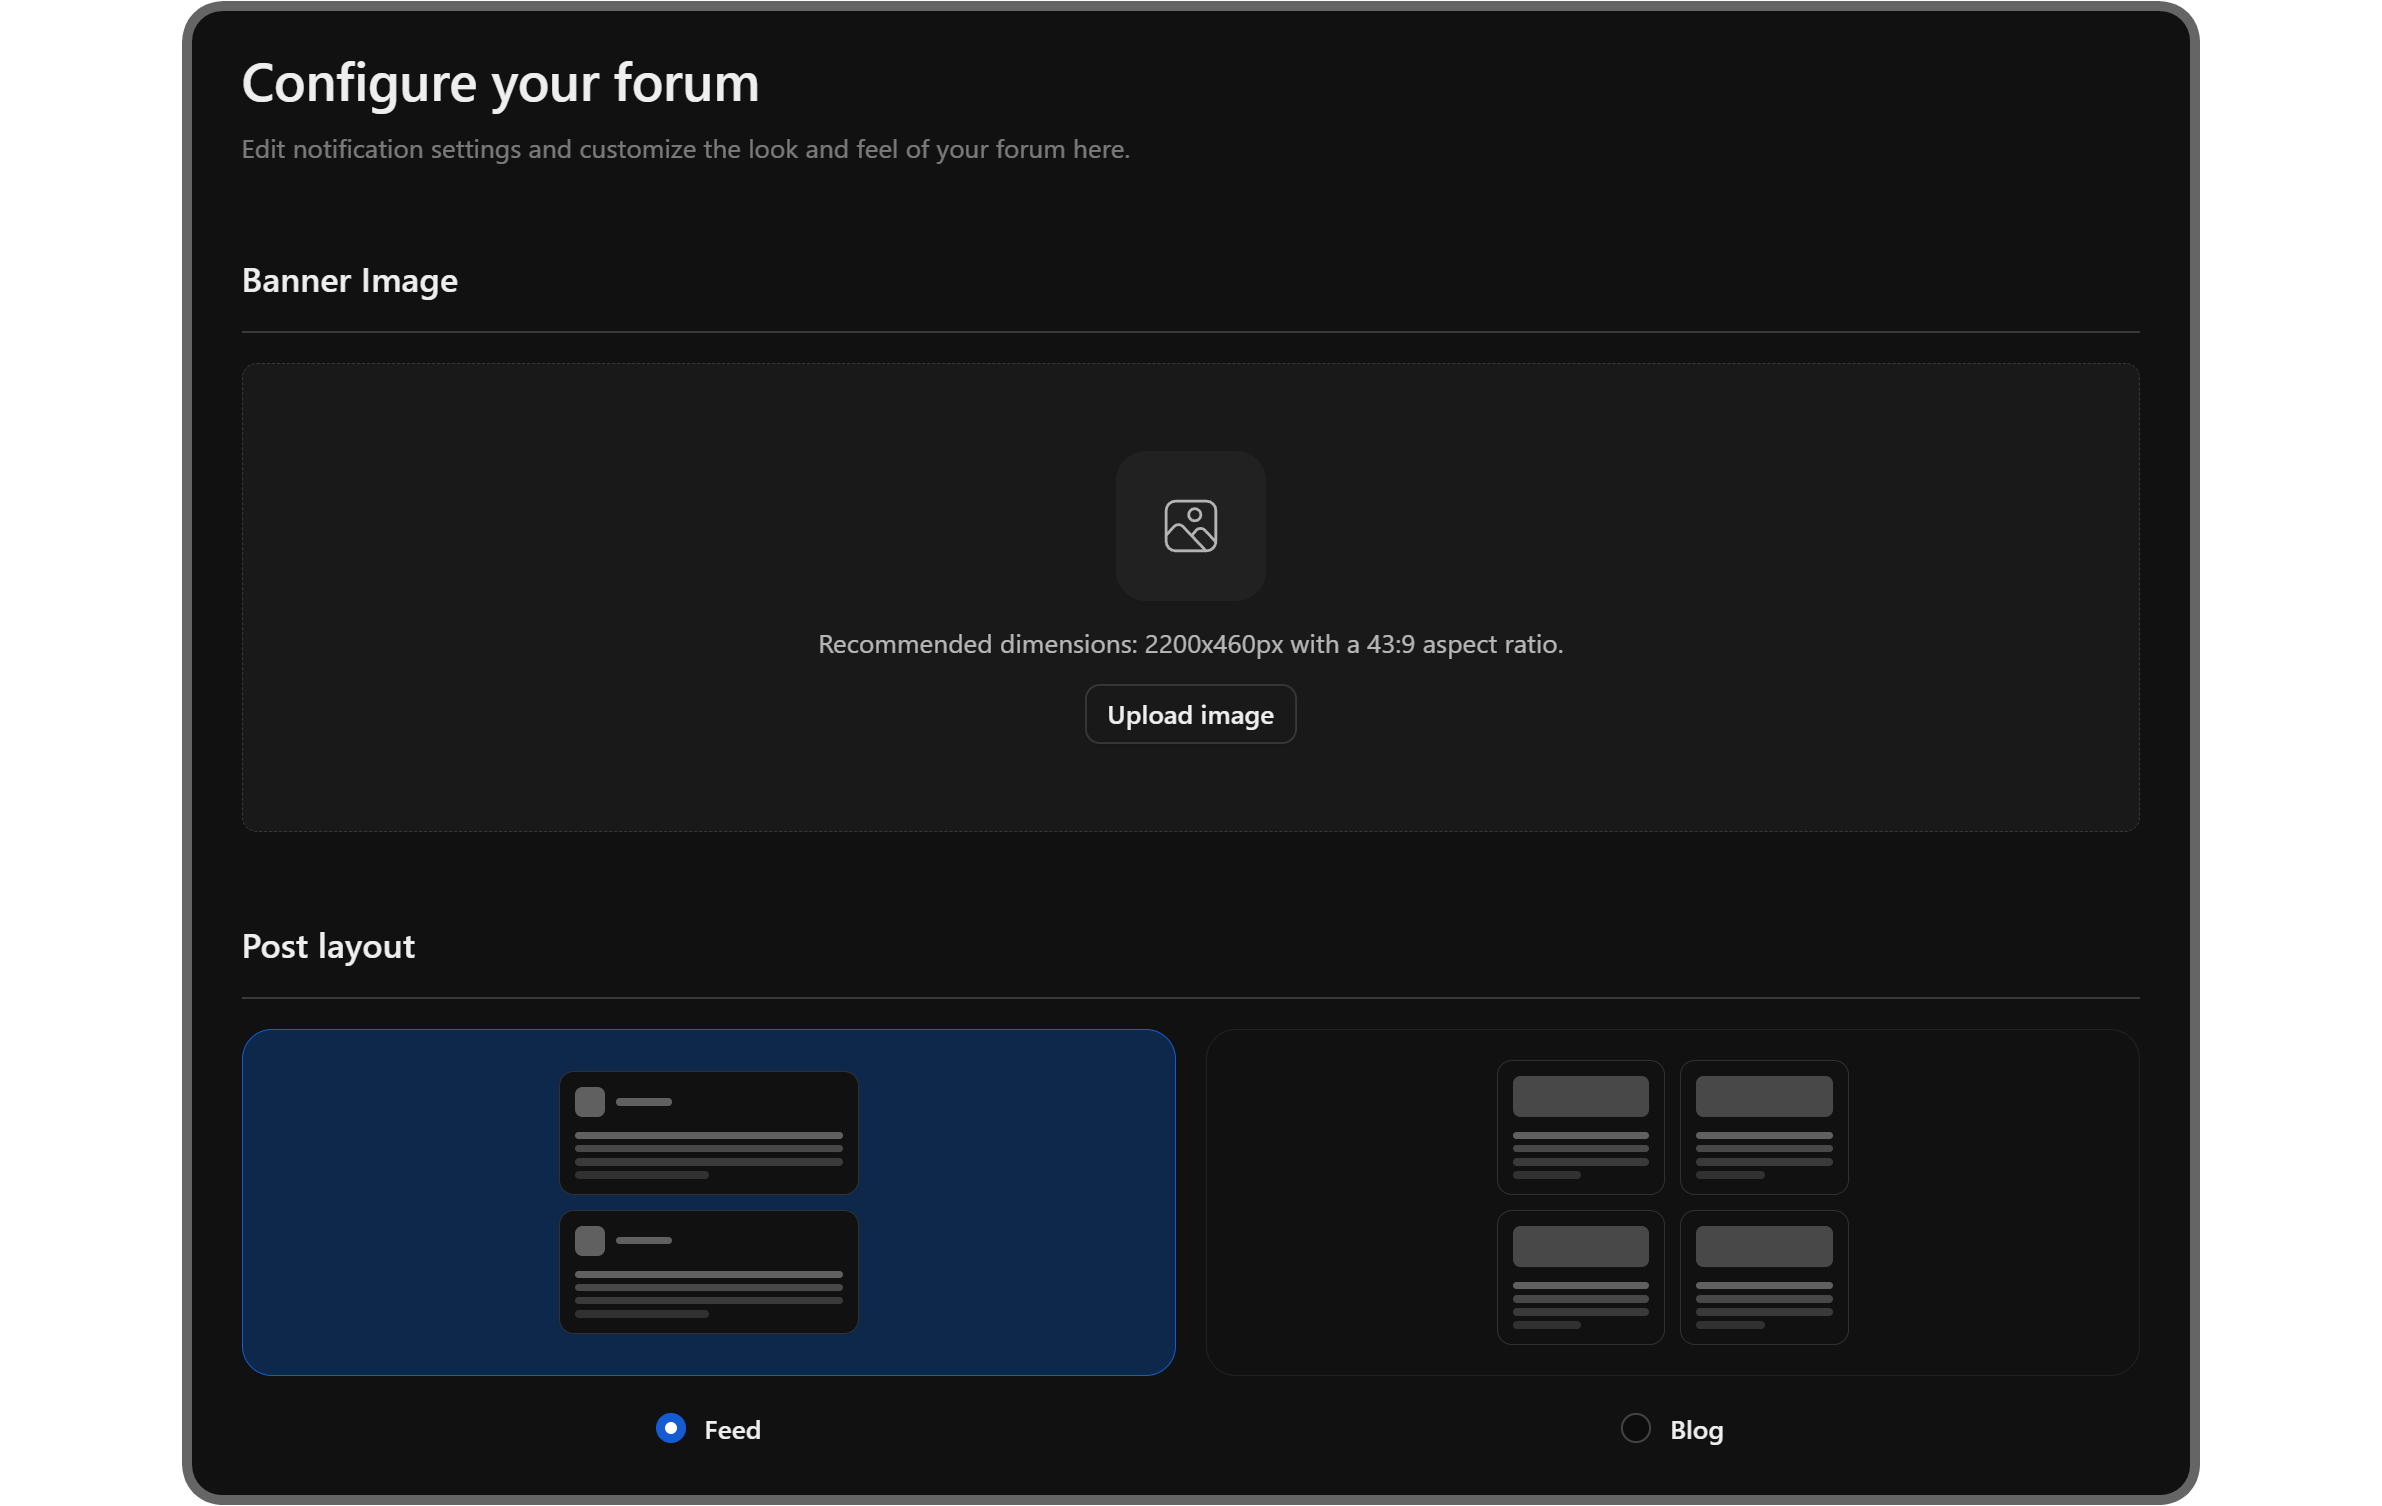
In the settings, titled Configure your forum, you’re going to see six different settings. Let’s start with the first two:
- Banner image: This is the field where you can add a banner to the Announcements app. Recommended dimensions of the image are 2200x460 with an aspect ratio of 43:9.
- Post layout: By default, the Announcements app has a feed-type layout, listing posts one per row. You have the option to select the Blog layout type to list the posts two per row with expanded content.
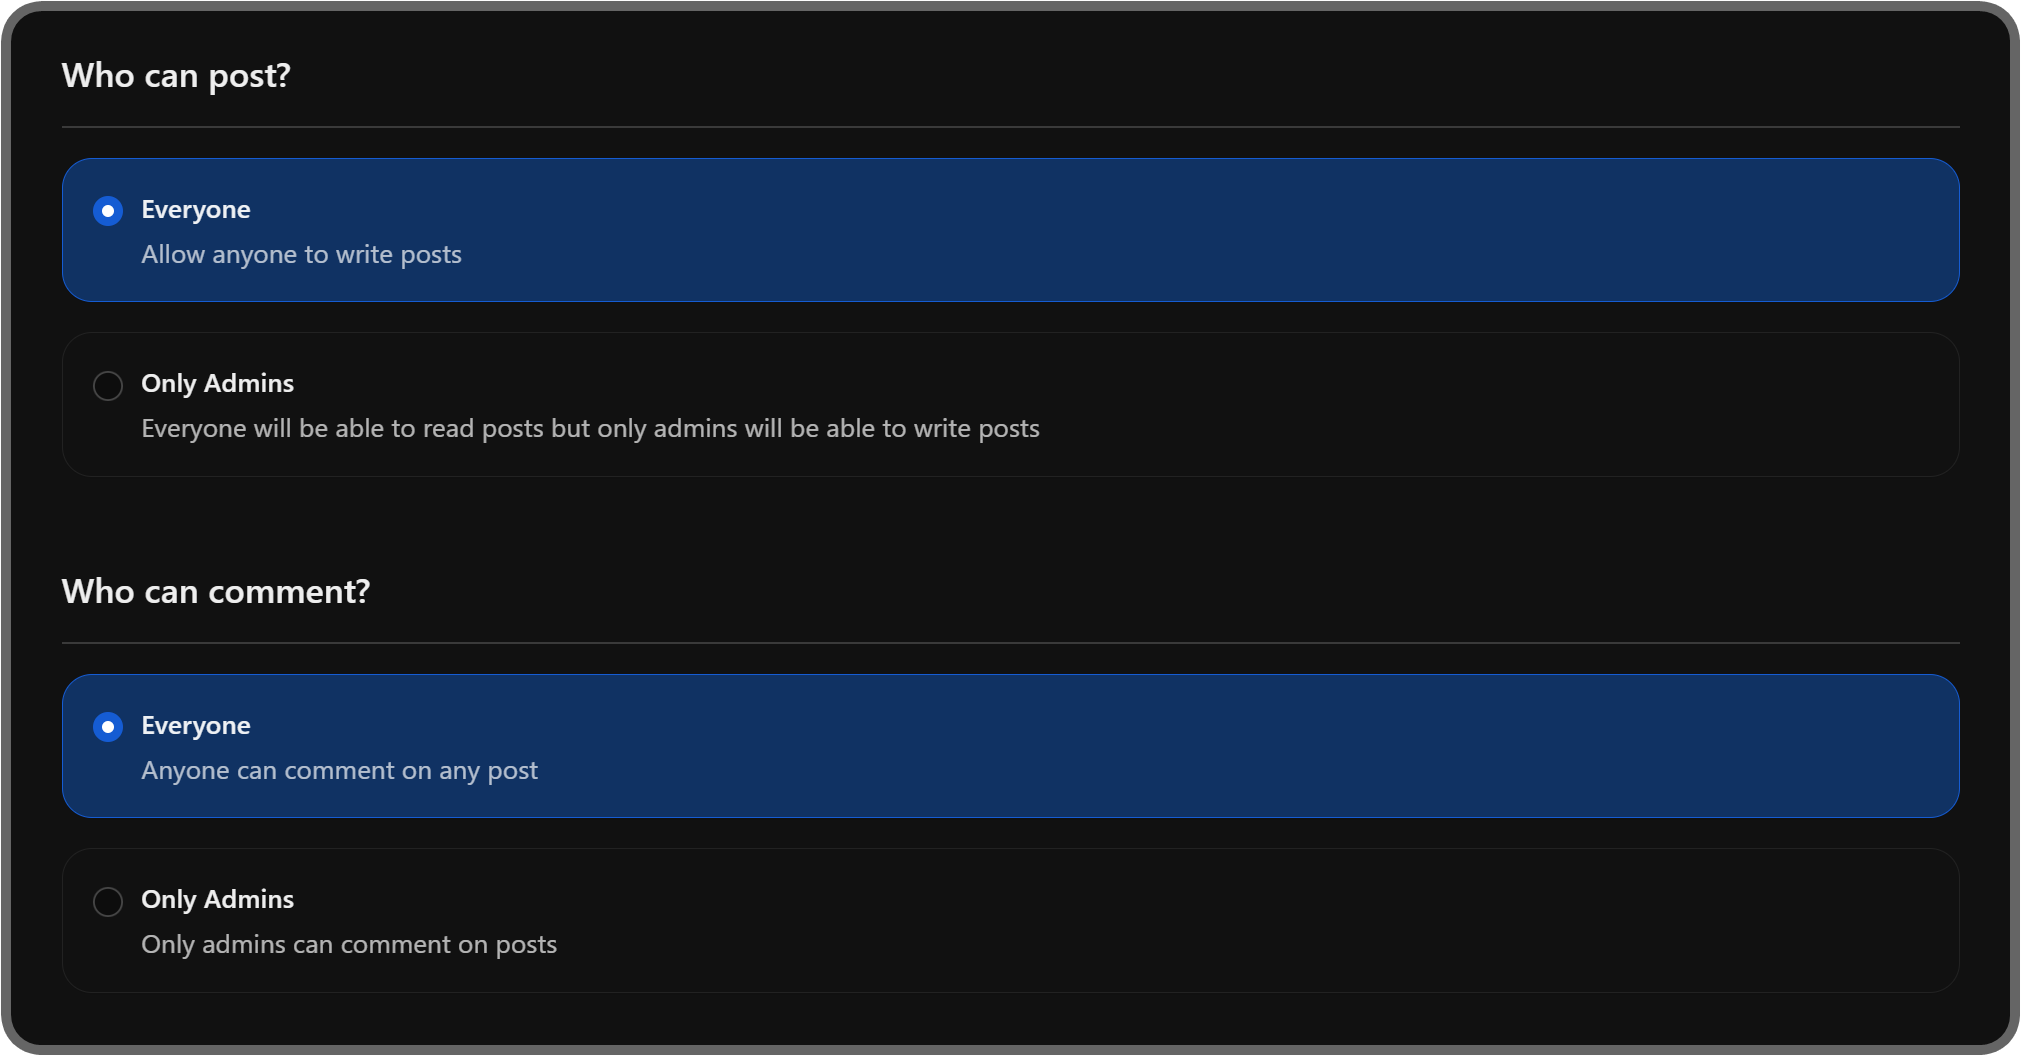
- Who can post?
The default option of this setting is Everyone, which allows all of your members to create posts in the Announcements app. Based on the main goal of the app, which is publishing announcements, you might want to select Only Admins option instead, allowing only admins to publish posts. - Who can comment?
Just like the Who can post? setting, the default option of this setting is Everyone, and as the setting’s name suggests, it controls who can leave comments on posts. If you’re fine with regular members being able to comment on announcements, you can leave it at Everyone.
- Email notification preferences:
In this field, you can change when the app will send email notifications to your members. The default option is All admin posts, which will send an email for each post made by an admin. You can also select Only weekly summary, which will send a weekly mail with the most liked posts, and Do not send emails, which won’t send any emails. - Discord webhook:
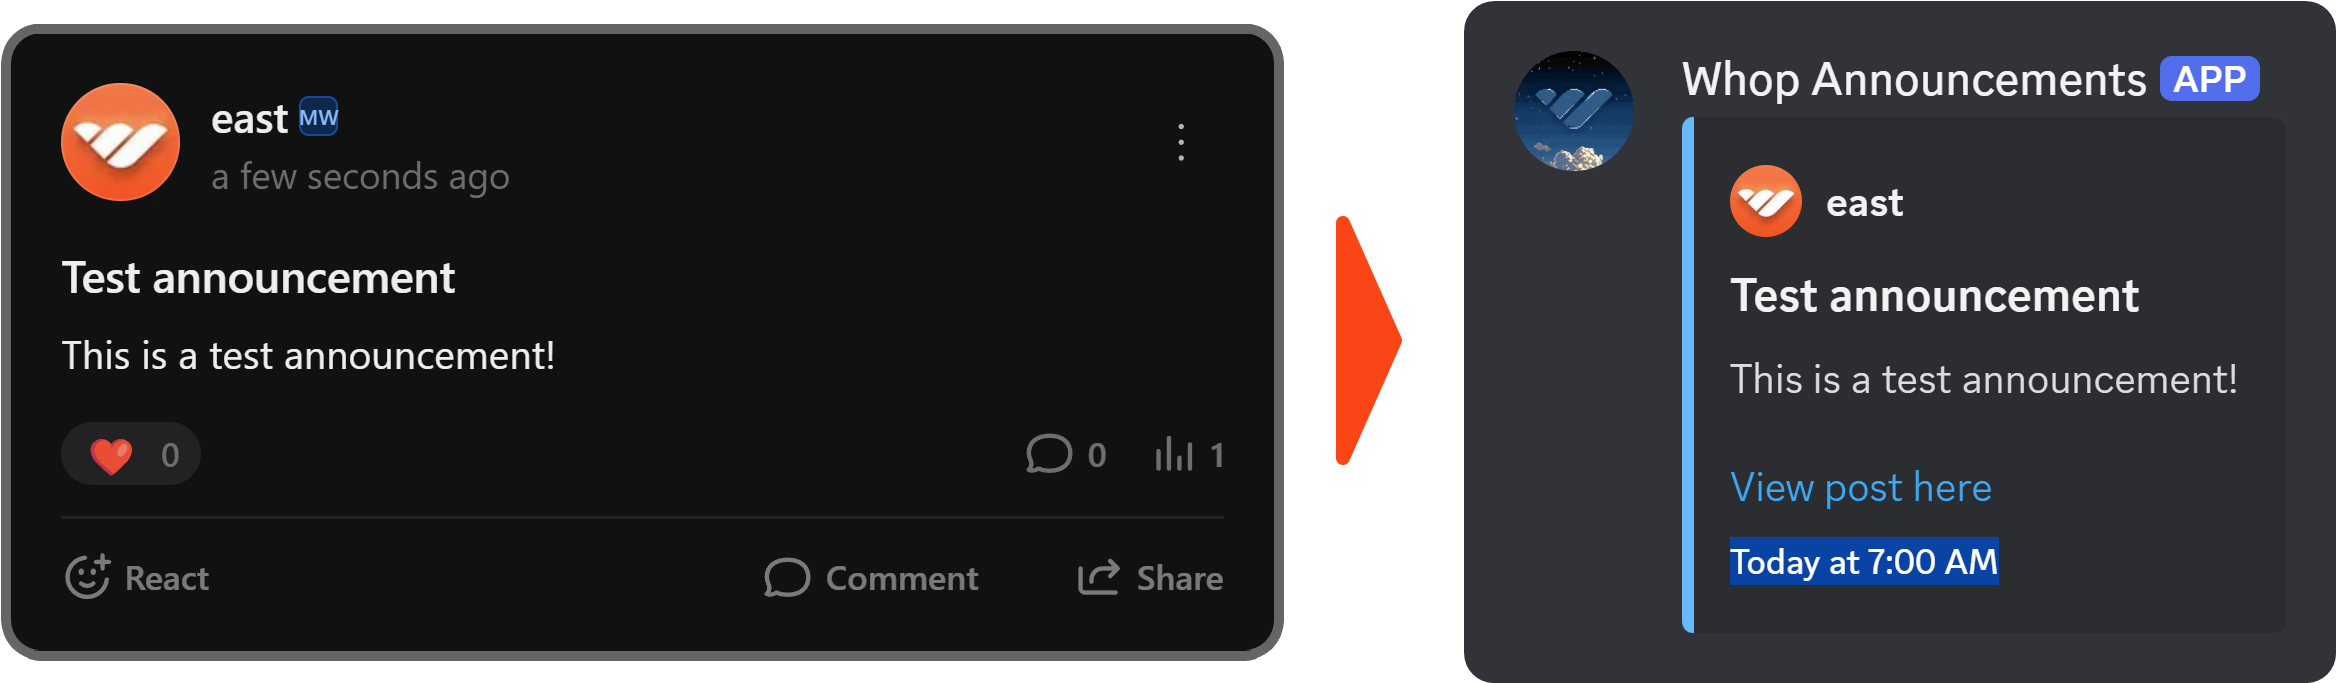
This field allows you to input a Discord webhook URL so that every post you make will be relayed to the webhook.
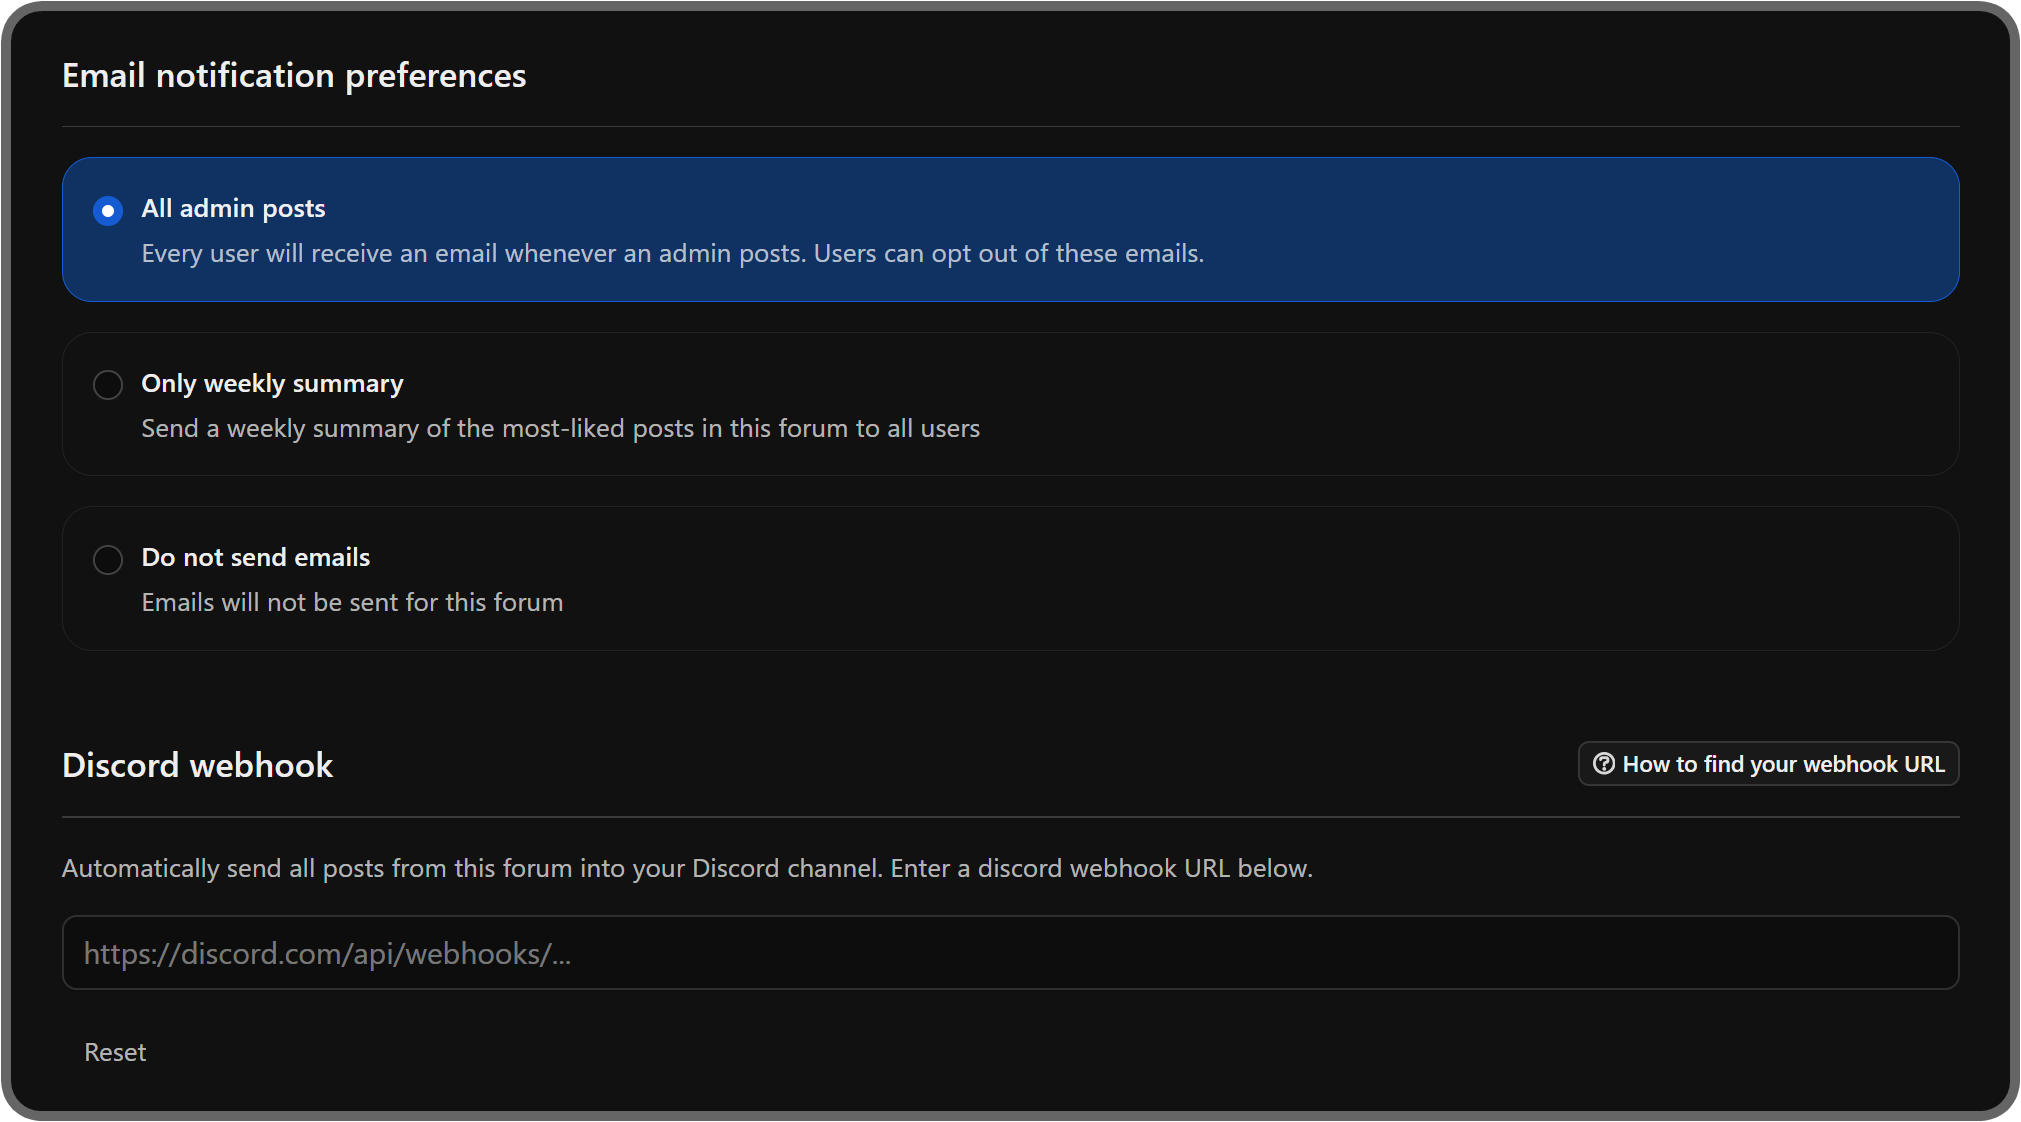
You can think of Discord webhooks as bridges between a source, which is the Announcements app in this case, and a Discord channel. After creating a webhook integration on Discord, you’ll receive a URL for it.
Inputting that URL into the Discord webhook field of the app’s settings will turn on the webhook relay feature automatically. Check out our how to create Discord webhooks guide to learn more about creating webhooks.
If you ever want to disable this feature, you can just delete the URL from the Discord webhook field in the app settings.
Make more money with your whop
If you’re already a Whop creator, make sure to check out our other guides to learn more about how you can scale your whop and boost your sales. If you don’t have a whop yet, consider joining thousands of creators in their journey of generating an income on the web.


