Looking for a step-by-step guide on how to make a Discord server? You're in luck - you've found our Discord server guide! Here, you'll learn everything that goes into creating a new Discord community from scratch.
Whether you have a pre-existing community you plan to migrate from somewhere else or you want to start your community from scratch, we're here to help you navigate this process. By the time you finish reading this information, you'll feel confident and capable in your next steps in how to make a Discord server from the ground up.
We aren't just going to guide you through Discord server creation, though. We'll teach you how to manage your Discord community once created and provide tips to optimize your server through different tools and integrations.
First things first - why take the time to learn how to start your own Discord server?
Why Learn How to Make a Discord Server?
Learning how to build an online community is one of the most profound time investments you can make. There's a reason people consider this the best online community platform. Here are all the reasons taking the time to learn about Discord server creation is worth it:
Establish Authority and Credibility
Building a thriving community on Discord allows you to showcase your expertise and thought leadership in your niche. As your server grows, members will begin to trust your insights and value your opinions. This credibility can help you gain recognition, attract new followers, and open doors to new opportunities. Your online presence will be solidified, and people will see you as the go-to person in your field.
Unlock Monetization Potential
Creating a Discord server not only brings people together but also presents numerous monetization opportunities. From offering exclusive content to selling merchandise or even hosting paid events, your community can become a valuable revenue stream. Your dedicated audience will be more likely to support your endeavors, helping you turn your passion into a sustainable business.
This is something we talk about in greater detail in our articles on how to charge access for Discord or create paid Discord servers. But let's move on to some other benefits of Discord server creation beyond monetary benefits.
Collaborate and Partner Up
A Discord server connects you with like-minded individuals who share similar interests and goals. These connections can lead to exciting collaborations and partnerships that benefit everyone involved. Your community becomes a breeding ground for creativity, innovation, and support, propelling your projects to new heights.
Growing your community on Discord means expanding your professional network. You'll encounter industry experts, influencers, and potential clients who can help you advance your career or business. Your server becomes a hub for learning, exchanging ideas, and creating lasting professional relationships.
Cultivate Customer Loyalty
If you already have a brand for which you sell products or services, creating a community for your customers is one of the best ways to nourish customers and ensure the highest LTV.
A Discord community allows you to engage with your audience in a more personal way. By being responsive, supportive, and providing valuable content, you'll foster loyalty and trust among your members.
This loyalty translates to repeat business, referrals, and a strong reputation that helps you stand out from the competition.
Gain Valuable Feedback and Insights
Your community members can provide invaluable feedback on your products, services, or content. By listening to their opinions and adapting your offerings, you'll be able to meet their needs and preferences more effectively. This constant improvement cycle will ensure you stay ahead of the curve and maintain your position as a leader in your niche.
Showcase Social Proof
A successful community serves as social proof of your expertise and the value you bring to your audience. When newcomers see a thriving, engaged community, they're more likely to trust you and join your server. This positive cycle will continue to attract more members and further solidify your online presence.
Grow Personally and Professionally
Managing a Discord server will help you develop invaluable skills like leadership, communication, and problem-solving. As you tackle the challenges of building and maintaining a community, you'll grow both personally and professionally. This development will enrich all areas of your life, making you a more well-rounded individual.
Is Starting a Discord Server Hard?
You may have your hesitations about starting a Discord server - even after hearing about these benefits. You may have preconceived notions that are still leaving you with doubts. Allow us to squash those for you right now. Starting a Discord server is both quick and easy - and even more so with the help of Whop.
The hard part is getting traction early on and growing your community. Again, that’s where Whop comes in. You can leverage our suite of tools as you jumpstart this journey and head out to create your own Discord server.
All things considered, learning how to start your own Discord server can be a game-changer for your personal and professional life. So, what are you waiting for? Start building your community today, and unlock the incredible benefits that come with it! Here's how…
How to Make a Discord Server From Scratch: Whop's Discord Server Creation Guide
It's time to learn how to start your own Discord server. As we mentioned earlier, creating a Discord server is as straightforward as it gets - especially now that you've found our step-by-step guide on how to make a Discord server from scratch. First things first - you need to create an account if you don't already have one.
Make Your Discord Account
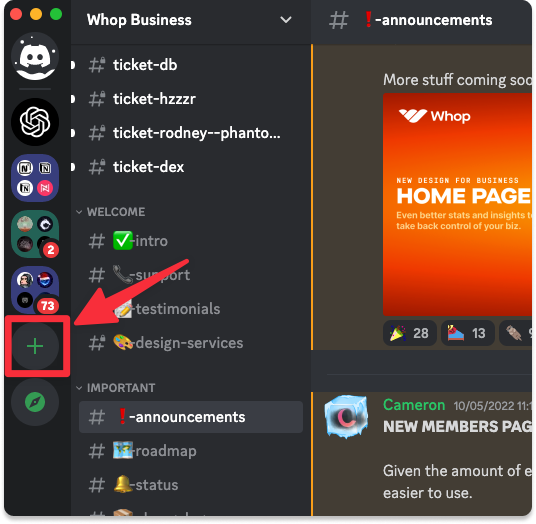
Before starting your Discord server, it is important that you sign up for a Discord account. This can either be done by downloading the Discord application or opening the Discord web-app. Once you have completed this, you are on your way to setting up your server. Once you are in the application and have created your free account, simply navigate to the left-hand side of your window and click on the + symbol.
Building From Scratch vs Using a Template
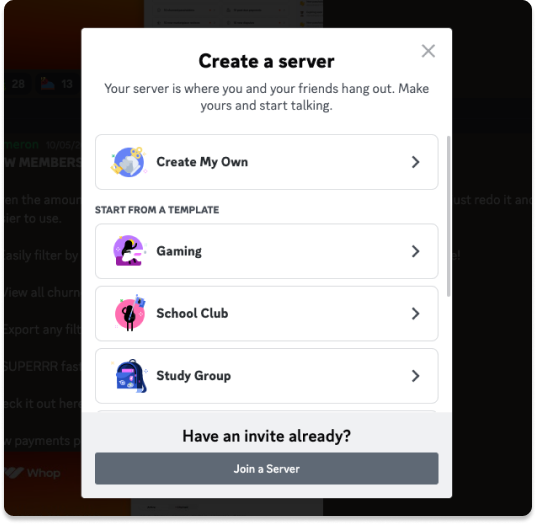
Once clicked, you will be presented with a plethora of different options you can choose to build your Discord server around. If you don't feel comfortable building your Discord server from scratch, we would recommend using one of Discord's pre-made templates (As shown below). In general, we would recommend you 'Create Your Own' and use the flexibility to make your dream community.
Once clicked, you will be presented with a plethora of different options you can choose to build your Discord server around. If you don't feel comfortable building your Discord server from scratch, we would recommend using one of Discord's pre-made templates (As shown below). In general, we would recommend you 'Create Your Own' and use the flexibility to make your dream community.
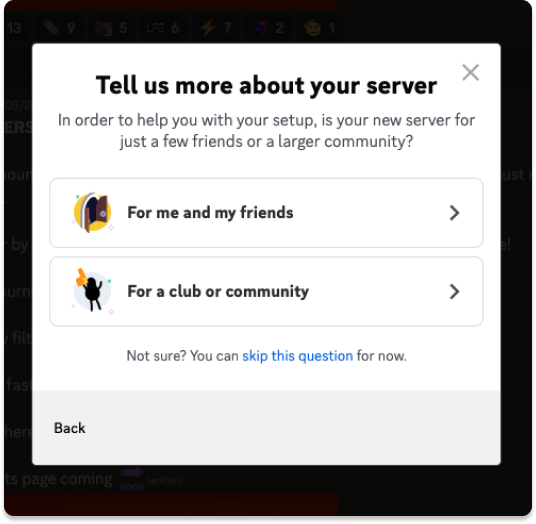
For this article, we will be basing off the following content assuming that you have decided to select the 'Create My Own' server option. Once clicked you will be prompted to choose whether your server will be used as a community or as a server for you and your friends. We would recommend selecting 'community', as community provides access to more Discord features.
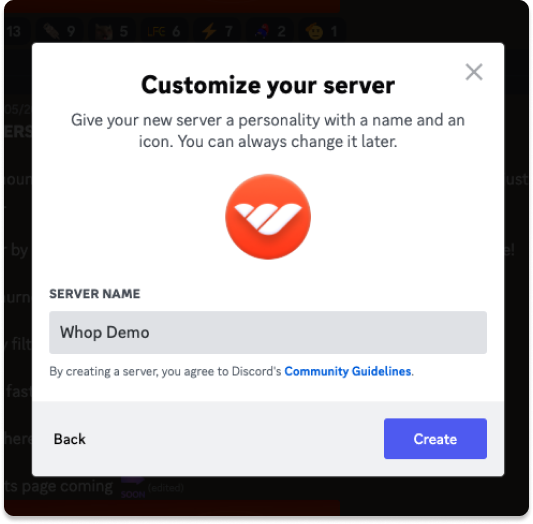
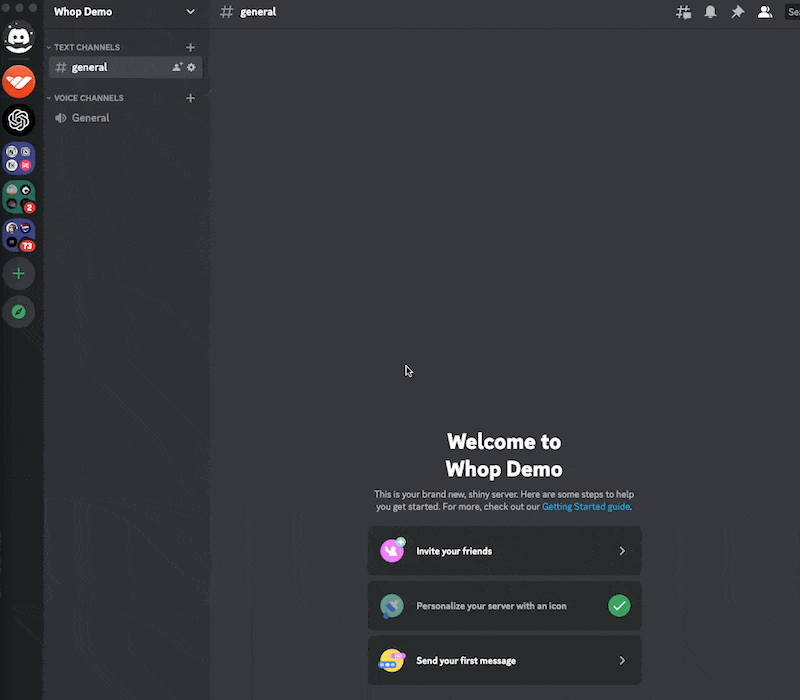
Lastly, Discord will prompt you to input a name for your new Discord server. For this purpose of this article I will be calling my server's name "Whop Demo". We highly recommend that you upload an image to your server to make it more recognisable to your friends and anyone else who might join.
Discord server creation summary
Putting all of these steps together, it is a simple process to create your Discord server;
- Signing up for a Discord account and loading up the application
- Locating and clicking the 'create server' plus symbol
- Selecting a pre-set Discord server template or clicking the default 'Create My Own'
- Selecting a community to get access to all features right out of the gate
- Entering a name for your Discord server (And optionally, adding an icon)
- Clicking 'Create' and starting a Discord server.
Now That You Know How to Make a Discord Server, Let's Spruce it Up and Organize Things!
Now that you have done the initial stages of creating your Discord server, it is important that you begin the process of making your Discord server ready for other community members to join. In other to do this, it is important that you set up two fundamental parts to your server - channels, and roles.
Setting up channels within your Discord server
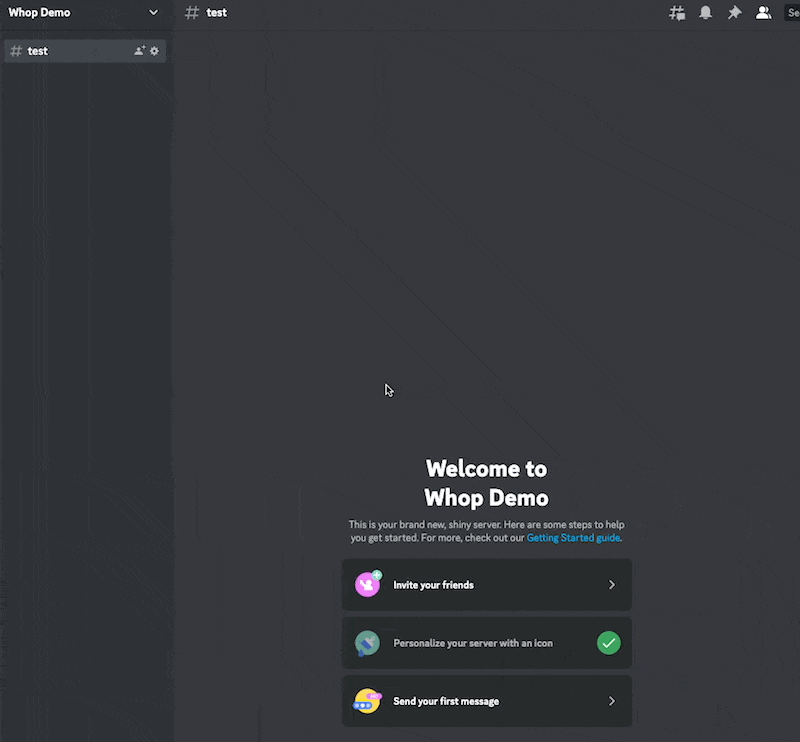
Once you are in your brand new Discord server, you will be presented with a blank Discord server with only a 'general' text channel and a 'voice' channel. We would recommend deleting these two channels from the beginning, as chances are, you will be replacing them with your own alternative channels.
To delete channels (and/or the categories the channels reside in), simply right-click the channel and select 'delete channel'. Once you have deleted the default channels, you can add in any channels that you want in your server.
Starting with this blank canvas, we recommend you add some channels that are more presentable. To do this, simply right-click on the channel list and create a category. Then click the + symbol next to your new category to create your first channel.
For public servers or any server in general, we would highly recommend adding the following channels.
- Rules
- Server Information
- FAQs
- Announcements
- General Chat
Creating roles for your Discord server
Once you have created your channels, it is time to starting thinking about the roles within your Discord server. Roles are an essential part of any Discord server as they determine which permissions certain users have, what they can access, and ultimately, how they will interact with your server. It is important that you take your time when allocating permissions, unless you want to have issues.
To create a role, simply head over to the server settings via clicking your server's name in the top left corner. Once there, select 'server setting' via using the drop-down menu and click on the 'roles tab' to be directed to the 'roles setting page' where the magic happens.
As you can see in the GIF below, once there, you can easily create a role to add to your server. Customization is easy, with Discord providing the ability to allocate a name, a colour and a unique set of permissions to your role.
To assign a role, simply go to 'Manage Members' and choose the users you want to have that specific role. We have a complete guide on how to create roles on Discord if you'd like to learn more about this process.
More Advice on Discord Server Creation
Now that you have set up the permissions and roles for your server, it is time to explore the other ways you can enhance your Discord and the experience for your community members.
Leverage the Power of Bots
The first great way to enhance your Discord is to add bots to your server. Discord membership bots can be thought of as unique add-ons for your server which serve to do different tasks. From managing workflow to monetizing your Discord server with a Discord subscription bot, this is a must-have if you're taking this journey seriously.
Our advice is always to find bots that work for your specific needs. But if you're looking for a personalized recommendation on the best bot for Discord, look no further than Whop. You can automate a wide array of tasks while effortlessly monetizing your community. We highly recommend you take a look at this page to discover all that you can accomplish through Whop as a Discord server creator.
Custom Branding
Another great way to improve your Discord and its user experience is to add custom branding and ensure your server stands out amongst the crowd.
Staying loyal to a theme or a brand throughout your server will help users identify your server, ensure that your server icon and any associated Discord server banners appear consistent, and stick to the same brand guidelines. This will require you to learn how to boost a Discord server, which we have a detailed guide on.
If you aren't a graphic designer, our team at Whop provides free graphic design services for you to use. This is just one of the many benefits of using Whop along your journey to Discord server creation and growth.
You can also get your first few members through our thriving marketplace, featuring millions of your ideal members. Learn more about how to grow your Discord server after you've created it in our complete guide. But for now, we are going to wrap up this guide on how to make a Discord server.
Bringing Our Conversation How to Make a Discord Server to a Close
As you can see, Discord server creation isn't all that complicated. When you're ready to actually create your own Discord server, you can come back to this guide and follow the steps we've outlined above.
👉 But, there's no reason to delay any longer - now that you know how to start your own Discord server, what are you waiting for? Get to work starting a Discord server today. You'll look back a few months or years from now and be glad you started when you did!