Webflow is a popular choice when it comes to building a website - but is it the best option for you? Find out all you need to know in this review.
Key takeaways
- Webflow offers unmatched design control and customization compared to simpler builders, but requires a steeper learning curve.
- Users can either host on Webflow's platform for simplicity or export clean code to host externally for greater control.
- Webflow suits everyone from solopreneurs to large brands, but has limited ecommerce features compared to dedicated platforms.
There are a lot of website builders out there, and each has their own advantages and disadvantages. However, when it comes to control over the visual and functional aspects of a website builder, Webflow shines. Although it’s considered quite complex when compared to other, simpler website builders, Webflow is one of the strongest on the market.
In this review, we’re going to talk about what Webflow is, what features it offers, the difference between plans, and more.
What is Webflow?
Webflow is a cloud-based software-as-a-service design tool for creating websites. The primary feature of Webflow is that it’s a “no-code” builder, meaning that even if you don’t know the first thing about coding, you can use Webflow to build a website of your own. Of course, just like other no-code website builders, knowing how to code (particularly HTML and CSS) will benefit you while using Webflow by allowing you to fine-tune your elements and advanced customization.
Why is Webflow so popular?
Unlike other website builders like Wix and GoDaddy’s builder, which largely rely on pre-designed templates that users build on, Webflow allows for customized designs and interactions at a high level. The degree of control that Webflow offers in its visual builder is much more open to intricate design and fine-tuning, which is why over 100,000 clients use Webflow for their websites.
One of the other advantages of Webflow is its Interactions feature. While it’s possible to create great visuals on website builders like Wix, it’s not always fit for the idea in your mind. Thanks to Webflow’s JavaScript-powered animations, you can create amazing-looking visuals that act the way you want them to without coding. Using the visual design approach, Webflow allows users to create visuals with all kinds of custom triggers and fine-tuned animations.
Apart from allowing you to easily build websites with no code, Webflow also provides responsive designs, meaning that your website will be responsive to both desktop and mobile devices, no matter the screen size. Since your visual design gets translated into code in the background, you can access it and use it however you like - the real deal is that Webflow outputs semantic HTML and CSS codes, meaning that the code will be clean, bug-free, and great for website performance and SEO.
Now, let’s say you’ve started building your website with Webflow. What kind of direction can you take? Well, you can start off with a simple portfolio website, which we will walk you through, or you can utilize the ecommerce features of Webflow to start selling stuff. There’s no way to say what kind of websites you can and cannot create on Webflow. Think of a website - got it? Good, you can build it on Webflow.
Hosting Your Webflow Website, Both on and Off Webflow
Before we delve deep into this Webflow review, one thing that we should get clear is the hosting side of things. Let’s say you’ve built a website for yourself on Webflow, and now you want to make it go live. There are two ways you can do this: hosting it on Webflow itself or exporting the code of your design and hosting it externally.
Let's take a look at both options.
Designing and hosting your website with Webflow
As you might imagine, hosting the website with Webflow and doing it externally both have their own pros and cons. To host the website you’ve built with Webflow, you’re going to need to subscribe to one of Webflow’s Site plans, which has two different categories and eight different tiers: Starter, Basic, CMS, Business, and Enterprise for the General category, and Standard, Plus, and Advanced for Ecommerce category.
When you host your website with Webflow, you’ll have the advantage of a couple of things. First, publishing your website and updating its code will be easier than doing it with your own server, which is much easier, in fact. You can publish websites and updates with just a single click.
Webflow is also going to provide two Tier 1 Content Delivery Networks to ensure your website is going to load fast no matter where you are in the world - Webflow using the Amazon Web Services hosting infrastructure is just the cherry on top for stable performance for your website. Like many other website builders, hosting on Webflow also provides you with an SSL Certificate.

Designing your website with Webflow and hosting on your own server
Hosting the website you’ve built off Webflow after you’ve designed it is still a viable option, though. Doing this is going to provide you with greater control over how your website works and its hosting environment so you can fine-tune every single detail. Of course, it’s also going to require some technical knowledge about running a live website on a server - which isn’t just HTML and CSS.
To be able to export an unhosted site that you’ve built, you’re going to need to subscribe to one of the Workspace plans. There are two categories and seven tiers in total. The “For in-house teams” category, which has Starter, Core, Growth, and Enterprise plans, while the “For freelancers & agencies” category has Starter, Freelancer, and Agency.
Hosting the website on your own server has one other main advantage: cutting costs for big websites. If your website is a big one with lots of traffic and content, hosting it on Webflow is going to cost more and more - doing it on your own server, however, is going to cut down on the costs.
Who Can Use Webflow?
There’s no way to determine if you should or shouldn’t use Webflow based on what you are: a small business owner, a solopreneur, or a large brand. Everyone can use Webflow to build amazing websites with ease, but based on your situation, the advantages and disadvantages differ.
Small business owners & solopreneurs
As a small business owner or a solopreneur, Webflow’s visual designer is going to help you a lot with building a website using no code at all - because coding a website is a really time-consuming process and isn’t easy. For a small business website, the no-code approach, low costs, and strong infrastructure are going to help you build and publish your website without any hardships.
The disadvantages you’re going to face when using Webflow as a small business owner/solopreneur are the learning curve, limited ecommerce features when compared to platforms like Shopify and BigCommerce, and traffic limits. While Webflow’s visual designer is super helpful, it’s not as easy to learn as Wix or GoDaddy’s visual designers - you might need to get some practice in. The limited ecommerce features include only two payment gateways (Stripe and Paypal), no POS integration, etc.
Web designers (freelance and agencies)
If you’re looking to use Webflow as a service for building websites for your clients, Webflow is a great choice since you have greater customizability and control over your designs when compared to other, simpler website builders. The Workspace plans of Webflow allow you to collaborate with others, whether they’re your customers or team members. Since Workspace plans allow you to export your code, you’re able to deliver your websites to customers who plan to host them externally.
Since websites you build on Webflow offer a streamlined and efficient workflow, you’re able to speed up your process and build better-looking and functioning websites. Of course, this doesn’t mean there are no disadvantages. The biggest disadvantage you’re going to face as a freelance or agency is the limited ecommerce features of Webflow. Still, you can use third-party integrations (which might be pricy for some) on Webflow to fix the issue.
Large brands
Webflow has many advantages for large brands. The infrastructure of Webflow is capable of handling large amounts of traffic and content without lowering the performance of the website. Since Webflow’s servers utilize AWS, your website will be accessible and load fast all around the globe. Using the integration capabilities of Webflow, you’re able to integrate your new website into your current systems. As large brands tend to subscribe to the enterprise plans, you’re going to have unlimited users, an SLA guarantee, priority support, and the ability to scale your traffic, content, and performance to match your brand’s needs. Perhaps the biggest disadvantages large brands are going to face are the increased cost (due to scale) and limited ecommerce features.
How Easy is it to Use Webflow?
We mentioned the steep learning curve of Webflow a couple of times in this review - but this doesn’t mean using Webflow is impossible. While it’s not as easy as using builders like Wix or GoDaddy builder, you have much more control over how your website looks and functions. To give you a headstart, let’s take a look at signing up for Webflow and creating your first site.
Signing up to Webflow
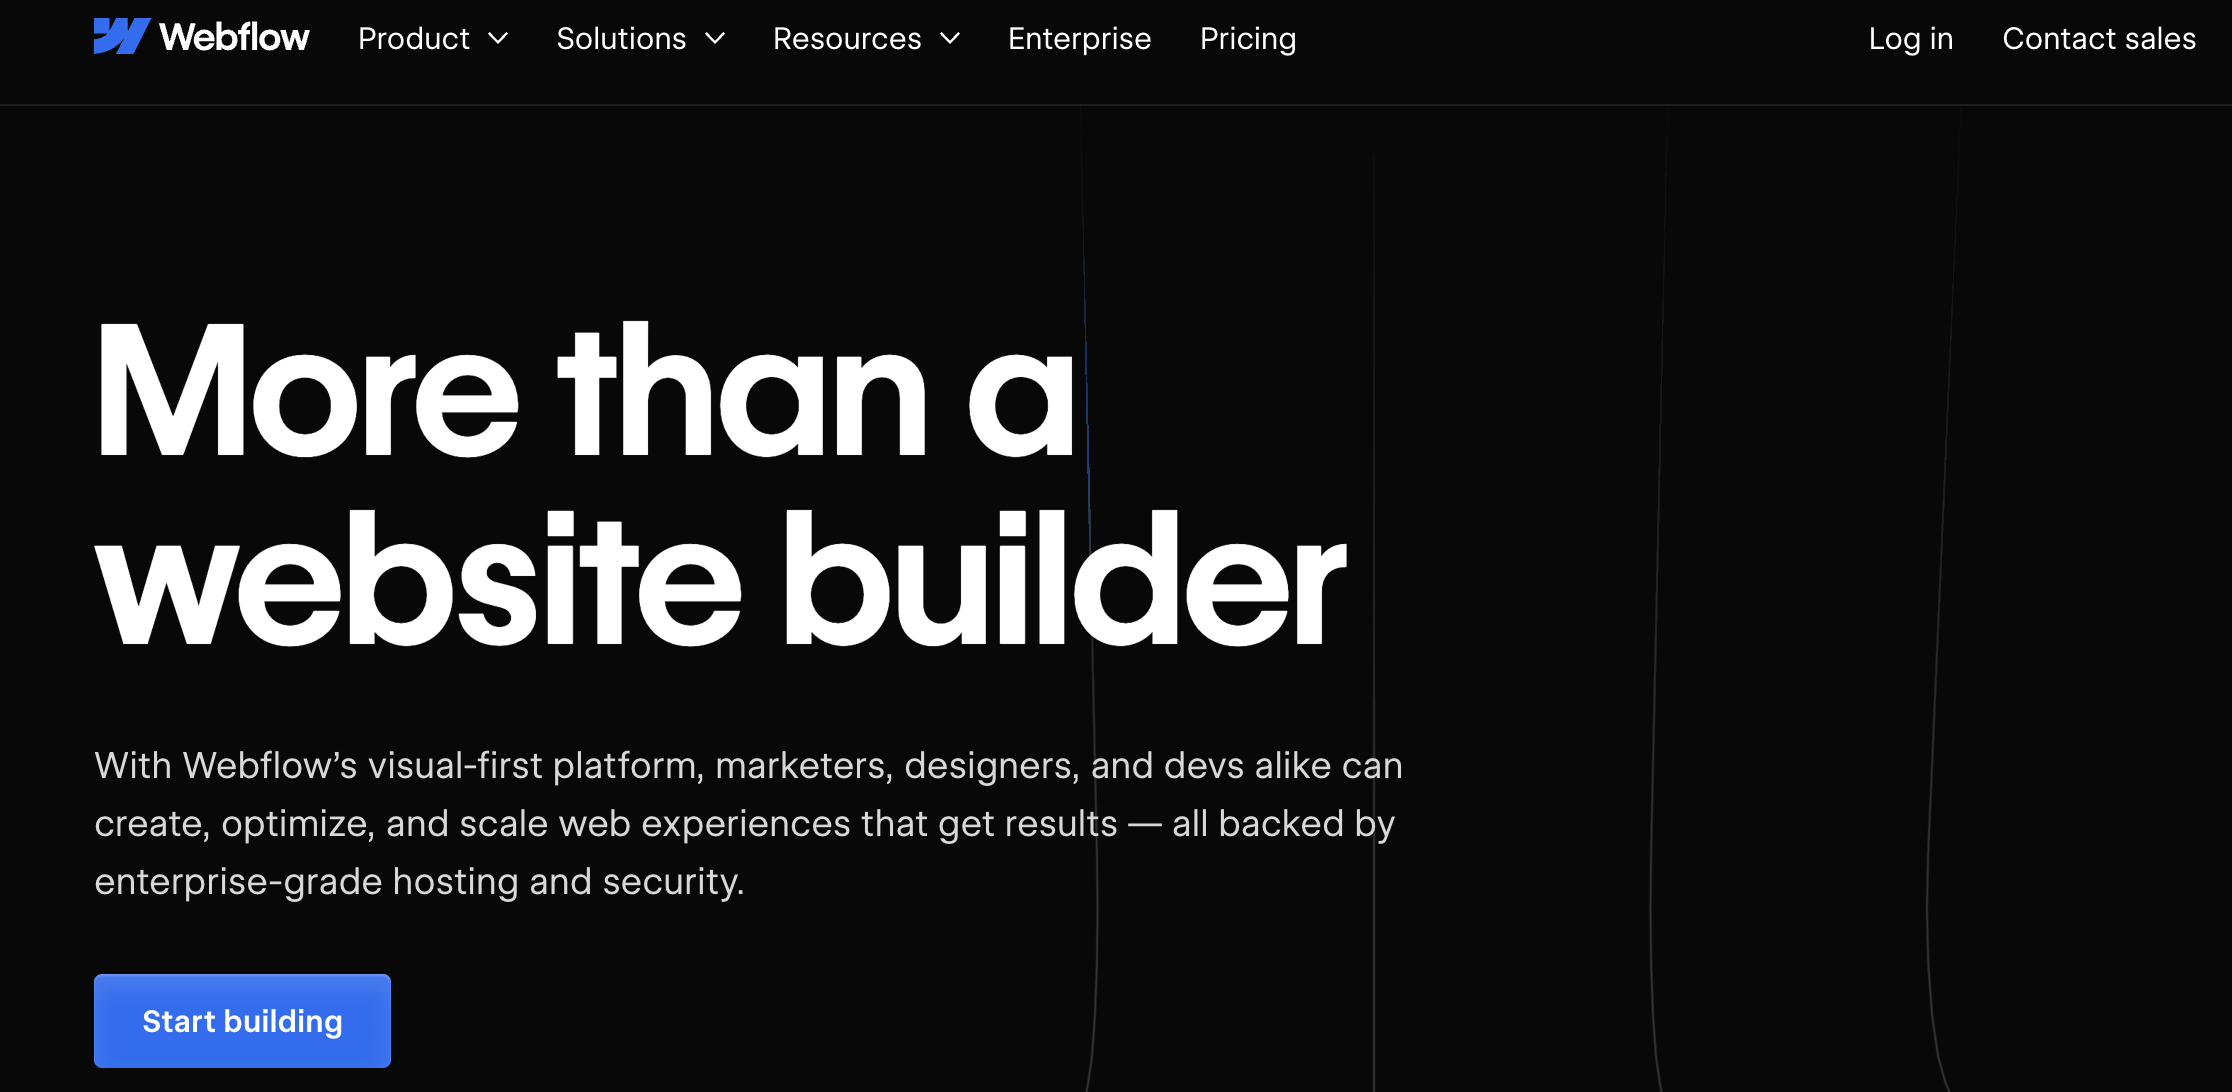
When you visit the Webflow’s website, you’re the first thing you want to do is to click on the Get Started button at the top right of your screen. This is going to take you to the signup page.
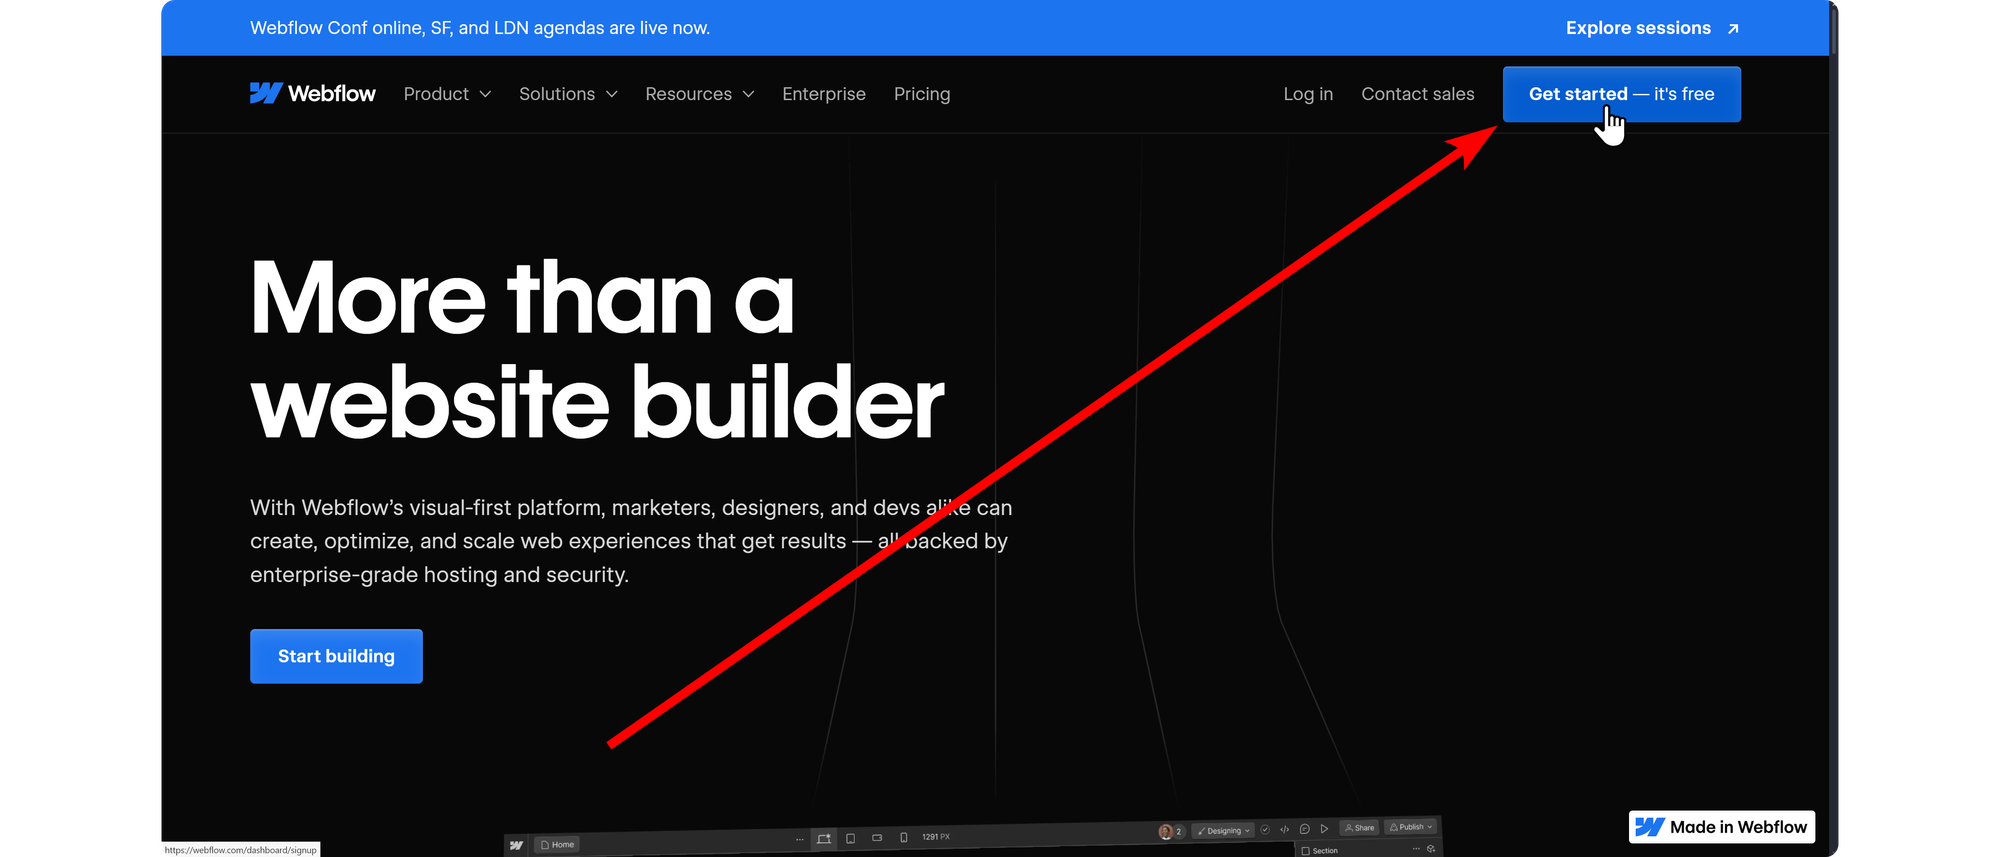
On the sign up page, you can enter an email to continue with the signup process, or you can use a Google account to quickly create an account and start creating sites right away.
Creating your site
After you create your account, you’re going to be taken into the dashboard. The dashboard is where you control your sites, team, settings, and more. In the All sites section of your dashboard, you’re going to see the New site button. Since you don’t have any sites yet, they are going to be in the center of the section where your sites are going to be listed. Let’s click on the New site button to start creating your first site.
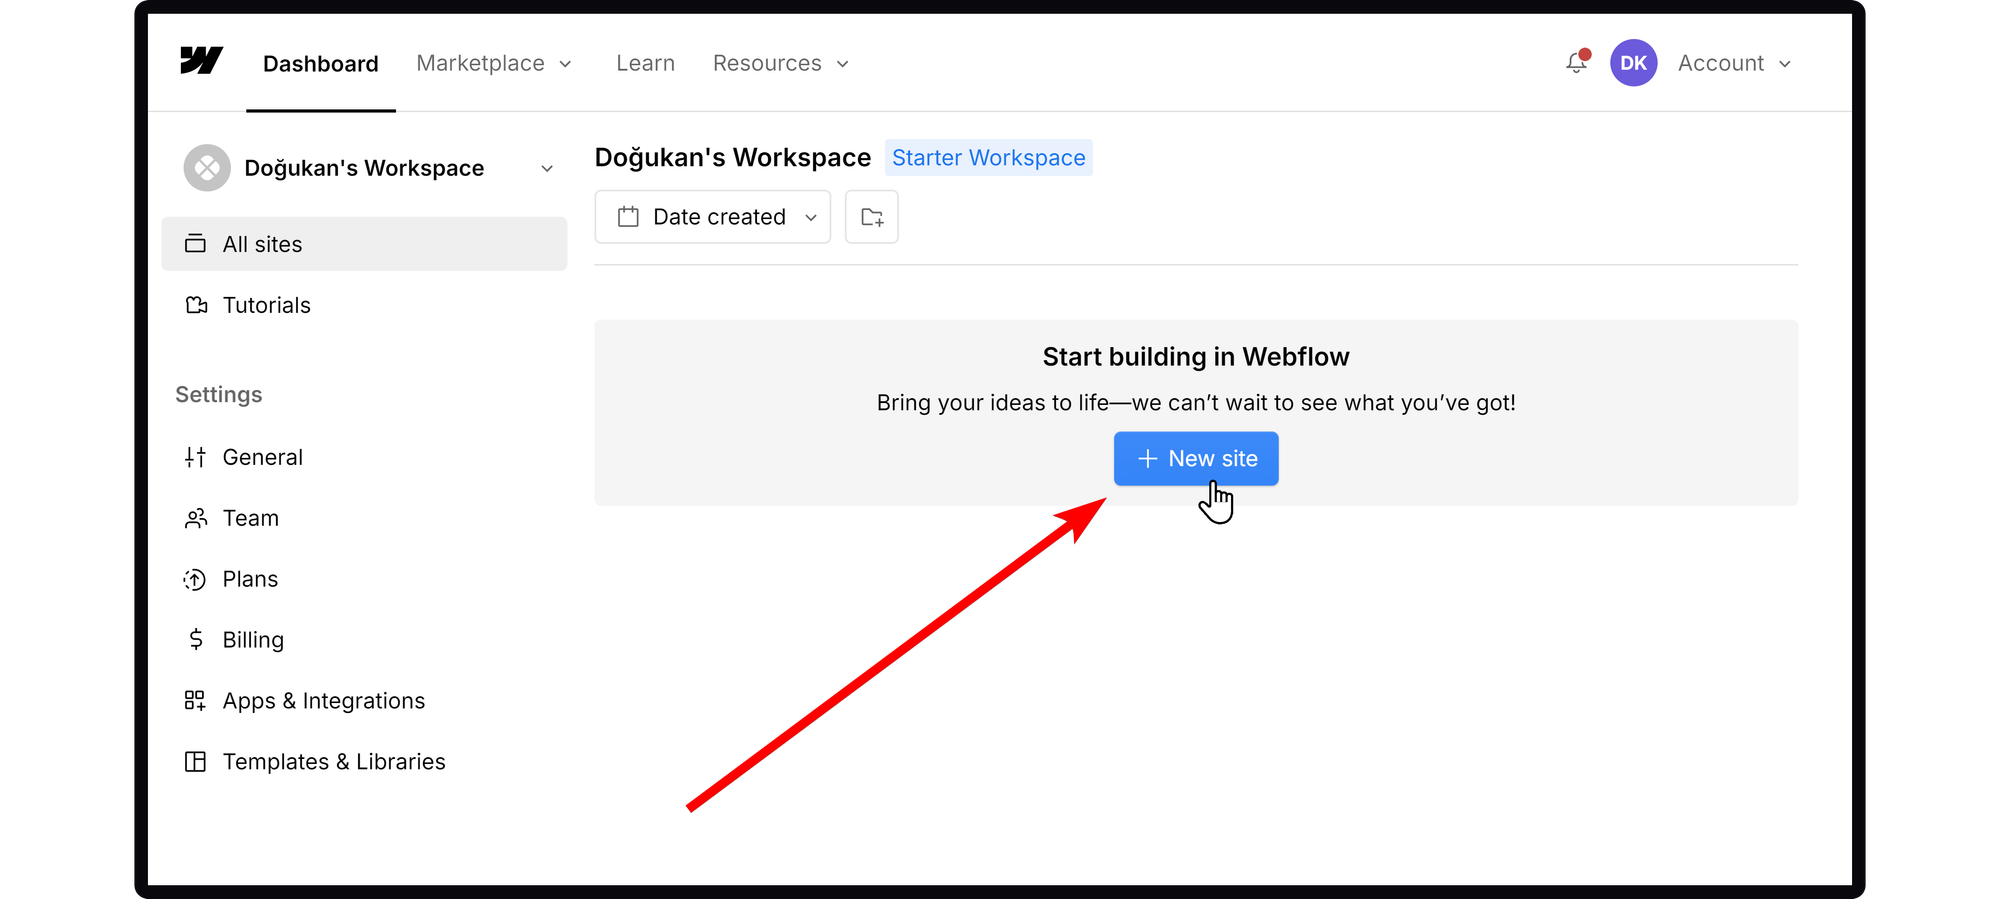
After clicking on the New site button, you’re going to be directed to the visual editor of Webflow - where the magic happens. Now, you’re going to see a selection modal first that asks you if you want to create a blank site, which will let you start from scratch or use a pre-made template. Let’s start off by selecting the Blank site first.
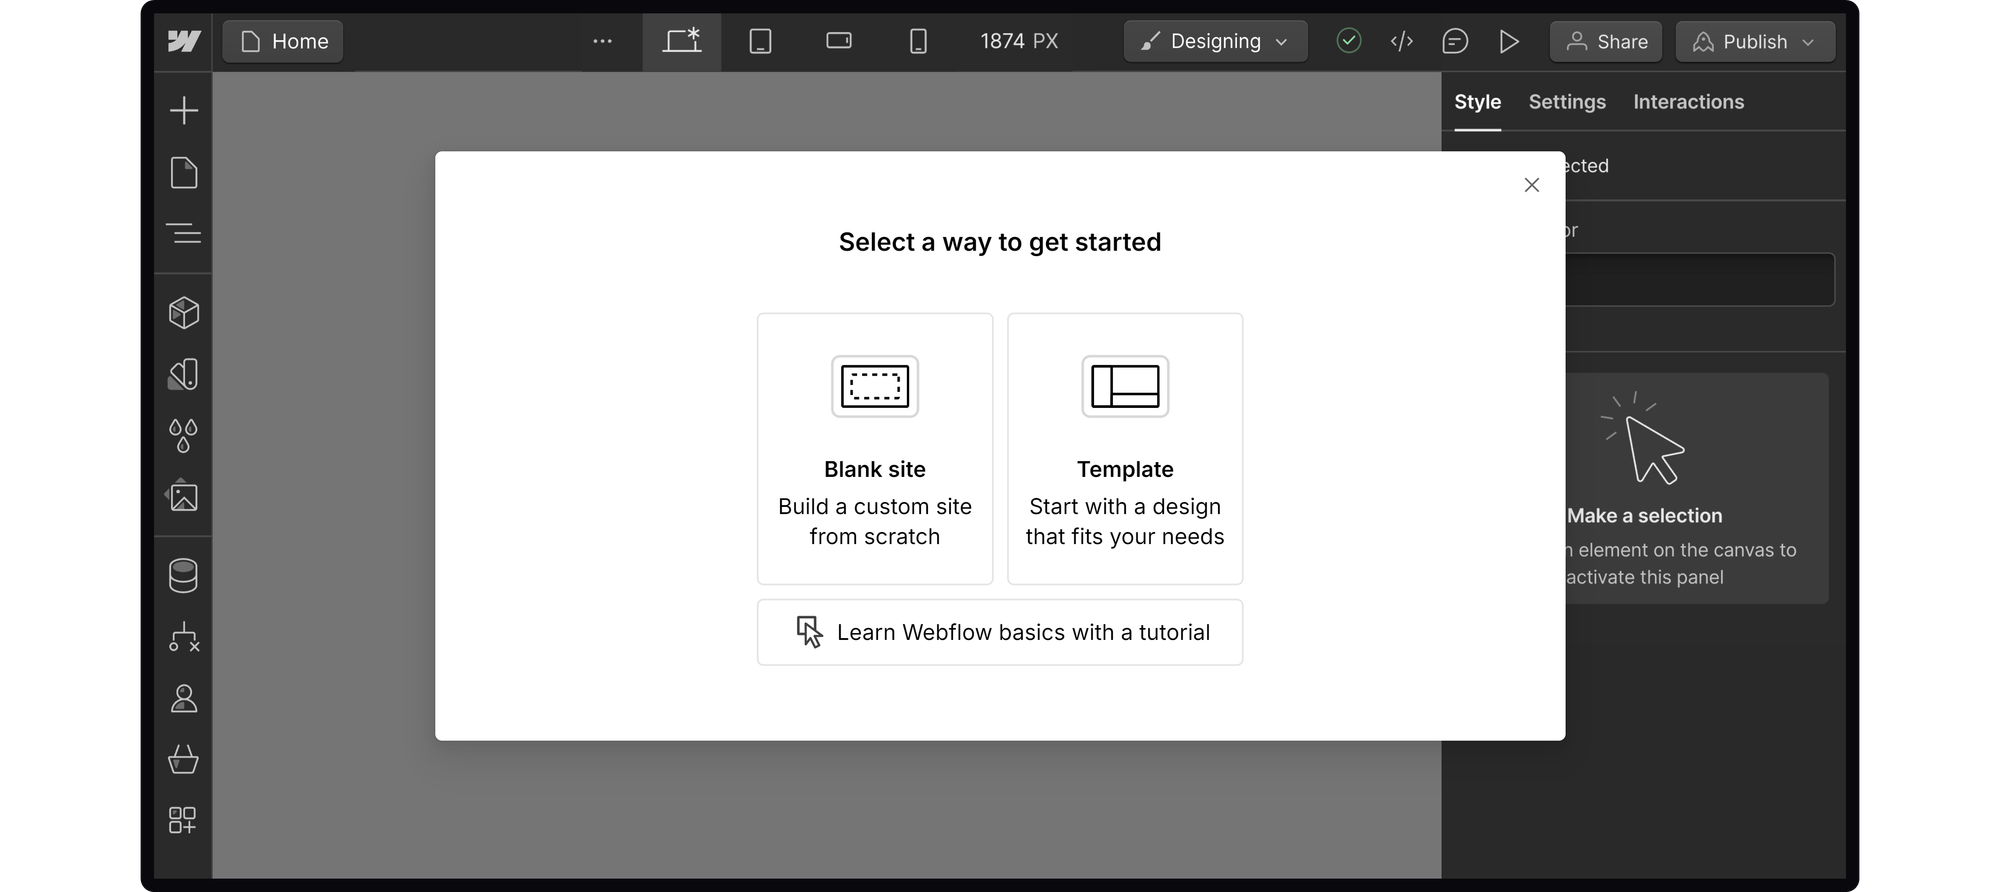
When you select Blank site, you’re going to be prompted to give your website a name, and then you’ll be able to start designing your website right away.

The visual editor might look confusing at first sight, but there’s nothing to be afraid of. Investing a little bit of time is enough to start designing websites.

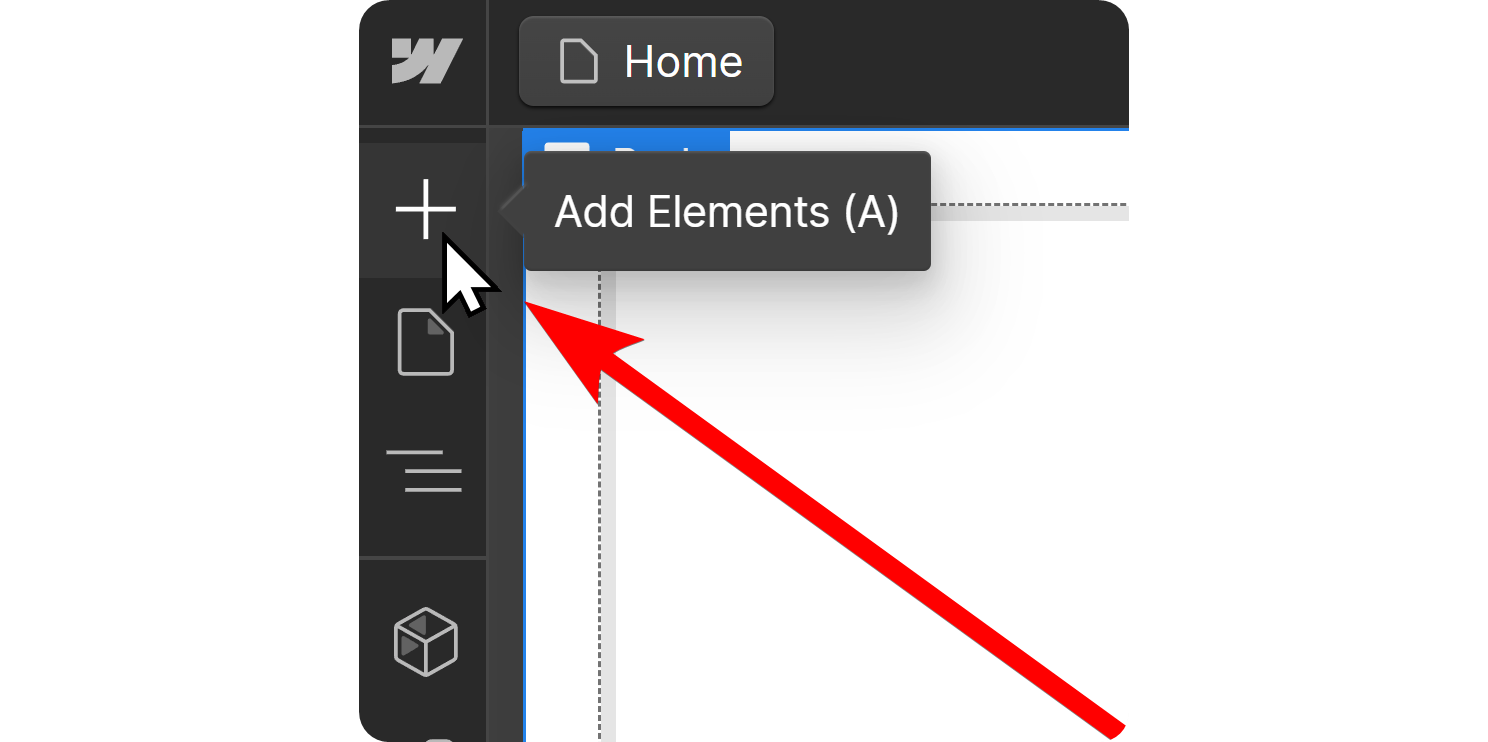
As you can see in the blank site option, there is nothing on the website right now, but you can start adding elements by using the Add Elements menu (keybind is A). In the menu, you can add elements to your website like sections, div blocks, paragraphs, CMS collection lists, media, forms, and even background videos.
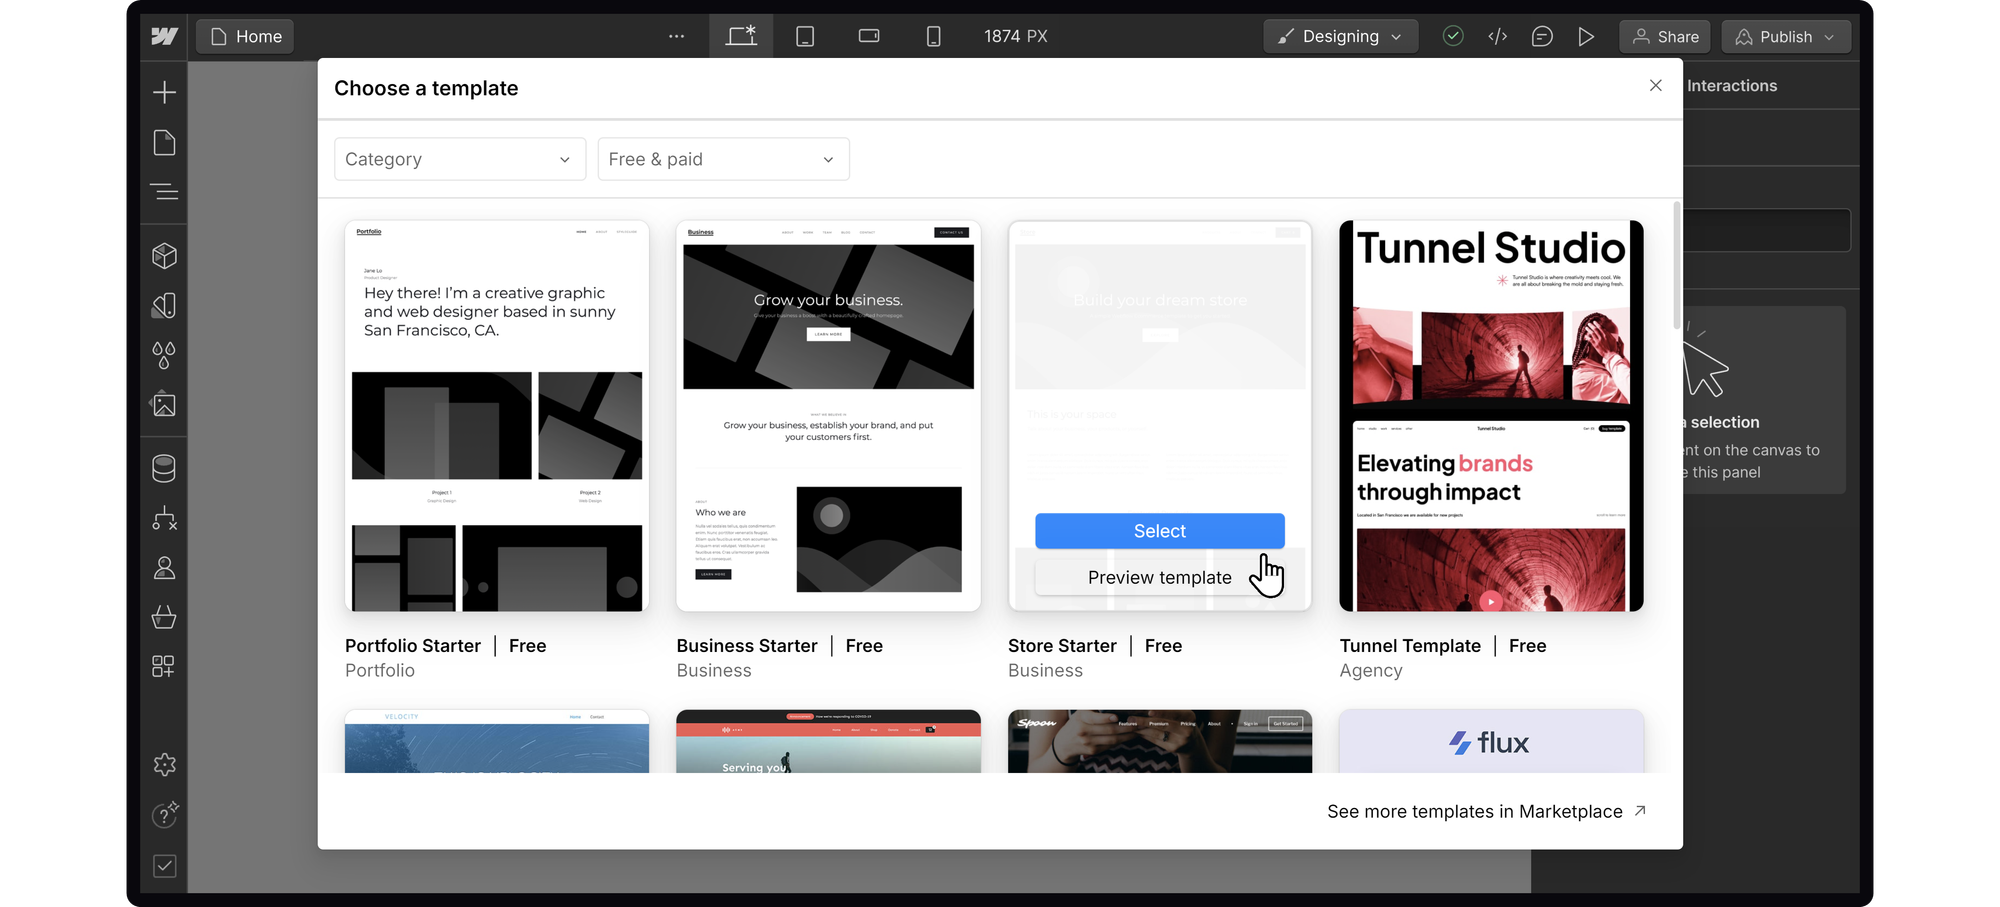
If you were to select the Template option instead of the Blank site at the start, you would see a list of templates that are available on Webflow. While some of them are free, others are paid. You can check whether a template is free or paid by looking at the title of it.
When you hover over a template in this list, you’re going to see two buttons: Select and Preview template - as their name suggests, clicking the Select button will select that template as your website design and take you to the visual editor. If you select the Preview template, you’re going to be directed to a sample website of the template.
Just like starting with a Blank template, you’re going to be prompted to give your site a name after you select the template you want. After giving your site a cool name, click on the Create Site button to proceed.
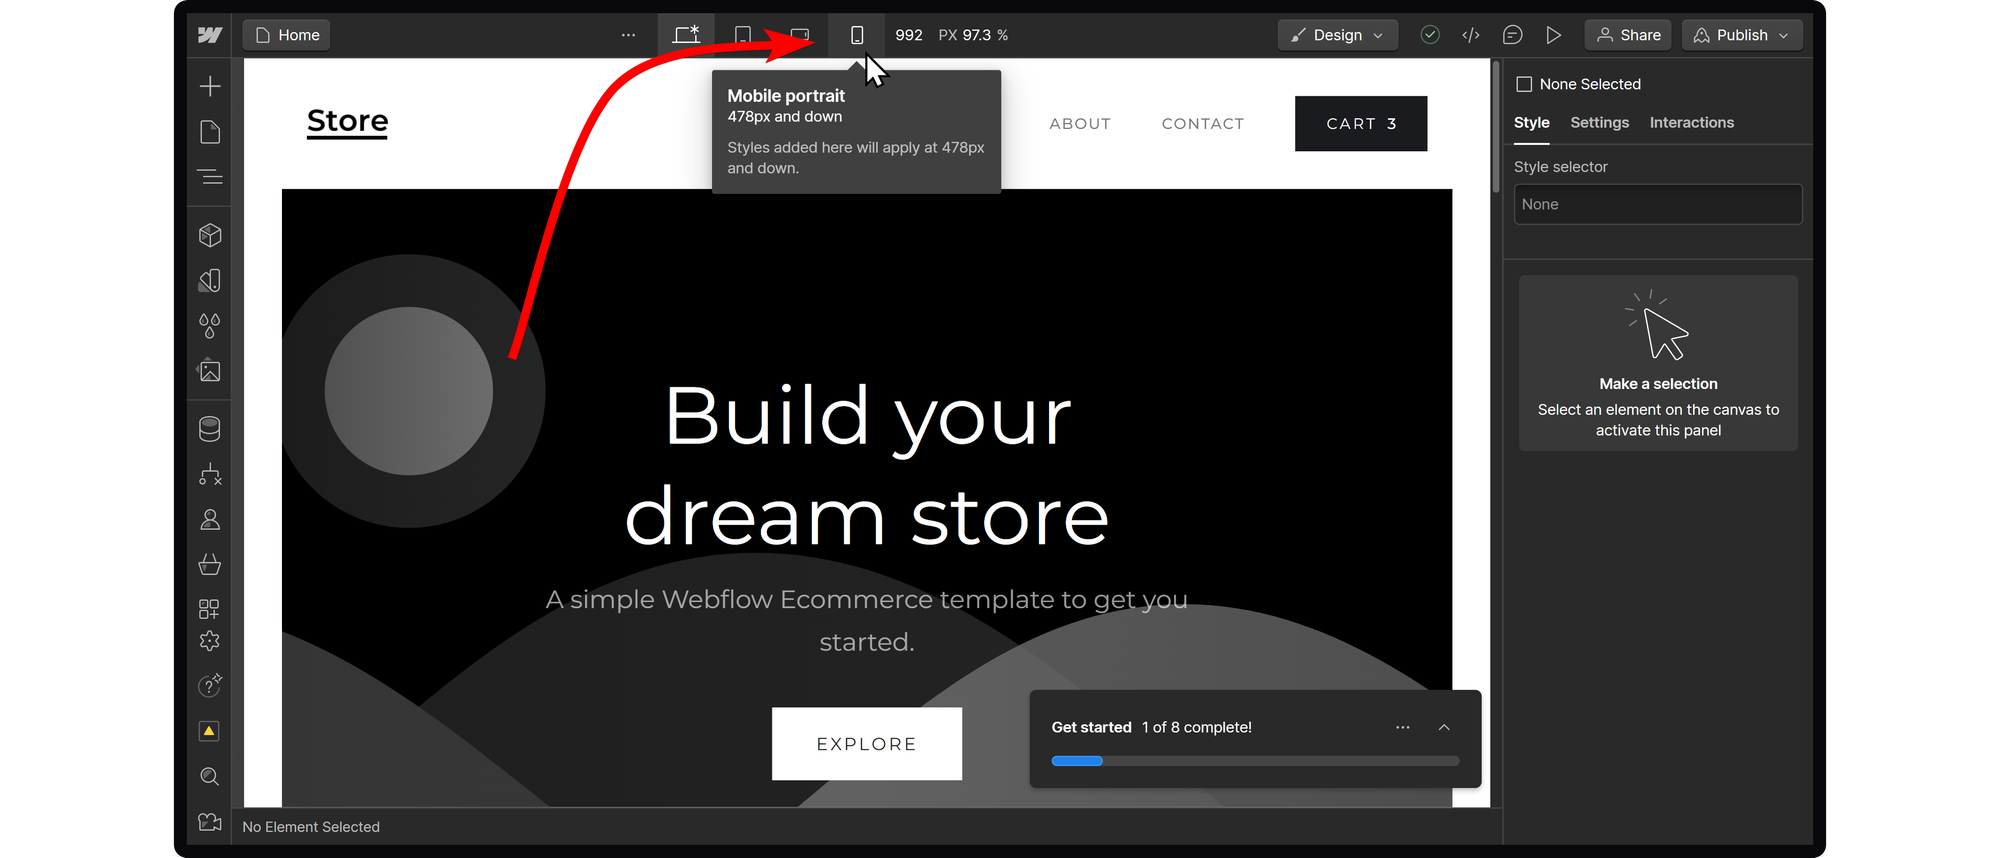
For both blank and template-based sites, you will use the same visual editor. The only difference is that when using a template, you will have a headstart due to the pre-made elements. As you design your website, you should occasionally use the desktop, tablet, and mobile buttons at the top center of your screen to switch between devices to see how your design is reacting to them and fine-tune them if necessary.
Using Webflow’s Interface
As we mentioned, Webflow’s interface might be a bit complex at first sight. So, let’s go over some of the basics of Webflow, starting with adding elements to your website.
Adding elements to websites
Adding elements is one of the core things you’re going to do when designing your website. Let’s say you want to create a text wall where you explain what your site is about. You’re going to do this by using the heading and paragraph elements.
Adding elements to your website is super easy. When you click on the Add Elements button (keybind is A), you’re going to see a list of all the elements you can add to your website popping up. Clicking or dragging those elements to your website is going to add those - you can later edit them by double clicking (for texts) or using the properties tab on the right side of your screen.
Adding images
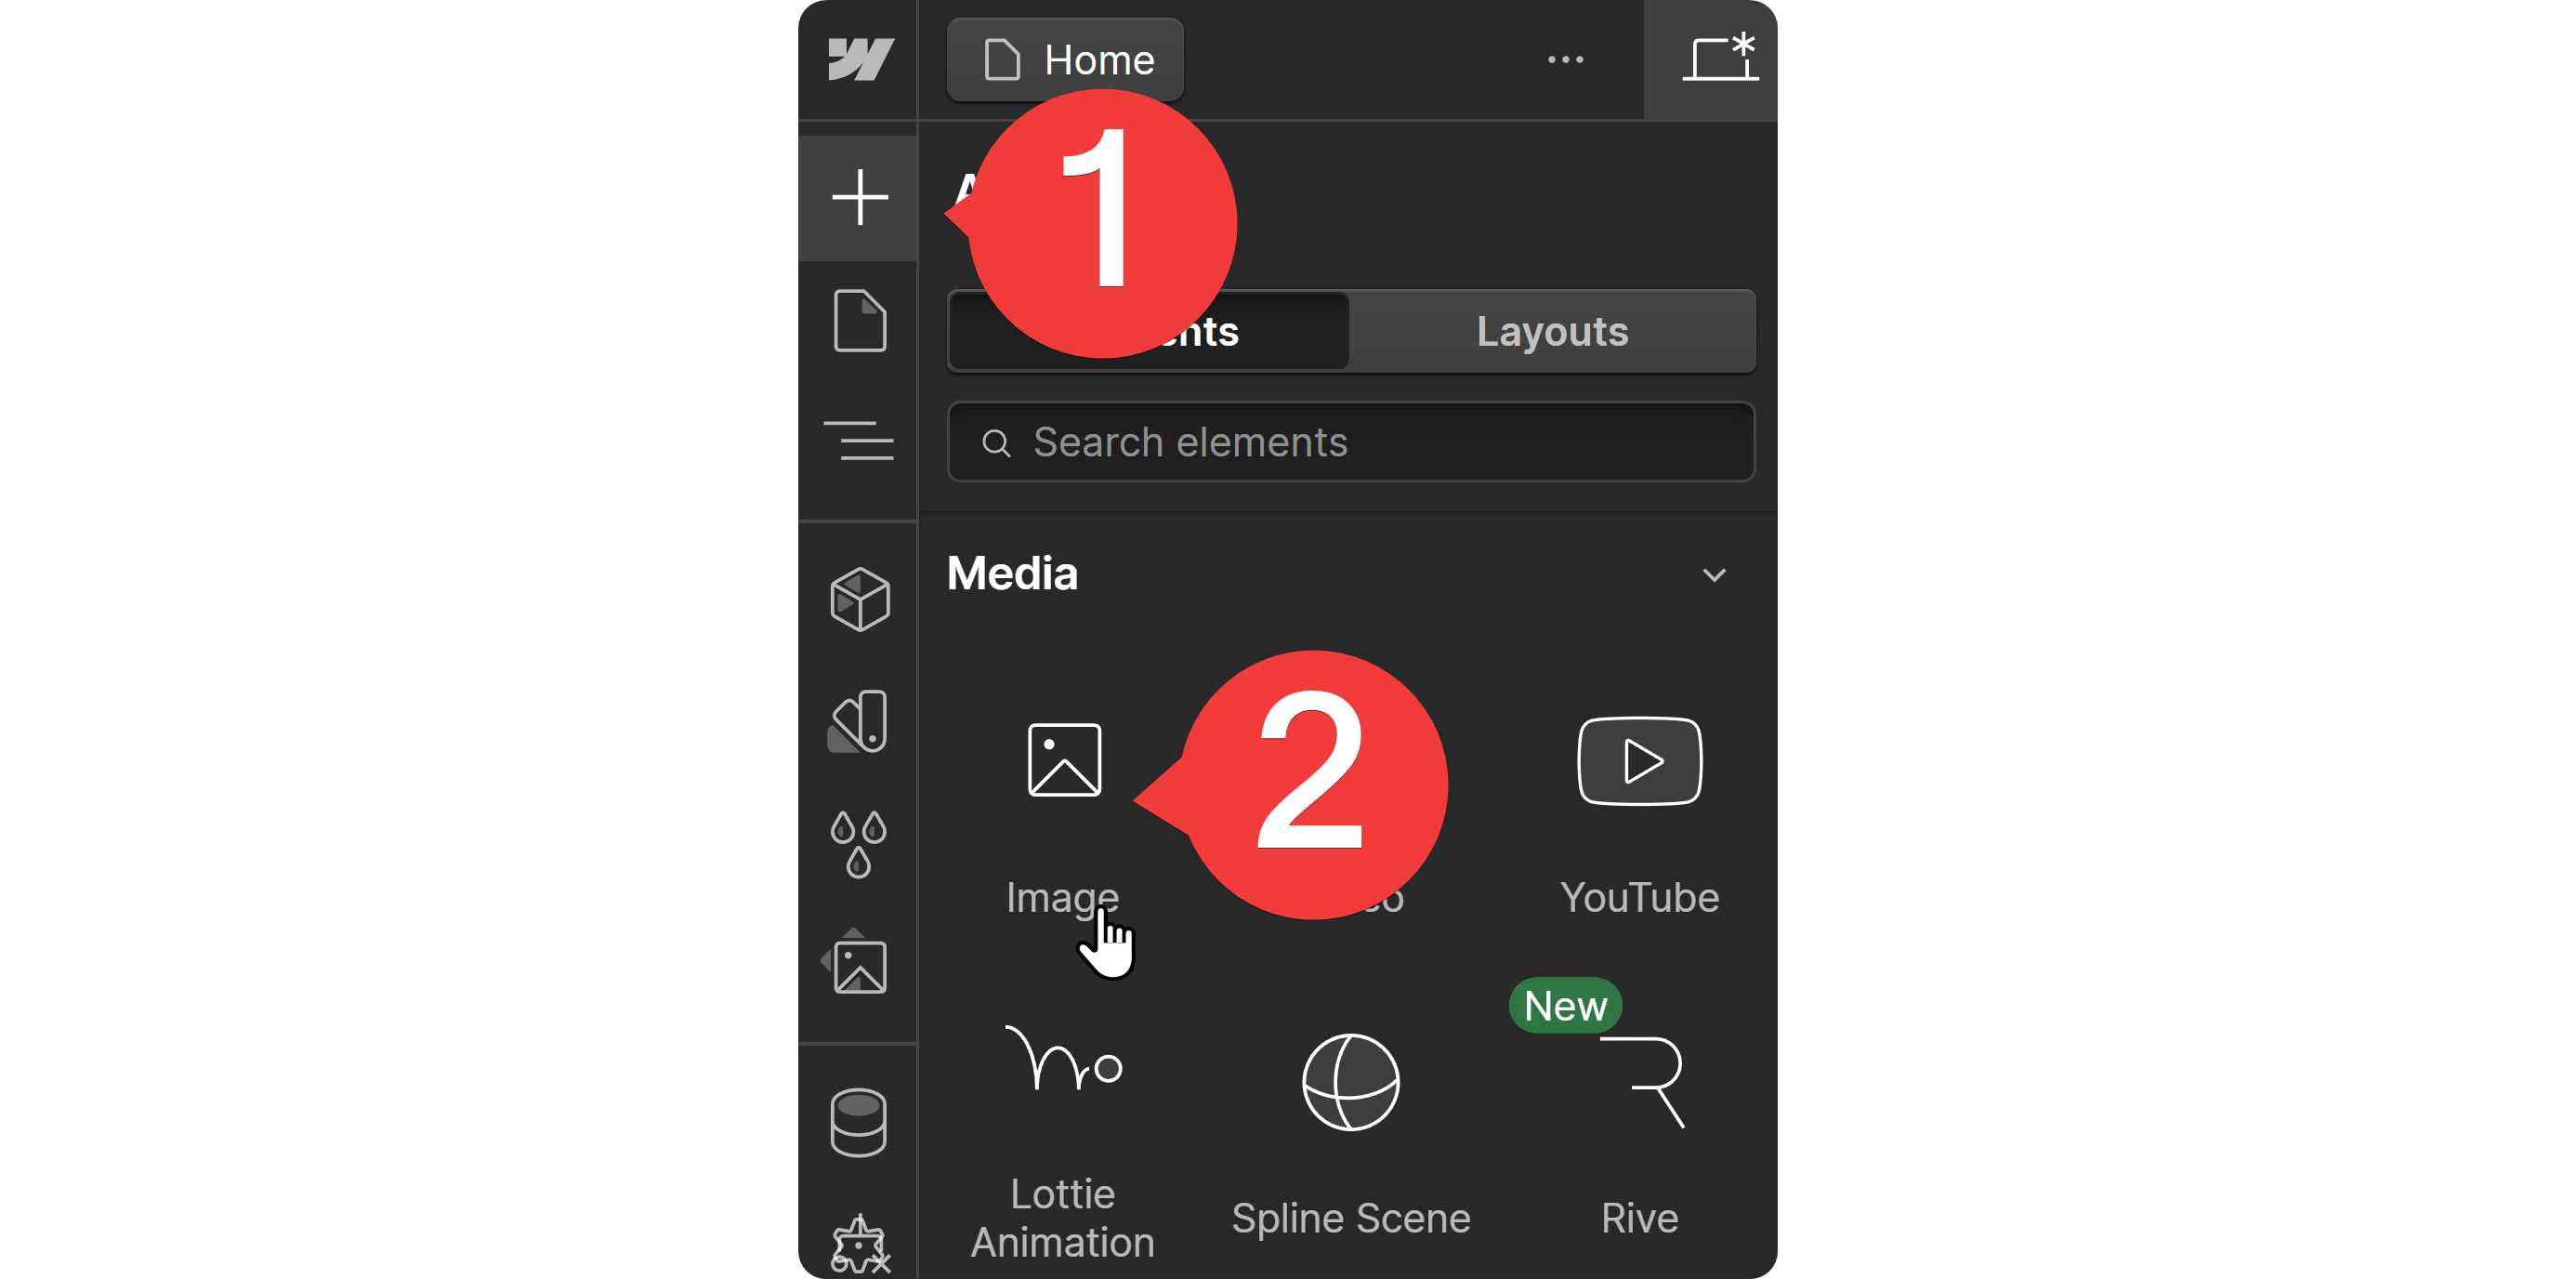
Adding images to Webflow sites works like adding an element, which we’ve covered in the section above. When you click on the Add Elements button, you’re going to see a list of all elements you can add to your website, and one of those is “Image.” Clicking or dragging it to your canvas will add it to your website.
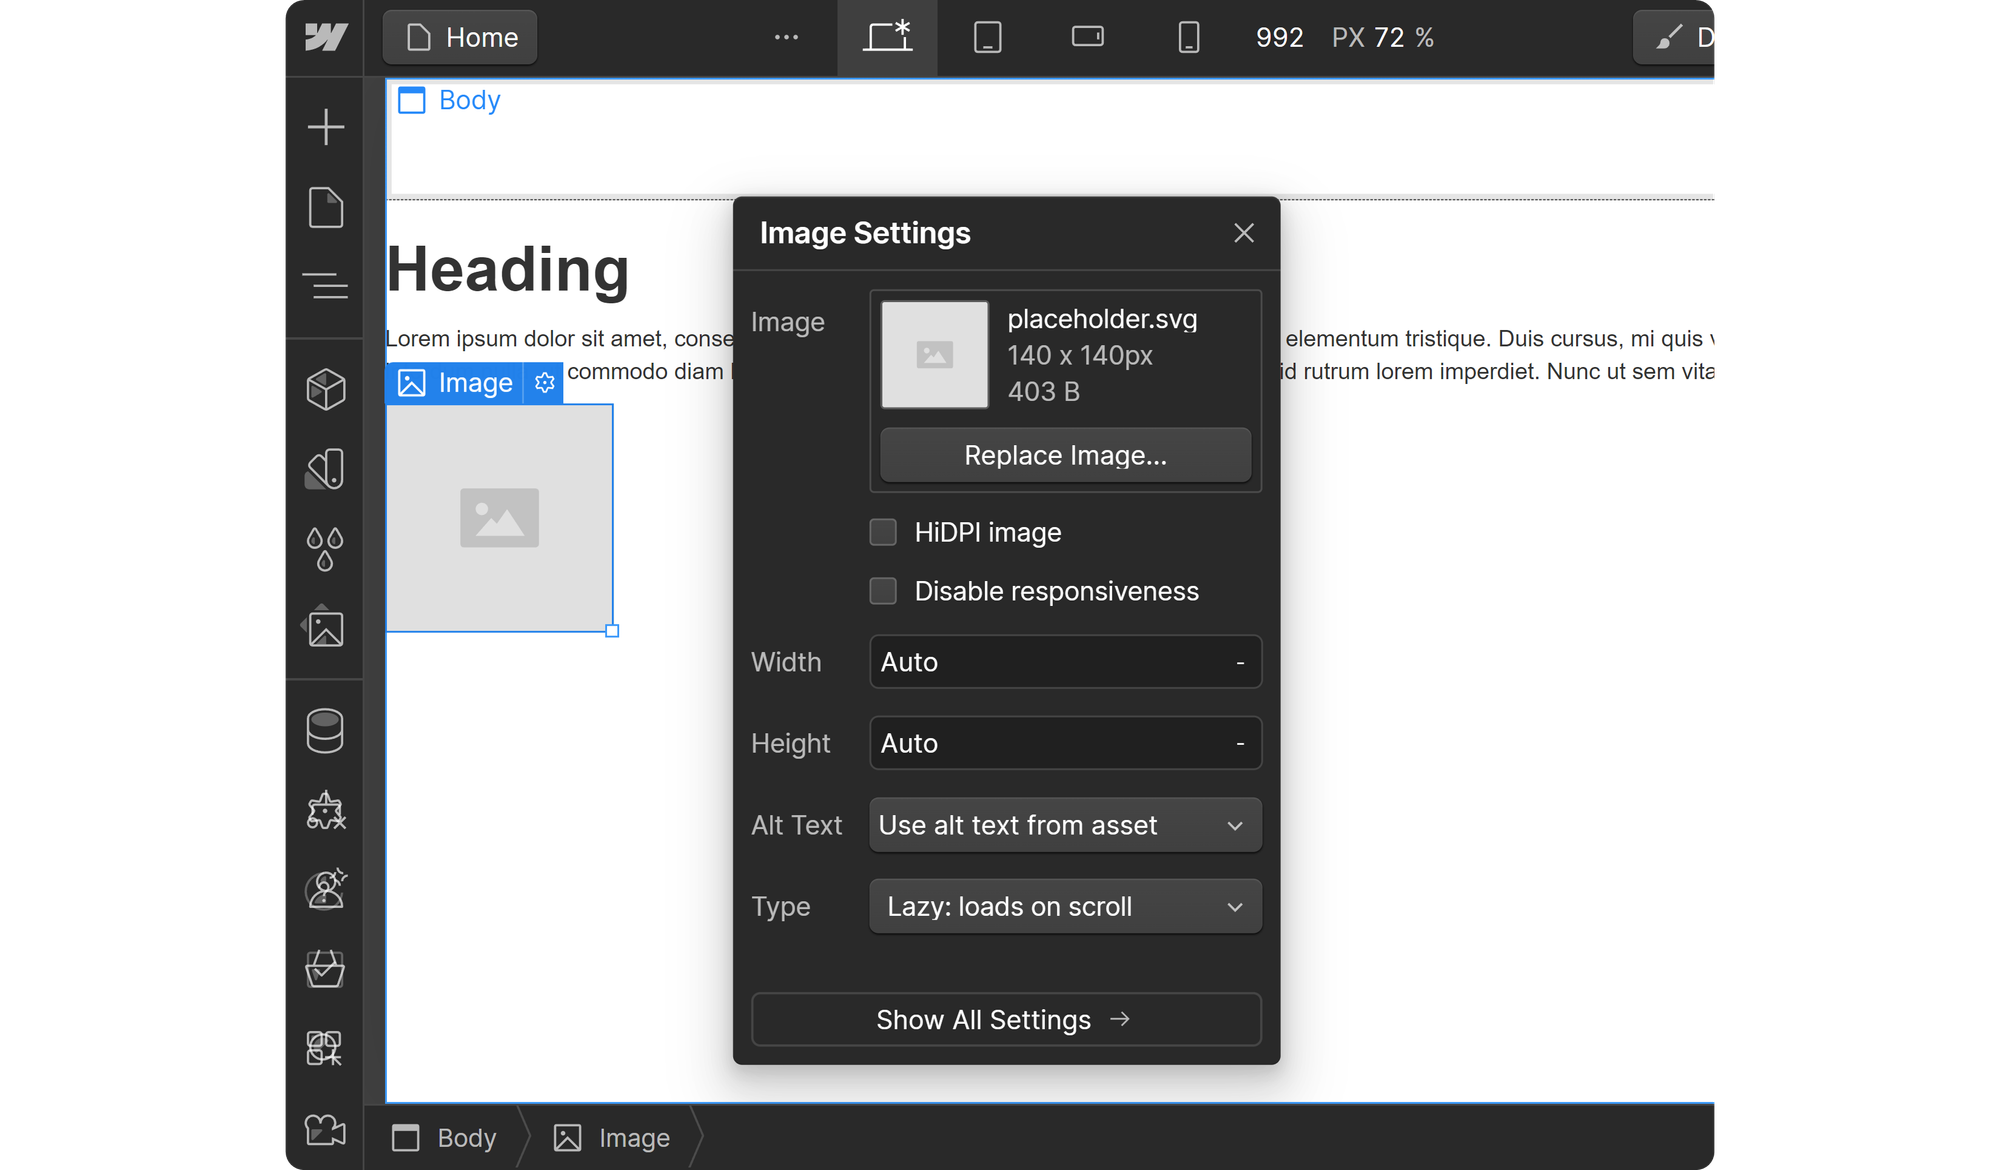
Once you’ve added an image, it’s going to appear as a placeholder, and Webflow will display its settings for you. In the Image Settings window, you can click on the Replace Image button to upload the image you want to use. You can also adjust settings like responsiveness, width and height, alt text, type, and more.
Interactions and Animations
One of the most powerful features of Webflow when it comes to visuals is the interactions. You’re able to set up animations of elements based on how visitors interact with it. Let’s make an interaction animation to better understand it.
First, click on the element you want to add animation to. This is going to focus your properties section on the right of that element, then select the Interactions tab of the properties.

In the Interactions tab, you’re going to see two parts: Element trigger and Page trigger. Element triggers are things like hovering over the element or clicking on it, while page triggers are page scroll, load, etc. Let’s click on the plus icon of the element triggers to open up the trigger menu and select mouse hover. Of course, this is just an example. You can select whatever trigger you want.
Once you do this, you’re going to see dropdowns for on hover and on hover out, which you can assign different animations to. Let’s select the Blink animation from the dropdown for on hover and preview it - it looks good! One cool feature is that you have the option to toggle the triggers for certain devices and even the landscape and portrait modes of phones.
Blogging features
Based on the plan you subscribe to, you have the ability to create blogs on your Webflow websites. The free Starter plan allows you to create 20 CMS collections (a blog is a CMS collection) and 50 CMS items, meaning that you can only create up to 50 blog posts. However, the Basic plan doesn’t support CMS collections at all. If you’re looking to create a blog, you’re going to have to subscribe to either CMS, Business, or Enterprise plans.
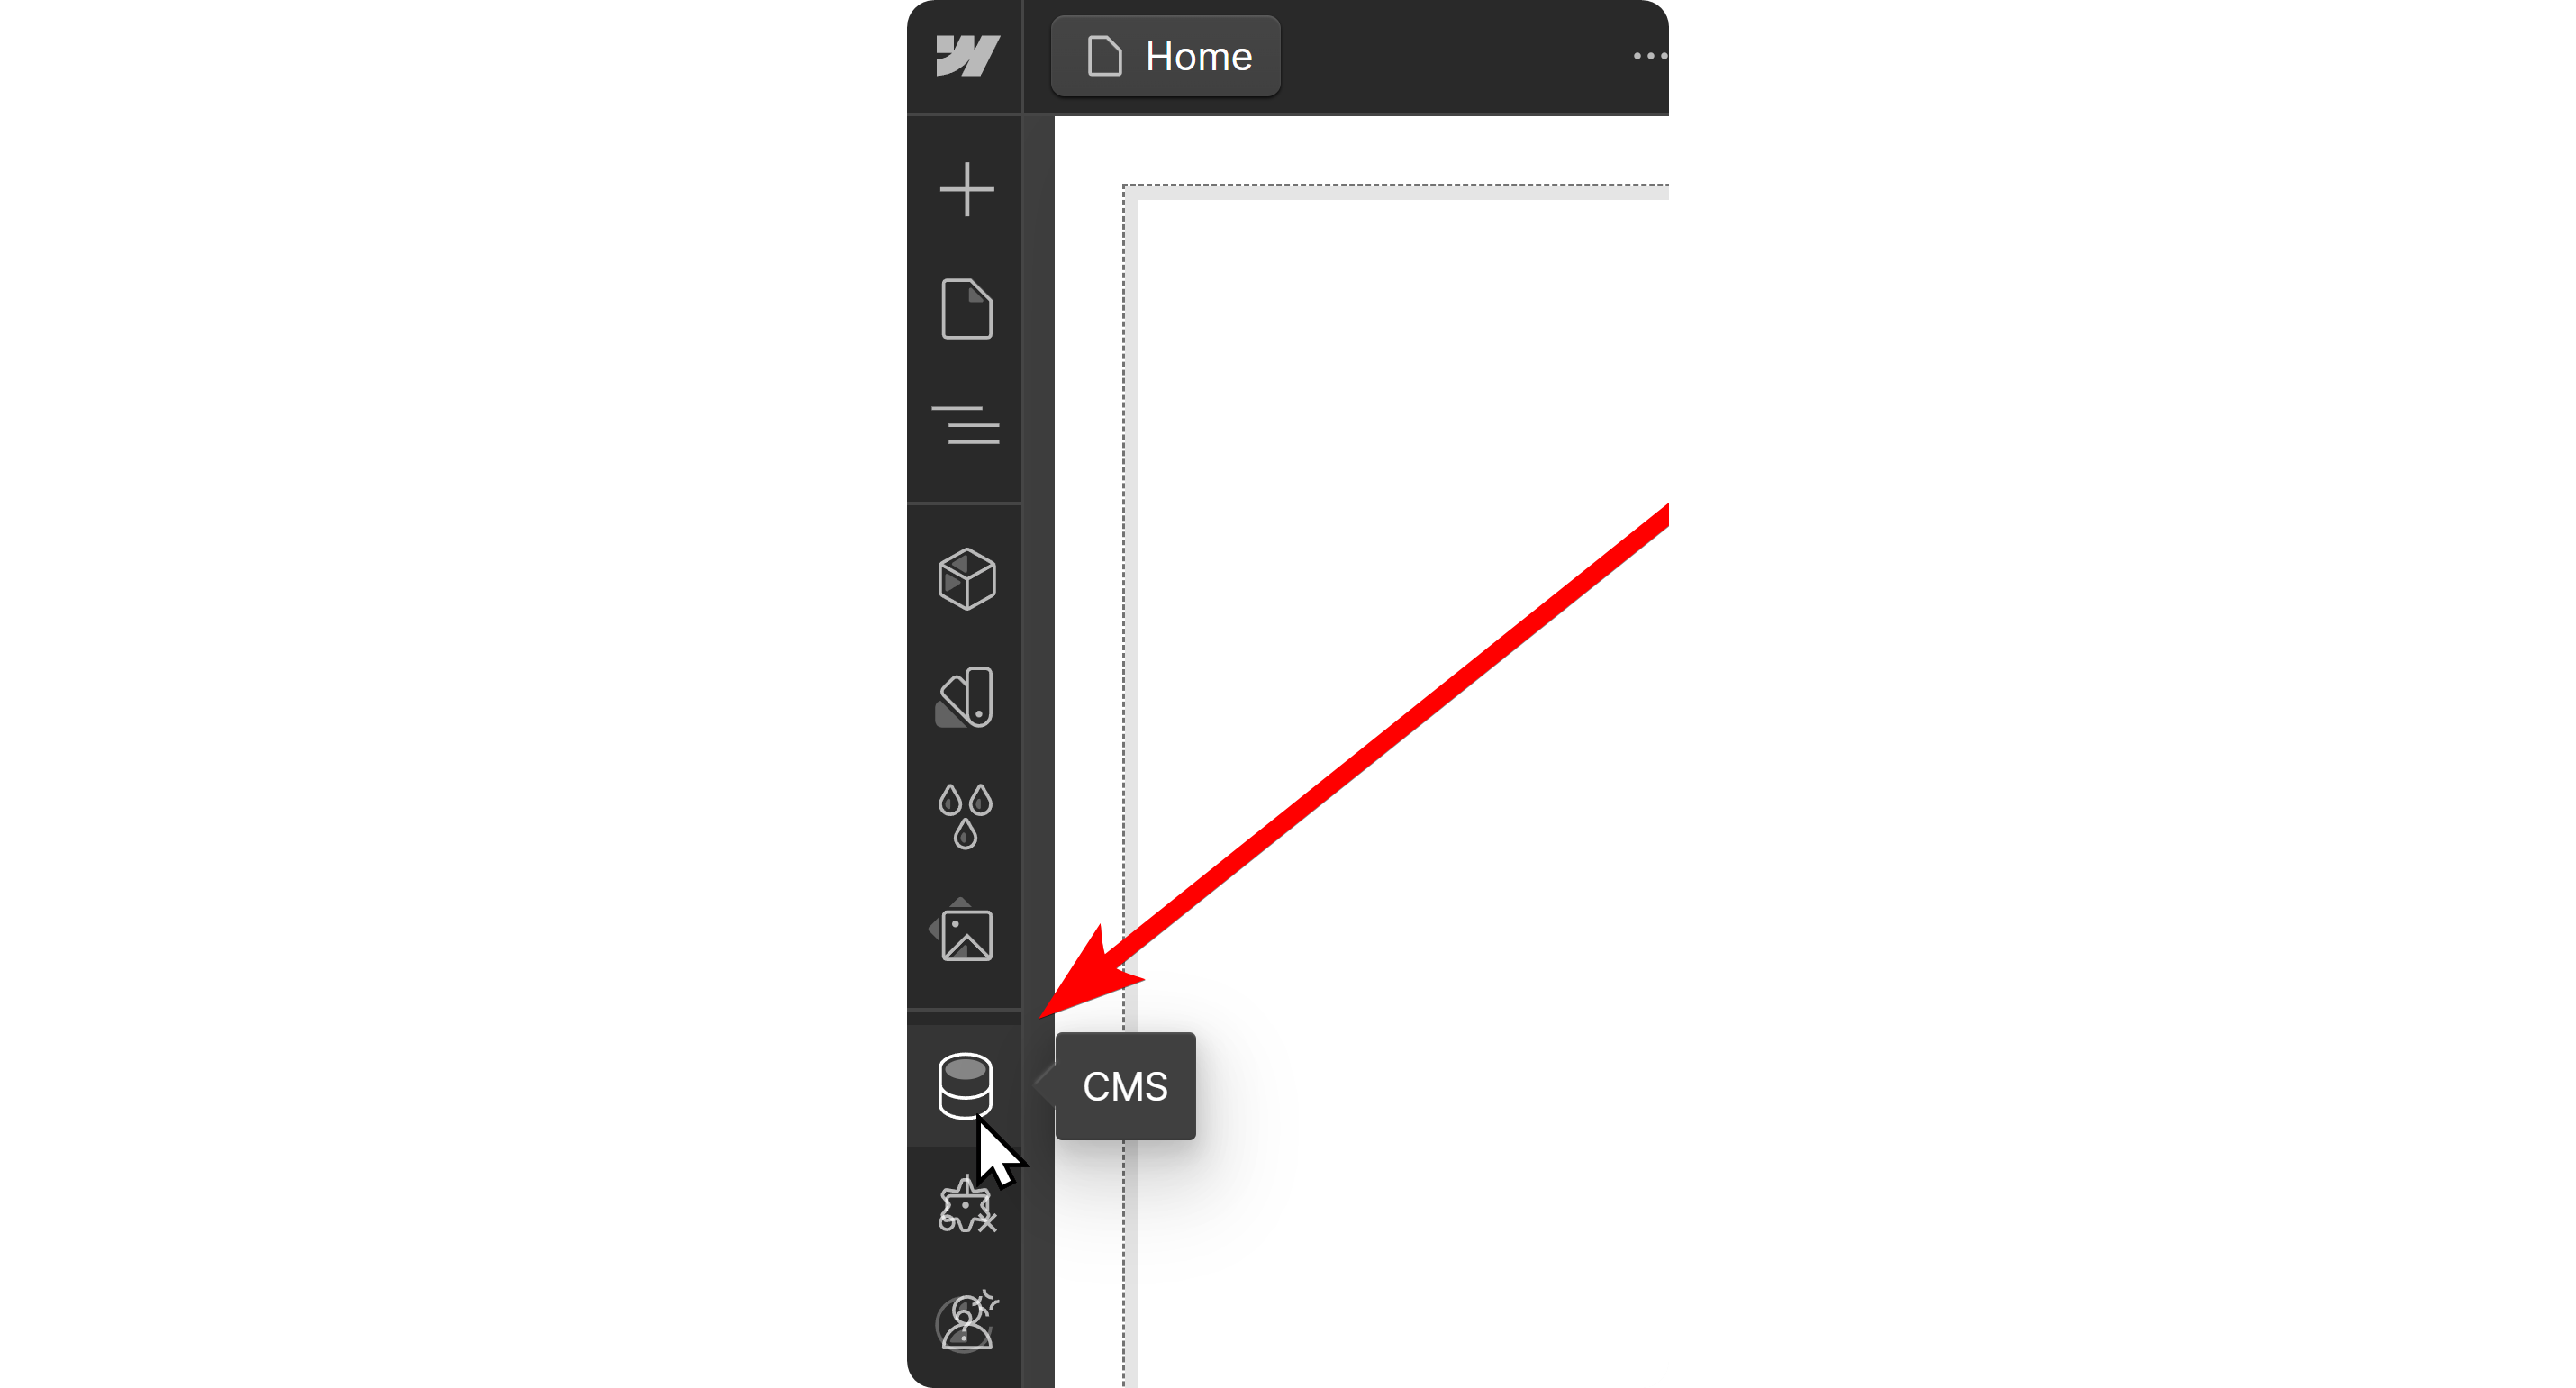
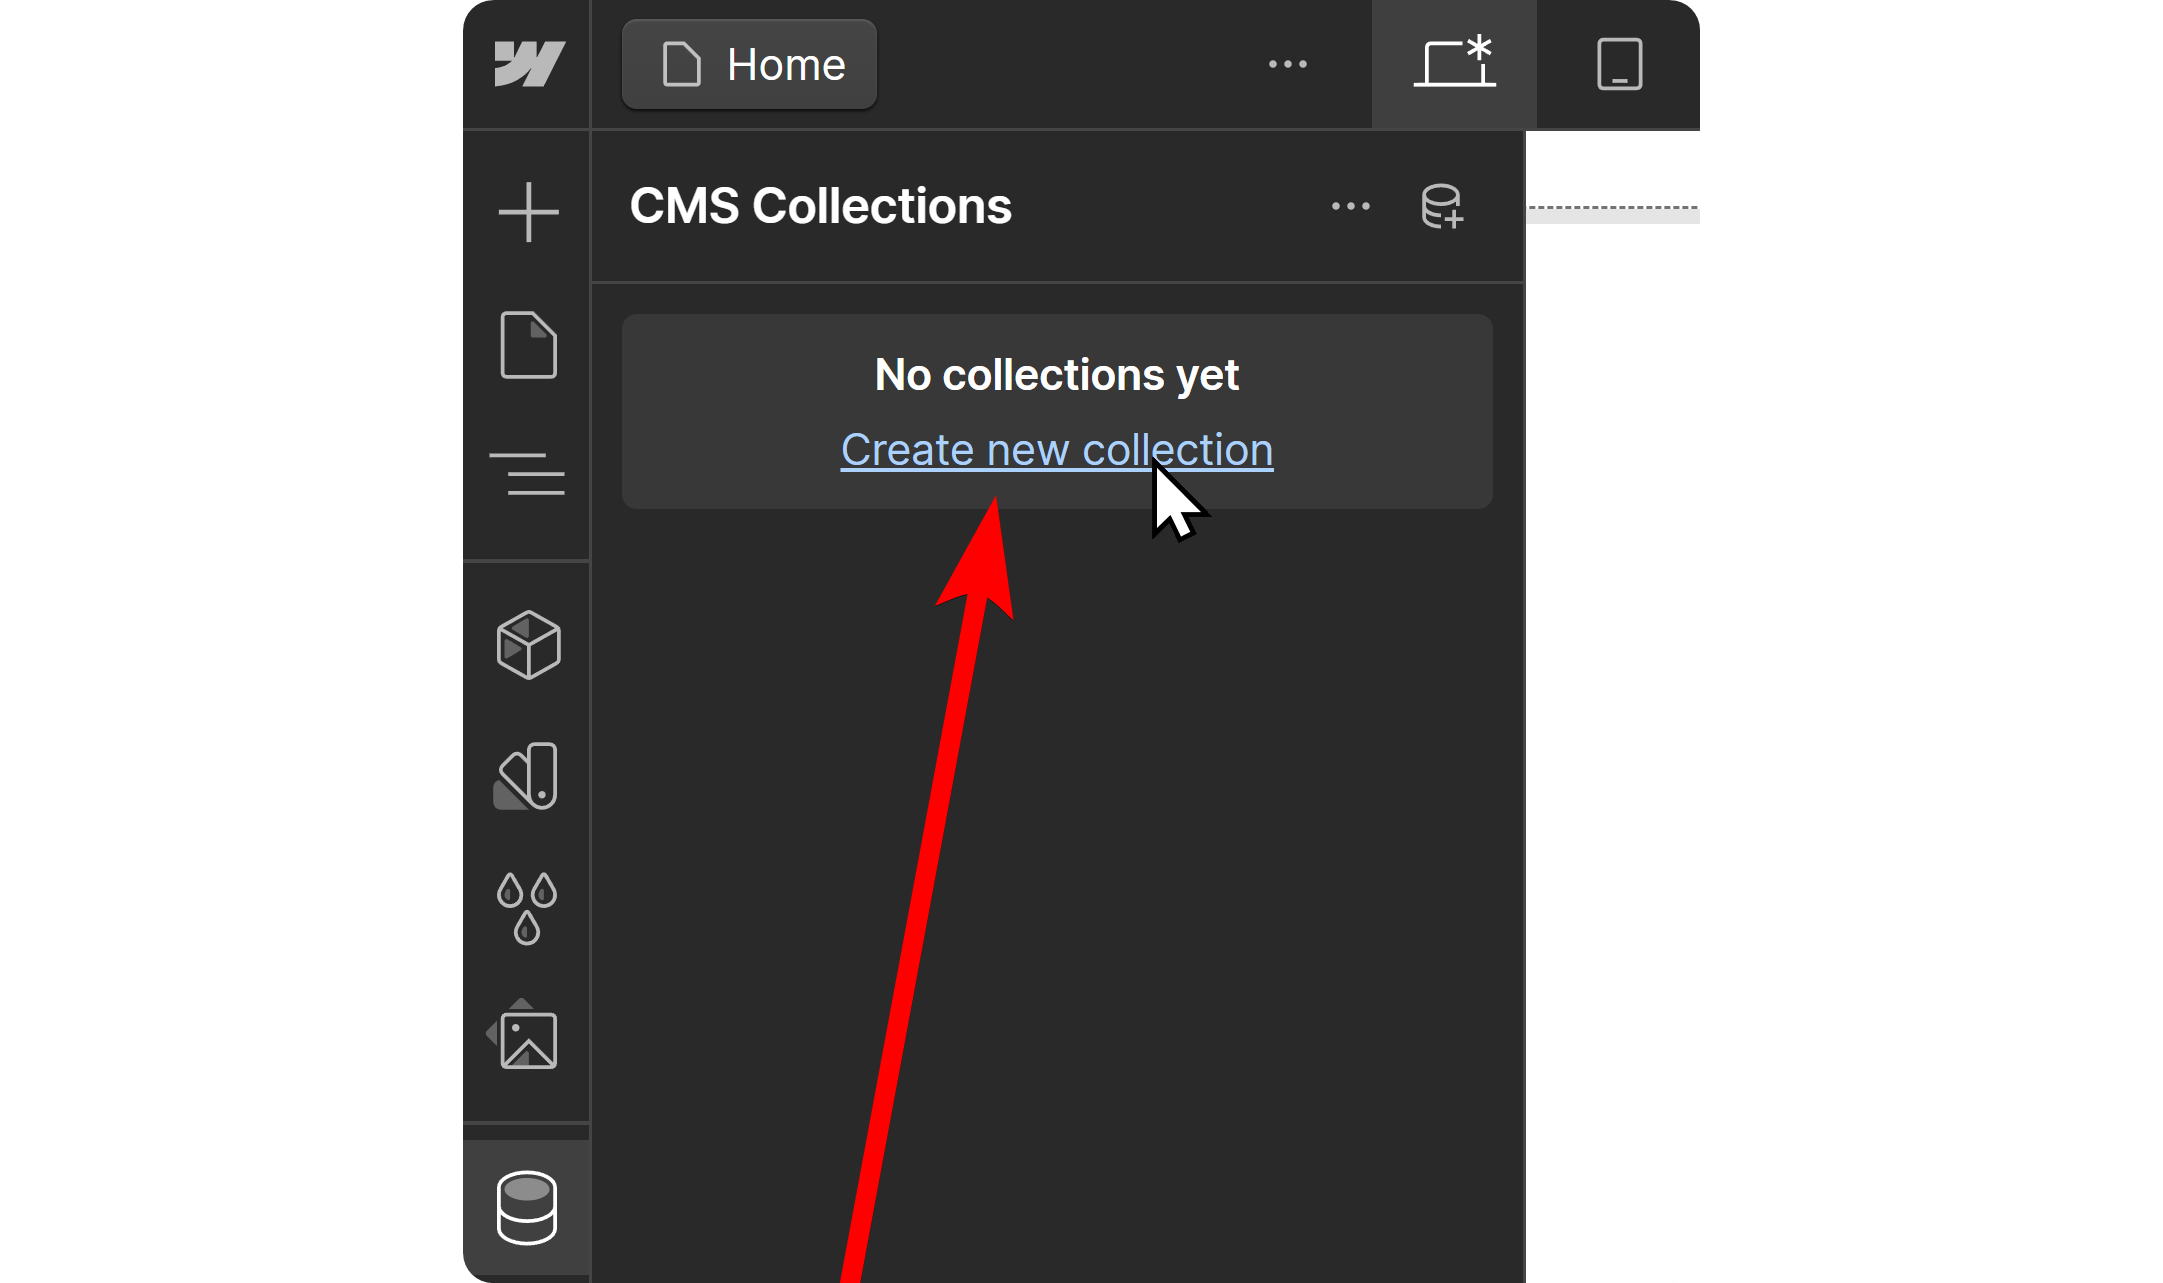
To add a blog section to your website, let’s first create a CMS collection for your blog posts. To do that, click on the CMS button on your toolkit. This is going to open up the CMS Collections tab.
In the CMS Collections tab, you’re going to see all of your CMS collections listed. Since you don’t have any yet, you’re going to see the Create new collection button. Click on it to proceed.
Once you click on the Create new collection button, you’re going to be directed to the settings of that CMS collection. There, you can adjust all the settings and fields (like blog name, body, image, etc.) of your CMS collection - you can also see a preview of your CMS editor on the right side of your screen. Luckily for you, Webflow has a Blog template ready to go. Click on the Blog Posts button under Collection Templates and then click Save Collection to get a fully-fledged blog post collection.

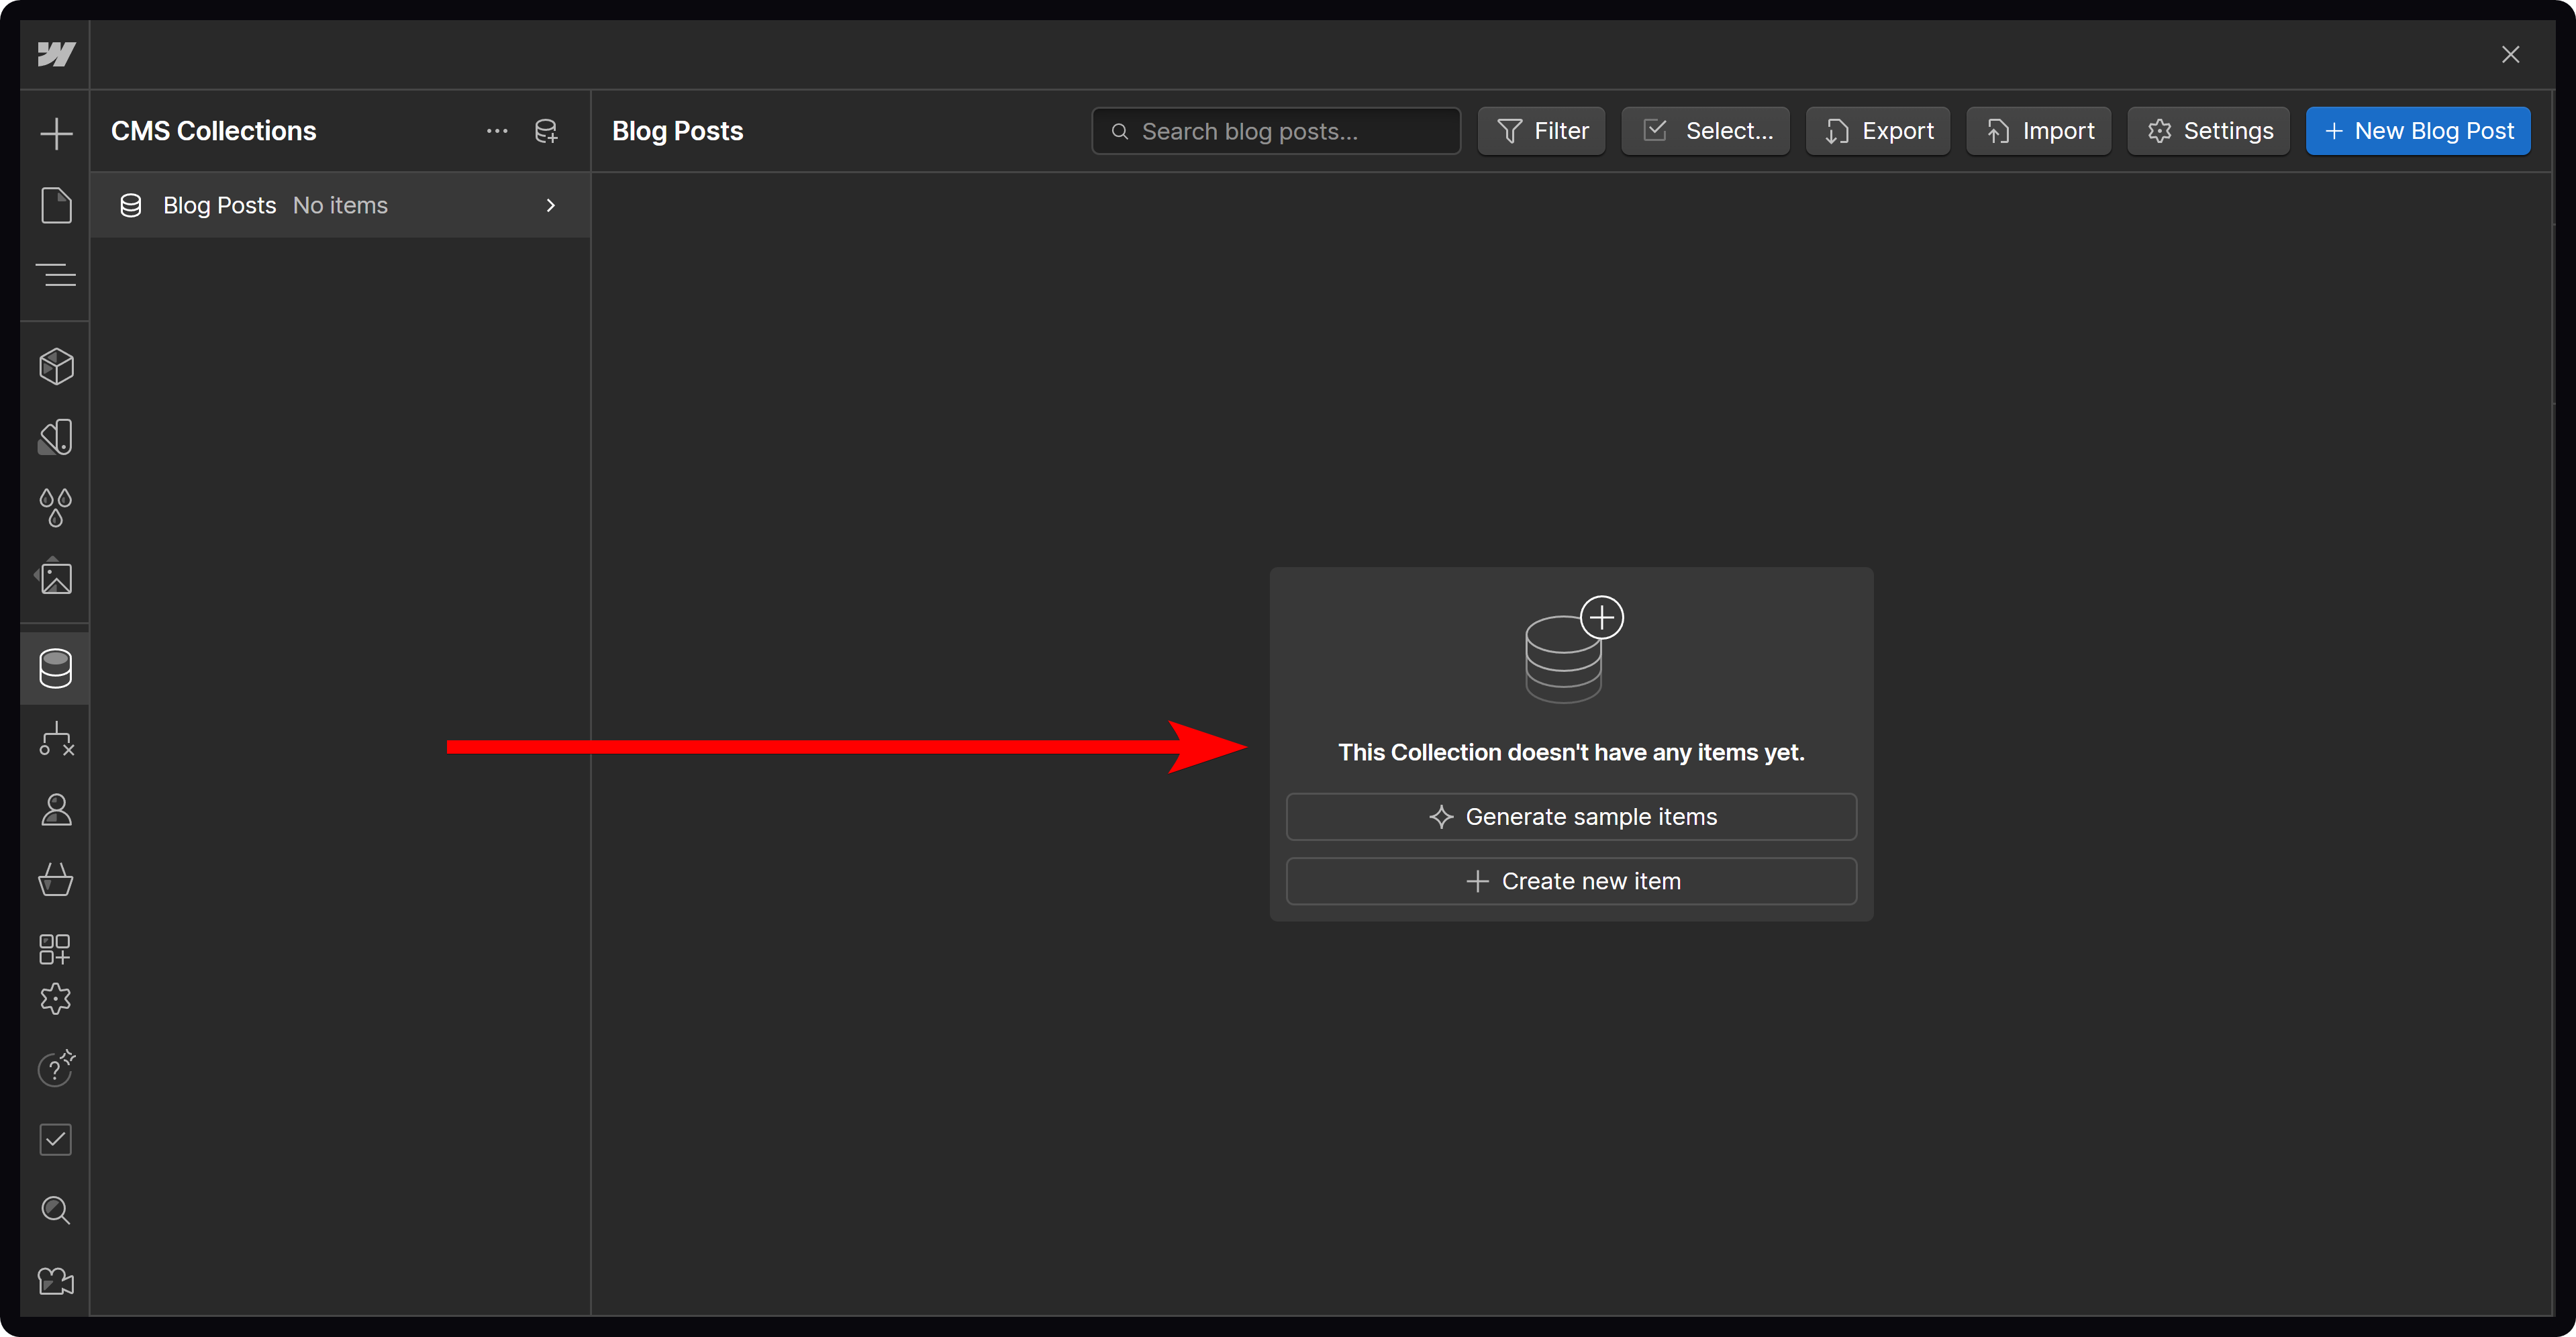
Once you create your blog posts collection, you’re going to see the list of items in that collection. Since you just created the collection, there are no items. To test things out, you can click on the Generate sample items button - or click on the Create new item button to create an item manually.
Now that you have all the things you need to start creating blog posts, let’s not forget to adjust how those blog post pages will look. If you click on the Pages button in your toolkit, you can see a list of all the pages on your website. There, you’re going to see that Webflow has created a “Blog Posts Template” page for you - that page is the foundation of your blog posts.

When you add elements and click on them on the Blog Posts Template page, you’re going to see the settings button (cogwheel icon) next to their names. Once you click on the settings button, for text elements, for example, you’re going to see the Text field, which you can edit.
Clicking on the purple dot on it will display your variables, which are things like your blog post’s title, summary, creation date, etc. Selecting one of those is going to mark that element as a variable and it’s going to change for each blog post - you now have a blog ready to go.
Accessible design features
Webflow provides an amazing level of control to its users, and this includes several accessibility adjustments. For example, Webflow has a built-in color contrast checker that will let you know if your website design doesn’t meet the Web Content Accessibility Guidelines requirements.
A vision preview feature that allows users to preview the website with several visual impairments like colorblindness (including full spectrum), blurred vision, and more. While these vision previews might not be 100% accurate, they give website designers an edge in making their websites accessible to everyone.
Webflow’s backup features
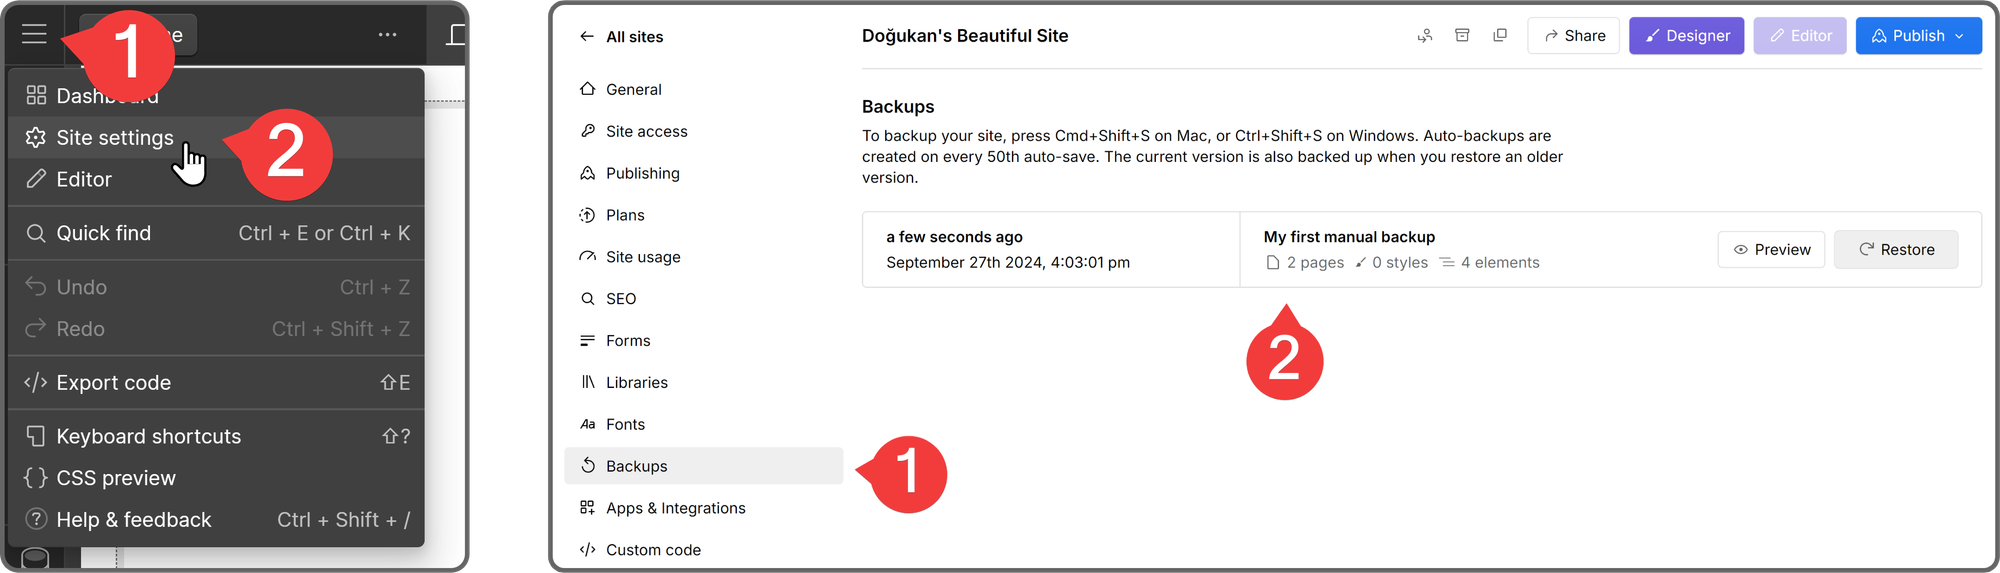
Backups are a feature that all website builders should have, and Webflow has them, too. If you’ve been designing your website on Webflow, you might’ve noticed that Webflow automatically saves your changes, but did you know that it also creates backup points on every 50th autosave?
Users also have the option to manually save backups by using the Command + Shift + S (macOS) or Control + Shift + S (Windows) keybinds. Once you back up a version of your website, you can click on the Webflow icon at the top left of your screen, select Site settings, and navigate to the Backups section to see all your backups. When you restore a backup, the current version of your website is backed up as well.
What Ecommerce Features Does Webflow Have?
Webflow offers its users a variety of ecommerce features for those who want to leverage the platform’s code-free website builder to create their own ecommerce platforms. While Webflow isn’t the first platform that comes to mind when you say “ecommerce,” it’s still a great place to start your ecommerce journey.
Let’s take a look at some of the features.
Selling digital and physical products
With Webflow, you can create stores for both digital and physical products. Utilizing the Content Management System of Webflow allows you to add, edit, remove, and switch products with ease.
If you’re looking to sell digital products, Webflow offers the feature to deliver them (the download links) via email. One downside of selling digital products on Webflow sites is the fact that you cannot directly upload digital content to sell - they must be uploaded to third-party platforms like Google Drive or Dropbox. Then, the product’s download link will be delivered to the buyer by Webflow.
When it comes to selling physical products, Webflow allows users to customize the shipping methods based on users’ regions. It can also be integrated with shipping management platforms like Shippo to utilize features like tracking, custom labels, notifications, and more.
Payment processing features
Webflow allows your customers to make purchases using major credit cards, debit cards, Apple Pay, and PayPal. One of the biggest disadvantages of ecommerce in Webflow is the limitation of payment gateways. The current integrations are limited to Stripe and PayPal, unlike Shopify or BigCommerce, which offer a broader range.
The ecommerce site plans that are available on Webflow are Standard ($29/mo), Plus ($74/mo), and Advanced ($212/mo). While the Standard plan has a 2% transaction fee, Plus and Advanced plans don’t have a transaction fee. One great feature of Webflow is its focus on transaction security. Since all transactions on Webflow are integrated into Stripe or PayPal, they’re secure. On top of this, Webflow complies with SCA requirements for users who want to operate in the European Economic Area as well.
Customized checkout pages
Checkout pages on ecommerce platforms have a notable impact on whether the buyer moves on with the purchase or not. Having a not-so-good-looking checkout page that’s hard to use might prevent users from going through, either through frustration or confusion. Luckily for Webflow users, it’s possible to fully customize the looks and user experience of the checkout process.
Branded receipts
After every purchase, the buyer receives a receipt in their email, and Webflow allows its users to customize those receipts so that you can carry your brand’s image to the user even in the receipt and order notification emails. This is a big plus for keeping your ecommerce platform professional and consistent.
Automated sales tax
Manual tax calculations are open to mistakes, and they take a lot of time. This is why Webflow offers automated sales tax calculations to its users. Businesses based in the US, Canada, EU, and Australia can utilize this feature. Webflow uses TaxJar’s API, which calculates sales tax and VAT during the checkout process.
One thing you should keep in mind is that if you’re operating in the EU, especially with digital products, we recommend you do in-depth research about the EU’s VAT Mini One Stop Shop rules to avoid any problems.
Data capture forms
Like some other website builders, Webflow allows its users to create highly customized data capture forms. From custom fields to reCAPTCHA integration, these forms can have all the parts that you want them to. However, the data you capture through these forms can only be sent to an email - so no storing data in Google Sheets or any other databases you use. If you want to do this, you’d have to use third-party integrations, which might require some coding knowledge or even premium subscriptions.
Also, there is a limit to how many form submissions you can take based on the plan you’ve subscribed to. For example, while the free Starter tier only has 50 form submissions (lifetime), the Business has 2,500 monthly submissions.
What About Integrations?
As most website builders do, Webflow offers its users a collection of integrations that allows users to incorporate functions or designs that are not natively built into Webflow itself. The integrations are developed by third parties, and as of September 2024, there are more than 150 integrations that you can add to your website.
There are 29 categories of integrations, from email marketing to payment processing, but not all integrations have the same impact on your website. While some integrations, like Scrollbar Styler by Finsweet, affect your website’s scrollbar, which isn’t a big change, others, like HubSpot, allow you to create powerful forms and embed them into your website. They all have varying levels of effect on your website’s performance and loading speed, but since Webflow utilizes AWS, this shouldn’t be a problem unless you overload your website with integrations.
One thing you should keep in mind about integrations is that while Webflow is an easy, no-code drag-and-drop website builder, some integrations might require you to have technical knowledge - especially the ones that require external setup, including custom code and APIs.
How SEO Friendly is Webflow?
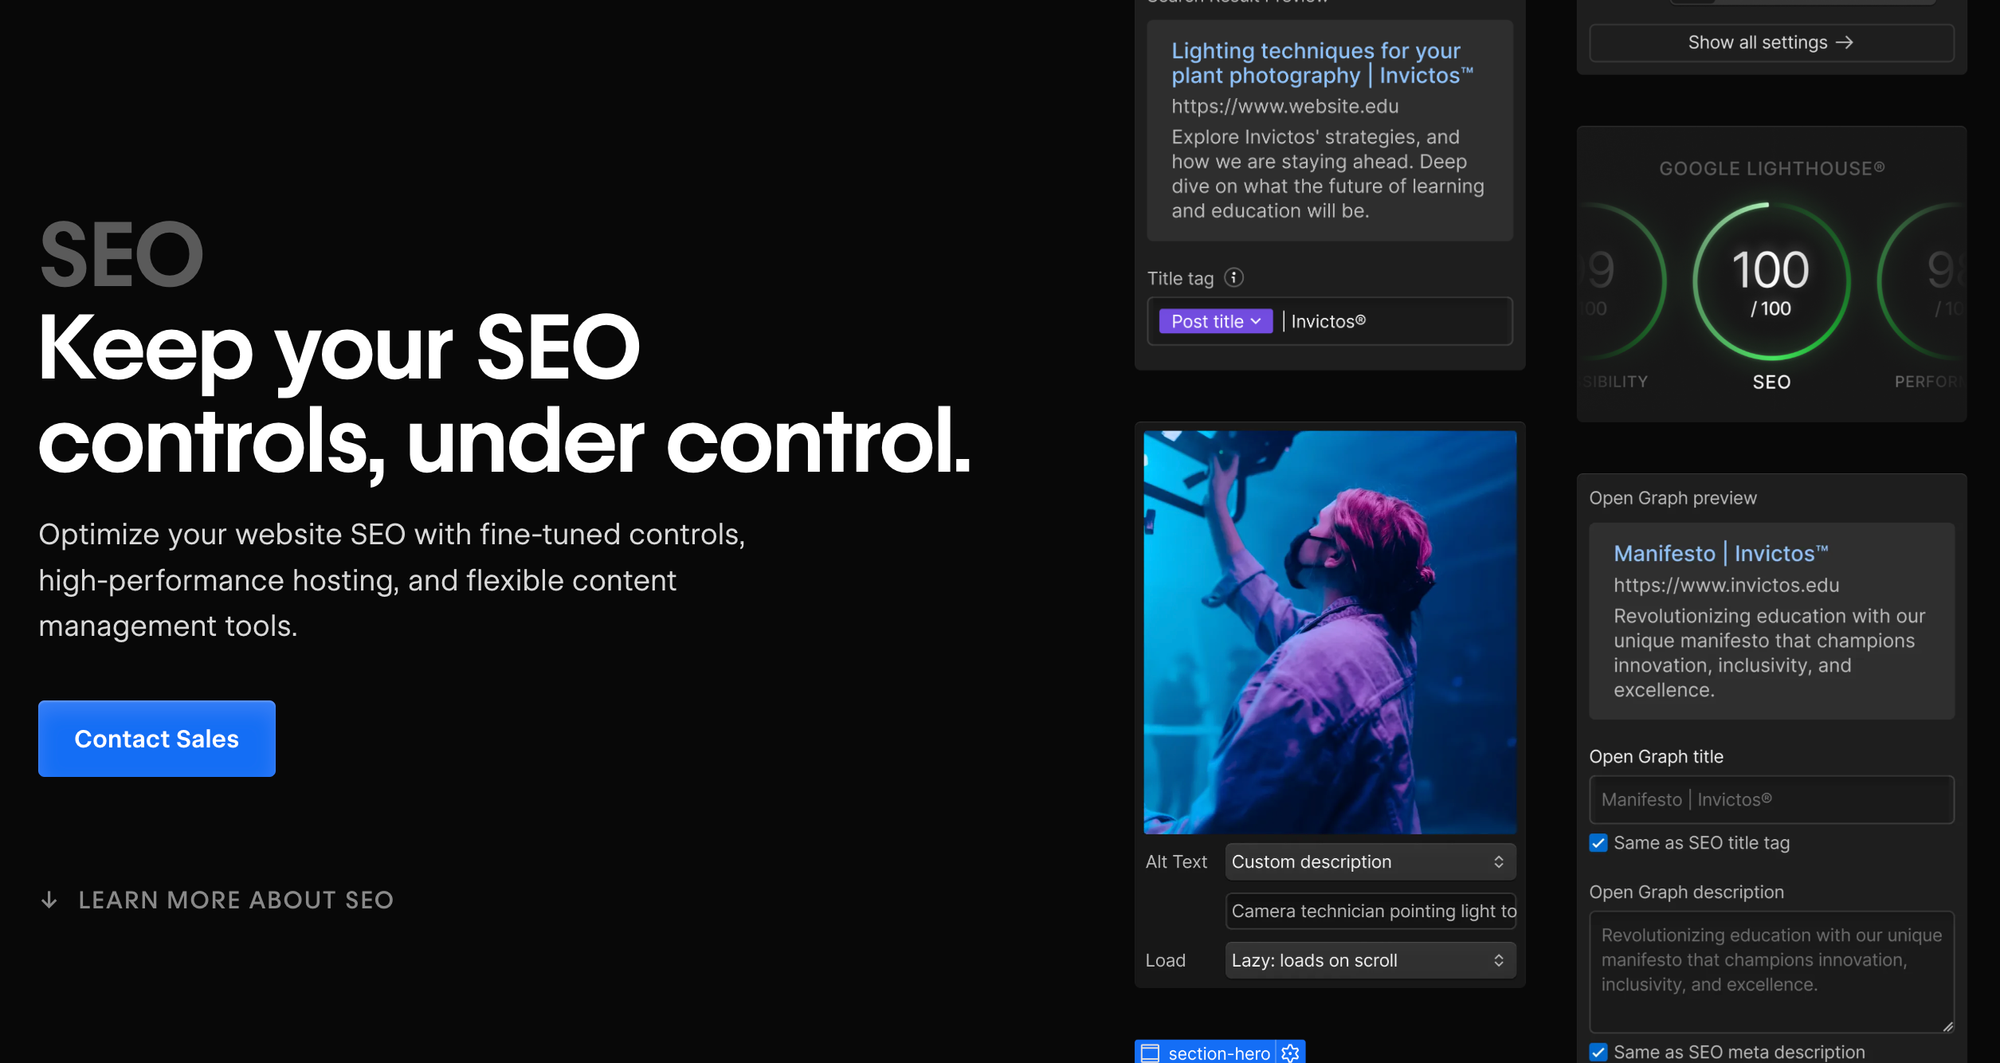
The first SEO tools you’re going to see when using Webflow are the fundamentals like customizable titles, links, and meta descriptions. Also, like many website builders, Webflow allows you to add alt texts to your images so that you can get a little boost of SEO from them as well. Apart from these, you’re able to control the 301 redirects, your website’s robots.txt file (which controls what parts of your website web crawlers are allowed in), and more.
Since the designs you make in Webflow are responsive to all kinds of devices and screen sizes, you’re going to have a greater search score when compared to websites made by other website-building platforms that don’t focus on responsive design as much as Webflow does. The semantic code Webflow uses when building your site only adds up to your advantages. Since the semantic code feature of Webflow allows your website to load faster, you’re going to rank higher on Google.
However, Webflow doesn’t provide a comprehensive SEO tool - you might have to rely on third-party integrations for this. You should also keep in mind that while Webflow allows you to create amazing-looking website designs full of cool visuals and animations, these mayp slow down your website. So, while you should use animations and other visual tools on Webflow designs, you should do it with consideration.
Webflow’s Customer Support: How Helpful is it?
When it comes to customer support, Webflow sadly offers email-only support for most plans. If you're on the Enterprise plan, you can access phone support, available Monday through Friday from 6AM to 6PM PT.
For everyone else, the only way to contact Webflow is via email. This is a big downside for people who want quick and easy answers to their questions - an asynchronous communication like email isn’t a great way to do it, and the 24- 48-hour response time might be too much for some people. On top of this, the support is English-only, and you’re not going to be able to get help with third-party integrations you use on your website since those integrations aren’t made by Webflow itself.
On the other hand, there are a number of resources you can consult for your Webflow questions. The Webflow University, which is a learning platform made by Webflow itself, is a great place to learn using Webflow and answer your technical questions. The forum and help articles of Webflow contribute to this.
How Much Does Webflow Cost?
Excluding free Starter plans, there are a total of 13 different plans you can subscribe to on Webflow. Like most website builders, Webflow’s plans are tiered as well, meaning that as the tier goes up, so do the price and features.
Plans are divided into two categories: Site and Workspace plans, and each has two categories within. Let’s take a look at each one.
Site Plans
As we mentioned, there are two categories within site plans and they’re general and ecommerce. General site plans are for people who want to easily design a website and publish it, hosted on Webflow. Ecommerce plans, however, have capabilities like creating shops, CMS items, and more.
General Site Plans
As we mentioned, general site plans are the go-to option for people who want to use Webflow’s powerful visual designers to design their website and publish it right in the visual designer itself. There are five tiers plans of general site plans:
- Starter
- Price: Free
- For: People who are new to Webflow and want to design a simple website with a Webflow.io domain
- Basic
- Price: $14/mo
- For: People who want to design a simple static website with 75 times the page count and 10 times the bandwidth of the Starter plan
- CMS
- Price: $23/mo
- For: People who want to create blogs or other content-based websites with 50 times the bandwidth of the Starter plan, multiple (3) editors, and more
- Business
- Price: $39/mo
- For: For people who want to create a website for large brands. The Business plan has customizable CMS items and bandwidth options ranging from 100 GB to 500 GB - of course, this reflects on the cost
- Enterprise
- Price: Custom
- For: For people who are looking for an enterprise-level solution. The enterprise option doesn’t have a set price, and you can negotiate it with Webflow itself. The plan guarantees an SLA, priority support (chat), uncapped users, and more
Ecommerce Site Plans
As its name suggests, the ecommerce site plans allow users to create ecommerce stores on their websites - a feature that general site plans don’t have. The ecommerce plans have three tiers:
- Standard
- Price: $29/mo
- For: For people who want to create a website with 500 ecommerce and 2,000 CMS items with a 2% transaction fee. This plan includes all features of the CMS general site plan
- Plus
- Price: $74/mo
- For: For people who want to create a high volume ecommerce store with 5,000 ecommerce and 10,000 CMS items with a 0% transaction fee. This plan includes all features of the Business general site plan
- Advanced
- Price: $212/mo
- For: For people who want to take their ecommerce site to a new level with 15,000 ecommerce and 10,000 CMS items with a 0% transaction fee. This plan includes all features of the Business general site plan
Workspace Plans
Just like site plans, workspace plans have two categories: for in-house teams and for freelancers & agencies. The difference between site plans and workspace plans is that site plans are bound to a single website that you design. If you want to create two websites, you’re going to have to subscribe to two site plans individually per site.
Workspace plans, on the other hand, are bound to your account - not the websites you create. When you subscribe to a workspace plan, the websites you create can be shared with multiple users to collaborate or showcase if they’re your customers. When you create a website, however, you’re going to need to subscribe to a site plan for it to publish. If you don’t want to host your website on Webflow, unlike site plans, workspace plans let you export your website’s code to host it externally.
Workspace Plans for In-House Teams
There are four tiers in the for in-house teams category, and they’re mainly for people who want to work with other people on a number of unhosted and hosted sites. Let’s take a look at the tiers:
- Starter
- Price: Free
- For: People who are new to Webflow and just getting started. This plan supports a single user, unlimited paid hosted websites, and 2 webflow.io staging (unhosted) sites. This plan doesn’t let users export sites
- Core
- Price: $19/mo
- For: Small teams (3 users) that want to collaborate on Webflow projects together. This plan allows unlimited paid hosted sites, 10 webflow.io staging (unhosted) sites, and exporting the code of your site
- Growth
- Price: $49/mo
- For: Large teams (9 users) that want to collaborate on Webflow projects together. This plan also supports unlimited paid hosted sites and unlimited webflow.io staging (unhosted) sites. On top of this, the Growth plan offers code exports and shared libraries, among other features
- Enterprise
- Price: Custom
- For: People who are new to Webflow and want to design a simple website with a Webflow.io domain
Workspace Plans for Freelancers & Agencies
The other category of the workspace plans is “for freelancers & agencies,” and it has three tiers. This plan category is made for freelancers and agencies who plan to use Webflow to design websites and deliver them to their clients. The tiers of this category are:
- Starter
- Price: Free
- For: People who are new to Webflow and just getting started. When you sign up to Webflow, you automatically get a free workspace. This plan allows a single user, 2 staging (unhosted) sites on webflow.io domains, 2 agency or freelancer guests, and 2 free commenters
- Freelancer
- Price: $16/mo
- For: Solo freelancers and small teams up to 3 people. This plan allows 10 staging (unhosted) sites on webflow.io domains, full CMS access on staging sites, free guest access, basic roles and permissions, and 10 free commenters.
- Agency
- Price: $35/mo
- For: People who are managing multiple clients and/or medium-big teams. This plan allows up to 9 users, unlimited staging (unhosted) sites on webflow.io domains, full CMS access on those sites, free guest access, advanced roles and permissions, 10 free commenters, and shared libraries (components and variables across multiple websites in the same workspace.)
Is Webflow Worth It?
The short answer is yes - Webflow is definitely worth it. The control over the design that you have on Webflow is unmatched, and using the powerful interaction-based animations (including Lottie files) allows you to design websites that you can’t by using other platforms. Of course, this doesn’t mean there aren’t places where Webflow falls short.
If you’re looking to create a simple personal website for yourself or you’re a freelancer/agency that designs websites for customers, Webflow is definitely the way to go. However, when it comes to rapidly scaling large businesses, you’re going to face limitations on sales volume, payment gateways, and dropshipping options.
If you’re selling digital products, things can get even a bit more complicated - that’s why you would want to use a dedicated platform like Whop.
| Pros ✅ | Cons ❌ |
|---|---|
| Incredible control over visuals | Steep learning curve |
| No-code website design | Limited ecommerce features |
| Semantic code generation and responsive design | Email support only except Enterprise plans |
| Ability to export website codes with Workspace plans | Page count limits |
| Strong Content Management System | Reliance on third-party integrations for advanced features |
3 Webflow Alternatives
Webflow is great for many things, but as with all platforms, there are advantages and disadvantages when comparing it with other platforms that you might use for the same purpose. “Same purpose” doesn’t necessarily mean website building. So, let’s talk about the alternatives of Webflow.
1. Shopify
If you’re looking to create an ecommerce site, one of the first platforms that come to mind is Shopify. When compared to Webflow, Shopify falls short on things like control over design and flexibility. However, in the context of ecommerce, Shopify takes the cake. It’s much more user-friendly and has many more ecommerce features than Webflow. On top of this, Webflow's pricing options might not be suitable for everyone, especially when compared to Shopify.
2. Squarespace
Squarespace, like Webflow, is popular due to its focus on design and aesthetics. However, it can’t match with Webflow’s greater control over those aspects. But when it comes to ease of use, Squarespace charges ahead here. Webflow’s learning curve is much harder than Squarespace’s. Just like Shopify, Squarespace is more user-friendly and streamlined when it comes to ecommerce, especially when you think about limitations like only two payment gateways, sales volume limits, etc.
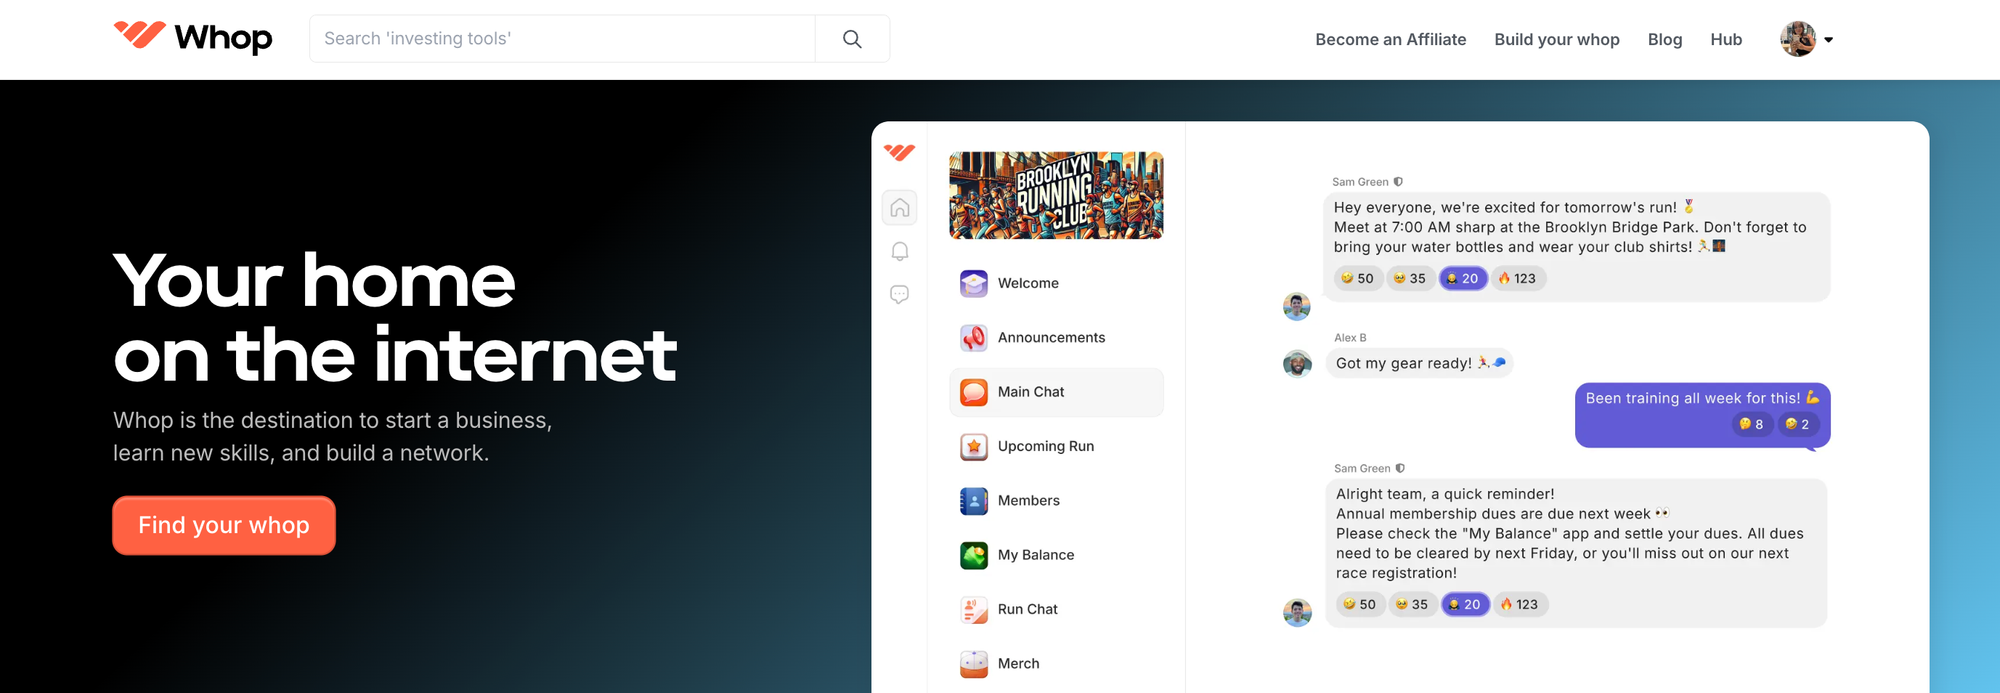
3. Whop
While you can create your own website on Webflow, Whop offers you a stable platform where you can create your own hubs. Unlike Webflow, however, you can do so much more on Whop, from creating online communities to selling digital products seamlessly. Selling digital products on Webflow will require code knowledge as you progress, but with Whop, you can start selling digital products and services with zero code knowledge.
Selling Digital Products? Sell With Whop
If you’re looking to get into digital product ecommerce, Webflow is a good platform - but there’s a platform that it can’t match with: Whop. Whop has been helping thousands of ecommerce entrepreneurs with creating their own dedicated platform and selling digital products - it can help you too.
Unlike Webflow, learning how to use Whop is super easy. Signing up to Whop and starting your ecommerce journey takes less than 10 minutes - sign up today.


