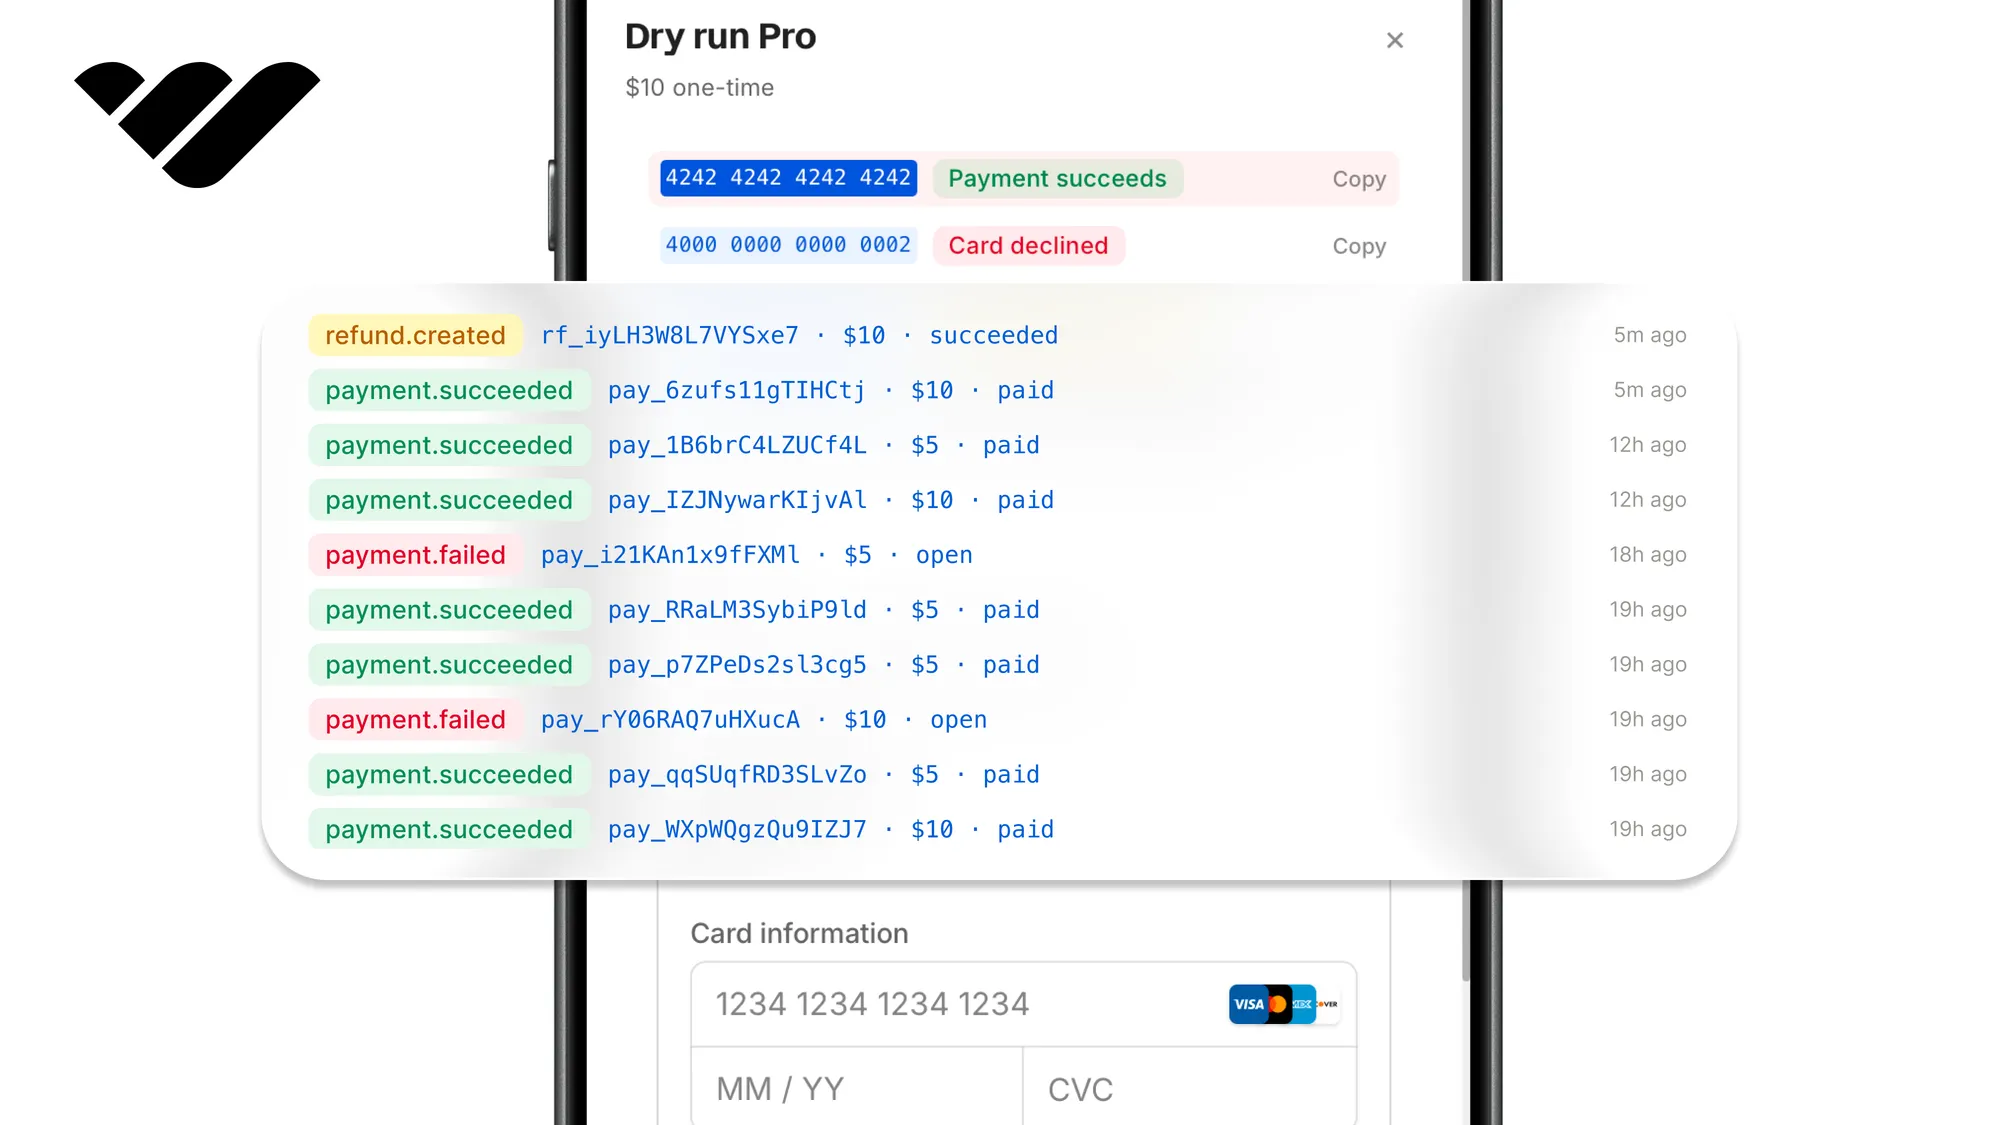
You can test payments end to end on your project without moving real money using the Whop sandbox. Learn how to in this guide.
Key takeaways
- Test every payment path against Whop's sandbox with fake money, no registered business or real card required.
- Flip one environment variable to swap the API host and checkout embed, keeping identical code across both environments.
- Deliberately break payments with test cards, since refunds return money but never revoke access until you cancel.
The Whop sandbox is an environment that you can use to see how the Whop integrations and systems work with your project. The sandbox has its own accounts, data, and fake money.
In this tutorial, we're going to point an existing Next.js app at it, test payments, verify a webhook, and show you how you can switch to production at the end.
You can try and see how the sandbox works in our companion demo and its repository.
How the sandbox maps to production
Switching between production and sandbox means changing the dashboard and the API host:
| What | Production | Sandbox |
|---|---|---|
| Dashboard and checkout | whop.com | sandbox.whop.com |
| API base URL | https://api.whop.com/api/v1 | https://sandbox-api.whop.com/api/v1 |
| Checkout embed script | js.whop.com | js.whop.com, unchanged |
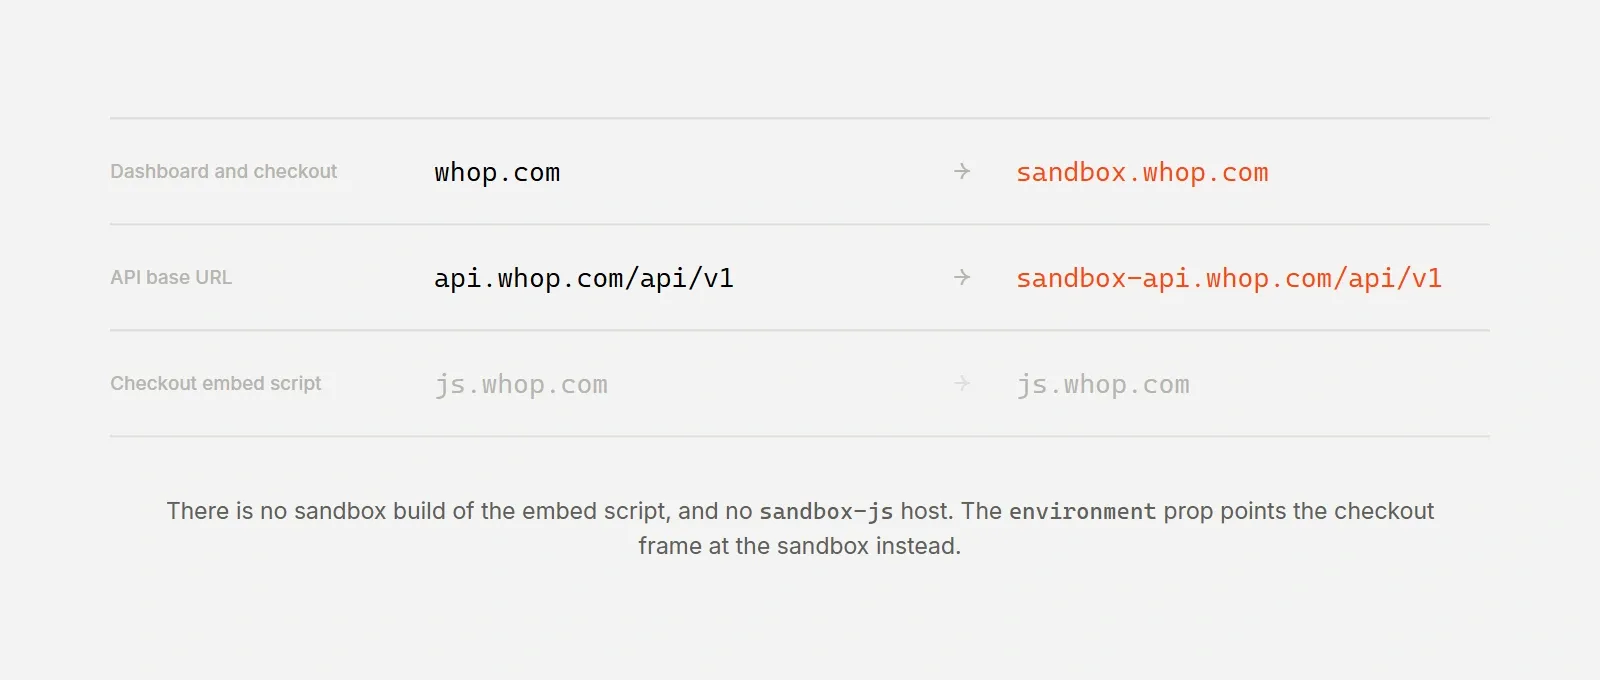
And you don't have to rewrite any of this since the endpoints, the SDK calls, and the webhook messages are identical. The only thing that knows which environment you're in are your environment variables.
Set up
To set up the sandbox, first, you should go and sign up at Sandbox.Whop.com. This will be a fresh account, even if you have an account on Whop.com, since the production and sandbox accounts are separate.
Once you have an account, you should create a Whop using the Start a business button on the left sidebar, then go to its dashboard and copy the company ID from the URL (starts with biz_).
Then, in the dashboard, go to the Developer page and create a company API key using the Create button under the Company API keys section.
While creating, give the API key these permissions: payment:basic:read, payment:manage, plan:create, and access_pass:create.
Now, install the packages needed:
npm install @whop/sdk@2.4.0 @whop/checkout zodThen add these to .env.local:
| Variable | Example | How to get it |
|---|---|---|
WHOP_COMPANY_API_KEY | apik_... | Sandbox dashboard > Developer > Company API keys. |
WHOP_COMPANY_ID | biz_... | From the sandbox dashboard URL. |
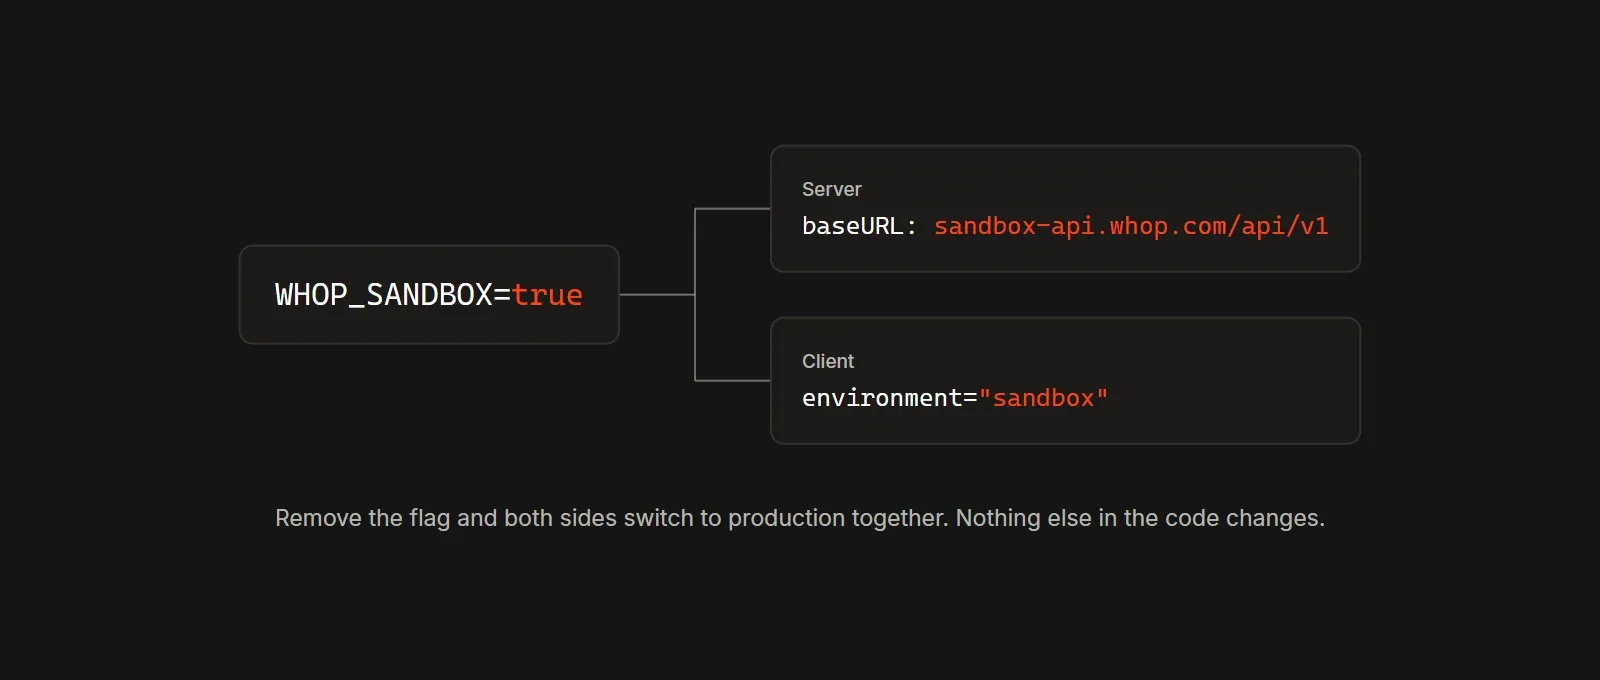
WHOP_SANDBOX | true | Set manually. Remove it in production. |
WHOP_WEBHOOK_SECRET | ws_... | Created with the webhook endpoint below. Leave unset until then. |
APP_URL | http://localhost:3000 | Your app origin, used for the embed's return URL. |
The SDK client
Now, let's create the file that decides which Whop you're talking to. Go to lib/ and create a file called whop.ts:
import { WhopClient, WhopEnvironment } from "@whop/sdk";
import { getEnv } from "@/lib/env";

let cached: WhopClient | null = null;

export function getWhop(): WhopClient {
  if (cached) return cached;
  const env = getEnv();
  cached = new WhopClient({
    token: env.WHOP_COMPANY_API_KEY,
    environment: env.WHOP_SANDBOX
      ? WhopEnvironment.Sandbox
      : WhopEnvironment.Production,
  });
  return cached;
}
baseURL with a capital URL. If you write baseUrl, the SDK targets production and your sandbox key returns a 401.We pass
environment instead of a baseUrl string because baseUrl sends every request to one host, and calls that carry raw card details only work on Whop's separate vault host.Create a product to test with
Now, before we can start testing, we need something to buy. So, let's go to your new whop's dashboard and create a product (in the Products section) with a one-time $10 price.
Then, copy its prod_ and plan_ IDs using the context menu of the product listing (in the Products and Checkout links) sections and copy those IDs into a constants file.
export const WHOP_IDS = {
  productId: "prod_XXXXXXXXXXXXX",
  planId: "plan_XXXXXXXXXXXXX",
} as const;
If you'd rather stay in the terminal, the Whop CLI creates the same product and plan.
One thing to know first: the CLI talks to production by default and has no sandbox mode, so every command needs WHOP_API_BASE_URL pointed at the sandbox API, including the login that saves your key.
Leave it off a single command and your sandbox key goes to production, where it fails with a 401.
npm install -g @whop/cli

export WHOP_API_BASE_URL=https://sandbox-api.whop.com/api/v1

whop auth login --method api-key --api-key apik_XXXXXXXX --profile sandbox
whop products create --title "Demo product"
whop plans create --product_id prod_XXXXXXXXXXXXX --plan_type one_time --initial_price 10prod_ or plan_ id has to be re-provisioned on the other side.Take a test payment
When testing payments in sandbox, instead of real cards, we're going to use Whop's test cards.
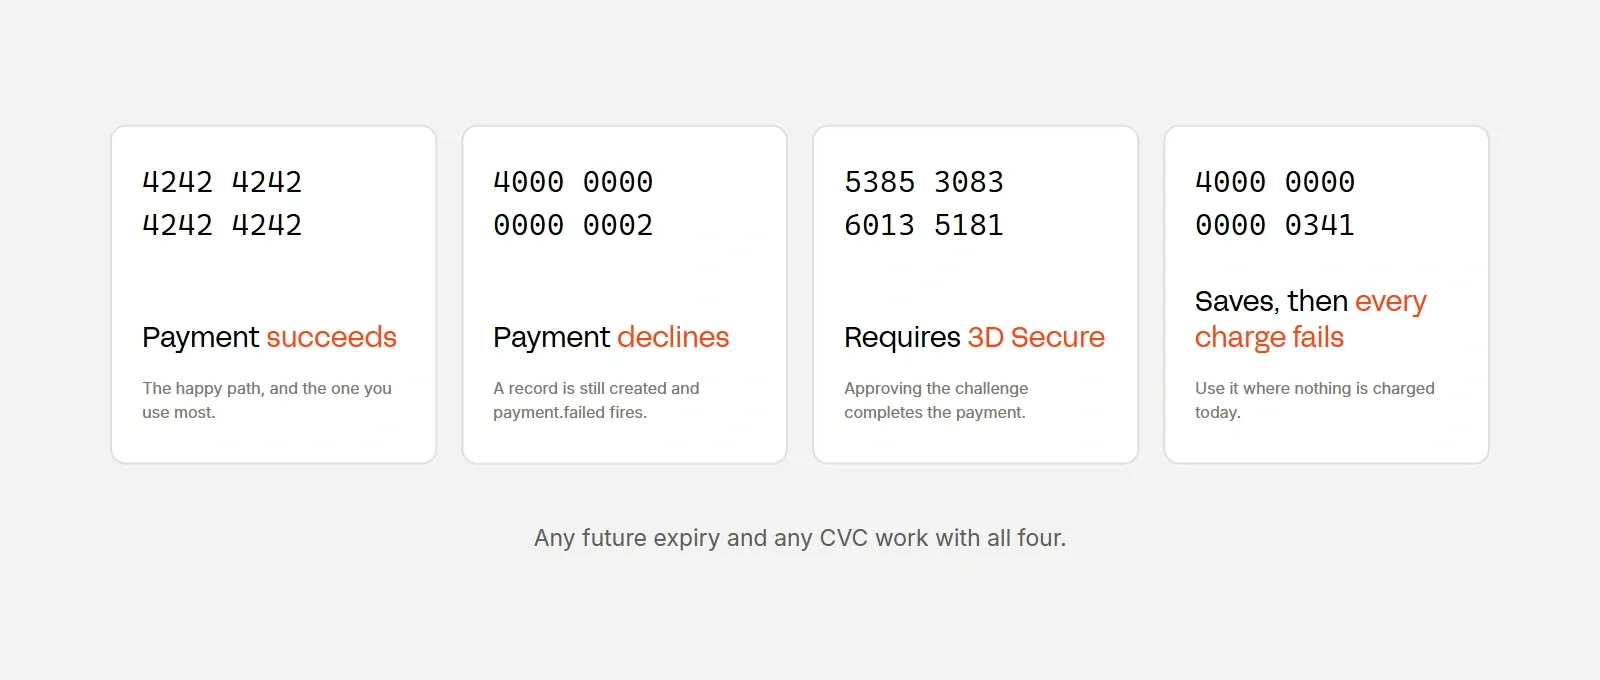
There are four of them for different outcomes and all of them can be used with any future expiry and any CVC:
| Card number | What it does |
|---|---|
4242 4242 4242 4242 | Payment succeeds. |
4000 0000 0000 0002 | Payment declines. A payment record is still created and payment.failed fires. |
5385 3083 6013 5181 | Requires 3D Secure. Approving the challenge completes the payment. |
4000 0000 0000 0341 | Saving the card succeeds, but every charge on it fails. |
When embedding a checkout, keep in mind that it takes an environment prop, which is the client-side part of the WHOP_SANDBOX flag.
Go to app/test-lab/ and create a file called page.tsx:
import { SandboxCheckout } from "@/components/SandboxCheckout";
import { WHOP_IDS } from "@/constants/whop-ids";
import { getEnv } from "@/lib/env";

export default function TestLabPage() {
  const env = getEnv();
  return (
    <main>
      <h1>Sandbox test lab</h1>
      <SandboxCheckout
        planId={WHOP_IDS.planId}
        environment={env.WHOP_SANDBOX ? "sandbox" : "production"}
        returnUrl={`${env.APP_URL}/test-lab`}
      />
    </main>
  );
}
SandboxCheckout is a component in our repo that renders Whop's WhopCheckoutEmbed and passes the receipt ID to a route that confirms it with payments.retrieve.
Now, go to /test-lab and pay with the 4242 card. The payment should appear on the Whop dashboard instantly.
frame-src https://whop.com https://*.whop.com and connect-src https://*.whop.com cover the checkout in both environments. List whop.com on its own, because the wildcard only matches subdomains and the production checkout loads from whop.com itself.Nothing changes when you flip the flag, because that wildcard already spans
sandbox.whop.com.Break payments on purpose
Now, let's test failed payments. This is one of the most important steps you should follow so that you know exactly what happens in failed payments.
When you pay with the decline card, the checkout should show a decline message and stay open. Whop records the payment still, and fires payment.failed, so a declined card proves your failure handling runs.
When you try the 3D Secure card, you'll see a bank challenge inside the checkout. You'll be able to see the password in the hint text. Once you approve, the payment will be completed normally.
Saving a card and charging it are two different actions, and this card, 4000 0000 0000 0341, allows you to test saving the card while failing to charge. On a regular checkout it looks like a decline so you should use it on a free trial, where the card is accepted, and the first renewal fails.
Refund it
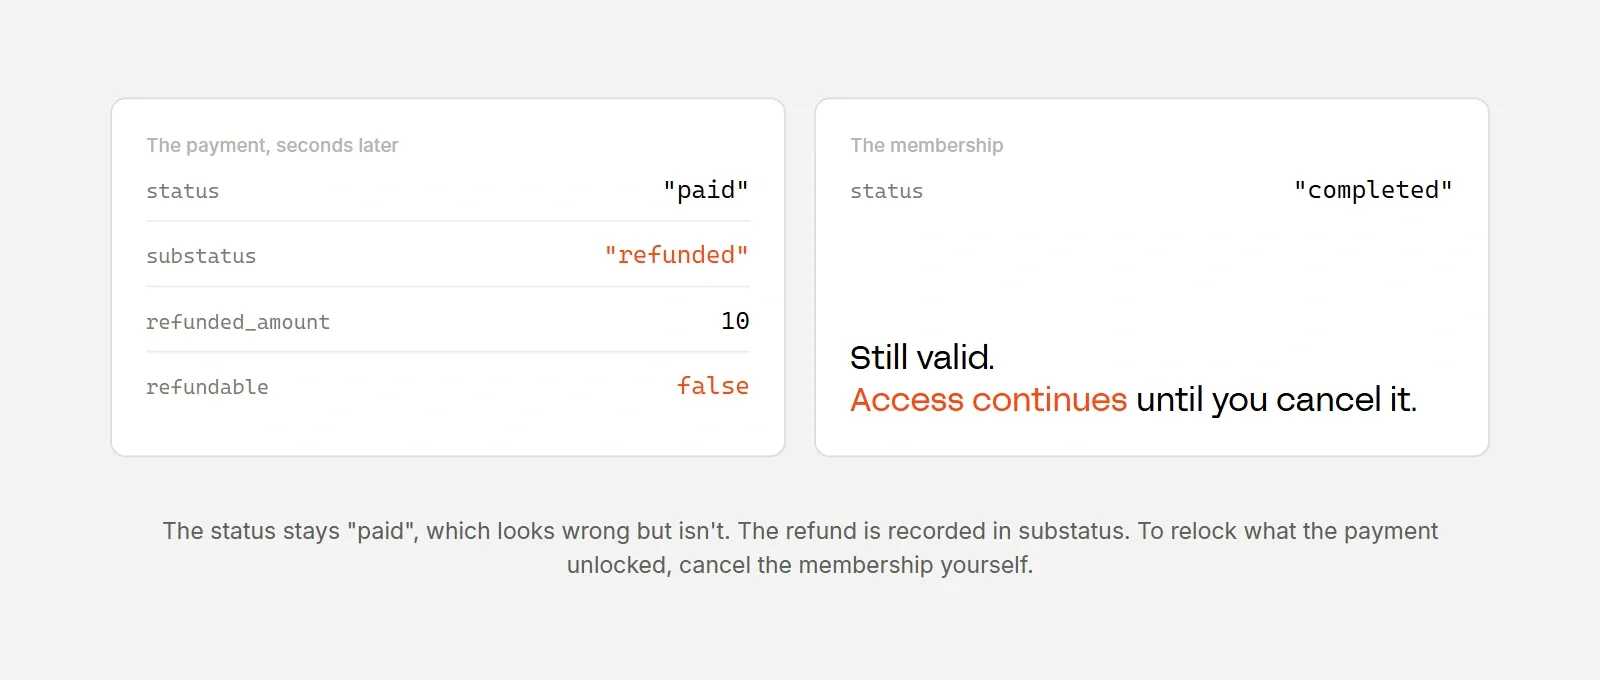
The refund flow is usually quite complex and can cost real money. With the Whop sandbox, however, you can do all the refund tests for free.
On the server you can refund with a single line: await getWhop().payments.refund({ id: receiptId }). Refunds settle in the background so you should read the payment a moment later.
It lands on status: "paid" with substatus: "refunded" and refundable: false.
One thing you should keep in mind is that refunds don't remove access and memberships stay valid. If the payment unlocked content, you can relock it with memberships.cancel.
Verify your webhooks
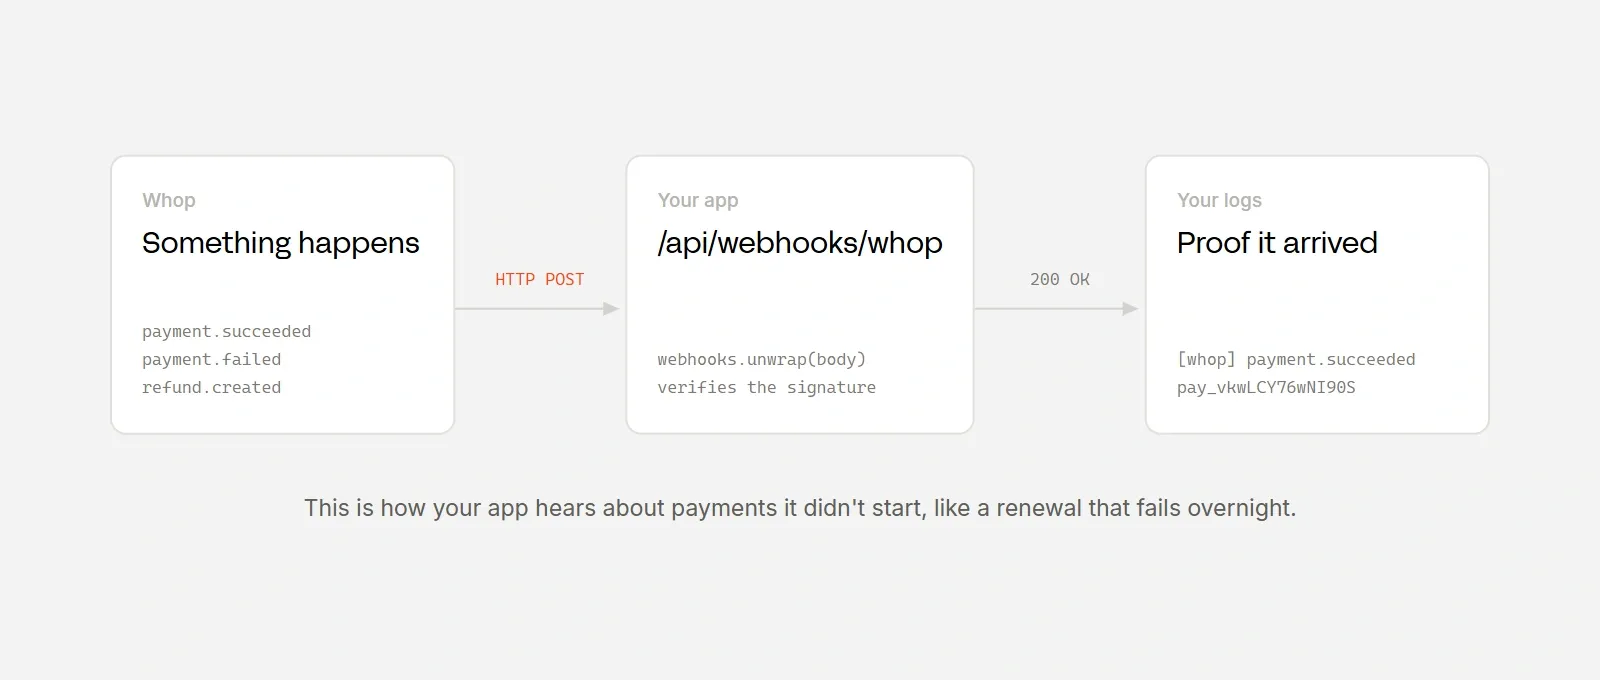
Webhooks are how Whop lets your app know when something happens. After you register a URL, Whop sends a payload to it every time one of those events happens.
To test it, you should deploy the app for a public URL, then create a webhook on the Developer page of your whop dashboard. While creating, you should subscribe to the events payment.succeeded, payment.failed, and refund.created.
Make sure the URL the webhook points at is your URL plus /api/webhooks/whop. Once the webhook is created, put its secret (starts with ws_) in WHOP_WEBHOOK_SECRET.
Now, go to app/api/webhooks/whop/ and create a file called route.ts:
import { unwrapWebhook } from "@whop/sdk/helpers";
import { getEnv } from "@/lib/env";

type WhopWebhookEvent = {
  id: string;
  type: string;
  data: { id: string };
};

export async function POST(request: Request) {
  const env = getEnv();
  if (!env.WHOP_WEBHOOK_SECRET) {
    return new Response("Webhook secret not configured", { status: 503 });
  }

  const bodyText = await request.text();
  const headers = Object.fromEntries(request.headers);

  let event: WhopWebhookEvent;
  try {
    event = unwrapWebhook<WhopWebhookEvent>(bodyText, {
      headers,
      key: env.WHOP_WEBHOOK_SECRET,
    });
  } catch {
    return new Response("Invalid signature", { status: 401 });
  }

  switch (event.type) {
    case "payment.succeeded":
      console.error("[whop] payment.succeeded", event.data.id);
      break;
    case "payment.failed":
      console.error("[whop] payment.failed", event.data.id);
      break;
    case "refund.created":
      console.error("[whop] refund.created", event.data.id);
      break;
    default:
      console.error("[whop] event", event.type, event.id);
  }

  return new Response("OK", { status: 200 });
}
At this point when you make a payment action, like a successful payment with 4242, the payment.succeeded event should reach your logs in a second.
unwrapWebhook wants the raw body text, not parsed JSON, and key must be the secret exactly as the dashboard shows it, ws_ prefix included and not base64-encoded. Either mistake fails with the same unhelpful signature error.Switch to production
To switch your app to the production environment, the only thing you should swap is the environment variables and the data. You should:
- Create a new production company
- Get its ID (from the dashboard URL)
- Create a new company API key
- Put the new company ID and API key in your env vars
- Remove (or set to
false) theWHOP_SANDBOXvariable - Re-create a product
- Create a new webhook with the same events
- Put the new webhook's secret in
WHOP_WEBHOOK_SECRET
There are many more ways you can use Whop
Now you know how to use the Whop sandbox in your projects to test how the Whop rails interact with your app.
Our other tutorials like integrating a KYC API into your project or adding user authentication also use the sandbox-first approach.
If you want to learn the entire flow of building a new project from the ground up using Whop rails and sandbox, then switching to production and publishing it, check out our tutorials like building a Fiverr clone.
To learn more about all the features Whop offers, visit the Whop developer docs.