Discord webhooks allow you to have messages automatically relayed to your server. But how do they work, and how can you set up a webhook? Find out in this guide.
Key takeaways
- Discord webhooks let you automatically post external content and create professional-looking server announcements with custom names and avatars.
- Never share webhook URLs or grant Manage Webhooks permission carelessly, as webhooks bypass all Discord filters and moderation rules.
- Use Discohook.org to create, send, and edit formatted webhook messages with embeds for professional-looking server channels.
Discord is one of the most popular instant messaging apps, and while it might seem a bit complex at first glance, it’s really easy to learn and use. However, this usually means that the app lacks complex features the simpler it is - this is not the case with Discord.
Making yourself comfortable with Discord will only take as long as two to three days, but only if you’re a regular user. When you create your own server or become a moderator for one, you’ll see the keel of the iceberg.
One of the features that you’ll want to utilize after becoming a server manager is the webhooks. In this guide, we will explain what Discord webhooks are, how to create them, and how to use them.
What is a Discord Webhook?
Webhooks are HTML callback functions - and callbacks are functions that are stored as data to be called by a different function. You can think of webhooks as bridges between two APIs - one writes a note and slides it off the bridge and the other gets it - simple.
If you ever saw a Discord server that automatically posts their blog posts in their server, they’re using a webhook. In terms of Discord, webhooks are an easy way to post messages. But what is the difference between normal messages and webhooks you ask?
Webhooks in Discord are mostly used to relay information like GitHub updates, blog posts, patch note releases, etc. to a channel of a server. Since webhooks require you to use a website or custom software to post messages, they’re not the best way to chat with your friends. The most common usage of webhooks in Discord, as we mentioned, is to relay posts, news, etc.
How You Can Use a Webhook in Discord
While some websites like GitHub let you submit a webhook to it and post updates automatically, setting up a new webhook might require you to use third-party apps. This is where you should research how the platform you want to relay information to Discord utilizes webhooks.
The second most common usage of webhooks is posting messages to core channels of a server - like #rules, #role-information, or #server-information.
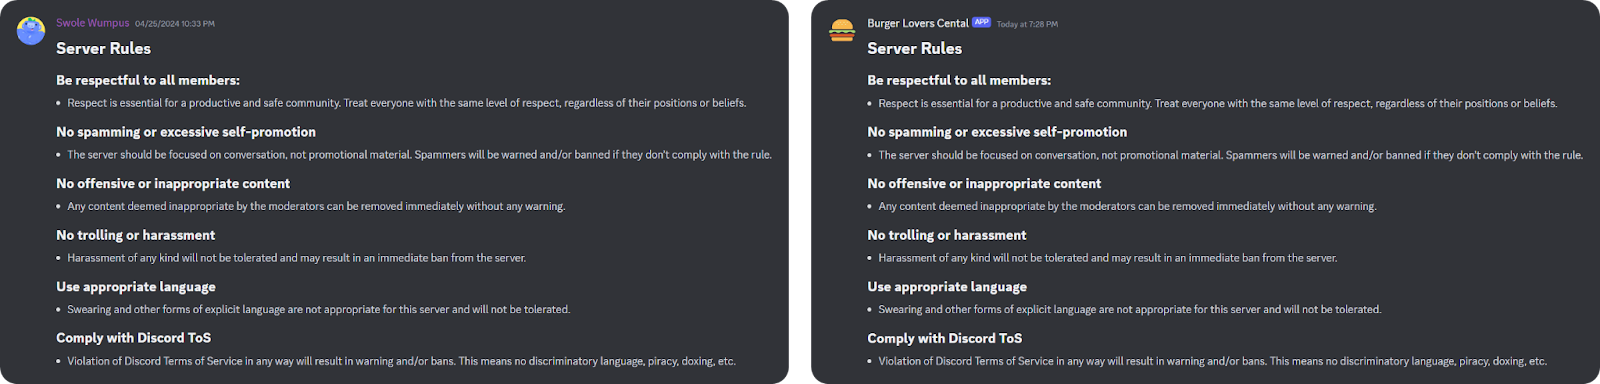
For example, when you join a Discord server and navigate to their #rules channel (if they have one) you’ll most likely see that an admin of the server sent the message themselves. This is the most common method since it can simply be done within Discord.
But if you join a professionally run server, you might see that the message was sent not by a user but from an “App.” Since most server managers want to personalize their Discord profiles to their liking, they don’t want the official messages posted in the name of the server administration to have a Fallout character as an avatar and “xxWastelandSurvivorxx” as their username. So, they use webhooks to set up a custom avatar, a name, and a message. This will make your server look and feel much more professional.
How to Create a Discord Webhook
Creating a webhook is very easy in Discord. To do so, you need to have the “Manage Webhooks” permission - if you’re the server owner or if you have the “Administrator” permission, you’ll automatically have all the permissions so you can create webhooks as well.
One thing you should keep in mind is that the Manage Webhooks permission is one of the most dangerous permissions you can grant to a user. Webhook messages are not subject to Discord filters, AutoMod rules, role permissions, and any bot filter you set up. If the permission falls into the wrong hands, they can spam your server with @everyone pings, obscene imagery, banned words (every bad word you can think of), scam links, and more.
Now that you understand what permission you need and how dangerous it is, let’s move on to creating a webhook.
To create a webhook, you should follow the steps below:
- Click on the cogwheel icon that appears when you hover over the channel you want to create the webhook for.
- In the channel settings, navigate to the Integrations section and click the Create Webhook button.
- When you click the Create Webhook button, you’ll see that Discord will immediately create a webhook with a default avatar and name it Spidey Bot, Captain Webhook, or something random like that. Click on the webhook to open its settings and change the avatar and name of the webhook. When using a third-party app to send a message to the webhook, you’ll most likely see a setting for its name and avatar, but for the sake of not doing that every time you want to post a message, you should edit the avatar and the name of the webhook itself. After you’re done customizing your webhook click the Save Changes button you’ll see at the bottom of your screen.
- Now you have a webhook - cool. In order to use it, click on the Copy Webhook URL button.
Now, one thing you should know is that, like the Manage Webhook permission, the webhook URL itself is incredibly dangerous. You should never share it with someone you don’t fully trust. Webhook messages are not subject to Discord filters, AutoMod rules, role permissions, or any custom bot filters. This means the person who has the webhook URL can spam the channel with obscene images, unwanted messages, curse words, scam links, and more.

Using Discohook to Send Messages to a Webhook
There are many websites that let you send messages to Discord using webhooks, and Discohook.org is the most popular one. To send a message to a Discord webhook, you need to first visit the Discohook website.

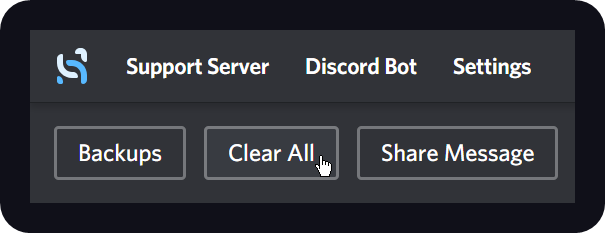
Before starting the process of sending a message, let’s clear the default messages that Discohook adds when you first open the website. To do that, click the Clear All button at the top left of your screen.
Now that you have a clear canvas, let’s paste the webhook URL you got from Discord into the Webhook URL input box. Once you do that, you’ll see the message preview on the right side of the screen will automatically pick up the avatar and the name of the webhook you set up.

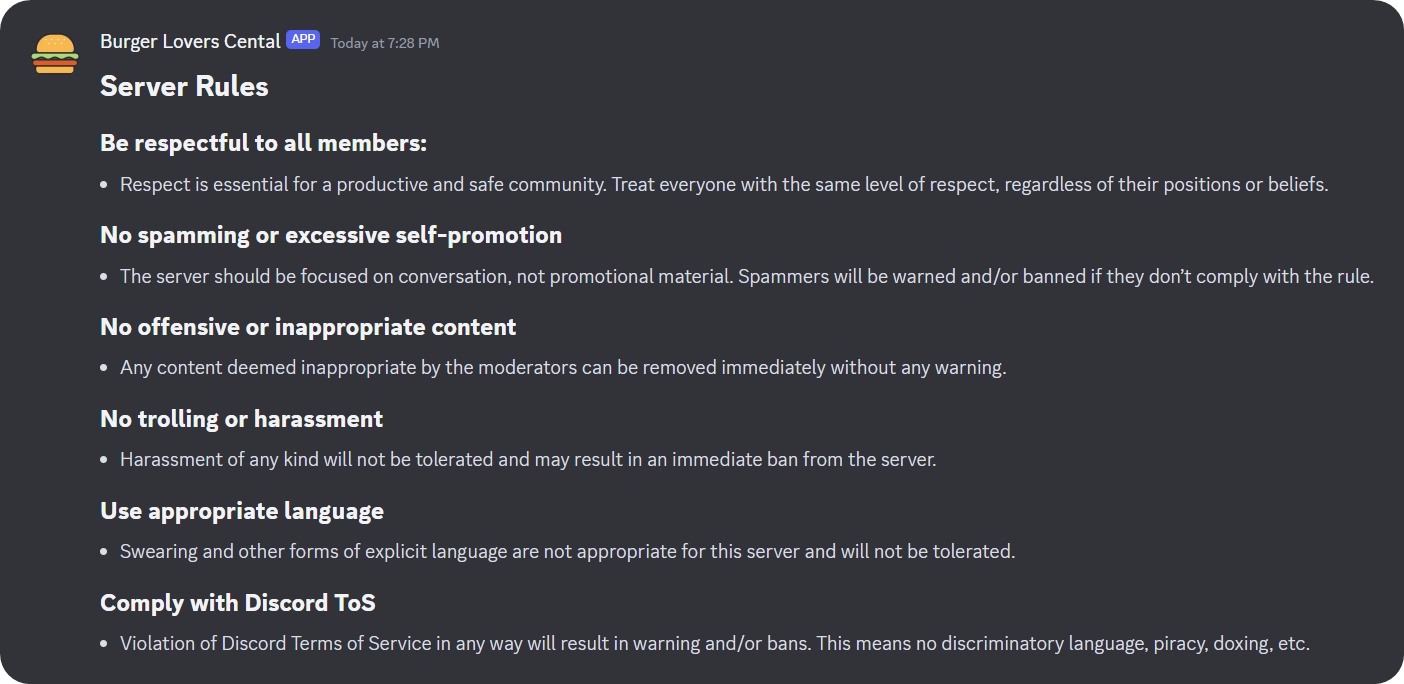
Now, in the Content section of the webpage, let’s write the message we want to send through the webhook. For this example, we’re going to write our server rules, since the webhook URL we have is for the #rules channel. As we write the contents of the message, the preview will be updated accordingly.
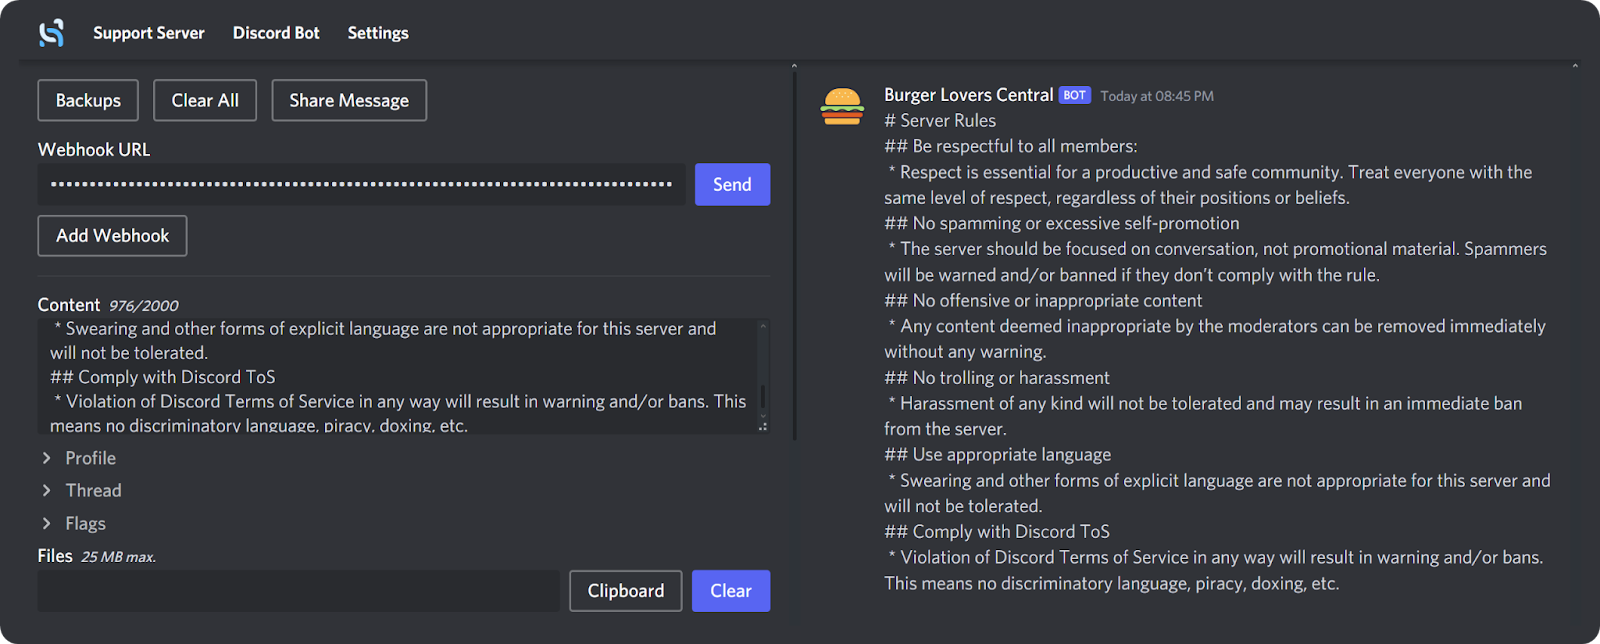
As you might’ve noticed in the image above, although we use Discord formatting to add headers and bullet points to our message, the preview will display them as plain text. This is the case with all formatting you’ll use - you won’t see the preview of the formatting. Don’t worry, though. When you send the message, it will be properly formatted.
There’s one last step left, and that is to click the Send button next to the Webhook URL input box. Clicking it will send the message through the webhook into the channel.

You won’t see a confirmation notice on the website, but if you go back to Discord and check the channel, you’ll see that the message is posted.
Unlike lacking confirmation notices, Discohook will let you know if there’s something wrong with your message.
That’s it. You’ve successfully sent a message using the Discohook website. Of course, there are a lot more features of Discohook - it’s not just for sending plain text messages. We suggest you play around with its features, which can all be found on the main page of the website, and join the Discohook Support Server for assistance.
5 Webhooks Tips and Tricks
Webhooks are a powerful feature and they can be used to improve your server. However, they can be risky as well. Here are five tips and tricks on using Discord webhooks:
- Do not share webhook URLs or grant the Manage Webhooks permission to people you don’t fully trust.
- Use webhooks for your core channels like #rules, #server-information, #role-information, etc.
- Use embeds with your webhooks. They look both more official and cool than plain messages.
- Use formatting within your webhooks. Formatting allows your messages to be more accessible and look better.
- Use the Discohook Discord Bot to import the contents of webhook messages into Discohook and easily edit them.
Take Your Discord Game to the Next Level with Whop
Discord is a powerful app that’s used by hundreds of millions of users. Those users are all members of servers - some free, some paid. Whop has been helping thousands of people transform their free server to a paid one so they can charge their members and generate an income. If you’re a server owner and you want to make your server a premium one, Whop is here to help.
Monetizing Discord servers has never been easier. Signing up to Whop and starting selling takes less than 10 minutes - sign up today.


