Once you’ve taken the time to build an online community, your goals will shift over to growing the server and fine-tuning its interworkings.
From moderating your community members to automating processes, entertaining your members, managing payments, integrating with other software, etc. - there is a lot more that goes into running a Discord server than meets the eye!
What if we told you that one simple tool could take all this work off your plate and create a better experience for your community members? Less stress while growing your community sounds too good to be true…but it’s not. With the best Discord server bots, all of this and more is possible. But - how do you add bots to your Discord server?
You’ve come to the right place. We’re going to teach you everything you need to know in regard to how to add bots to a Discord server. With the help of this guide and our one-of-a-kind Discord membership bot, you’ll be well on your way to reaping all the benefits this intuitive tool has to offer.
Before we get into all that, let’s quickly touch on why learning how to add bots to your Discord server is worth the time and effort in the first place.
📚 The Benefits of Learning How to Add Bots to Your Discord Server
If you’re just now discovering the world of Discord bots, you’re in for a real treat. This is a powerful solution that will free up your time, eliminate stress, and allow you to run a more enjoyable community that can charge more for access.
Below, we’re going to highlight the 7 most potent benefits Discord creators stand to gain through the addition of a bot.
🔨 Moderation
Coming up with the best rules for Discord is step one - enforcing them is the tricky part. Bots can help you maintain a friendly, respectful, and enjoyable environment for your community by monitoring messages, warning users, and taking necessary actions like muting or banning rule-breakers.
With a bot handling the moderation tasks, you can focus on more important things while ensuring your server remains a safe space for everyone. But to be honest, your bot is going to take a whole lot more off your plate besides just moderation. Let’s explore some additional automations you will enjoy by adding a bot to your Discord server…
🤖 Automation
Automation can save you time and energy while managing your server. Bots can handle repetitive tasks, such as welcoming new members, assigning Discord roles, posting regular announcements, creating surveys, assisting in payment disputes & cancelations, and more.
By automating these tasks, you ensure that your server runs smoothly and consistently while freeing up your time to engage with your community and work on other aspects of server management. You spend less time working in the business and more time working on the business.
🎉 Entertainment
While many Discord servers are created with the goal of providing valuable expertise and information to users, that doesn’t mean you can’t have some fun along the way. This is part of the challenge of running a thriving community - keeping your membership entertained. And this is yet another reason to invest in a solid Discord bot.
Bots can offer games, quizzes, or trivia, creating an enjoyable atmosphere and encouraging interactions among members. You can even rely on bots to play music or other audio content. By providing entertainment options, you keep your community active, happy, and more likely to stick around for the long term.
💸 Monetization
This is the biggest reason to leverage the power of bots - they can help you monetize your community with ease. Whether you already charge access to Discord or are just getting started learning about monetization, having a Discord subscription bot do the heavy lifting is an invaluable asset. Of course, using bots is not the only way to make money through Discord - check out our guide on making money on Discord to learn more.
With a bot like Whop, you can manage paid memberships, recurring subscriptions, NFT gating, crypto renewals, ETH payments, free trials, and promo codes effortlessly. The bot will even handle payment disputes and cancellations for you.
You can learn more about creating a paid Discord server in our blog. But for now, let’s keep going down the list of reasons to learn how to add bots to a Discord server.
🛠️ Customization
From boosting a Discord server to adding a Discord server banner, there are so many different ways you can make your community your own unique space. But you don’t have to do it on your own - let a bot help!
A customizable bot allows you to tailor its features and functions to fit the specific needs of your server. This means you can create a unique experience for your community, making your server stand out from others. A bot that adapts to your server's theme, goals, or preferences will not only enhance your server's functionality but also resonate better with your members.
🦾 Integration
Integration with external platforms is another key advantage of using a bot on your Discord server. Bots can connect your server to services like streaming platforms, social media, or other web services, providing real-time updates and notifications.
This ensures your community stays informed and engaged with your content or announcements, even when they're not actively using Discord.
📊 Analytics
Last but certainly not least, taking the time to learn how to add a bot to your Discord server will save you time in the long run on tracking and analyzing your analytics.
Data-driven decision-making is essential for growing and improving your server. Bots with analytics capabilities can track server statistics and provide insights on member activity, engagement levels, and other useful metrics.
By understanding the trends and patterns within your community, you can make informed decisions on how to evolve your server and better cater to your members' needs.
How to Add Bots to a Discord Server: Step-By-Step Guide
As you can see, the power of bots is profound for Discord creators. The only question now is…how do you add bots to your Discord server? Don’t sweat it - we’re going to walk you through the process below.
It sounds daunting, but we’re going to demystify the topic to help you feel confident getting your bot added today. Then, we’ll guide you through setting it up and putting it to work. Step one, though, is choosing the right bot for your unique server needs.
Step 1) Choose the Right Bot for Your Sever’s Unique Needs
Just as with finding the best online community platform to host your members, you need to find the best bot to maximize the value you and your community enjoy. And there are countless options for you to choose from - but one stands alone as the premier choice. That’s Whop.
With a single Whop bot you’re able to take advantage of all the benefits we described above. You can create, monetize, and manage your community on autopilot. This saves you a ton of time and stress while creating a better experience for your members: everyone wins!
But there’s another reason you need Whop - you gain access to the Whop Marketplace. This is an easy way for your community to get discovered by millions of people who could be interested in what your movement represents. Plus, you get free design services, ratings & reviews, affiliate offers, and so much more.
It’s no wonder community creators prefer Whop to the alternatives. The best part? With a powerful, easy-to-use API, you can get started in minutes. Here’s how…
Step 2) Create Your Whop Account
Once you’ve decided to pull the trigger and reap all the benefits Whop has to offer, you’ll want to create your Whop account. This is where you’ll connect your Whop account to your Discord server. You’ll want to describe your project - add the name of your community, a description, and a logo/image for the server.
You can go through the rest of the setup checklist at your leisure, but we want to skip to the good part - actually getting your bot added to the Discord server.
Step 3) Add Your Bot to the Discord Server & Assign Roles
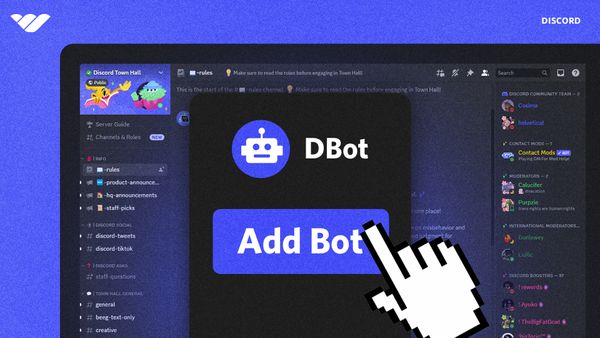
To actually get your Whop bot to work, click the “connect your Discord server” button. This will bring you over to Discord, where you’ll need to grant the external Whop application rights to make changes to your server. Make sure you’ve selected the right server if you have more than one you manage.
From this point, you can select the specific permissions you want to grant the Whop bot. The more access you give it, the more possibilities it has to actually help you run a better server. But, if for any reason you don’t want the bot to have access to a specific feature/aspect of your server, you can uncheck that bot.
After that, you’ll want to make sure you go to your server’s settings and drag the Whop bot to the top of your list of roles. This is a key step that cannot be skipped, or you won’t be able to see your roles on Whop.
And that’s it - you now have your Whop bot added to your Discord server. Pretty straightforward, right? Now - let’s talk about how to get the bot put to work in the best way possible.
Step 4) Create Passes to Monetize Your Community and Manage Members
Because the beauty of Whop is in how effortless it makes monetizing and managing your community, we want to talk about how to actually create passes with the bot.
From the Whop dashboard, you can click “passes” and then choose from a list of pre-configured options or create something entirely new. This is where you’ll need to consider what sort of subscription or payment method you want to offer your users - and what level of access they are given in exchange.
For example, you can create a $5/month subscription tier for basic access to your server, a Zoom call with you, software, or whatever other experience you have to offer in your server. This is unique to your offerings. You can also charge a one-time initial fee if you’d like, offer a free trial, and more.
Step 5) Set Up Whop Payments
Now, you’ve got your various passes created - but no way of actually charging customers access to your server. That’s because you need to set up Whop payments still! You can link an Ethereum wallet or connect your Stripe account.
And at this point, you can now copy the link to the passes you’ve created and share them as you see fit - whether within the Discord community itself to turn free users into paid users or on other channels to bring new members into your ecosystem altogether.
Step 6) Start Exploring the Other Possibilities After Adding a Bot to Your Discord Server
At this point, most of the hard work is done. You’ve integrated your Discord server with Whop, created passes, and set up payments. Now - it’s just a matter of maximizing the value you get from your bot.
For example, you can explore collaborations with other companies/users (using collab codes). You can also set up affiliate marketing offers for your community to grow your Discord server with ease. Consider using other rewards to offer your community - such as text-based guides or access to specific pages.
As we’ve said already, the possibilities after learning how to add bots to a Discord server are seemingly endless. You’ve got a lot of exploring to do after doing all the heavy lifting - so what are you waiting for?
Parting Thoughts on How to Add Bots to a Discord Server
Hopefully, this guide on how to add a bot to your Discord server answers the questions that brought you here today. You now know everything about adding bots to a Discord server. We’ve touched on the benefits of doing so, along with the 6 steps to adding a bot and putting it to work.
With Whop, the way you build, manage, and grow online communities changes forever. Beyond offering the most intuitive bot the industry has to offer, we have additional resources to help you make the most of your community. You can learn about how to start your own Discord server, the differences between Guilded vs Discord, how to set up automated Discord rewards, reselling Discord servers, and a whole lot more.
But for now, it’s time to take what you’ve learned today in this guide on how to add bots to a Discord server and get to work! After putting in the initial legwork, it’s smooth sailing from there.
